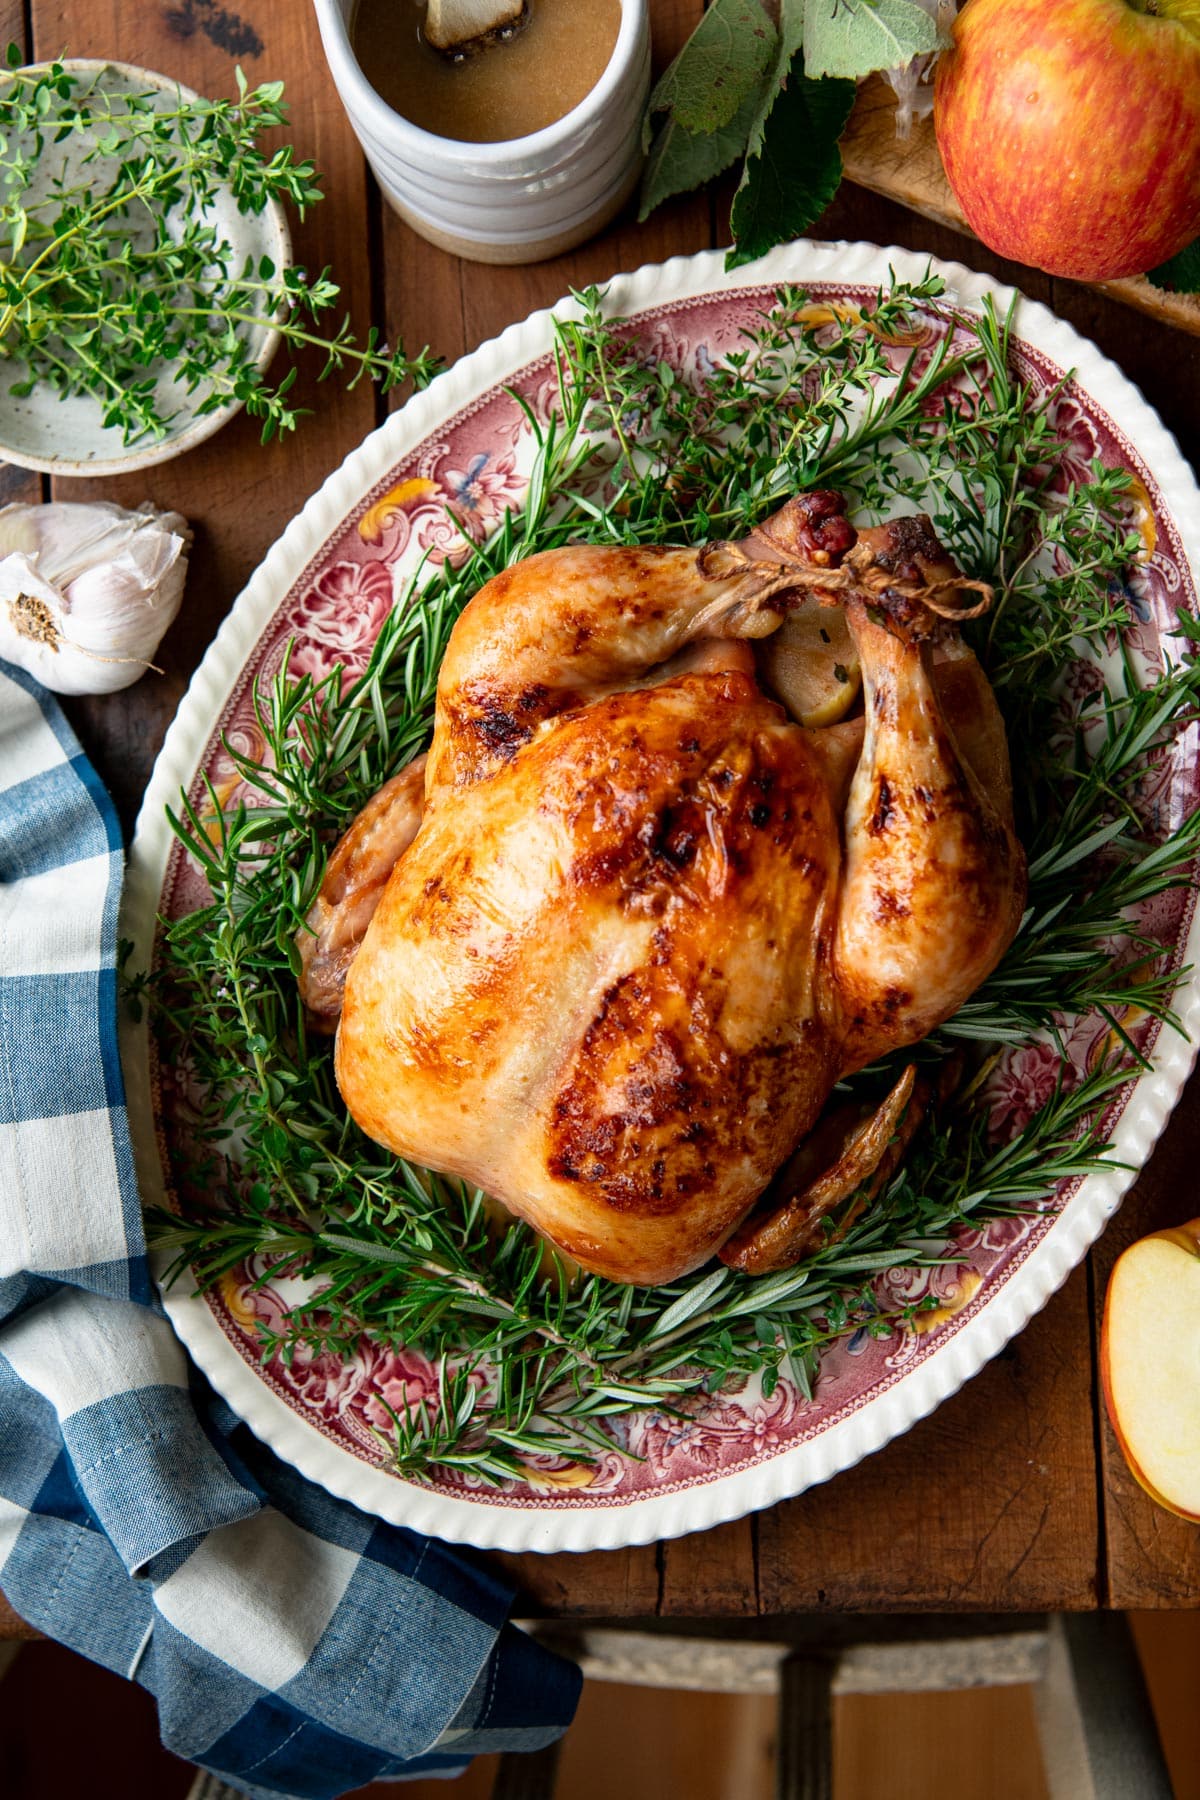
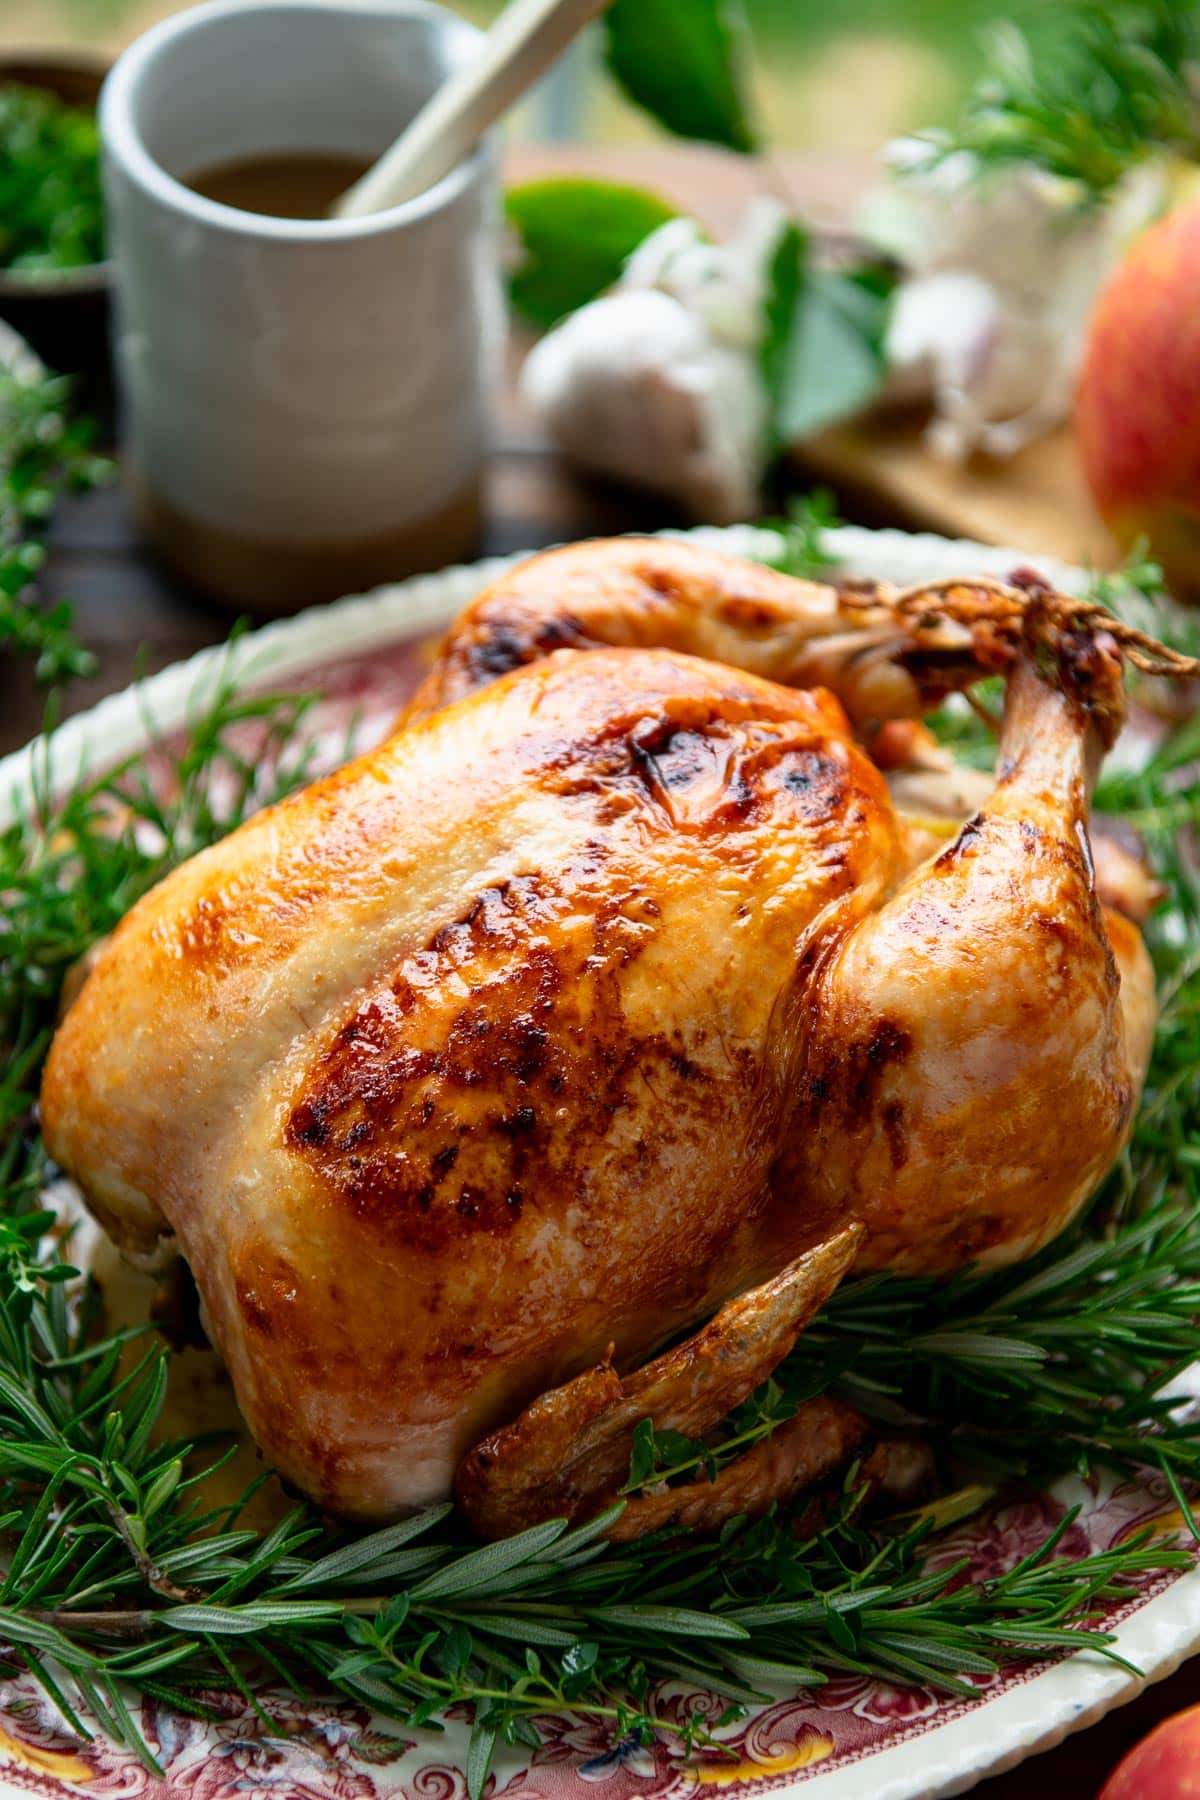
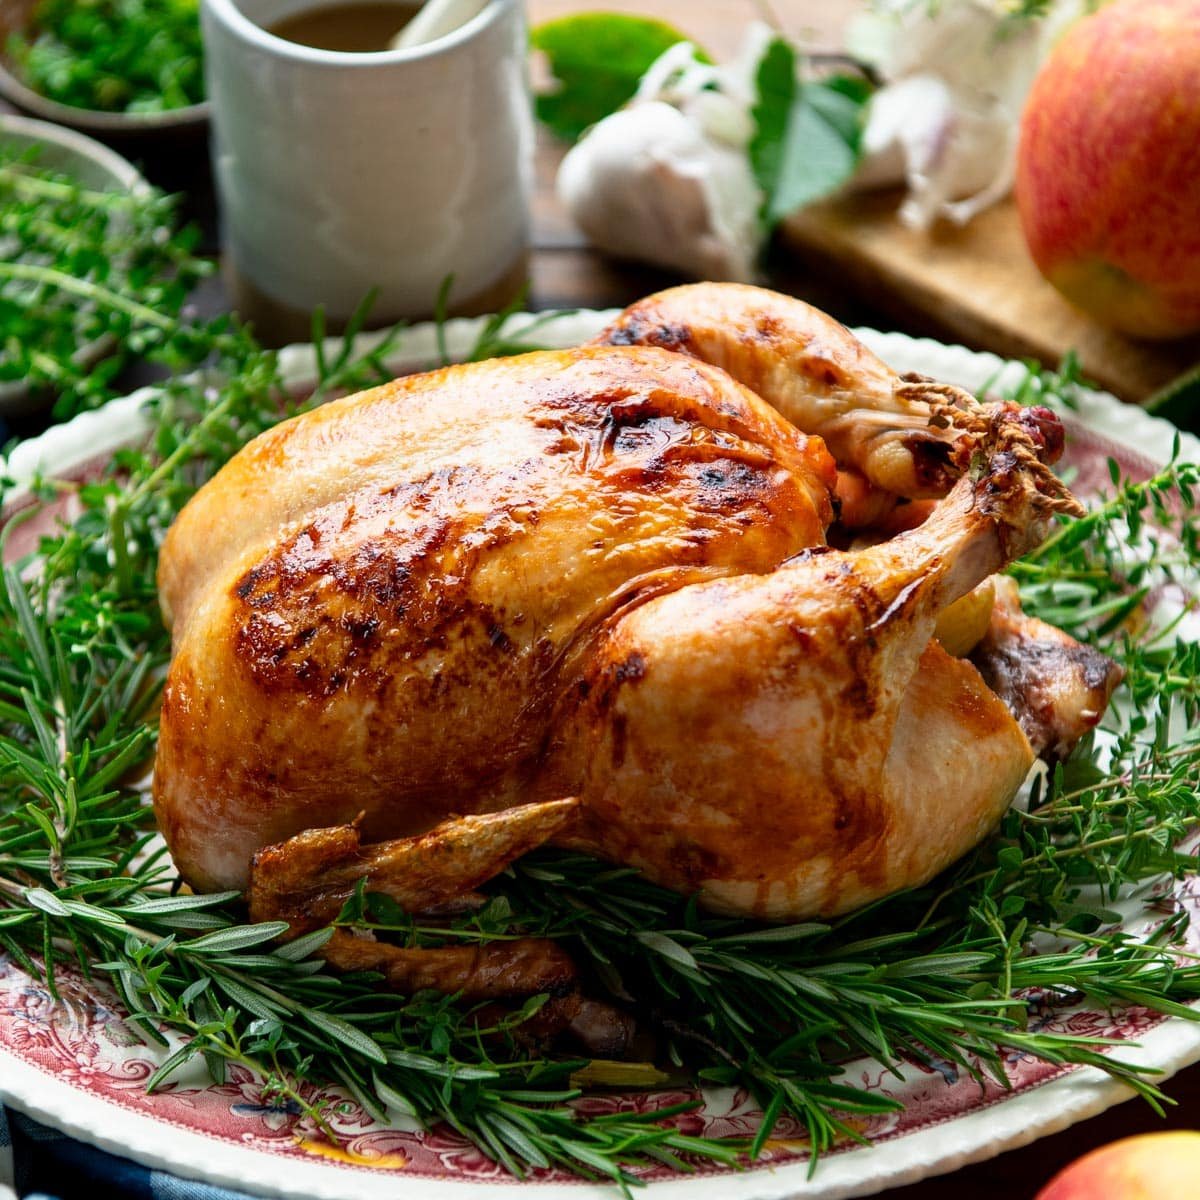
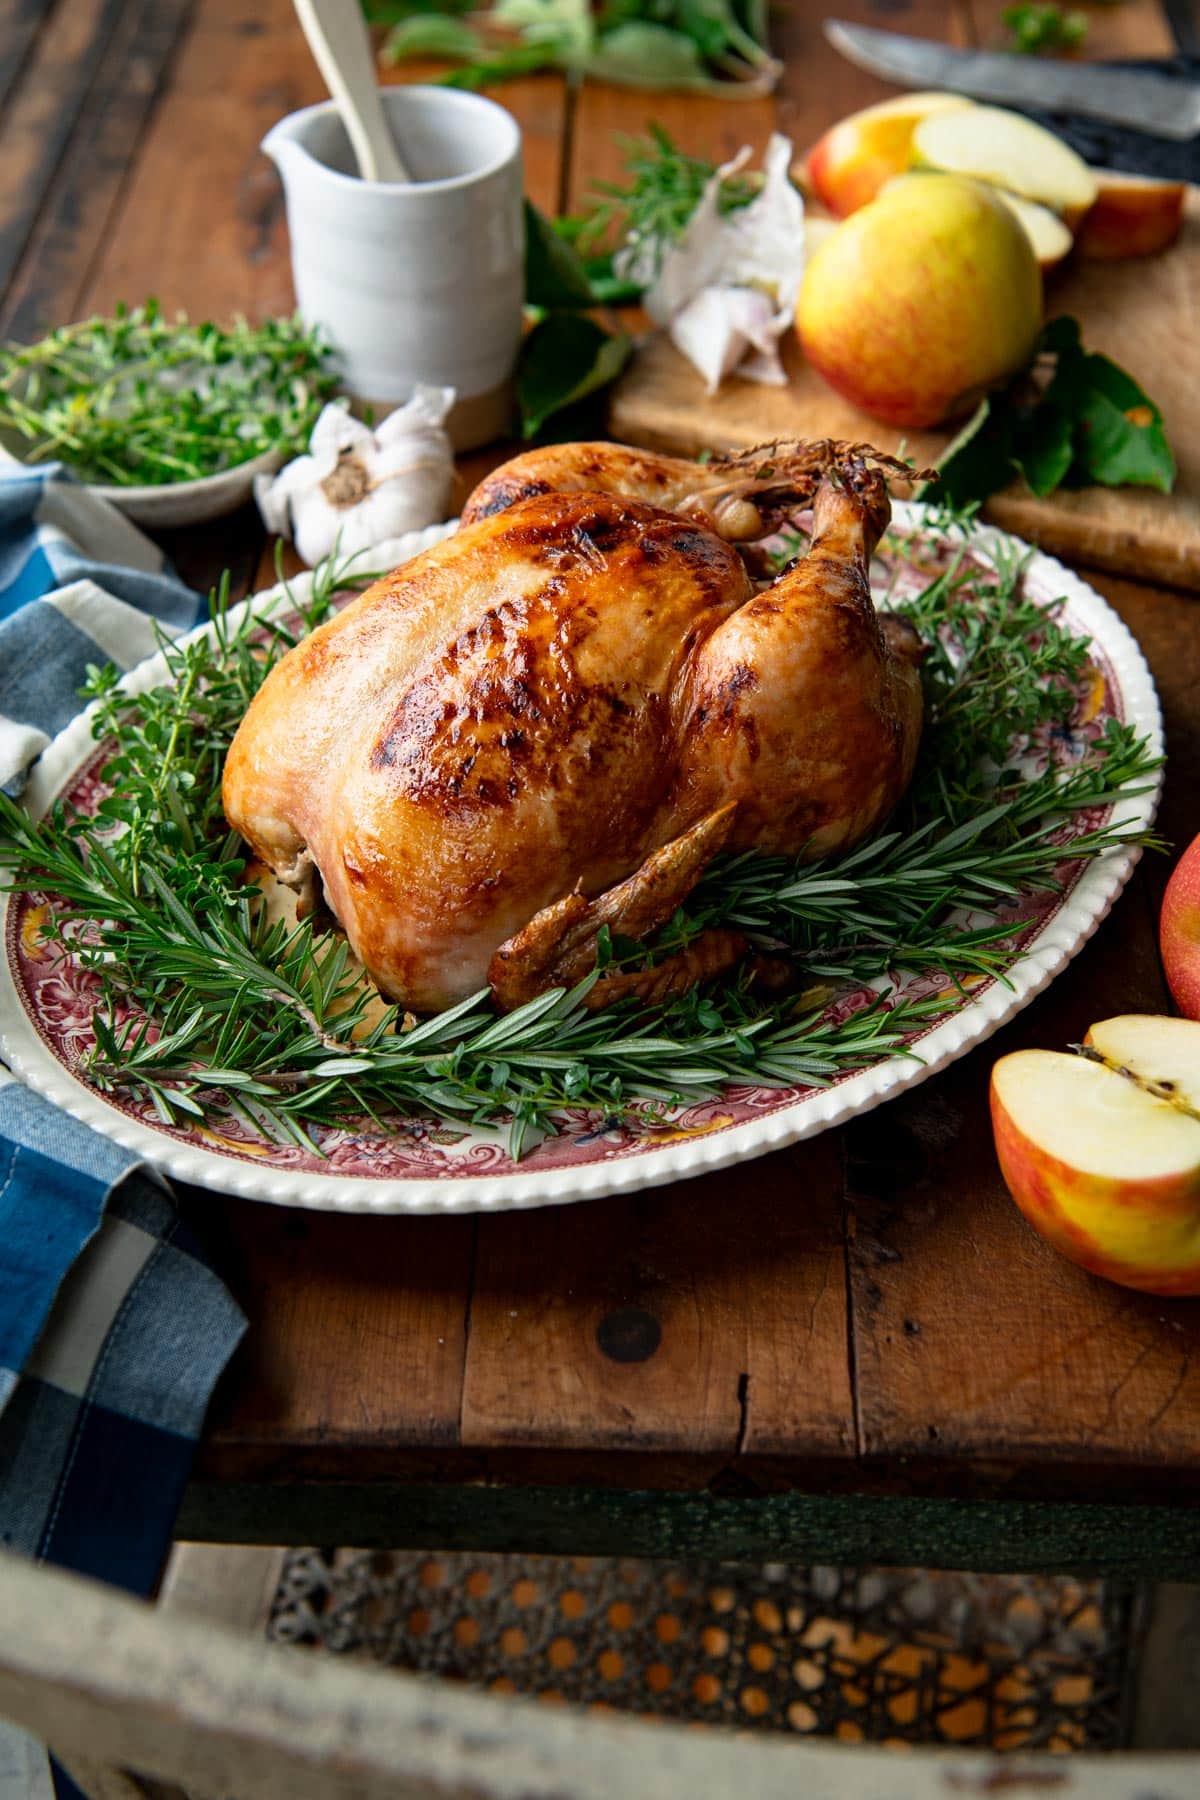
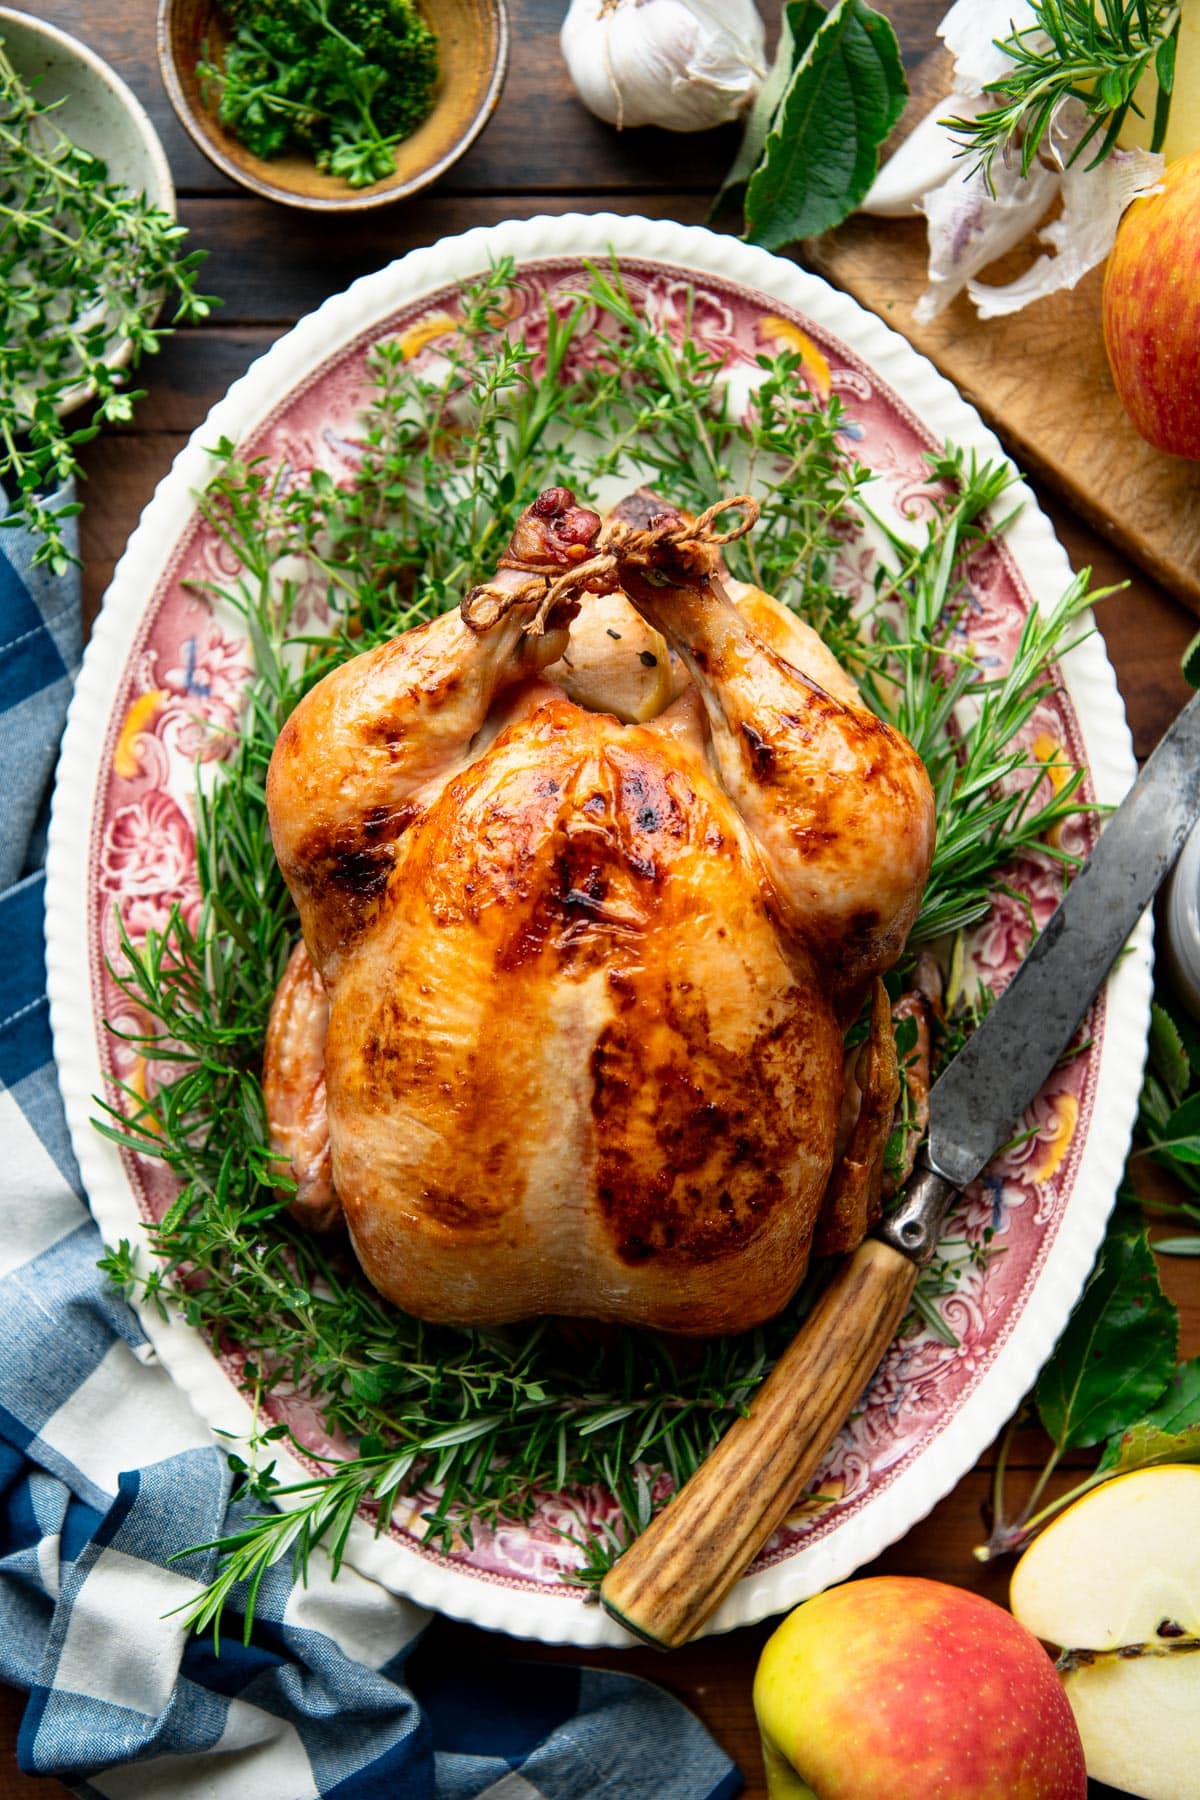
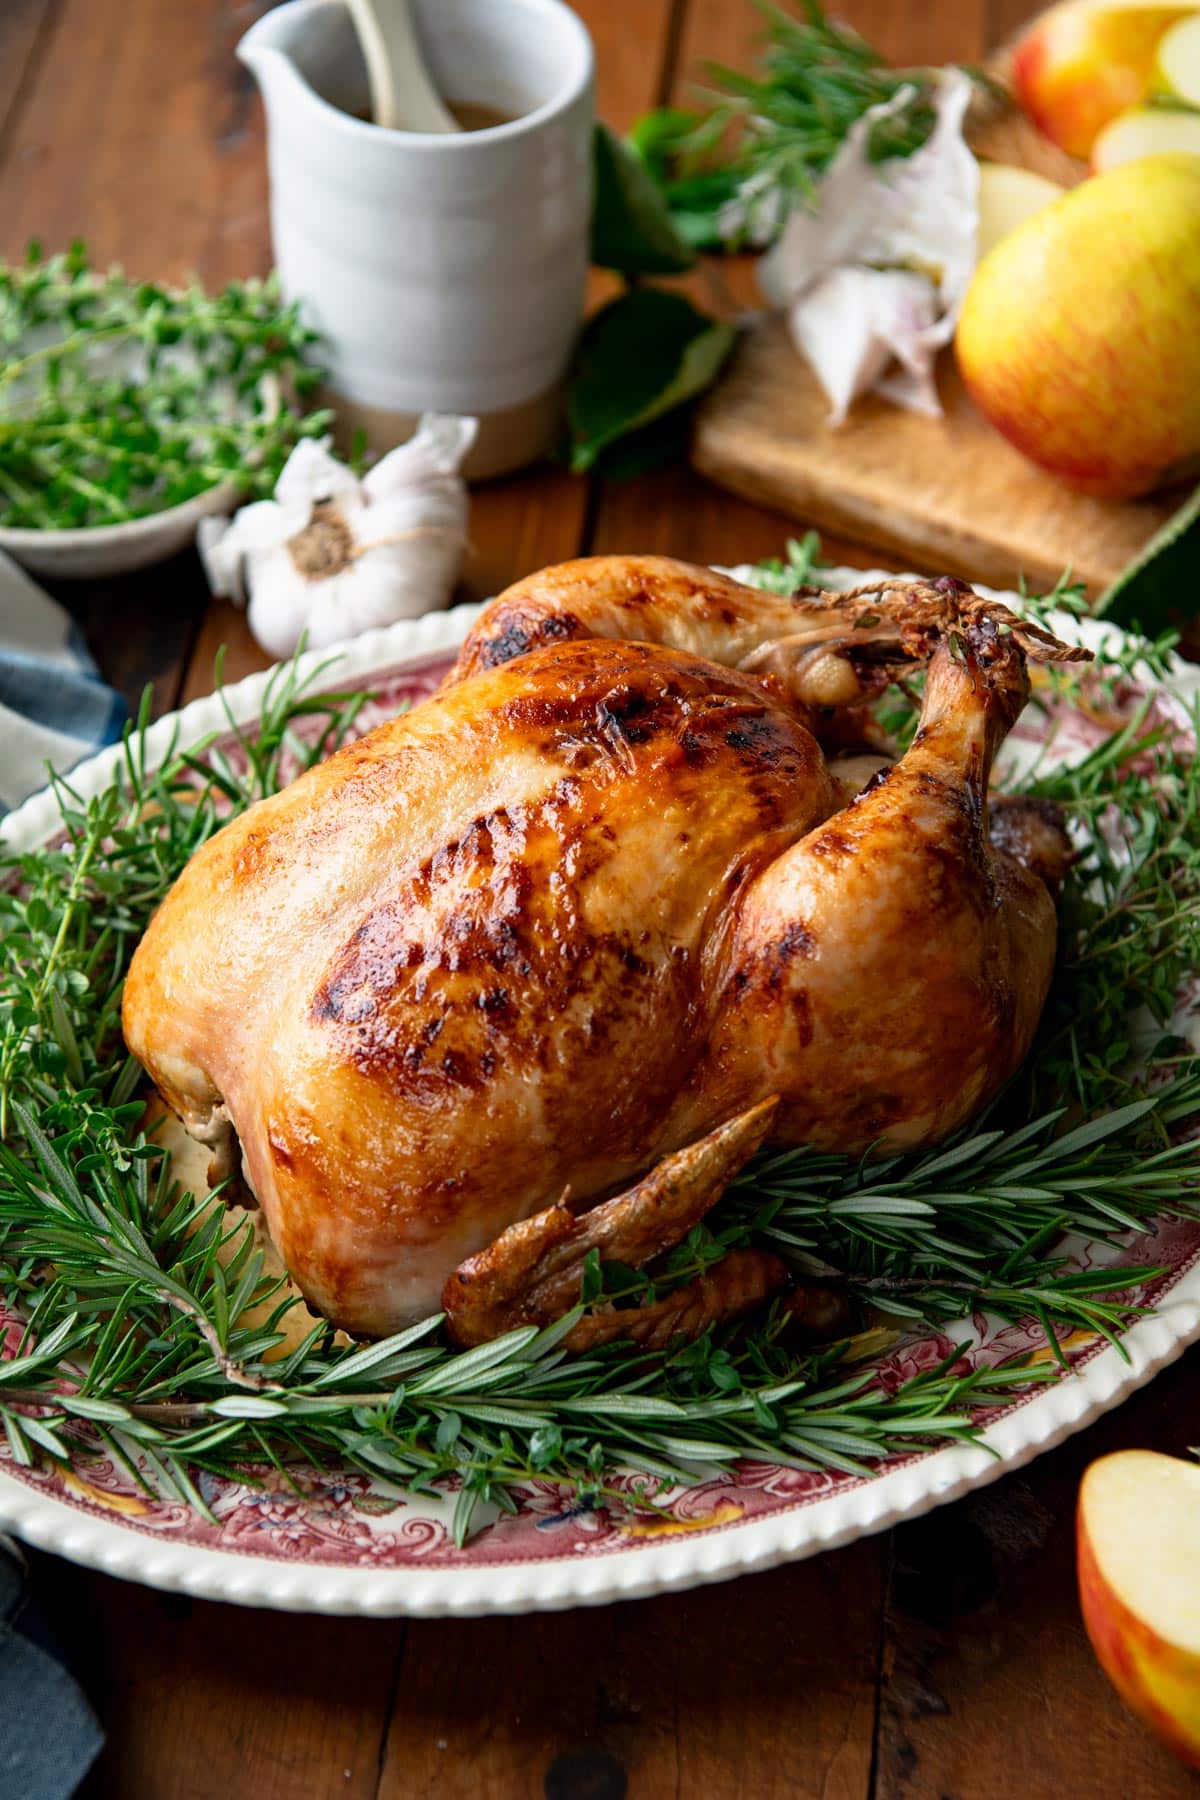
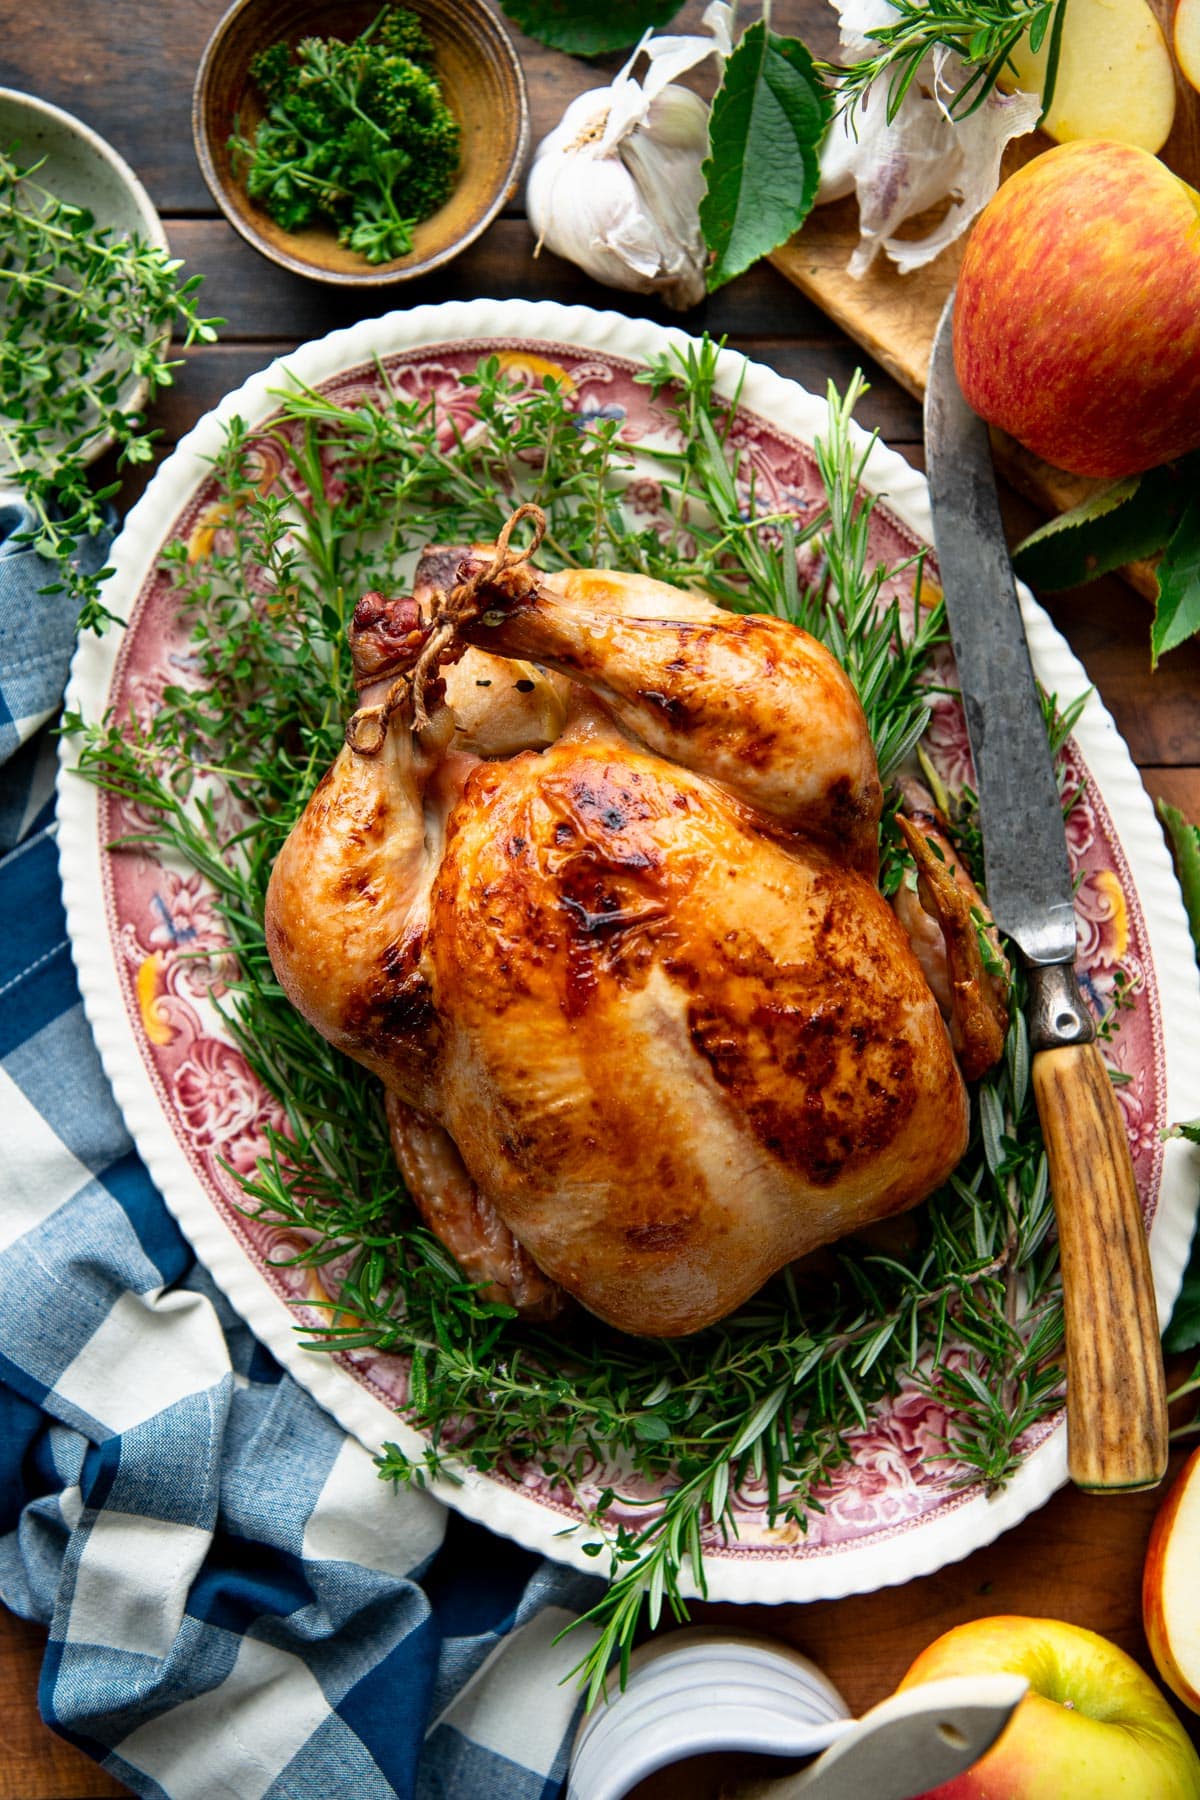
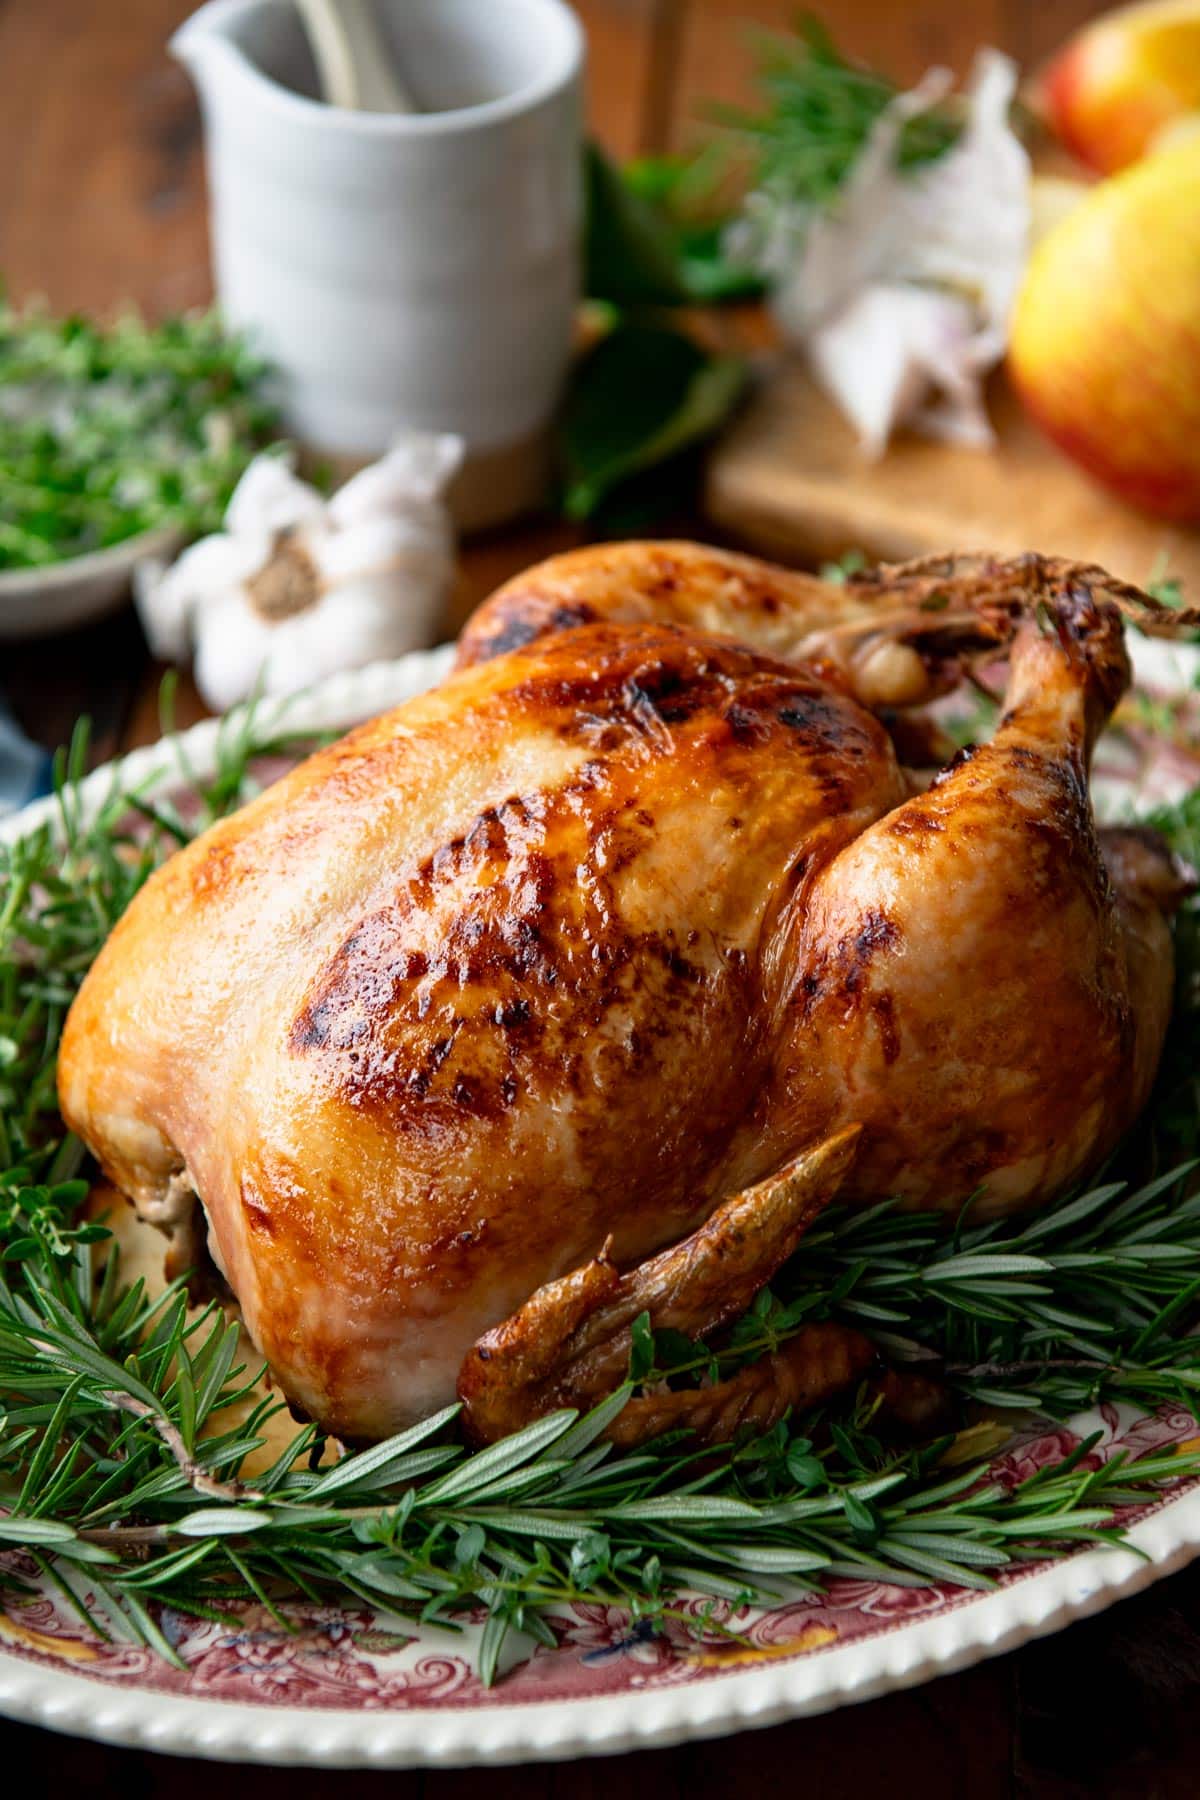
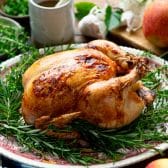
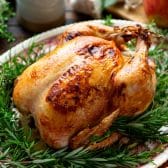
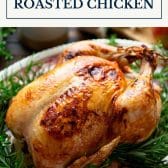
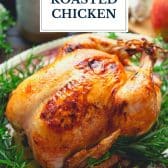
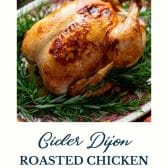
Crisp on the outside and juicy on the inside, this roasted chicken is a versatile, easy dinner! Seasoned with onion, garlic, apples, and herbs, and then basted with a cider Dijon sauce, the flavorful, down-home comfort food is a perfect addition to your autumn table.
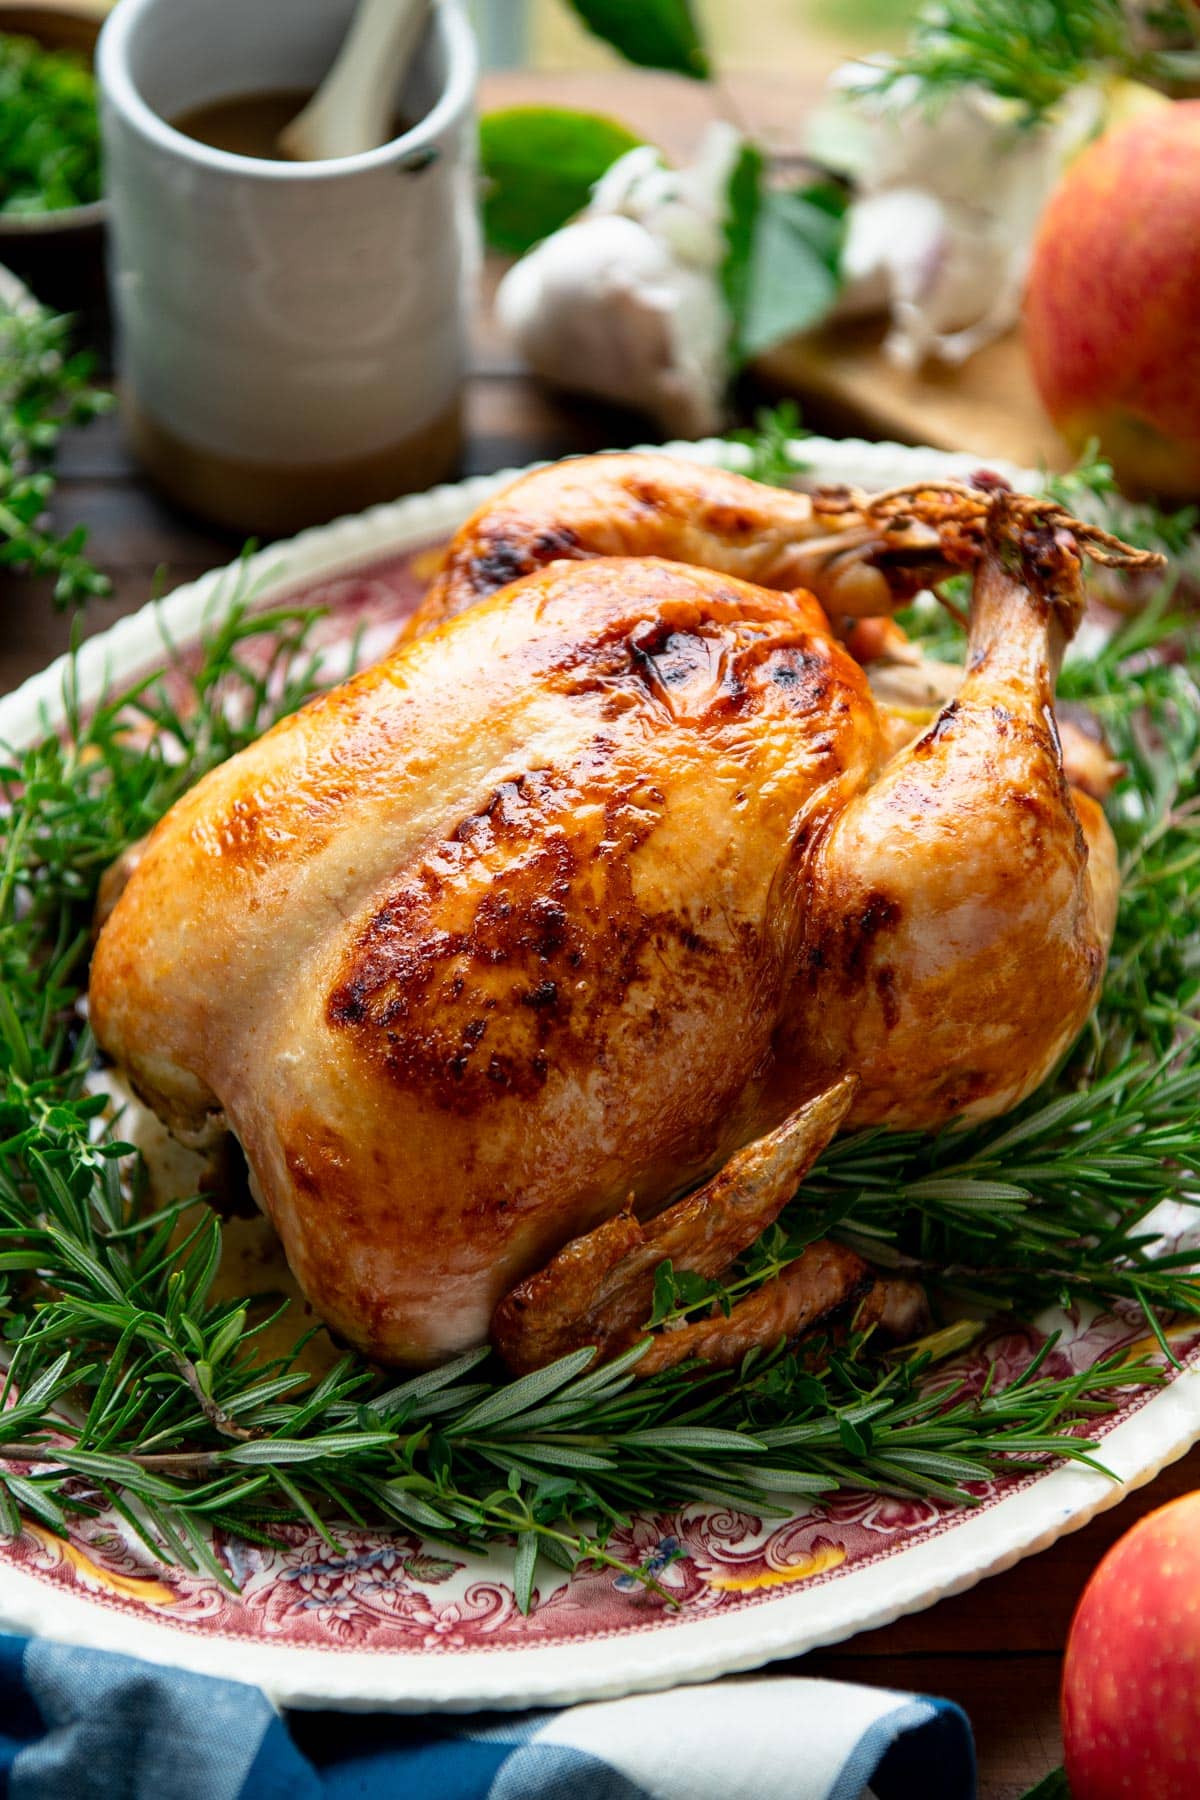
Table of Contents
- Why We Love this Whole Roasted Chicken Recipe
- Ingredients
- How to Roast a Chicken
- How Long to Cook a Chicken in a Dutch Oven
- Roast Chicken Temperature
- Serving Suggestions
- Preparation and Storage Tips
- Whole Roasted Chicken Recipe Variations
- Tips for the Best Roasted Chicken Recipe
- Cider Dijon Roasted Chicken Recipe
If you’re looking for even more whole chicken recipes, be sure to try this Crock Pot whole chicken, a Dutch oven chicken, and this roast chicken and vegetables, too!
Succulent, juicy, and crispy roasted chicken is such an underrated, affordable way to feed a family. Flavored with fresh herbs, apples, and onions and finished with an apple cider sauce, this simple, wholesome meal will soon become a staple in your fall and winter rotation (it would even be great for Thanksgiving in lieu of a turkey). If you love roast chicken recipes as much as we do, be sure to try this Dutch oven chicken, this rosemary oven roasted chicken, or this roast chicken and vegetables, too!
Why We Love this Whole Roasted Chicken Recipe
There’s something magical about a simple oven roasted chicken. It’s inexpensive, it’s one of the easiest meals that any home cook can serve, you can prepare the meat in a variety of ways, and it’s almost impossible to mess up! Even with the most basic seasonings (like salt and pepper), you can achieve a really delicious bird with so much natural flavor. Add some fresh rosemary, thyme, apples, and onions, and the crispy roast chicken is absolute perfection!
Bake the chicken uncovered for the entire 1 ½ hours for a dry roast that crisps the skin and creates that gorgeous golden brown exterior. The apple cider sauce is like the icing on the cake, as it provides sweet and savory flavor, while also helping the skin crisp and brown. If you don’t want the chicken quite so dark, you can easily cover the pot at any point. You get the best of both worlds — moist, juicy meat with crispy skin. No more dried-out white meat or charred exterior!
Use a Dutch Oven for the Best Roasted Chicken Recipe
A Dutch oven is perfect for roasted chicken because of its unique design and the flexibility that it provides. Dutch ovens are made from cast iron, so they retain and evenly distribute heat. First, the sides of the pot trap moisture, resulting in the juiciest roasted whole chicken that you will ever taste. The lid on the Dutch oven also gives you flexibility to control the browning process on the outside of the chicken.
What Size Dutch Oven for a Whole Chicken?
You’ll need a Dutch oven with a capacity of at least 5½-6 quarts. I use a 7¼-quart Dutch oven, which works particularly well and allows room for additional potatoes or vegetables, if you like.
We rounded up the best Dutch ovens you can buy, including 3 (yes, 3!) that I personally own and love! It was difficult to choose my favorite, but the Staub Cast Iron Dutch Oven (5.5 quarts) earned the top spot. You can buy it on Amazon for $311.50 or at Walmart for $359.95. That said, the Le Creuset Enameled Cast Iron Dutch oven was a close second that’s just a little bit larger (7.5 quarts). It’s available on Amazon for $459.95.
Ingredients
This is just a quick overview of the ingredients that you’ll need for a whole roast chicken. As always, specific measurements and step-by-step cooking instructions are included in the printable recipe box at the bottom of the post.
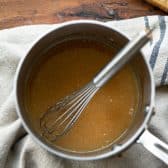
- Apple cider: boil it down so that it reduces and the flavor concentrates.
- Maple syrup: adds sweetness and flavor to the sauce.
- Dijon mustard: for a bit of zesty tang in the sauce.
- Salted butter: add flavor and richness to the outside of the chicken, while also helping the skin brown.
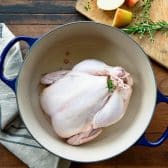
- Whole chicken: I use a larger 5-6 lb. chicken, which easily feeds a family of 4-5. Smaller chickens will cook faster, and larger chickens will require a bit more time (use a meat thermometer to know when your bird is done).
- Vegetable oil: to coat the bottom of the Dutch oven.
- Kosher salt and ground black pepper: to enhance the other flavors in the recipe.
- Onion, apple, thyme, rosemary, and garlic: flavorful aromatics that season the chicken from the inside as it roasts.
How to Roast a Chicken
Allow plenty of time for the chicken to come to room temperature and for the chicken to roast in the oven, but the actual hands-on prep time for this recipe is only about 15-20 minutes. It’s so easy, so delicious, and your kitchen will smell amazing while it cooks! I’ve included detailed directions in the recipe card below, but here’s the quick version:
- Boil the apple cider sauce. Let cool.
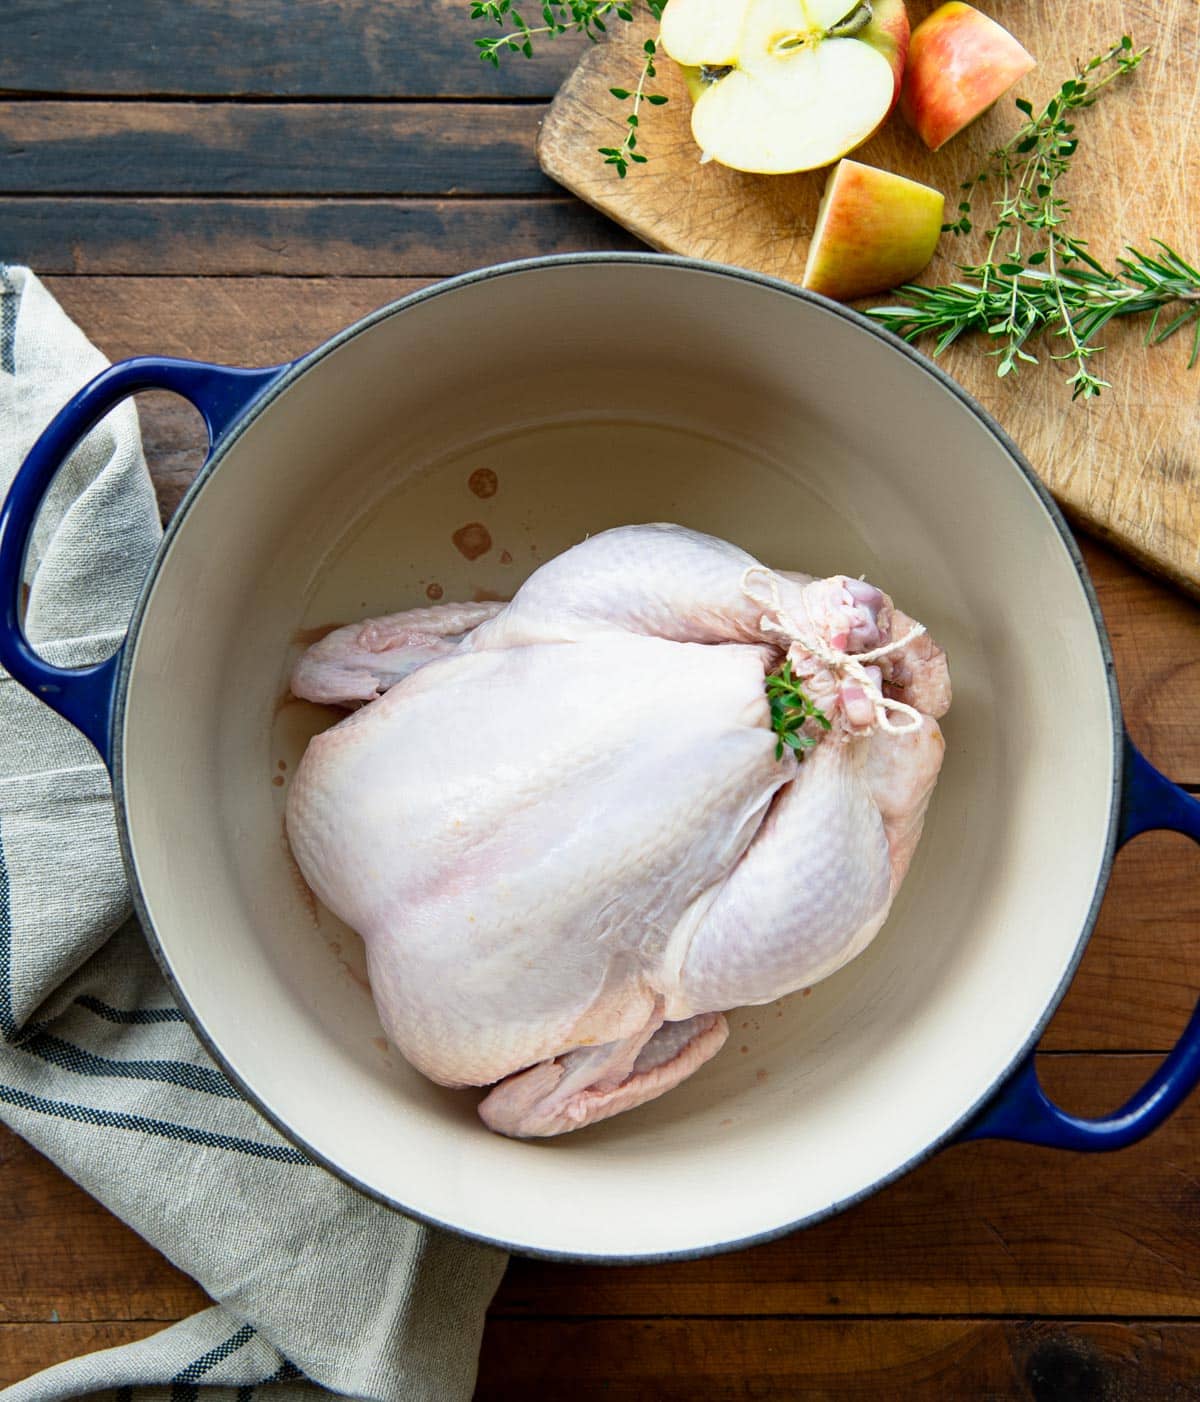
- Stuff and truss the chicken. Brush with melted butter and season with salt and pepper.
- Roast the chicken for about 90 minutes, basting with the sauce during the final 30 minutes.
- Let the chicken rest for about 15 minutes before carving.
How Long to Cook a Chicken in a Dutch Oven
This Dutch oven method roasts a whole 5-6 lb. chicken at high heat (425°F) for about 90 minutes. The total cooking time will vary depending on the size and initial temperature of your chicken. If you’re starting with a smaller 3-4 lb. chicken, decrease the cooking time.

Roast Chicken Temperature
A whole chicken is ready when a meat thermometer inserted between a leg and thigh (not touching the bone) reads at least 170 – 175°F. It will be tender and juicy! Note: the temperature of the meat will continue to rise slightly when you pull it out of the oven.
Serving Suggestions
A crispy roasted chicken makes the perfect Sunday supper. Pair the juicy meat with any of your family’s favorite sides, such as:
- Baked Potato Wedges, Crispy Parmesan Potatoes, Twice Baked Potatoes, 3-Ingredient Buttermilk Mashed Potatoes, Mashed Potatoes with Sour Cream and Chives, Skin On Mashed Red Potatoes, Baked Potatoes, or Easy Potato Salad
- Cast Iron Cornbread, Sour Cream Cornbread, Southern Cornbread, Pumpkin Cornbread, Cake Mix Cornbread, Skillet Cornbread, Sweet Cornbread, Jiffy Cornbread with Creamed Corn, Corn Sticks, Honey Cornbread, Broccoli Cornbread, or Cornbread Muffins
- 3-Ingredient Buttermilk Biscuits, Cathead Biscuits, Southern Buttermilk Biscuits, Flaky Biscuits, Aunt Bee’s 3-Ingredient Buttermilk Biscuits, Sweet Potato Biscuits, Cheese Biscuits, Easy Drop Biscuits, or Cheddar Biscuits with Chives and Bacon
- Creamy Baked Mac and Cheese, Duke’s Homemade Mac and Cheese, Pumpkin Mac and Cheese, Crock Pot Mac and Cheese, No-Boil Overnight Mac and Cheese, Shells and Cheese, or Creamy Stovetop Mac and Cheese
- Homemade Crescent Rolls or Soft Dinner Rolls
- No-Knead Honey Beer Bread
- Pumpkin Bread or Pumpkin Muffins
- Dutch Oven No-Knead Bread or Easy Baguette
- Rice Pilaf or Charleston Red Rice
- Cranberry Orange Sauce
- Corn Salad, Jiffy Corn Casserole, Southern Cornbread Dressing, or Fried Corn
- 3-Ingredient Sour Cream Muffins
- Cranberry Muffins or Mom’s Cranberry Orange Bread
- Kale Apple Salad with Creamy Poppy Seed Dressing, Wedge Salad with Buttermilk Ranch Dressing, Southern Caesar Salad, Green Salad with Red Wine Vinaigrette, House Salad with Candied Pecans, or a Mixed Greens with Dijon Vinaigrette
- Roasted Cabbage, Braised Cabbage with Apples and Bacon, or Fried Cabbage
- Homemade Applesauce, Southern Fried Apples, or Baked Apple Slices with Brown Sugar and Cinnamon
- Southern Collard Greens or Sweet and Spicy Collard Greens with Bacon
- Arkansas Green Beans with Bacon, Southern-Style Green Beans or Roasted Green Beans
- Broccoli Cauliflower Salad
- Creamed Peas
Preparation and Storage Tips
- Leftovers will keep in an airtight container in the refrigerator for 3-4 days or in the freezer for up to 3 months. Be aware, however, that the skin will not be as crispy when thawed.
- How to Reheat: Allow the chicken to come to room temperature on the counter for at least 30 minutes. Preheat the oven to 350°F. Arrange chicken on a foil-lined baking sheet or roasting pan and place (uncovered) in the oven until the skin is crisp and the chicken is warmed through (about 25-30 minutes for a whole chicken, or less for individual pieces). Be careful not to leave the chicken in the oven for too long or it will dry out.
- How to Use Leftover Roasted Chicken: Shred the leftover meat and use the cooked chicken in casseroles (like Chicken Spaghetti, Chicken Noodle Casserole or Chicken and Stuffing Casserole), in soups (like Chicken Tortilla Soup or Brunswick Stew), in stuffed potatoes, in Chicken Salad, in Chicken Enchiladas, in quesadillas or tacos, for Chicken Pot Pie, or on top of Caesar Salad. So many delicious options!
Whole Roasted Chicken Recipe Variations
- Omit the apple cider sauce, if you like. The sauce adds a bit of flavor and browning to the skin, but it’s not mandatory. The roasted chicken is still delicious without it!
- I typically leave the chicken uncovered for the entire 90 minute cooking time, because we love a really brown, crispy skin. If you prefer less color on the outside of your chicken, add the lid to the Dutch oven at any point.
- Instead of brushing the outside of the chicken with melted butter before roasting, rub (or brush) olive oil all over the skin. The extra fat on the skin helps it get brown and crispy in the oven.
- Dutch Oven Chicken and Potatoes: Place 6-8 small, halved or quartered Yukon Gold or red potatoes in the bottom of the Dutch oven before adding the chicken on top.
- Include Vegetables: Add butternut squash or root veggies such as onions, carrots, or turnips to the bottom of the Dutch oven to create a one-pot meal.
- Stuff lemon wedges inside the chicken cavity for a bright, citrus flavor.
- Additional Herbs: Use fresh basil or parsley in addition to the rosemary and thyme.
Tips for the Best Roasted Chicken Recipe
- Bring the chicken to room temperature for about 30 minutes before roasting in order to ensure even cooking.
- For the crispiest skin, make sure that your chicken is very dry before roasting.
- Cooking time will vary depending on the total weight of your chicken. Always use an instant read thermometer to test the internal temperature of the meat to know when it’s done.
- Truss the chicken. This only takes a minute or two, but tying together the chicken legs with twine and tucking the wings underneath helps the chicken cook evenly.
- Season liberally. Don’t be shy with the salt and pepper. This is a big piece of meat, so you want to add plenty of flavor by using enough seasoning both inside and outside the bird.
- For the juiciest meat, allow the chicken to rest for at least 10-15 minutes before carving.
- Don’t omit the butter before roasting. The butter on the outside helps to make sure that the exterior is perfectly crispy and golden brown, and it also adds great flavor.
- Use additional fresh herbs as a garnish just before serving.
More Recipes with Apple Cider
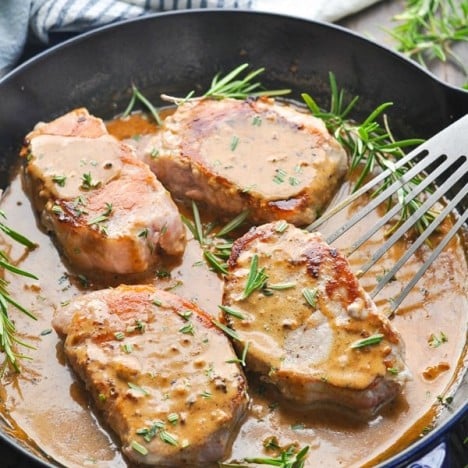
Stovetop Pork Chops with Apple Cider Gravy
30 minutes mins
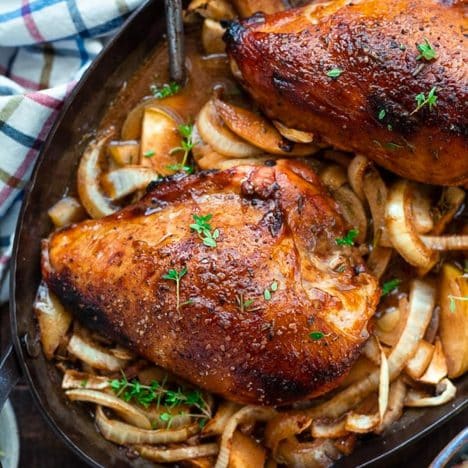
Roasted Chicken Breast with Molasses and Apples
1 hour hr 15 minutes mins

Apple Cider Braised Pork Shoulder
4 hours hrs 40 minutes mins

Did you make this recipe?
If you enjoyed this recipe, please leave a comment with a 5-star review at the bottom of the post. Thank you!
Cider Dijon Roasted Chicken
Ingredients
FOR THE CIDER DIJON SAUCE (OPTIONAL)
- 2 cups apple cider
- 2 tablespoons maple syrup
- 1 tablespoon Dijon mustard
- 1 tablespoon salted butter
FOR THE CHICKEN
- 1 (5-6 lb.) whole chicken, giblets removed
- 1 tablespoon vegetable oil (for coating the Dutch oven)
- Kosher salt and black pepper
- ½ of an onion, cut into 4 pieces
- ½ of an apple, quartered but not peeled
- 3 sprigs fresh thyme
- 2 sprigs fresh rosemary
- 2 cloves garlic, peeled but not chopped
- 2 tablespoons salted butter, melted
- Kitchen twine
Instructions
MAKE THE SAUCE (OPTIONAL)
- Boil cider in a medium saucepan until it’s reduced by at least half, about 15 minutes. Whisk in the maple syrup, mustard, and butter. Let cool while you preheat the oven and prepare the chicken. Reserve about half of the sauce for serving at the end. Use the other half of the sauce to baste the chicken during the final 30 minutes of roasting.

ROAST THE CHICKEN
- Allow chicken to sit on the counter for about 30 minutes to come to room temperature. Preheat oven to 425°F. Lightly coat the bottom of a Dutch oven with vegetable oil.
- Pat chicken dry with paper towels. Season the inside cavity of the chicken liberally with salt and pepper. Stuff cavity with onion, apple, thyme sprigs, rosemary sprigs, and garlic cloves. It’s okay if you can’t fit everything in there – just stuff as much in as you can! Tie the legs together with kitchen twine and tuck the wings underneath the bird. Place the chicken (breast-side up) in the Dutch oven. Drizzle or brush the melted butter over the outside of the chicken. Season liberally all over with salt and pepper.
- Roast the chicken uncovered at 425°F for 1 ½ hours, or until the juices run clear when you cut between a leg and thigh and the temperature on a meat thermometer inserted into the thickest part of the thigh reaches 170-175°F. Baste the chicken with the cider glaze after the first hour. If the skin starts to get too dark at any point, cover the pot with the lid for the remainder of the roasting time.
- Remove chicken from the pot and allow to rest for 10-15 minutes before carving. Serve with reserved sauce for dipping or drizzling, if desired.


I can’t wait to try this recipe. I’ll make it twice, once now, to try it asap, then for Thanksgiving, when my mom is visiting us. Excited to try. I’m so hungry reading this recipe.
We hope you enjoy it, Sheryl!
Hi Blair,
What type of apple do you usually use to put in the cavity? Thanks!
Hi, Renee! Any apple that you have on hand is great. Since you’re not actually eating the apple (it’s just used as an aromatic for flavor), the texture isn’t important. To answer your question, I usually use Honey Crisp, but that’s just because it’s what I keep in my fridge. Hope you enjoy!