Your family’s new favorite easy dessert! This 5-ingredient ice cream sandwich cake is a no-bake treat that’s ready with just 10 minutes of prep. Just layer ice cream sandwiches with Cool Whip and all of your favorite toppings — chocolate syrup, caramel sauce, sprinkles, M&M’s, and more — then re-freeze, slice, and serve. Bring on summer!

Table of Contents
If you’re looking for even more no-bake desserts that are perfect for summer, try this cookie ice cream sandwich, quick and easy banana pudding, key lime icebox cake, ice cream pie, and this old-fashioned icebox cake, too! Or, try peanut butter rice krispie treats!
How to Make Ice Cream Sandwich Cake | 1-Minute Video
I’ve made this using crushed Butterfinger candy bars. Also, chopped up Reese’s Cups are delicious.! This is the easiest dessert to make and looks like you e slaved for hours! I’ve also found that if it’s made in one of the tinfoil cake pans that has a lid, the lid won’t smash the top of the dessert It’s just perfect.
– Beverly
Why You’ll Love this Recipe
- Easy. If you’re not much of a baker, then this is the dessert for you! It’s perfect for those of us who always seem to need a crowd-pleasing potluck dish to serve to family and friends, but we don’t always have time to whip up a homemade cake from scratch. With layers of store-bought ice cream sandwiches and whipped topping, you can assemble this no-bake easy ice cream cake in about 10 minutes.
- No Bake. Especially during the warm summer months, it’s nice to have a few recipes in your back pocket that don’t require an oven. Once you assemble this dessert, just pop it in the freezer to firm up and your job is done — no baking or cooking required!
- Versatile. Mix up the ice cream flavors or add different toppings — once you know how to make ice cream sandwich cake, the options are endless! It’s great for holidays because you can use different colored sprinkles to match the occasion. Kids and adults love this simple dessert.

Ingredients
This is an overview of the ingredients that you’ll need for an ice cream sandwich cake. As always, specific measurements and step-by-step instructions are included in the printable recipe box at the bottom of the post.
- Ice cream sandwiches: you will need approximately 24 ice cream sandwiches for this 9 x 13-inch cake. I use vanilla ice cream sandwiches, but you can pick your favorite flavor.
- Chocolate syrup and caramel syrup: add extra flavor to the ice cream cake, making it taste just like a sundae! I like Hershey’s brand chocolate syrup and this Smucker’s caramel syrup, but other varieties of hot fudge sauce and caramel sauce will work.
- Frozen whipped topping: such as Cool Whip. Thaw the whipped topping in the refrigerator overnight before you plan to assemble the cake. Do not thaw the whipped topping on the counter at room temperature, or the texture will be runny. You can whip your own cream at home, as you would do for this icebox cake, if you prefer homemade whipped cream.
- Toppings of choice: I’ve shown mini M&M candies here, but you can add almost any toppings that you prefer. See the notes below for other suggestions.

Directions
Regular blog readers know that I’m a big fan of quick-prep, family-friendly recipes, so it’s no surprise that Stephanie sent me this idea via email a few years ago. One look at her instructions and I knew that it would be a winner in our house! After one taste, I knew that I better share it with all of you, too!
You’ll find detailed directions in the recipe card below, but here’s the overview with my notes:
- Arrange 12 ice cream sandwiches in the bottom of a 9 x 13-inch dish. You may need to cut the last ice cream sandwich in half in order to get it to fit in the pan. Trust me — this doesn’t have to be perfect (it will still taste amazing)! Use a very deep baking dish, if possible. I’ve shown a deep lasagna pan here.
- Allow the ice cream sandwiches to soften a bit, and then use the back of a spoon (or your fingers) to gently press them down a little bit. You can skip this step if you’re using a particularly deep pan.
- Top the first layer of ice cream sandwiches with a layer of whipped topping, drizzle with chocolate and caramel syrups, and sprinkle with toppings of choice (I used mini M&M’s and sprinkles here).
- Repeat the layers once more, using the remaining Cool Whip to “frost” the top of the cake.
- Freeze the homemade ice cream sandwich cake for at least 1-2 hours or overnight, until firm.

Mother of Pearl! This ‘recipe’ is a game changer! Made it for grandsons 13th birthday and it was a hit! Will make over and over again and try different ice cream sandwiches, toppings, etc. The possibilities are endless.
– donna
Storage Tips
Prepare the cake at least 1-2 hours in advance of when you plan to serve it. The cake needs adequate time to firm up in the freezer again before you slice into it.
Wrapped tightly with aluminum foil or plastic wrap, this easy ice cream cake will keep in the freezer for up to 1 week. This simple no-bake dessert is so easy that you truly cannot mess it up!

Recipe Variations
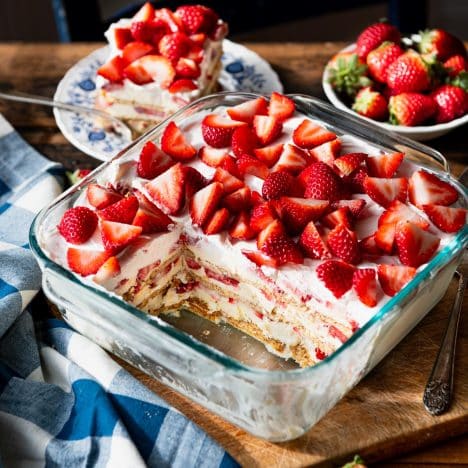
- Neapolitan: Use Neapolitan ice cream sandwiches for a combination of chocolate, strawberry, and vanilla ice cream in your cake. Garnish with sliced fresh strawberries just before serving and sprinkle with chocolate chips. A drizzle of strawberry syrup would also be a good swap for the caramel.
- Magic Shell: instead of the chocolate syrup, drizzle the top of the cake with Magic Shell topping.
- Oreo: instead of the M&M’s, make the ice cream cake with ice cream sandwiches and a layer of coarsely crushed Oreo cookies (in lieu of the M&M’s or other toppings). You can also use cookies and cream flavored ice cream sandwiches or chocolate ice cream sandwiches.
- Birthday Cake: put a birthday spin on this fun dessert! You can purchase Blue Bunny Birthday Cake Ice Cream Sandwiches at many grocery stores and Super Target stores. Use rainbow sprinkles as a fun topping, too.
- Toppings: I used mini M&M’s, but Stephanie also suggested coarsely crushed Oreos, Heath toffee bits, chopped candy bars (such as Snickers or Milky Way), chocolate chips, crushed waffle cones, chopped peanuts (or other nuts like almonds or pecans), Reese’s pieces, or Reese’s peanut butter cups.
- Sprinkles: Garnish with different colored sprinkles to match the upcoming holidays. For instance, one reader suggested using red, white, and blue sprinkles for Memorial Day or July 4th, or you can pick rainbow sprinkles for a birthday party.
I made this today for a church gathering. Everyone loved it and asked how to make it! Thanks for this recipe! Will definitely make it again. There’s no end to the garnishes you can try.
– Renee

More Desserts that are Perfect for Summer

Ice Cream Pie
3 hours hrs 23 minutes mins
Strawberry Cream Cheese Icebox Cake
4 hours hrs 25 minutes mins

Strawberry Cake with Cream Cheese Frosting
4 hours hrs

Did you make this recipe?
If you enjoyed this recipe, please leave a comment with a 5-star review at the bottom of the post. Thank you!
Watch How to Make It

Ice Cream Sandwich Cake
Ingredients
- 24 ice cream sandwiches
- 16 ounces frozen whipped topping (such as Cool Whip), thawed in the refrigerator
- Chocolate syrup
- Caramel syrup
- Topping of choice: such as mini M&M’s, sprinkles, crushed Oreo cookies, toffee bits, chopped nuts, chopped candy bars, chocolate chips, etc.
Instructions
- Layer 12 ice cream sandwiches in the bottom of a 9 x 13-inch dish. You may need to cut the last ice cream sandwich in half in order to get it to fit in the bottom of the dish. Allow to soften for a few minutes and then use a spoon to gently press the ice cream sandwiches down a little bit. You can skip this step if you're using a very deep pan!

- Spread half of the whipped topping over the ice cream sandwiches. Drizzle with chocolate and caramel syrups. Sprinkle with desired toppings.
- Top with another layer of 12 ice cream sandwiches. Spread remaining whipped topping over the ice cream sandwiches. Drizzle with additional chocolate syrup and caramel syrup, if desired. Sprinkle with additional toppings.
- Freeze for about 1-2 hours (or overnight) to give the cake time to firm up before slicing and serving.


Notes
- Use a very deep baking dish, if possible. I’ve shown a deep lasagna pan here. If your dish is deep, you don’t need to press down on the first layer of ice cream sandwiches — just skip that step.
- Thaw the whipped topping in the refrigerator overnight before you plan to assemble the cake. Do not thaw the whipped topping on the counter at room temperature, or the texture will be runny.
- Allow the ice cream sandwiches to soften slightly so that you can gently press them down as you’re creating the layers. This will help them fit in the pan!
- Prepare the cake at least 1-2 hours in advance of when you plan to serve it. The cake needs adequate time to firm up in the freezer again before you slice into it.
Nutrition
This post was originally published in June, 2018. It was updated in June, 2024.


Came out delicious!! We used crushed oreo cookies so I didn’t use the caramel. One thing I would have done differently was put a layer of crushed oreos before the first layer of ice cream sandwiches. Everyone ranted !!
I’m so glad that it was a hit, Michele. Thank you!
I made this once before and it was so delicious! Planning to make it again and wondered if I could use fresh whipping cream instead of frozen kind? Have you tried this?
Hi, Patti! I haven’t tried it myself, but the fresh whipped cream should work great!
Could I make this a couple days in advance?
Hi, Kendra! Absolutely! I’d say it’s fine for at least 2-3 days in advance (if not more). 🙂
Ice cream sandwiches are a favorite ice cream treat around our house! I made this for my son’s 6th birthday last year. He liked it so much that he requested it again this year for his 7th birthday cake(which was yesterday). Thanks for sharing this simple recipe! Its a hit!!
Happy birthday to your son! We’re so happy you all enjoy this recipe so much and hope he had a wonderful day.
I have made this cake before and it was AMAZING and so easy!! to make it even more amazing, I added about 1 to 1 1/2 pints of softened fudge swirl ice cream (your ice cream of choice), which I left out to soften so I can spread on top of the first 12 ice cream sandwiches, and then I covered the second layer of 12 ice cream sandwiches with Cool Whip!!
Sounds incredible, Rhonda! Thank you for sharing.
Eek! I forgot to add the chocolate and caramel syrup between the layers. Do you think the ice cream cake will stay together? I was thinking of drizzling the syrup on top when I serve it. I don’t want to have to start all over again if I don’t have to. What do you think? Thanks in advance. I’ve made it before and it is delicious and a favorite in my house.
It will probably still be okay as long as you allow it to firm up in the freezer!
Absolutely delicious. Great for a hot summer day!
Thank you, Ineke! We’re glad you enjoyed it.
made this cake but on a smaller scale. i used 12 ice cream sandwiches six on the bottom with white icing on top then added six more ice cream sandwhiches to the top covered the whole thing in whip cream even the sides as i used a cake container to make it. then topped with smarties. It’s in the freezer now for my sons birthday. I am hoping it is well loved. Thanks for the idea
I hope that your son loved it, Kim!
Served this dessert at a family dinner and got WOW reviews! Bear in mind, that hardly ever happens!
Going to serve it again this Easter especially for my granddaughter to LOVES ice cream cake! Thank you!
We’re so happy to hear this, Sandi! Thank you for trying it out and taking the time to leave a review.
Excellent!! Soooo easy to make this. I used chocolate chip ice cream sandwiches and instead of sprinkles I cut up mini peanut butter cups. I gave some to two neighbors, both said excellent!! I was trying it out for a family vacation to Honolulu. It will be perfect since it uses few ingredients and is so easy to make!
Thank you……
Sue
I’m using big ice cream sandwiches and a small er pan
That should be fine. You’ll just have a thick cake. We hope you enjoy, Lisa!
This is so simple and delicious .
Everyone enjoyed it . 5 ⭐️ ! A crowd pleaser !
I lined my pan with parchment paper so i could remove it to a cutting board and slice servings . So easy .
I used crushed oreos .
Thank you, Barb! We’re so glad you enjoyed it and appreciate you taking the time to leave a review!