Just like Grandma’s kitchen, these old-fashioned corn sticks are classic Southern comfort food! Thanks to the magic of a cast iron pan, the baked cornbread sticks are perfectly crispy on the outside, yet tender and moist on the inside.
If you love cornbread, you’ll also want to try these easy cornbread muffins, this cast iron cornbread, or my favorite Southern cornbread recipe.
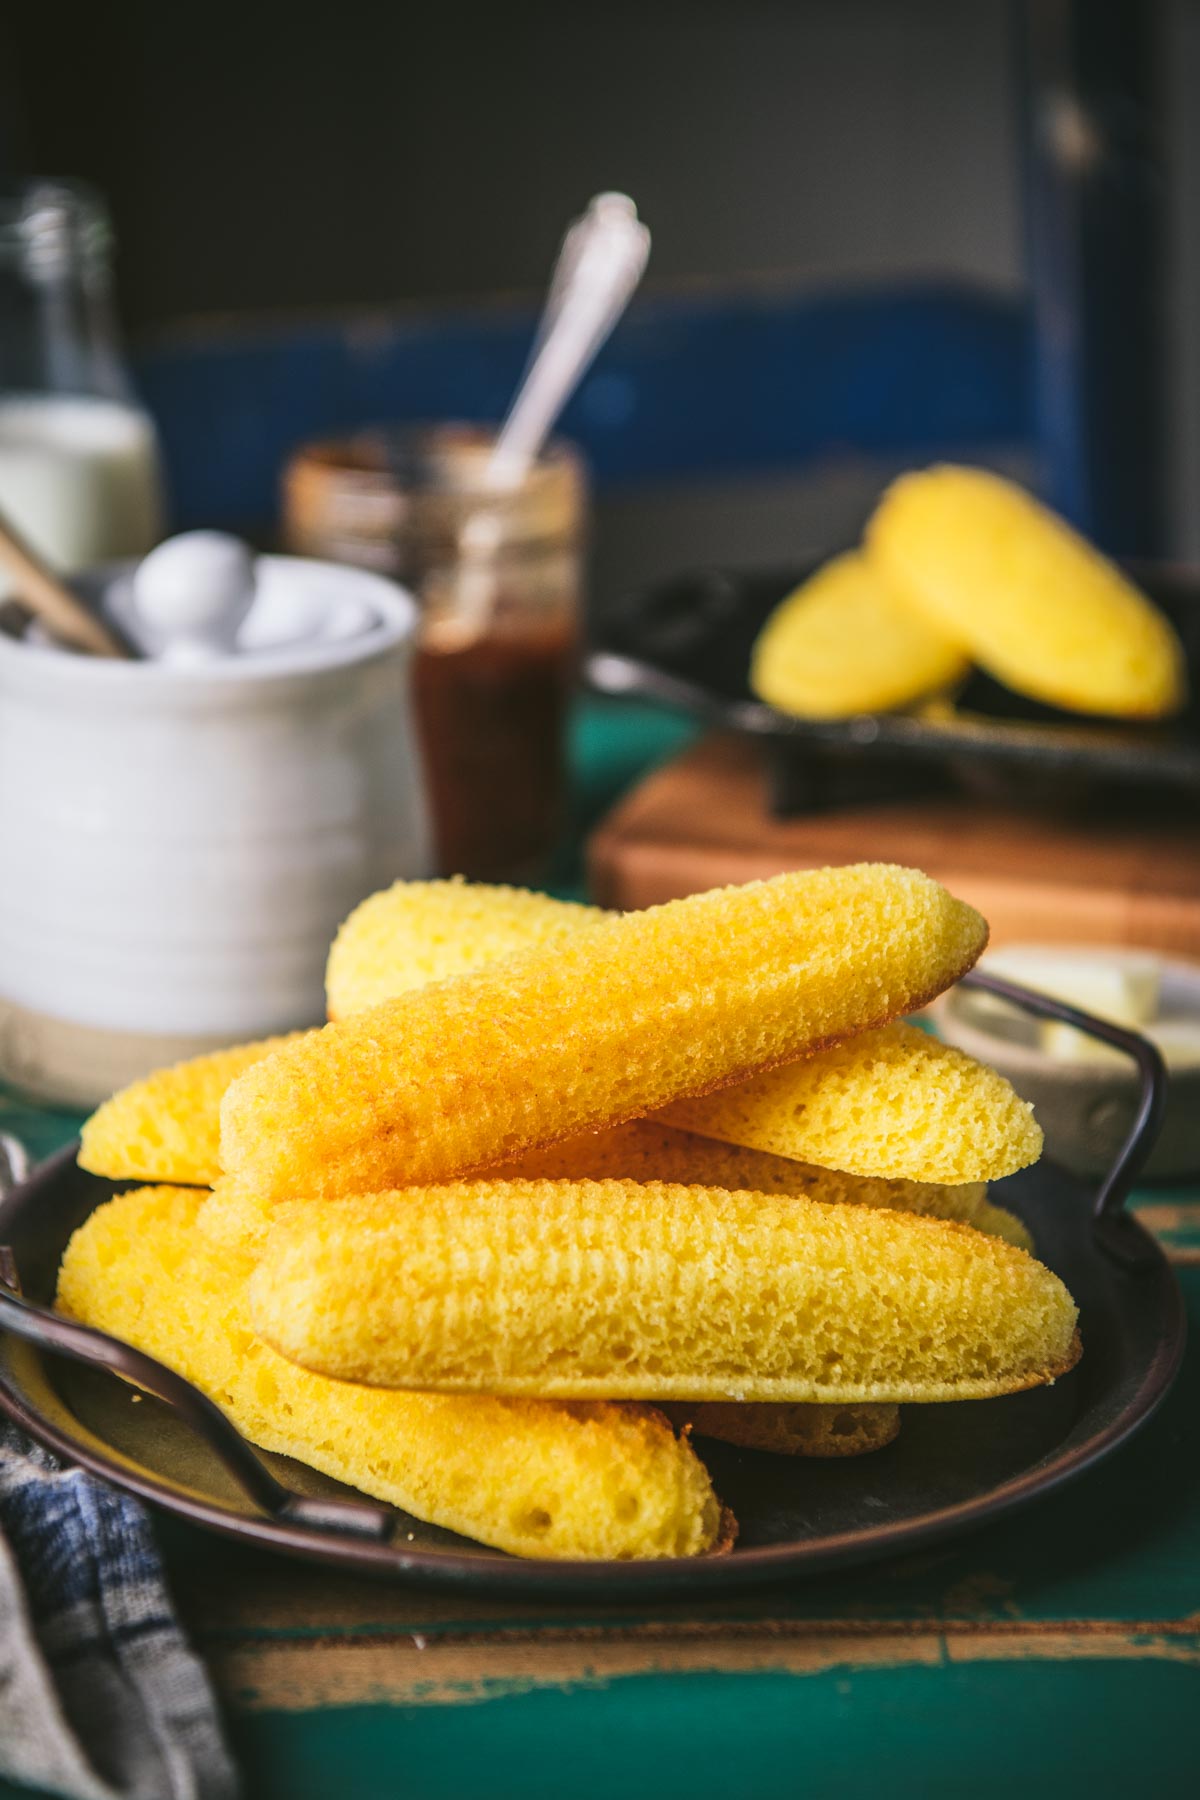
Table of Contents
Before You Get Started
A few simple tips will help you get perfectly crispy, golden corn sticks every time.
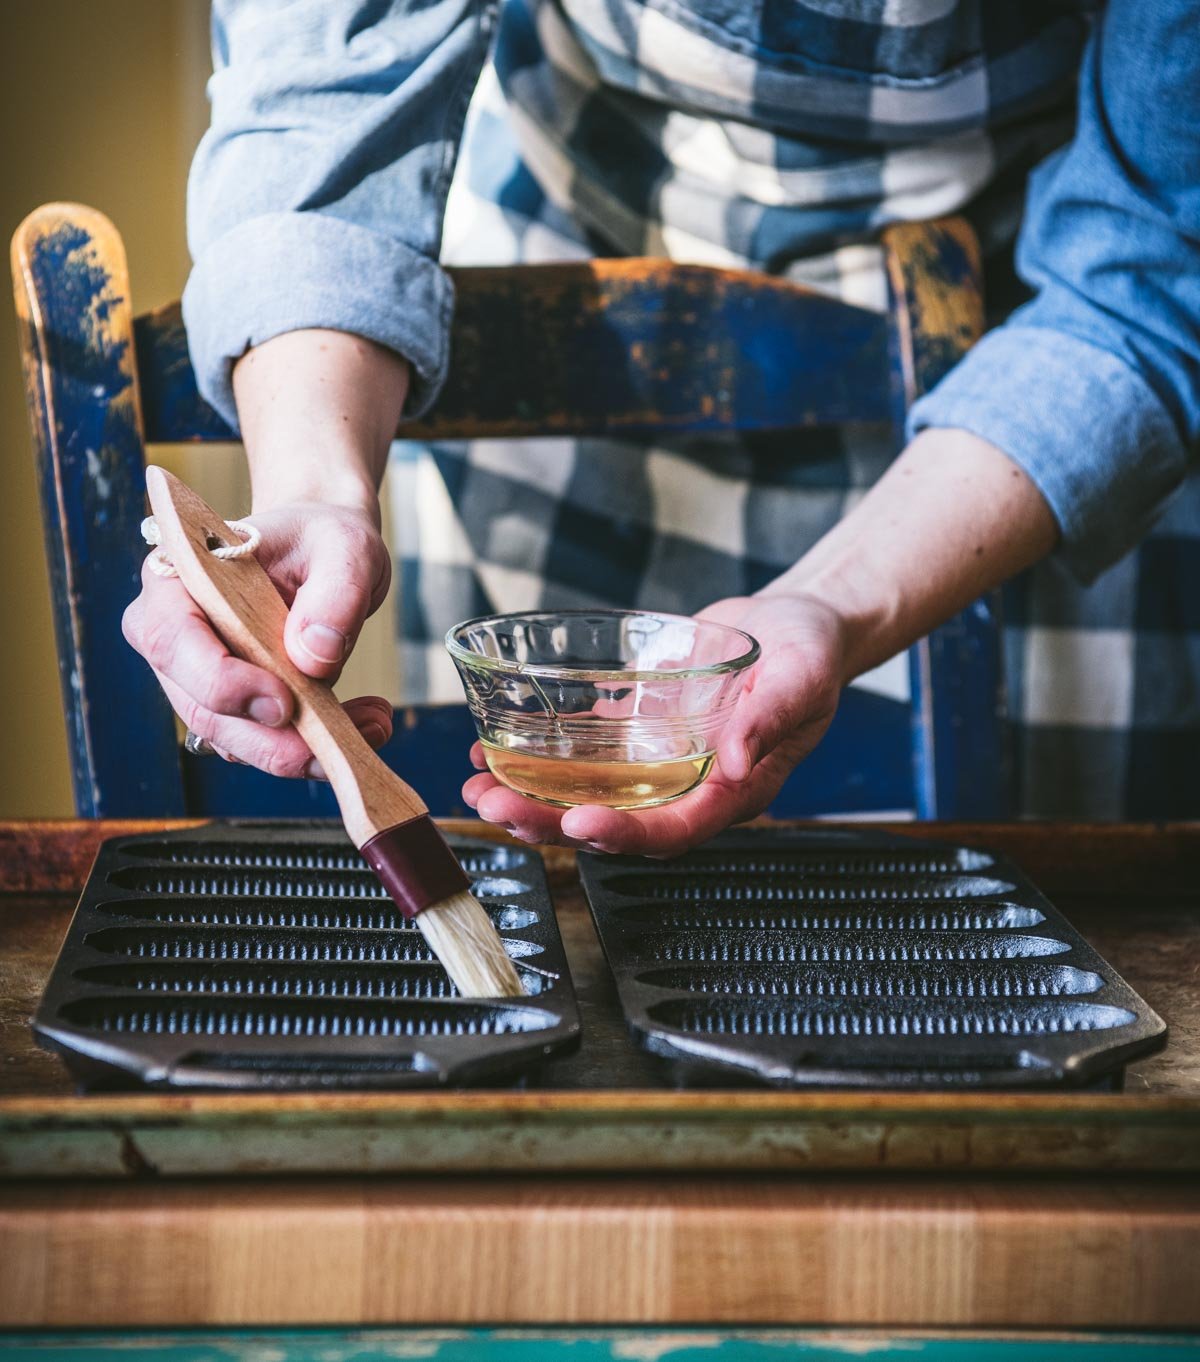
- Grease the pan generously. Use about 1 tablespoon of shortening or vegetable oil per pan, rubbing it into every curve of each cavity. It will probably look like you’re putting too much in there, but you’re not. This is what prevents sticking and creates those irresistible crispy edges.
- Preheat the greased pan in the oven. The hot, greased cast iron is the secret to corn sticks with a crispy exterior. Place the greased pans in the oven for about 5 minutes while you mix the batter.
- Don’t overmix the batter. Stir just until the ingredients come together. A few small lumps are fine! Over-mixing develops the gluten and leads to dense, dry corn sticks instead of that tender crumb you’re after.
⇢ Don’t have a corn stick pan? You can use this same batter to make cornbread muffins or cast iron cornbread instead. The results will be delicious, just a different shape!
About Corn Stick Pans
Corn sticks are baked in special cast iron pans with ear-of-corn-shaped cavities. The Lodge corn stick pan is widely available and comes in 5, 6, or 7-cavity options. I use the 6-cavity Lodge pans for this recipe, but other varieties work well too.
Cast iron is ideal for baking cornbread because it provides excellent heat distribution and retention for consistent, even baking. It doesn’t warp at high temperatures, and that naturally-seasoned surface helps the corn sticks release easily. Plus, the fun corn-shaped molds are nostalgic and create fond memories around the table!
New cast iron corn stick pans almost always come pre-seasoned, so you can start baking right away. If you have an older pan or one that’s rusty, Lodge has helpful instructions for re-seasoning.
How to Make Corn Sticks
These easy homemade corn sticks are ready for the oven in about 10 minutes, making them a great last-minute addition to the weeknight dinner table.
Step 1: Prep the Pans
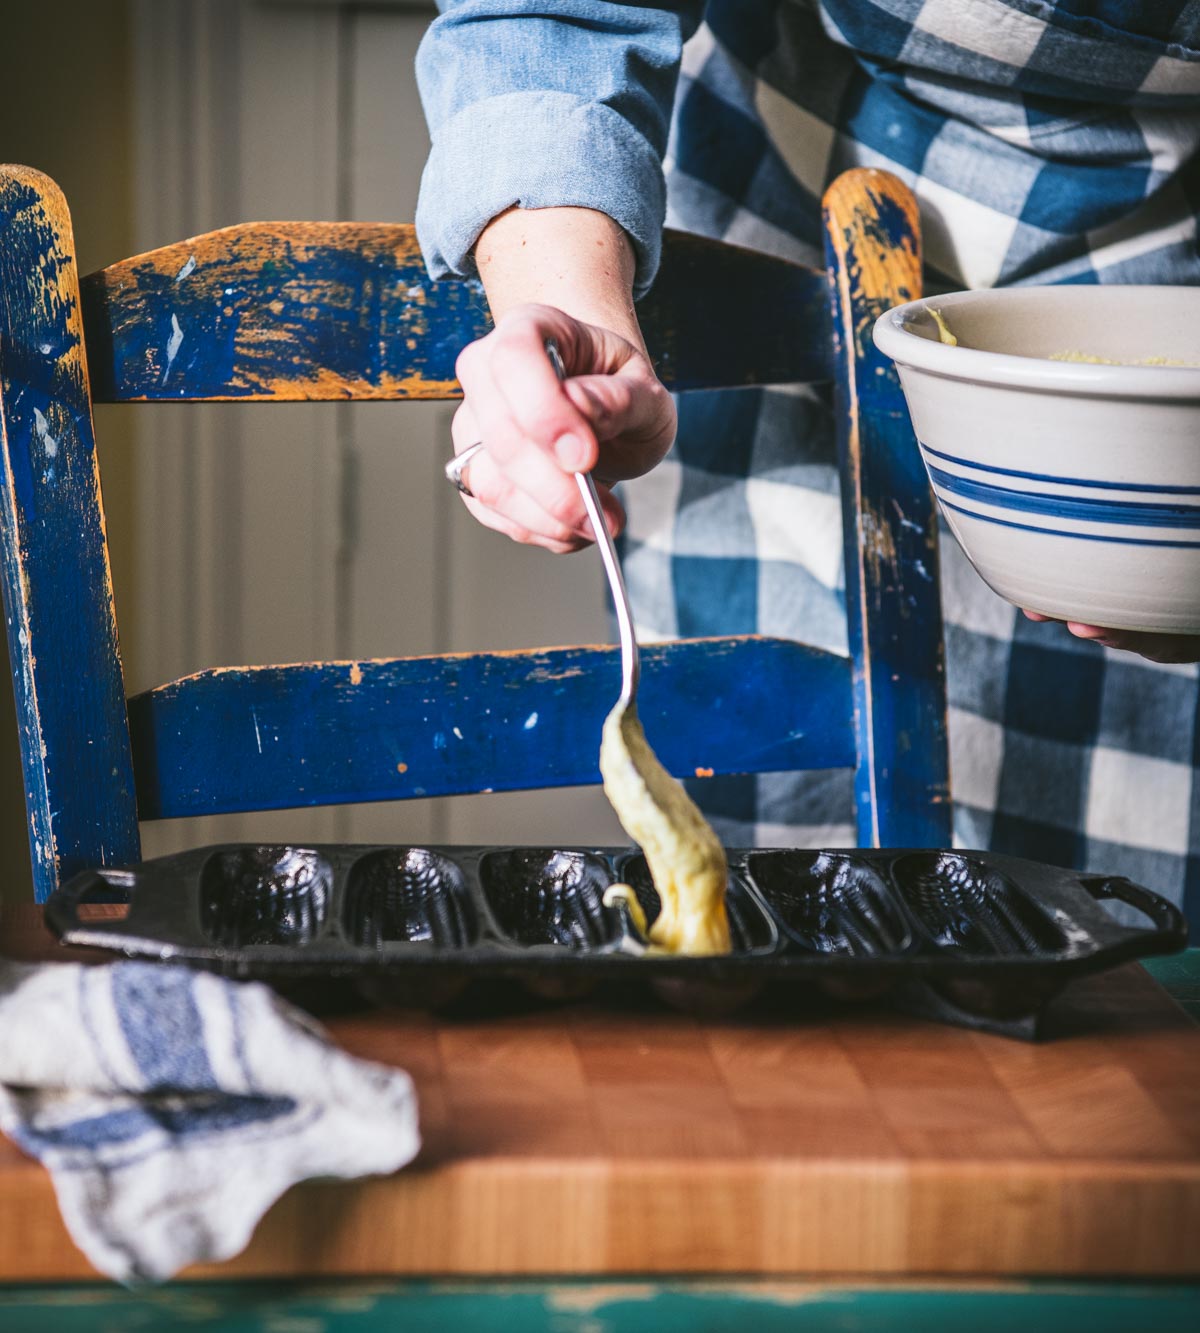
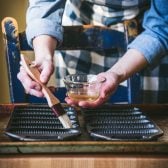
Grease two 6-cavity corn stick pans with shortening or vegetable oil, making sure to coat every curve of each cavity.
Place the greased pans in a 450°F oven and let them preheat for about 5 minutes while you mix the batter. The sizzle you hear when the batter hits the hot pan is exactly what you want!
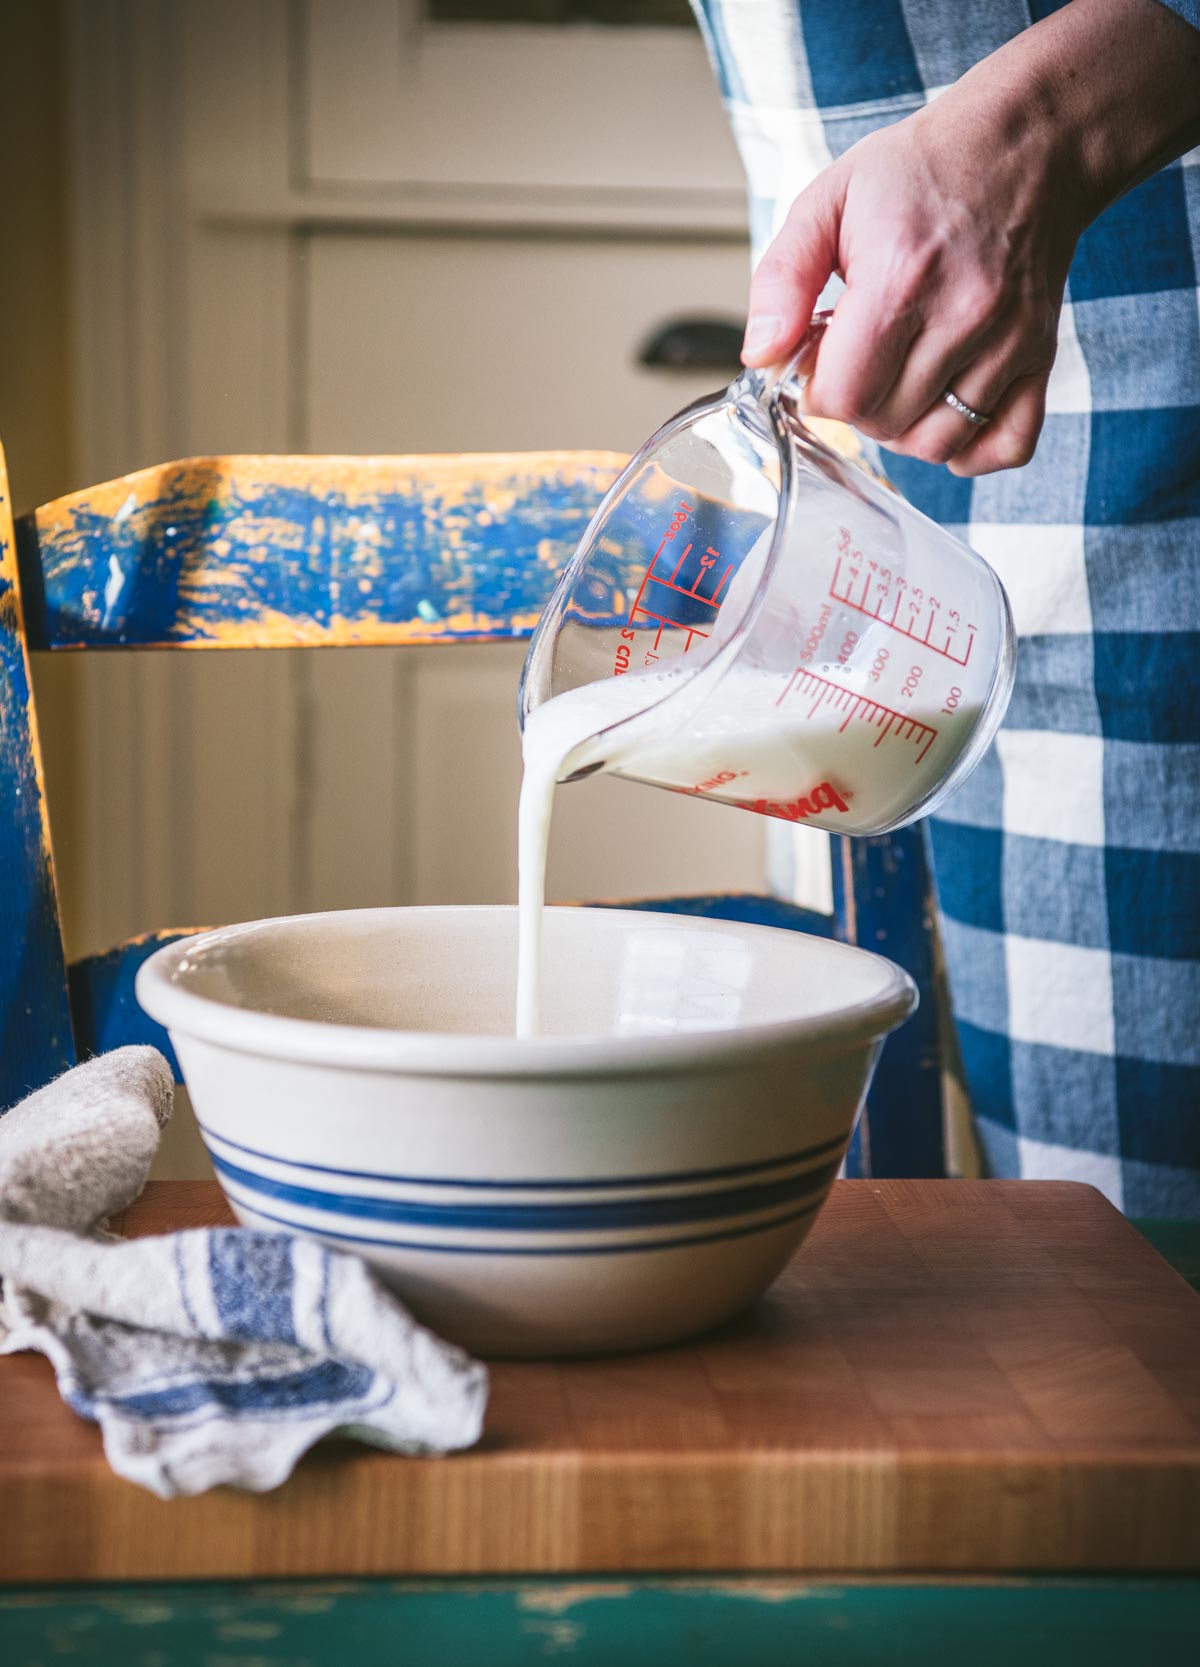
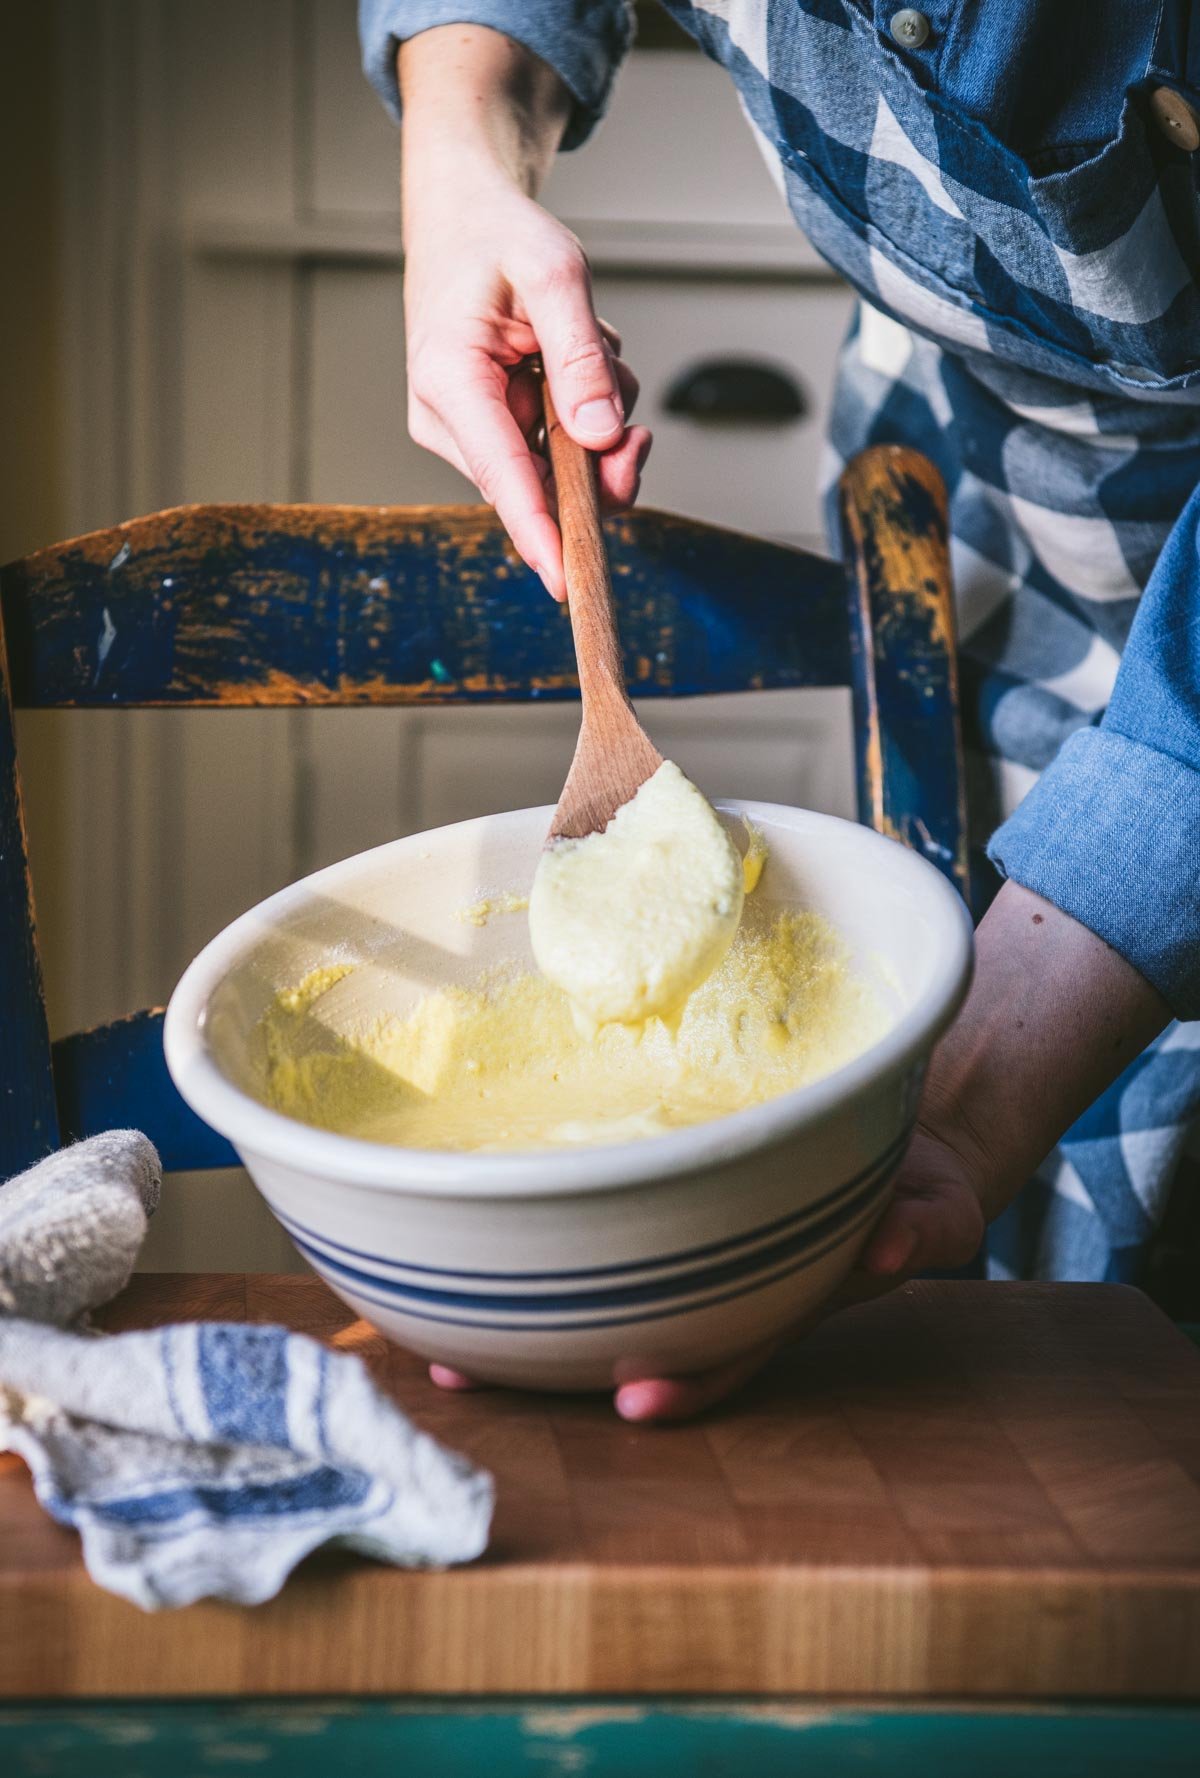
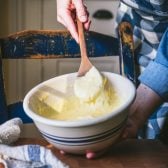
Step 2: Mix the Batter
In a large bowl, whisk together the cornmeal, flour, sugar, salt, baking powder, and baking soda. Add the buttermilk, beaten egg, and vegetable oil (or melted shortening). Stir just until the batter comes together. A few small lumps are perfectly fine.
⇢ Let it rest: If you have an extra 5 to 10 minutes, let the batter sit before baking. This gives the baking powder time to activate and incorporate more air, which means lighter corn sticks.
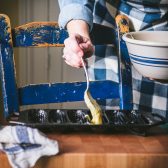
Step 3: Fill and Bake
Carefully remove the hot pans from the oven. Spoon the batter into each cavity, filling them almost to the top (leave about 1/8 inch). The batter will puff up as it bakes but shouldn’t overflow.
Bake at 450°F until the tops are light golden brown, about 14 to 16 minutes for larger corn sticks (in 6-cavity pans) or 12 to 14 minutes for smaller ones (in 7-cavity pans).
⇢ Don’t overbake, or they can dry out. The bottoms will be darker and crispier since they’re in direct contact with the hot pan.
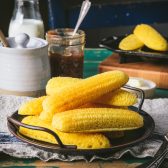
Step 4: Serve Warm
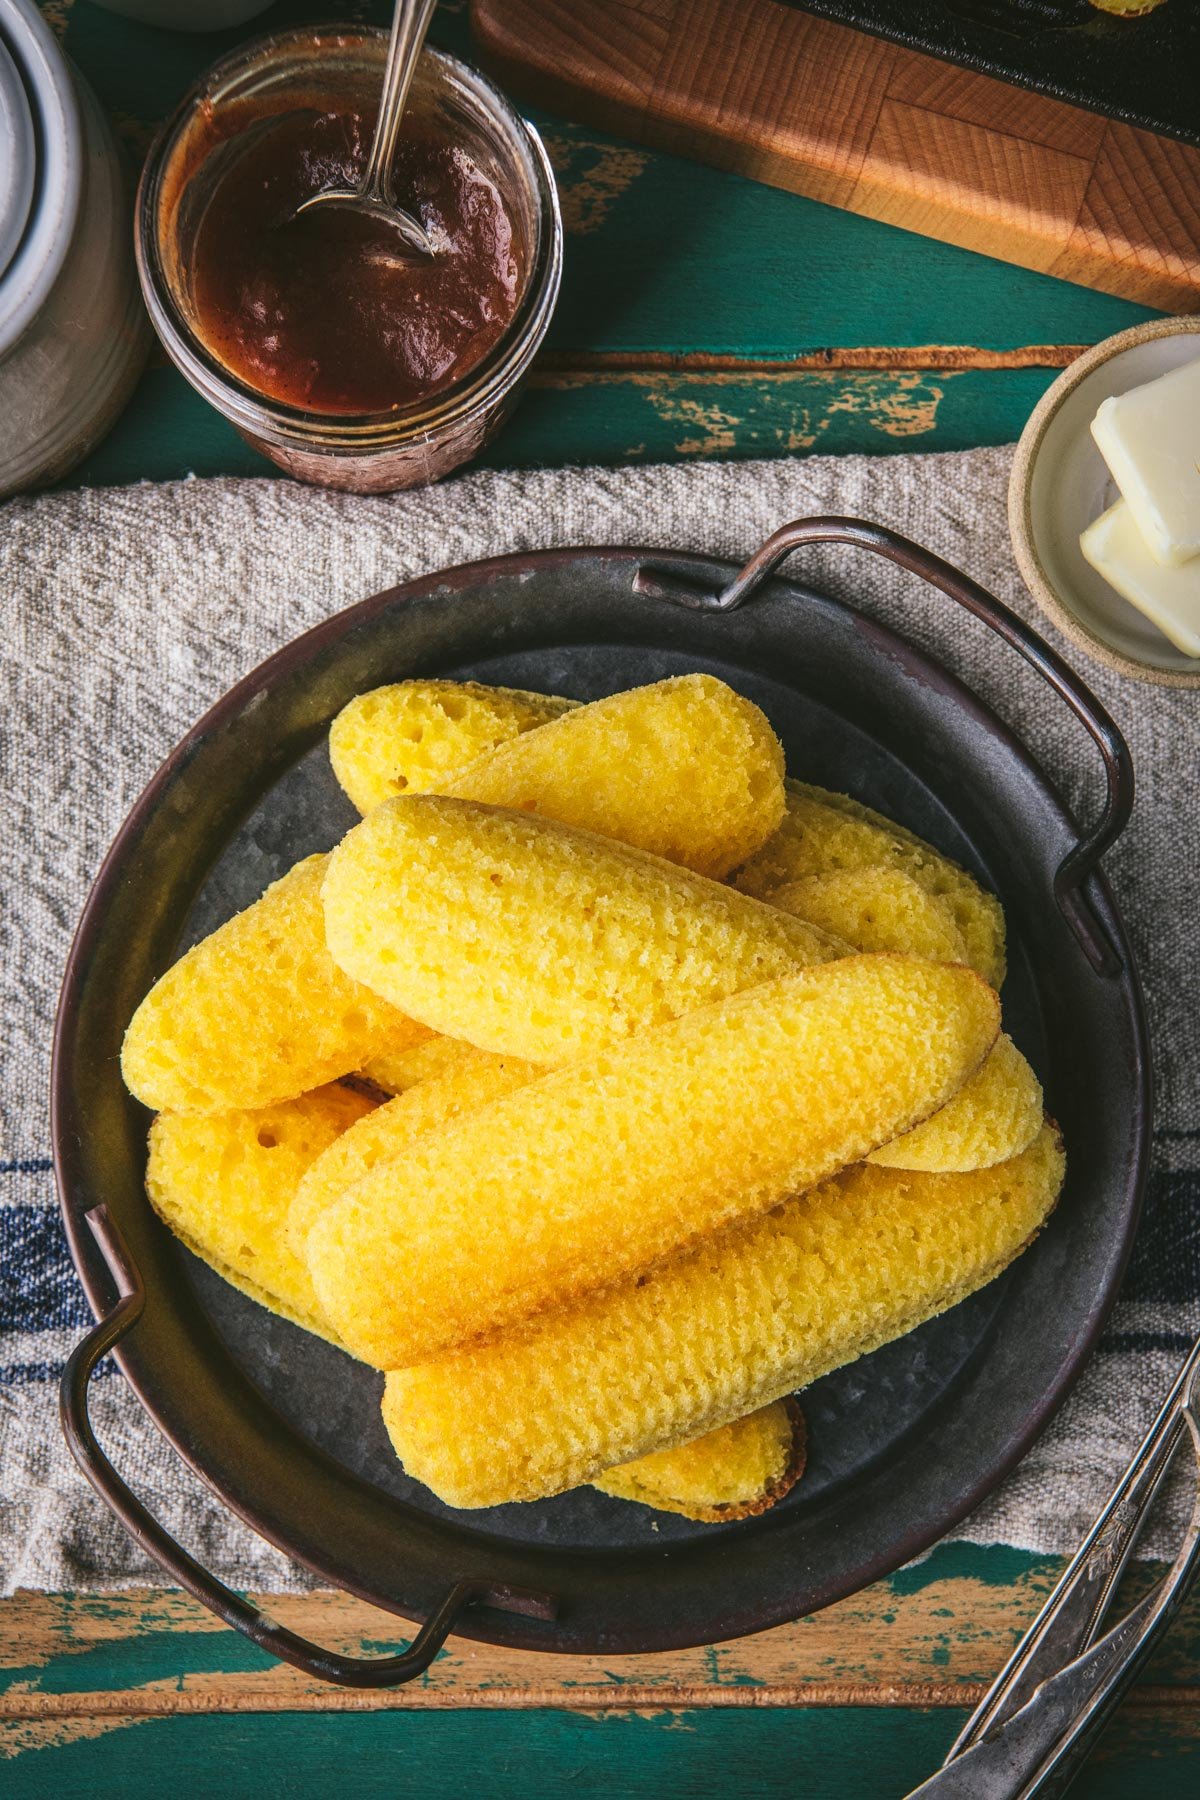
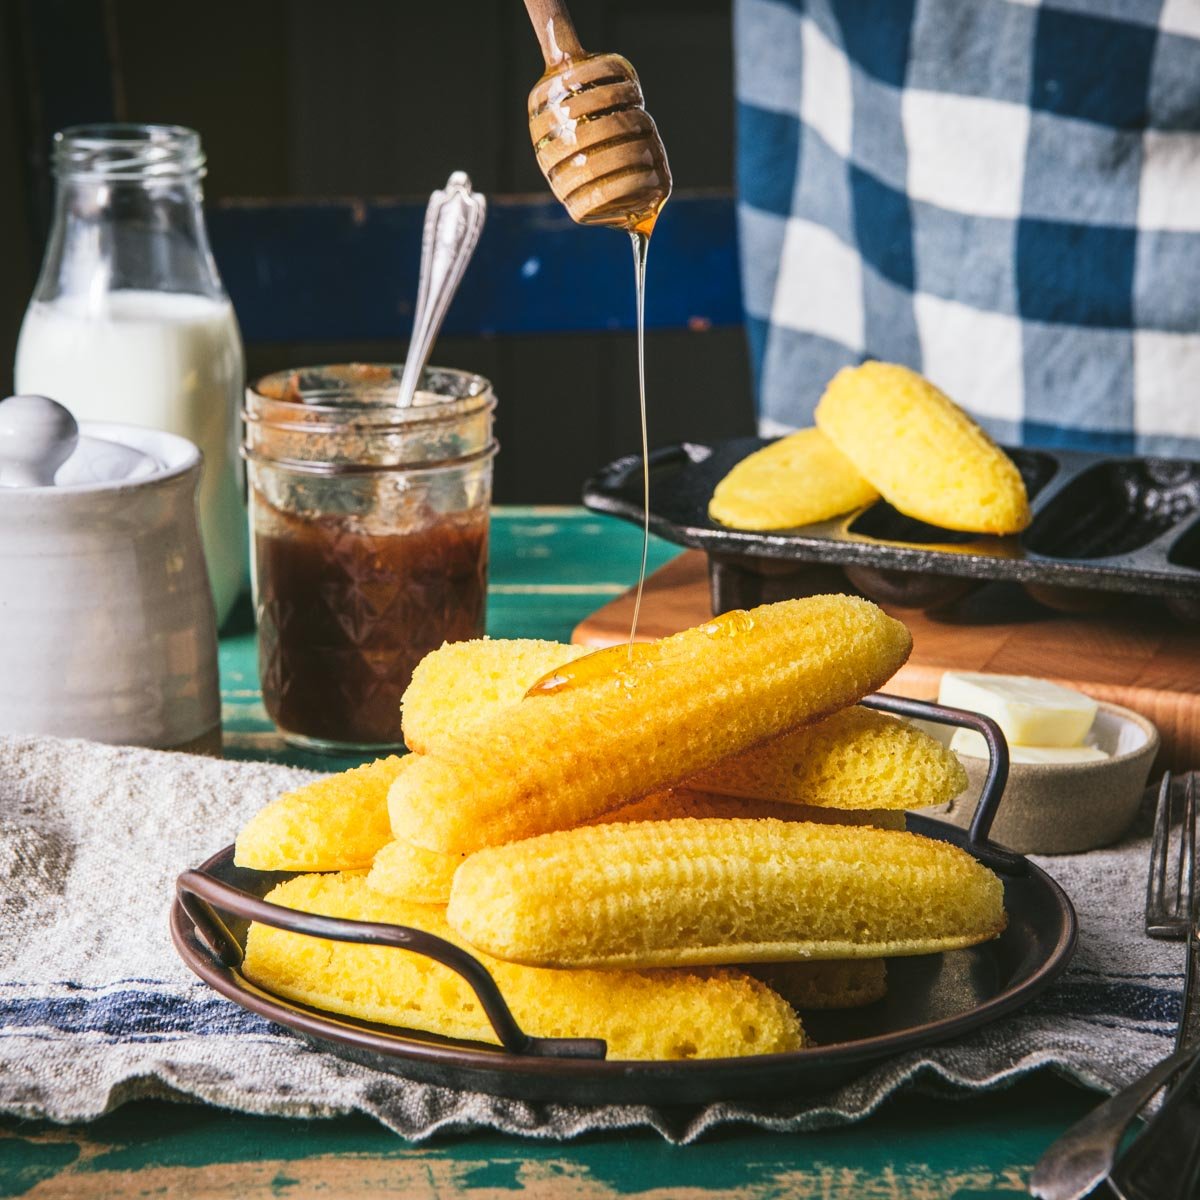
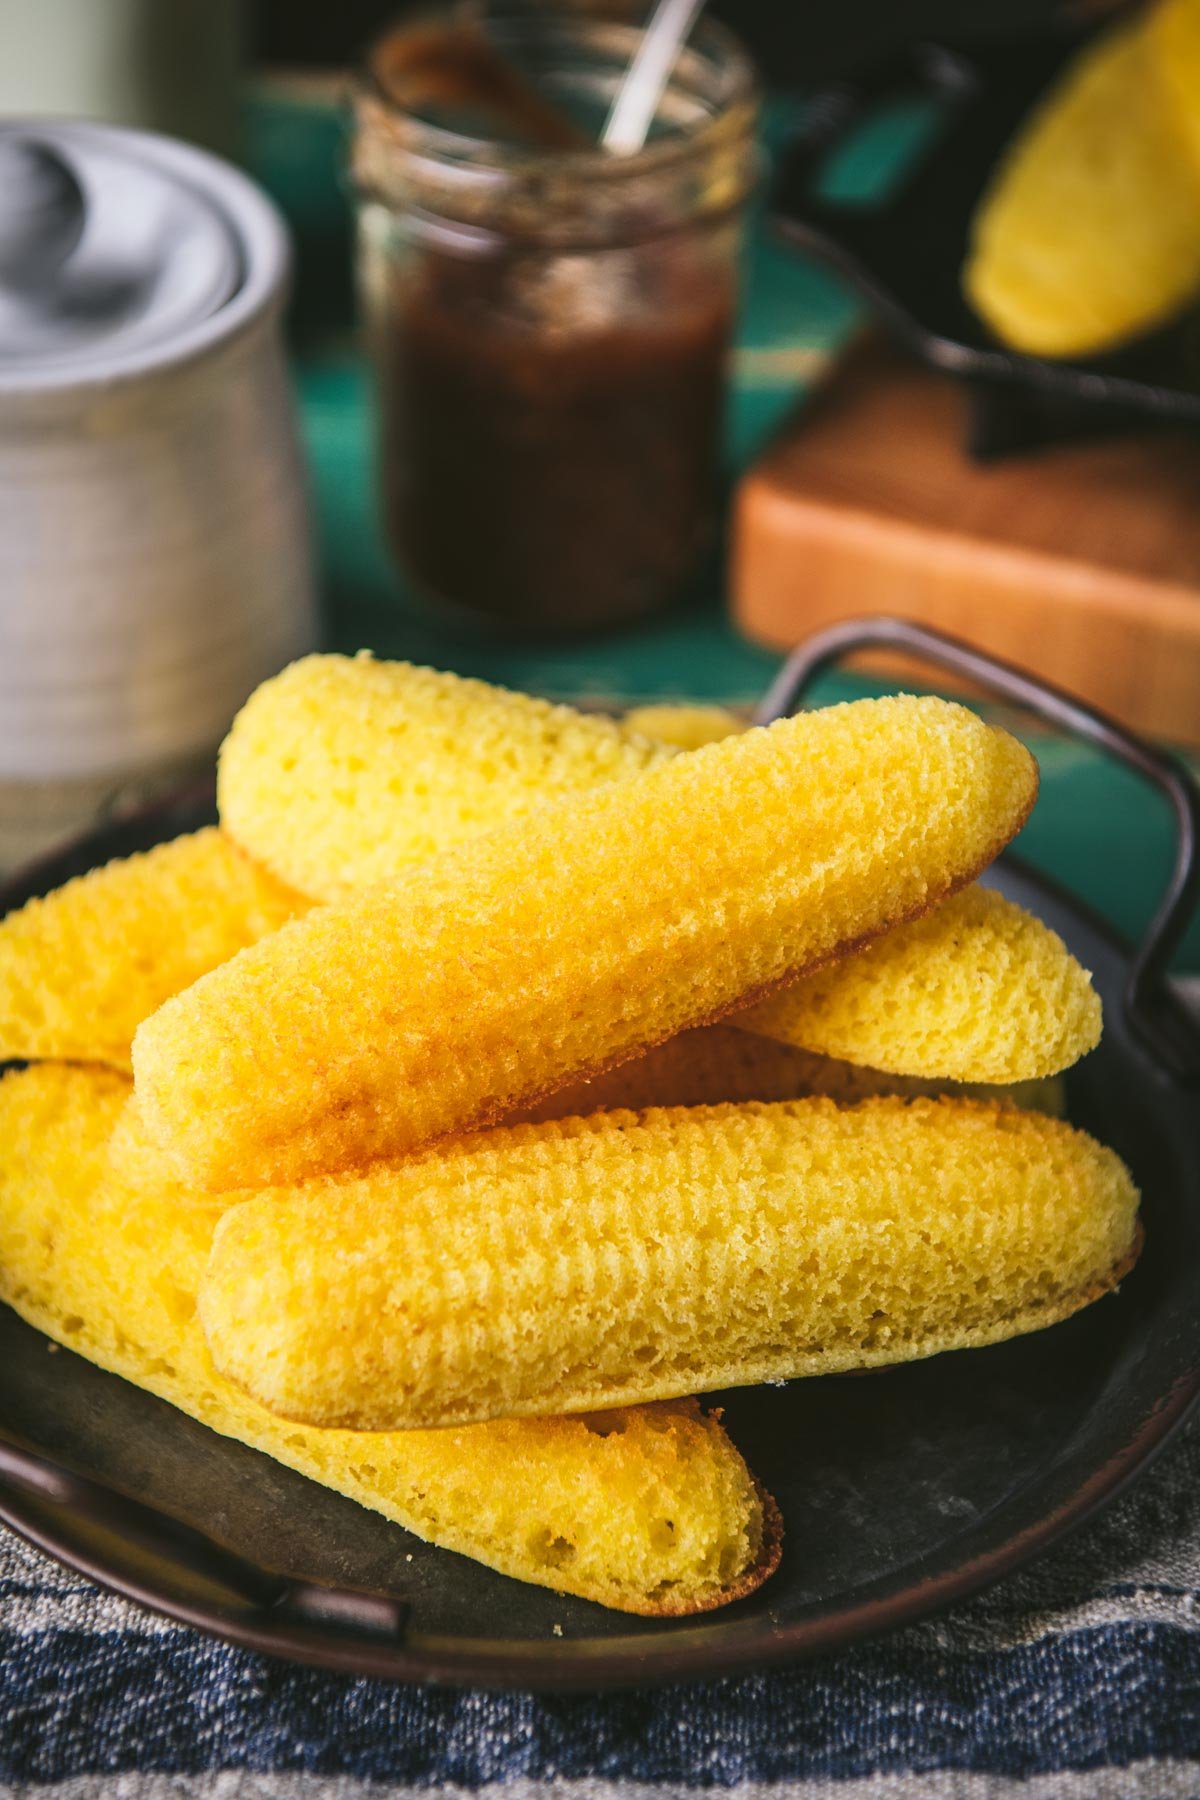
Remove the corn sticks from the pans immediately. If you’ve greased properly, they should pop right out.
Serve warm with butter, honey, or your favorite spread.
Have extra batter? Just re-grease one of the hot pans and bake another batch.
Finally a good recipe! I’m so glad I came across your blog and this recipe. The corn sticks puffed up nicely and didn’t stick AT ALL! Another recipe I tried stick horribly to the pans. But here we are now with fluffy and crispy corn bread sticks yay!
– Christine
Variations & Add-Ins
Once you’ve mastered the basic recipe, try these twists:
- Sweeter corn sticks: Increase the sugar to ¼ cup. This is a great option if you’re serving them to kids or prefer a sweeter style cornbread.
- Buttermilk substitutes: Regular milk or cream will work in a pinch, though buttermilk gives the best tender crumb and subtle tang.
- Different fats: Use melted butter or bacon grease instead of vegetable oil to coat the pan for extra flavor.
- Add-ins: Fold in 1 to 2 chopped jalapeños, 1 cup shredded cheddar or Pepper Jack cheese, 1 cup fresh blueberries, or orange zest with dried cranberries.
- Seasonings: Try garlic powder, onion powder, fresh chives, or Cajun seasoning for a savory kick.
When to Serve Corn Sticks
Corn sticks are delicious on their own with butter and a drizzle of honey, but they really shine as part of a bigger meal. Here are some of our favorite ways to enjoy them.
On chili night: A basket of warm corn sticks is a natural match for beef chili, slow cooker chili, or Crockpot white chicken chili. Check out my best chili recipes for more ideas.
With soups and stews: When the weather cools down, serve them alongside ham and bean soup, Crockpot Brunswick stew, or Dutch oven beef stew.
At a Southern spread: Corn sticks belong on the table with crispy fried chicken, oven fried chicken breast, shrimp and grits, fried catfish, sausage and cabbage, and Crock Pot pulled BBQ chicken.
Storage & Make-Ahead Tips
Corn sticks are best when freshly baked and warm from the oven, but they can be made ahead for easy entertaining.
- Make ahead: Bake the corn sticks up to 8 hours in advance and store them in an airtight container at room temperature until ready to serve. This is perfect for holiday meals or cookouts when you want to get the baking done early.
- Storing leftovers: Wrap tightly and store at room temperature for 1 to 2 days, or in the refrigerator for 3 to 4 days.
- Freezing: Wrap tightly and freeze for up to 3 months. Thaw on the countertop before reheating.
- Reheating: Wrap in foil and warm in a 350°F oven for about 5 minutes. You can also microwave (without foil) for 20 to 30 seconds, just until warmed through.
Frequently Asked Questions
How are corn sticks different from cornbread?
Corn sticks use the same basic batter as traditional cornbread, but they’re baked in special cast iron molds shaped like ears of corn. The individual portions and increased surface area mean more crispy edges in every bite. It’s like getting the best “edge piece” of cornbread every time!
Can I make corn sticks without a corn stick pan?
Not in the traditional shape, but you can absolutely use this same batter to make corn muffins or a skillet of cast iron cornbread. The flavor will be the same, just a different presentation.
Why did my corn sticks stick to the pan?
The most common cause is not using enough grease. Be generous with the oil or shortening, coating every curve of each cavity. It should look like too much, but it’s not! Also make sure your pan is properly seasoned. If you have an older or rusty pan, it may need to be re-seasoned before use.
Do corn sticks need to rest before serving?
No resting time needed. Remove them from the pans immediately after baking and serve warm. Leaving them in the hot pans can cause the bottoms to over-brown or steam, which softens those crispy edges.
More Cornbread Recipes

Did you make this recipe?
If you enjoyed this recipe, please leave a comment with a 5-star review at the bottom of the post. Thank you!
Watch How to Make It

Southern Corn Sticks
Equipment
- 2 cast iron corn stick pans (6-cavity or 7-cavity)
Ingredients
- 2 tablespoons shortening or vegetable oil, for greasing the pans
- 1 cup cornmeal (yellow or white, finely or medium ground)
- ½ cup all-purpose flour
- 2 tablespoons sugar (increase to ¼ cup for sweeter corn sticks)
- ¾ teaspoon salt
- 1 teaspoon baking powder
- ¼ teaspoon baking soda
- 1 cup buttermilk
- 1 large egg, beaten
- 3 tablespoons vegetable oil or melted shortening
Instructions
- Preheat oven to 450°F. Grease two 6 or 7-cavity corn stick pans with about 1 tablespoon of shortening or oil per pan, coating every curve of each cavity. Place the greased pans in the hot oven to preheat for about 5 minutes.

- In a large bowl, whisk together cornmeal, flour, sugar, salt, baking powder, and baking soda. Add buttermilk, egg, and vegetable oil (or melted shortening). Stir just until the batter comes together. Do not overmix.
- Carefully remove the hot corn stick pans from the oven. Fill each cavity with batter, almost to the top (leave about ⅛ inch).
- Bake until light golden brown on top, about 14-16 minutes for larger corn sticks (in 6-cavity pans) or 12-14 minutes for smaller corn sticks (in 7-cavity pans). The bottoms will be darker and crispier.
- Remove corn sticks from pans immediately and serve warm.
- If you have extra batter, re-grease one of the hot pans and bake another batch.
Notes
- Greasing is key: Use about 1 tablespoon of oil or shortening per pan. It should look like too much, but this prevents sticking and creates crispy edges.
- Don’t overmix: Stir just until combined. A few small lumps are fine. Overmixing leads to dense, dry corn sticks.
- Batter fill level: Fill cavities almost to the top, leaving about 1/8 inch. The batter will puff up but shouldn’t overflow.
- Cornmeal grind: Use finely or medium ground cornmeal. Coarse cornmeal will give a grainier texture.
- Buttermilk substitute: Regular milk or cream will work, though buttermilk gives the best texture and flavor.
- Sweeter version: Increase sugar to ¼ cup for sweeter corn sticks.
- Storage: Store tightly wrapped at room temperature for 1-2 days, or refrigerate for 3-4 days.
- Freezing: Wrap tightly and freeze for up to 3 months. Thaw before reheating.
- Reheating: Wrap in foil and warm in a 350°F oven for 5 minutes, or microwave for 20-30 seconds.No corn stick pan? Use this batter for corn muffins or cast iron cornbread instead.
- Yield: About 11-12 large corn sticks (when baked in 6-cavity corn stick pans) or about 18 smaller corn sticks (when baked in 7-cavity pans). The nutritional information provided is an estimate assuming a total of 11 corn sticks.
Nutrition
Originally published in August, 2021, this post was updated in February, 2026.


Are these the same as corn fritters or hush puppies?? Kind of look the same but has been MANY years since I’ve had them??!! Used to get a lot of these when I was a kid growing up in Nebraska. My Dad fished a lot and my Mom would make fried Catfish with hush puppies or fritters….. miss those!!
Where was the “little guy” during the Christmas/New Year break?? He’s SO cute!!!!
Hi, Sherrie! No, these are different. They’re like cornbread or cornbread muffins, since they’re baked instead of fried. I love fried hush puppies, too! Here’s our recipe for those if you’d like to make them yourself: https://www.theseasonedmom.com/hush-puppies-recipe/
Teddy was right in the mix all throughout the holiday celebrations! I’ll have to snap another picture of him soon. Thanks for asking!
I inherited a pan like this (7-cavity) and figured it was for cornbread! I found your recipe and they turned out so nice! Will be using your recipe again and again! Thank you!
We’re so glad! Thank you for trying it out, Andrea!
Blair: Sorry to say, but right now, those corn stick pans are not available at Amazon.They stated that they didn’t know when they would be available again. Just a quick “heads up” here.
Lucky you, having such nice weather. Your fields are even showing a bit of green grass. We have snow here.
Best Wishes for a great New Year to you & your whole family!
Sandra W.
Thanks, Sandra! I’ll have to find some different pans to link to. There are many different brands that make them. Take care, stay warm, and have a great New Year!
I found one of these pans at a second hand store so had to try corn sticks. Yum! Love how crunchy they get.
Oh, good! I’m so glad that you like them. Yes, I love those crispy edges. The best!
Roughly any guidance on how much batter should go into each little corn basin in the pan? I’ve tried these twice now, and am having a tough time getting it right. The batter seems to pile up and not spread through the mold unless I overfill. Maybe my batter is too thick or I should try vegetable oil instead of melted shortening?
Hi, Dave! I don’t have a specific measurement, but I spread the batter in each cavity so that it’s almost to the top. You want it thick so that it doesn’t overflow, and you can just use the back of a spoon (or something similar) to spread it evenly. Then when the corn sticks bake, the batter should puff up, but it shouldn’t run over the edges. Hope that makes sense!
I was just wondering… What if you are not able to get a corn stick pan? Is there another substitute for that or not really? Only because I’m already enjoying the look of these sticks and would REALLY LOVE to make them one day!!!
Hi Lubaba!
This recipe works best with a corn stick pan as it allows for the perfect doneness. In a pinch, we’ve heard that madeleine pans can be used, but we can’t attest to the results. Instead, we recommend one of our other cornbread recipes.
Is this self rising cornmeal for the recipe? Thanks!
Hi, Kristen! This recipe just calls for regular cornmeal (not self-rising). If you have self-rising cornmeal on hand and would rather use that, you can follow this recipe: https://www.theseasonedmom.com/cast-iron-cornbread/ Just use that batter, but divide it between the corn stick pans instead of baking it in a cast iron skillet. Follow the cooking time/directions for the corn sticks. Hope you enjoy!
Finally a good recipe! I’m so glad I came across your blog and this recipe. The corn sticks puffed up nicely and didn’t stick AT ALL! Another recipe I tried stick horribly to the pans. But here we are now with fluffy and crispy corn bread sticks yay! My family had but one request for time – can I make them sweeter? They like the sweeter corn bread and I’m thinking I can simply up the sugar. Thought?
Thank you, Christine! We’re so happy to have you here. You can increase the sugar to 1/4 cup for a sweet option. Hope that helps!
RE: Buying cornstick pans..WalMart online has them, plus several sizes of iron skillets, made by Bayou Classics. Great products and service!
That’s a great tip, Allowee. Thank you! I will definitely check out that brand.
So easy and fun to make and serve. I didn’t have buttermilk so made it with milk and lemon juice, plus not quite enough milk so added yogurt to make the full cup. Thank you!
We’re so glad you were able to make it work for you and enjoyed it, Janet! Thank you for trying it out and taking the time to leave a review.