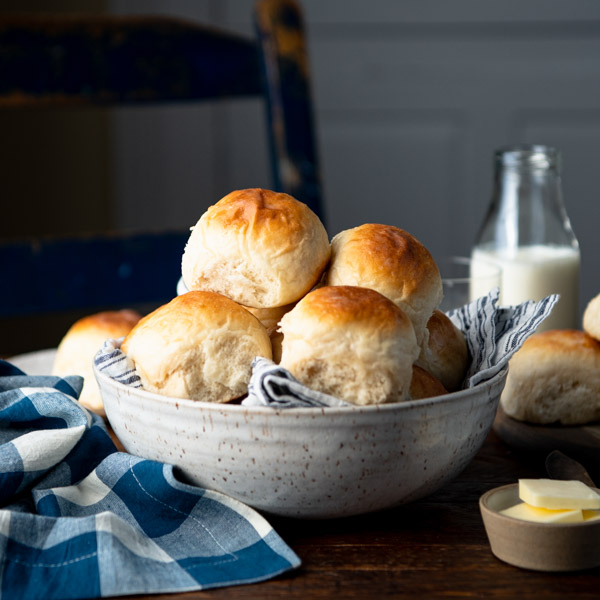
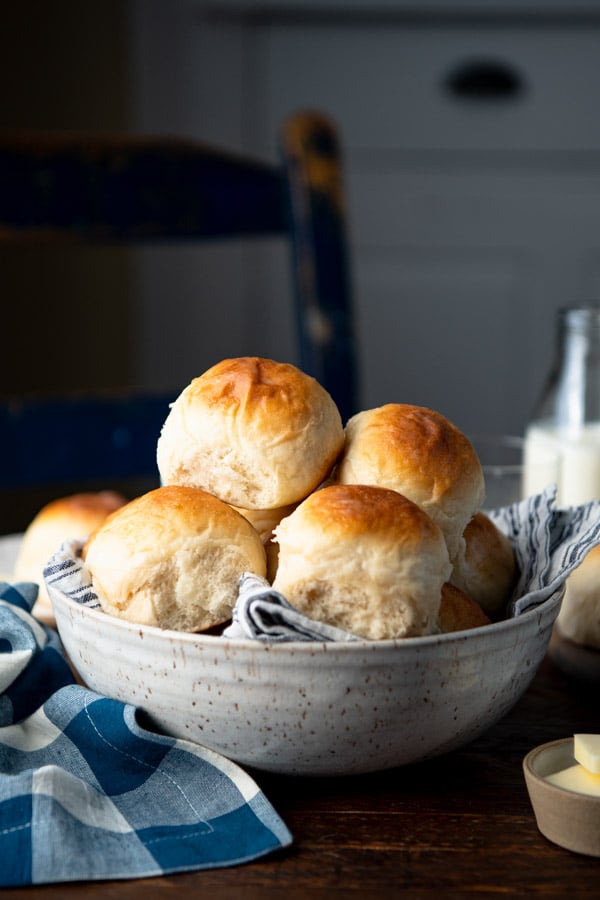
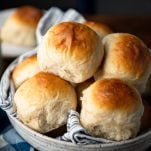
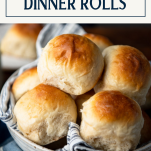
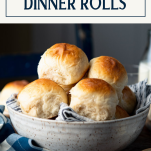
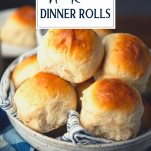
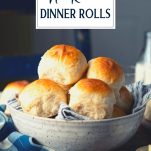
That’s right — you can make light and fluffy, no-knead, easy dinner rolls in about 1 hour! With some special tips and tricks, this quick dinner roll recipe produces buttery, homemade rolls that pair perfectly with almost any meal. From ground beef stroganoff, a savory pot roast, Bisquick chicken pot pie, chicken noodle casserole, chicken broccoli pasta casserole, or a crispy roast chicken, to a hearty bowl of stew or a warm mug of soup, the yeast buns are always a favorite side dish!
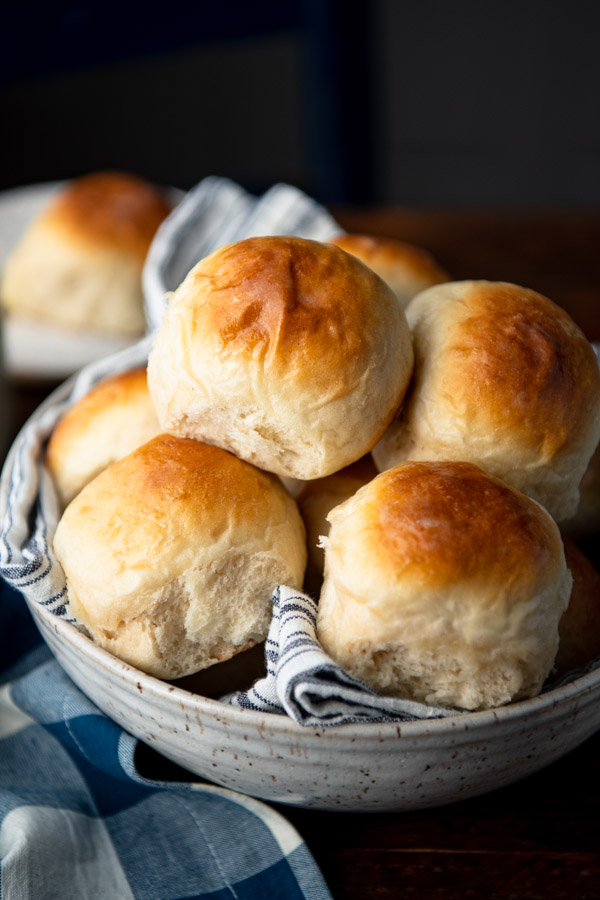
Homemade Dinner Rolls
A typical yeast dinner roll recipe requires kneading the dough, followed by two rounds of rising (each of which take about 1-2 hours). Imagine my surprise, then, when I came across a “one hour” dinner roll recipe in a vintage community church cookbook. How could it possibly work?! After some trial and error (and plenty of recipe adjustments along the way), I’ve landed on these easy dinner rolls that come together quickly — no kneading, no stand mixer, and no long rising times necessary!
Are they actually ready in 1 hour?!
Well, full disclosure here: one hour from start to finish is a bit of an exaggeration. It’s more like one hour of rising time, plus the amount of time that it takes you to stir together and shape the dough, then bake them off in the oven. From start to finish, the rolls actually take more like 1 hour and 30 minutes. That’s the fastest homemade yeast roll recipe I’ve ever come across, and they still turn out light, fluffy, and incredibly flavorful!
The Secret to Quick Dinner Rolls
The two main components for a short proofing time are:
- Baking soda. In addition to the yeast, this recipe includes another leavening agent (the baking soda), which reacts with the buttermilk to help the rolls rise high — quickly! It’s similar to a loaf of English muffin bread, which also includes both baking soda and yeast.
- Warm environment. As with any yeast bread, it’s imperative that you find a warm spot for your dough to proof if you want the rolls to rise quickly and be ready for the oven in about an hour. If your dough isn’t rising, check the temperature of your kitchen. Ideally, you want to find a spot that’s about 75-78°F, but this doesn’t have to be exact. If it’s too cool, the dough will rise much slower (or not at all).
Ingredients
This is a quick overview of the ingredients that you’ll need for a pan of easy dinner rolls. As always, specific measurements and complete step-by-step baking instructions are included in the printable recipe box at the bottom of the post.
- Dry active yeast: helps the dough rise.
- Water: the warm liquid softens and activates the yeast.
- Buttermilk: adds flavor to the dough, gives the rolls a tender texture, and interacts with the baking soda to help the dough rise.
- Sugar: feeds the yeast and gives the rolls a slightly sweet flavor.
- Shortening: creates super soft dinner rolls with a light, fluffy texture.
- Bread flour: has a bit more protein and yields a slightly higher rise than all-purpose flour. See my note below if you want to substitute with all-purpose flour.
- Salt: gives the rolls depth and enhances the other flavors. Bread with too little salt tastes flat and dull.
- Baking soda: an extra leavening agent that helps the no knead dinner rolls rise quickly.
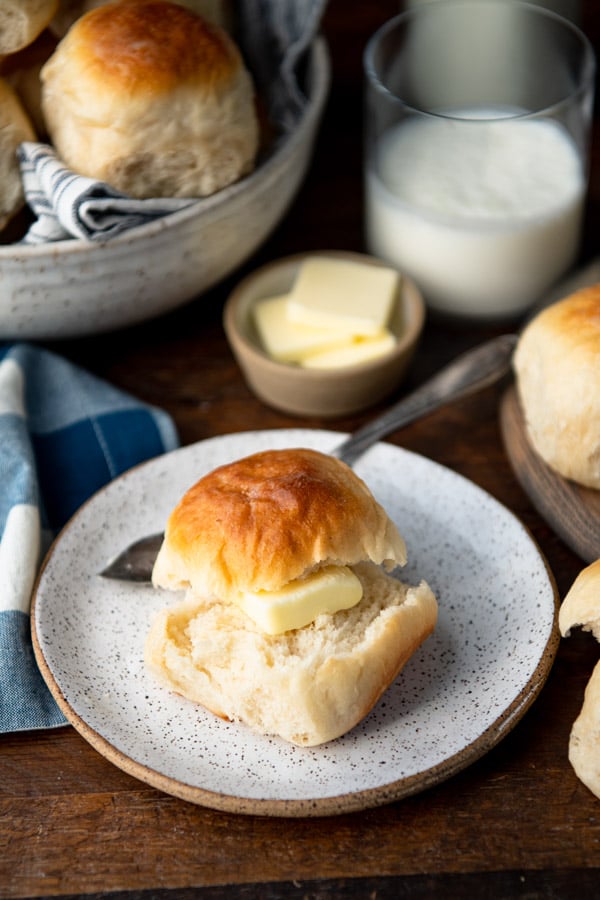
- Butter: for brushing the tops of the rolls. This adds so much flavor and gives them a soft, shiny finish.
How to Make Easy Dinner Rolls
Of all of the different breads, muffins, and scones that I bake in our little farmhouse kitchen, these easy dinner rolls are definitely a family favorite. When the aroma of warm, sweet, yeasty rolls wafts through the house, the boys come running! One pan doesn’t last long around here, so it’s a good thing that they’re simple to make.
- Dissolve the yeast in warm water in a large mixing bowl. Let it sit for 5-10 minutes.
- Add the buttermilk, sugar, and shortening to the yeast mixture. Whisk to combine.
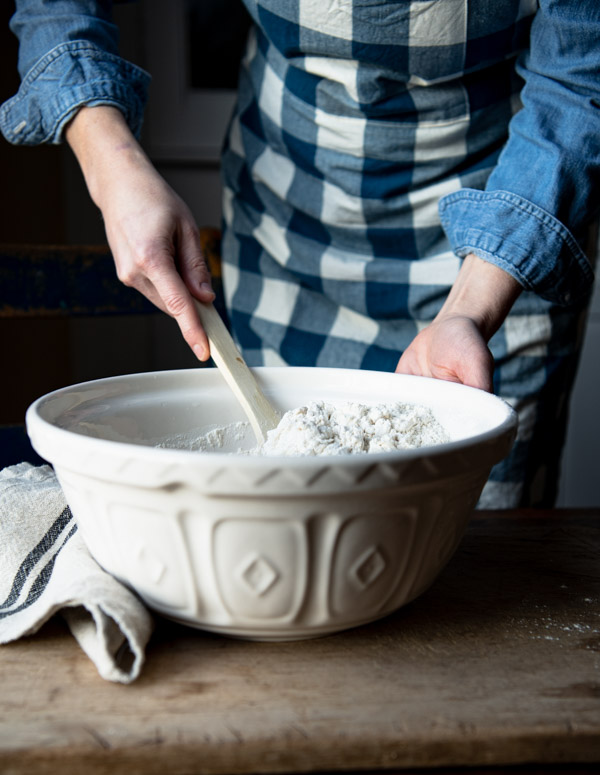
- Whisk together the flour, salt, and baking soda in a separate bowl.
- Stir the dry ingredients into the wet ingredients until a well-combined, soft, shaggy dough comes together. Add a little bit of extra warm water if the dough seems too dry.
- Transfer the dough to an oiled bowl. Cover and let stand in a warm spot for 10 minutes.
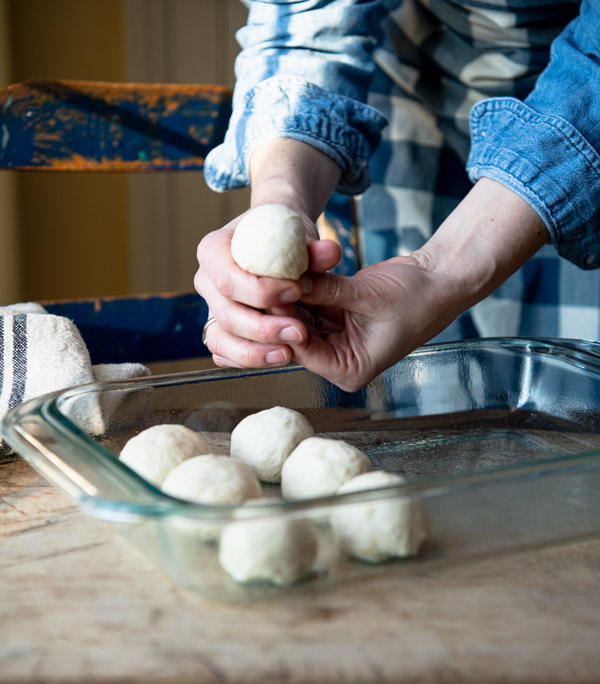
- Divide the dough into 24 equal pieces (I use a bench scraper or a sharp knife to cut the dough).
- Shape each piece of dough into a smooth, round ball. Working with one piece of dough at a time, tuck the edges underneath to the middle of the roll — creating a smooth, round top — pinching and sealing the bottom.
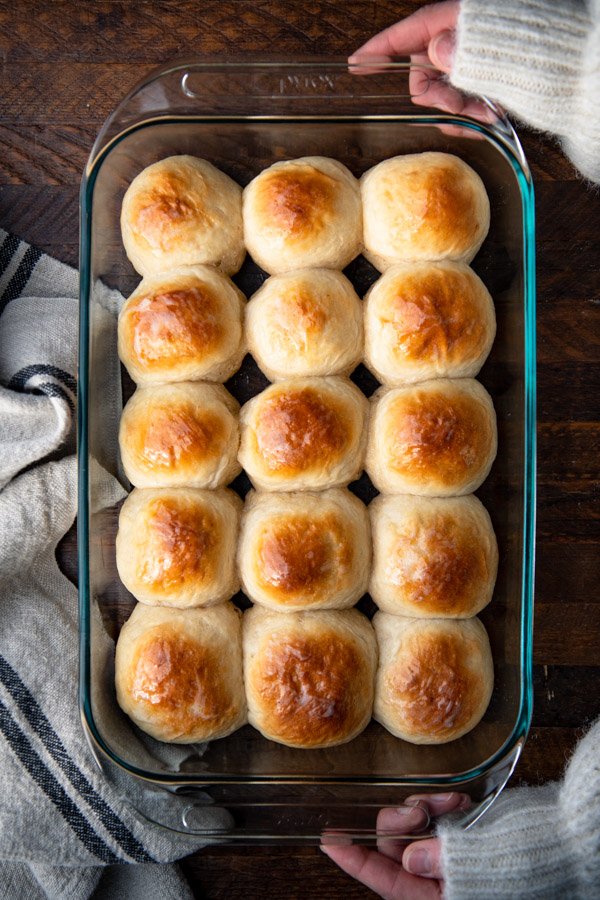
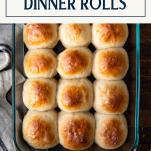
- Arrange 15 of the dough balls in a 9 x 13 inch baking dish that has been greased, sprayed with cooking spray, or lined with parchment paper. Place the remaining 9 dough balls in a prepared 8-inch square baking pan.
- Cover the pans and let the dough rise in a warm spot for about 30-40 more minutes. At the end of this time, the dough should look puffy.
- Bake the rolls uncovered in a 425°F oven for 10-12 minutes, or until they’re a nice golden brown color.
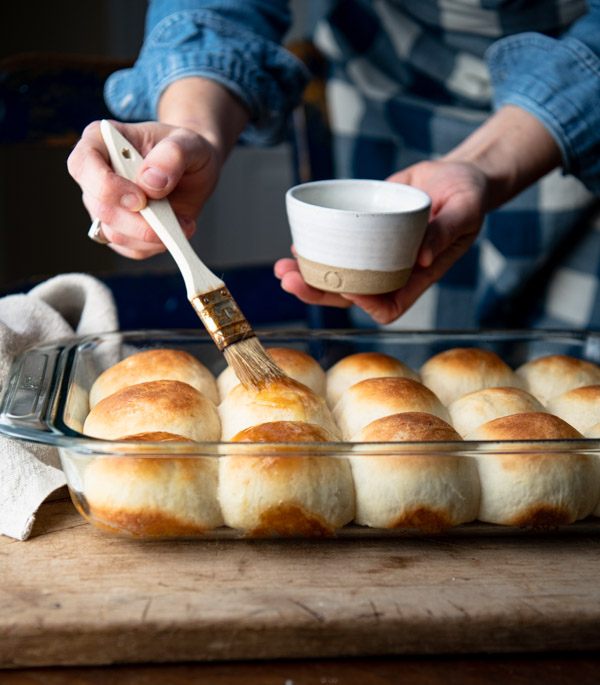
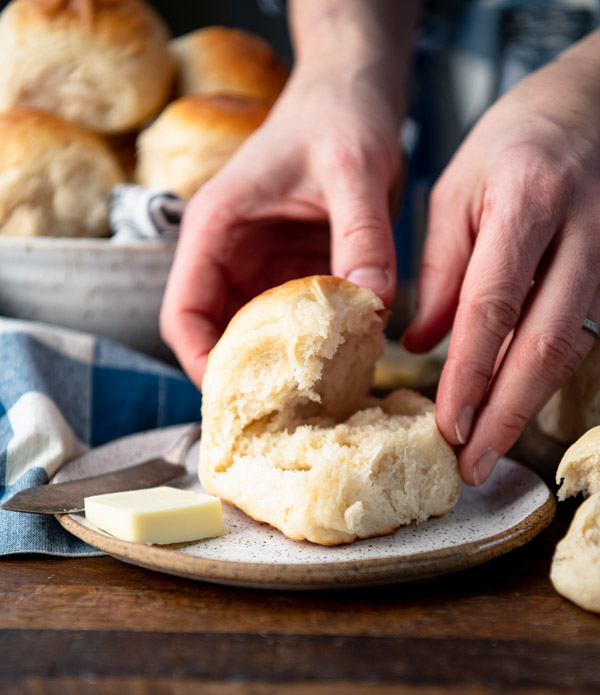
- Brush the tops of the warm rolls with melted butter and serve!
What to Serve with Quick Dinner Rolls
These easy dinner rolls are delicious at any time of day! We love them for breakfast with butter and jam, slathered in honey butter, or served with sausage gravy or ham and cheese casserole. They’re also great alongside eggs or in an egg sandwich. You can use the rolls to make little sandwiches (or “sliders”) for lunch. Try them with turkey, ham, grilled chicken, this easy chicken salad, or a Greek yogurt chicken salad.
As a side dish, the warm, baked dinner rolls go well with any of these entrées:
- Chili (like this Slow Cooker Chili, White Bean Chicken Chili, Pumpkin Chili or Classic Beef Chili)
- Soup (such as Chicken Tortilla Soup, Chicken Vegetable Soup, Chicken Gnocchi Soup, Split Pea Soup, Hamburger Soup, Creamy Cauliflower Soup, or Slow Cooker Cabbage Soup)
- Stew (like this Virginia Brunswick Stew, Crockpot Brunswick Stew, Chicken Stew, or Dutch Oven Beef Stew)
- Beans (such as Lima Beans, Black-Eyed Peas, Ranch Style Beans, Baked Beans, or Bean Casserole)
- Barbecue (like Crock Pot Beef Barbacoa, Baby Back Ribs, Pulled BBQ Chicken, Pulled Pork, or Dr. Pepper Pulled Pork)
- Seafood ( such as Shrimp and Grits, Crab Cakes, and Shrimp Creole)
- Fried Favorites (such as Fried Chicken, Fried Catfish, Oven-Fried Fish, Fried Oysters, or Fried Shrimp)
Storage
The homemade rolls are best served warm, straight from the oven. Leftovers will keep at room temperature in an airtight container for about 1 day, or wrapped tightly in an airtight container or freezer bag in the freezer for up to 3 months. If the rolls have been sitting at room temperature for a day or two, it’s best to warm them in the microwave for a few seconds to get them nice and soft again!
What to Do with Leftover Dinner Rolls
After about 1-2 days at room temperature, the baked rolls will start to get stale, dry, and hard. Instead of tossing them into the garbage, put them to good use! Here are a few ways to take advantage of those leftovers:
- Bread Pudding. Use cut-up leftover dinner rolls, hamburger buns, and hotdog buns to make bread pudding. The stale bread will soak up the delicious custard.
- Breakfast Casserole. Instead of using regular bread or brioche, use the stale dinner rolls in a breakfast strata to soak up a savory egg custard.
- Croutons. Dice the rolls into cubes, toss with melted butter or oil, season, and bake until toasted. Use the homemade croutons to garnish your soups and salads.
- Breadcrumbs. Cube the rolls and grind them in a food processor to make homemade breadcrumbs.
Recipe Variations for Easy Dinner Rolls
- Bread Flour vs. All-Purpose Flour: All-purpose flour has between 8 and 11 percent protein, while bread flour contains between 12 and 14 percent protein. The extra protein in bread flour results in a higher rise. I have not tested the recipe with all-purpose flour, so I cannot guarantee that the recipe will “work” as well if you make that substitution. My assumption is that the all-purpose flour will rise, but your rolls will be slightly smaller (with less rise) and slightly more dense.
- Instant Yeast vs. Active Dry Yeast: This recipe calls for dry active yeast, which must be dissolved in warm water (“proofed”) before combining with other ingredients. By contrast, you can add instant yeast (or “rapid rise yeast”) directly to your dough. For tips on substituting instant yeast for dry active yeast, see this article.
- You can probably use an equal amount of melted unsalted butter as a replacement for the shortening; however, I find that shortening yields a softer, light, more tender roll with a fluffier texture.
- Add even more flavor to the dough by folding in grated cheese or minced fresh (or dried) herbs. Rosemary would be delicious! You can also brush the tops of the rolls with melted garlic butter.
Tips for the Best Dinner Roll Recipe
- Use a glass or ceramic baking dish. I find that metal pans, muffin tins, and cast iron skillets cause the bottoms and sides of the rolls to burn more easily.
- Bake in the center of the oven to prevent excessive browning on the top or bottom of your rolls. You likely will not need to do so, but you can cover the rolls loosely with foil if they start to get too dark on top before they’re done baking.
- Store yeast in the freezer. Even unopened packets of yeast with a good expiration date can go bad at room temperature, so I always keep yeast in the freezer. Old yeast will impact the dough’s ability to rise.
- Rise in a warm spot. If your dough isn’t rising, check the temperature of your kitchen. Ideally, you want to find a spot that’s about 75-78°F, but this doesn’t have to be exact.
- Properly measure the flour. Always spoon and level the flour — do not scoop it out of the package. Incorrectly measuring the flour will result in dense, hard dinner rolls.

More Easy Bread Recipes to Try
- White Bread with Milk and Honey
- Jalapeno Cheddar Bread
- Classic Farmhouse Oatmeal Bread
- Homemade Breadsticks
- Soft Homemade Dinner Rolls
- Homemade Crescent Rolls {Amish Butterhorns}
- Dutch Oven No Knead Bread
- Soft Pretzels {Auntie Anne’s Copycat}
- Quick, No-Knead English Muffin Bread
- Easy French Baguette for Beginners
- Homemade Focaccia Bread
- Beer Bread

Did you make this recipe?
If you enjoyed this recipe, please leave a comment with a 5-star review at the bottom of the post. Thank you!
One Hour, No Knead, Easy Dinner Rolls!
Ingredients
- 2 envelopes (¼ ounce each) dry active yeast, (about 4 ½ teaspoons total)
- ¼ cup lukewarm water (110°F – 115°F)
- 1 ½ cups lukewarm buttermilk (110°F – 115°F)
- ⅓ cup granulated sugar
- ½ cup shortening, melted and slightly cooled
- 4 ½ cups bread flour (measured properly, see note below)
- 1 ½ teaspoons salt
- ½ teaspoon baking soda
- 1-2 tablespoons melted butter
Instructions
- In a large bowl, dissolve the yeast in the warm water. Let it sit for 5-10 minutes (it should get bubbly and foamy).
- Add the buttermilk, sugar, and shortening. Whisk to combine.
- In a separate bowl, whisk together the flour, salt, and baking soda.
- Stir the flour mixture into the buttermilk mixture until well combined and a soft, shaggy dough comes together. If the dough seems too dry (with pockets of dry flour), add 1 tablespoon of warm water at a time until the dough comes together. It shouldn’t be too wet, but you don’t want it so dry that the flour won’t mix into the dough.
- Oil or spray a large mixing bowl with nonstick spray. Place the dough in the greased bowl, turning once to grease the top. Cover and let stand in a warm spot for 10 minutes.
- Grease a 9 x 13-inch baking dish and an 8 x 8-inch baking dish. Set aside.
- Divide the dough into 24 even pieces (I use a bench scraper or a sharp knife to cut the dough).
- Working with one piece of dough at a time, shape the dough into smooth, round balls. To do so, tuck the edges underneath to the middle of the roll — creating a smooth, round top — pinching and sealing the bottom.
- Arrange 15 of the dough balls in the greased 9 x 13-inch baking dish, and arrange 9 of the dough balls in the greased 8 x 8-inch baking dish.
- Cover both of the dishes and let the dough rise in a warm spot until puffy, about 30-40 minutes.
- While the dough rises, preheat the oven to 425°F.
- Bake the rolls, uncovered, for 10-12 minutes. Brush the warm rolls with melted butter and serve!
Notes
- Use a glass or ceramic baking dish. I find that metal pans, muffin tins, and cast iron skillets cause the bottoms and sides of the rolls to burn more easily.
- Bake in the center of the oven to prevent excessive browning on the top or bottom of your rolls. You likely will not need to do so, but you can cover the rolls loosely with foil if they start to get too dark on top before they’re done baking.
- Store yeast in the freezer. Even unopened packets of yeast with a good expiration date can go bad at room temperature, so I always keep yeast in the freezer. Old yeast will impact the dough’s ability to rise.
- Rise in a warm spot. If your dough isn’t rising, check the temperature of your kitchen. Ideally, you want to find a spot that’s about 75-78°F, but this doesn’t have to be exact.
- Properly measure the flour. Always spoon and level the flour — do not scoop it out of the package. Incorrectly measuring the flour will result in dense, hard dinner rolls.


Good morning Blair,
I love bread, it’s probably the larger percentage of my belly roll. In my younger years I had gotten into bread making to the point I grinded my grains. I understand yeast proofing but the one thing I haven’t been able to find an answer to is this scenario: I keep a jar of Fleischmann’s active dry yeast in my refrigerator based on the jar’s recommendation. My question is whenever I use dry yeast in recipes do I need to allow the yeast to come to room temperature before adding the water and sugar or use directly from the jar once I pull it out of the refrigerator and allow the lukewarm warmer bring the temperature of the yeast mixture where it needs to be? Thank you.
Hi, Cindy! I don’t usually give the yeast time to come to room temperature and I’ve never had any problem. I think it’s probably fine straight from the fridge! 🙂
Hello Blair, I don’t like sweet bread, so how much can I reduce the sugar by, but still enable the bread to rise.
Hi, Sheila! I think you could probably reduce the sugar to at least 1/4 cup, and maybe even 2 tablespoons. I haven’t tested these alternatives, though, so I can’t say exactly how they will taste/rise. Let me know if you give it a try!
Hi.. do these freeze ok?
Hi Lois,
Yes! These will stay fresh in the freezer for up to 3 months.
Thanks for sharing your wonderfully simple and easy recipes! I am saving them all for when my adult triplet sons come to visit.
I cooked every meal we ate when they were young – just like you!
I wish I’d found you when they were kids! Cheers, Lizz.
Thank you so much, Lizz! We hope you enjoy your time with your sons and enjoy the recipes!
Is it possible to cut this recipe in half?
Sure! Just keep an eye on your oven, and adjust the baking time as needed.
We hope you enjoy, Lesley!
Hi Blair…I live on Vancouver Island in British Columbia, Canada. I love your recipes and always go thru them to make something new and interesting or stick with the ones I know work for my family that are yours.
Regarding the dinner rolls, can you substitute Gluten Free flour for bread flour? I have a friend who has Celiac so like to take breads etc to her.
I’ve done it recently with Banana loaf and muffins and it’s a 1-1 ratio with regular flour.
Thanks for all the many recipes that you send via email!
Warm Regards, Val
Hi, Val! Thanks so much for reading the blog, trying the recipes, and leaving such a kind note! It’s great to hear from you. 🙂
I don’t know if there’s a 1:1 gluten-free bread flour substitute available? If so, I would definitely try that! If it’s just a 1:1 all-purpose gluten free flour, it won’t yield the same results. Bread flour is high in gluten, which gives the rolls structure and chew, helps them rise, and provides a soft, stretchy texture. Otherwise, I would look for a specifically gluten-free dinner roll recipe, which will make other modifications to account for the lack of gluten in the dough. Hope that helps!