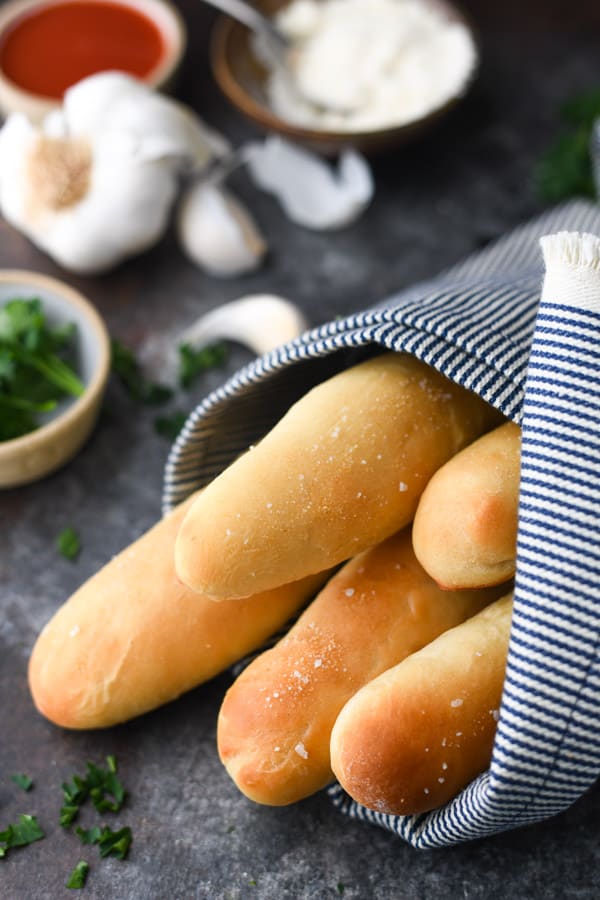
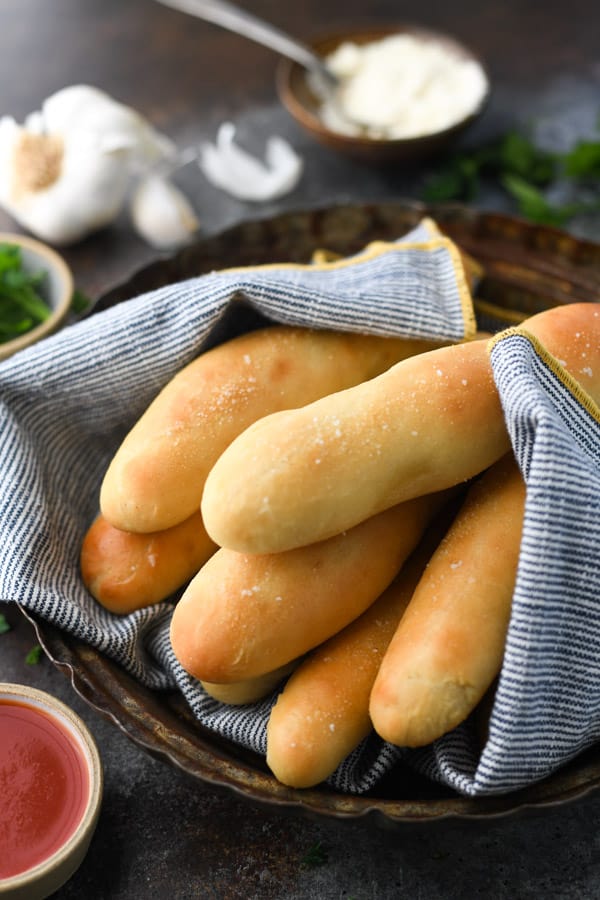
If you love the garlic breadsticks at Olive Garden, then you’ll love these homemade breadsticks even more! They’re light, fluffy, buttery and finished with a subtle dusting of garlic and salt. Just like Olive Garden breadsticks, this made-from-scratch breadstick recipe goes well with all of your Italian favorites — like spaghetti and meatballs, chicken gnocchi soup, lasagna, and stuffed shells. They’re truly a perfect, family-friendly side dish!
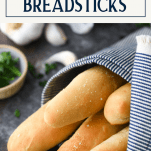
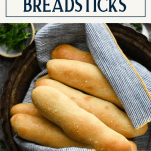
Olive Garden Breadsticks
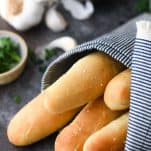
Olive Garden breadsticks are always soft, warm, brushed with butter and sprinkled with a bit of garlic. I’m pretty sure that those endless breadsticks are the main reason that so many people love the popular Italian chain! Fortunately for those of us who don’t actually live near an Olive Garden restaurant, this easy homemade breadstick recipe makes it possible to enjoy the delicious treats in the comfort of our own kitchen. You can bake a batch whenever a craving strikes…and stash any leftovers in the freezer for another meal.
Whether you serve them alongside your next pasta dinner or pair them with soup and salad for a classic combination, these homemade breadsticks come out perfectly every time! You can also adapt the recipe to suit your preferences, like adding fresh herbs, extra garlic, or a sprinkling of cheese. Have fun experimenting with your favorite varieties and get ready to sink your teeth into the best breadstick recipe ever!
Ingredients for Homemade Breadsticks
This is a quick overview of the ingredients that you’ll need to make a batch of homemade breadsticks. As always, specific measurements and complete cooking instructions are included in the printable recipe box at the bottom of the post.
- Bread flour: you can substitute with all-purpose flour, but I prefer the bread flour which has a higher protein content and therefore yields a slightly higher rise and a chewier texture.
- Granulated sugar: feeds the yeast.
- Salt: for flavor.
- Instant “rapid rise” yeast: the leavening agent that helps the breadsticks rise.
- Warm water: to activate the yeast. Make sure that it’s not too hot and not too cool — somewhere in the range of about 110°F – 115°F is ideal.
- Canola oil: this added fat in the dough keeps the breadsticks nice and soft.
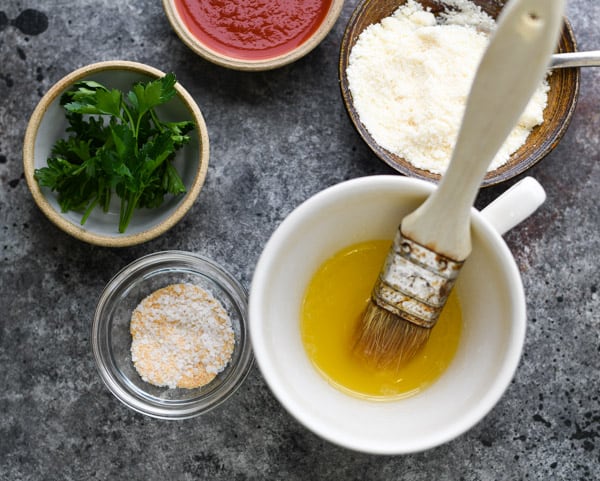
- Melted butter, salt and garlic powder: finishing touches to take these breadsticks over the top.
How to Make Breadsticks
A breadstick is essentially just a little loaf of bread, so I adapted my favorite easy homemade bread recipe to create these delicious garlic breadsticks. It’s a simple dough that’s easy to work with, so they come out perfectly every time!
- Mix and knead the dough.
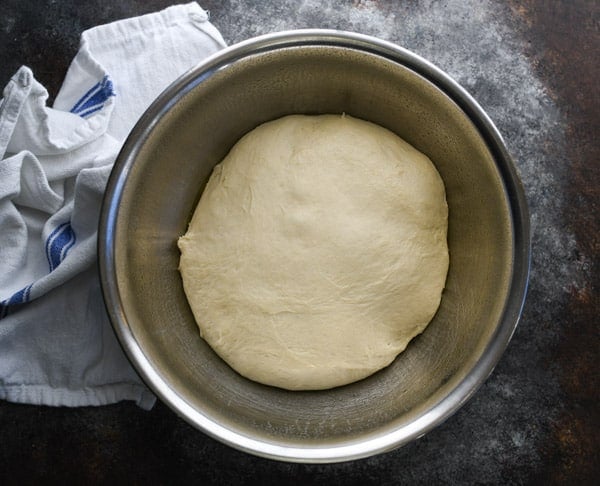
- Transfer to a lightly-oiled bowl, cover, and let rise in a warm spot until doubled in size, about 1 ½ – 2 hours.
- Cut the dough into 12 equal pieces.
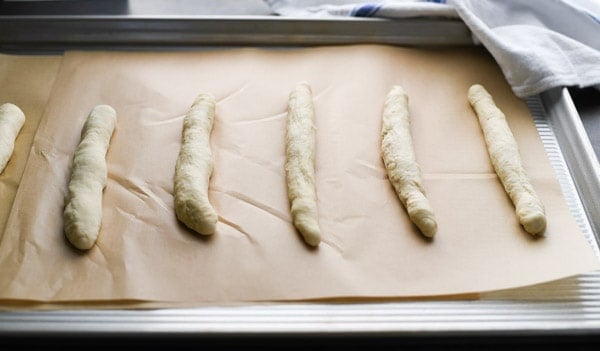
- Knead each piece lightly and shape into a 7-inch long breadstick.
- Arrange the breadsticks on parchment-lined baking sheets.
- Cover with plastic wrap and let the dough rise again until it’s nice and puffy, about 1 hour.
- Remove the cover and bake the breadsticks in a 400° F oven until they’re a light golden brown, about 12-15 minutes.
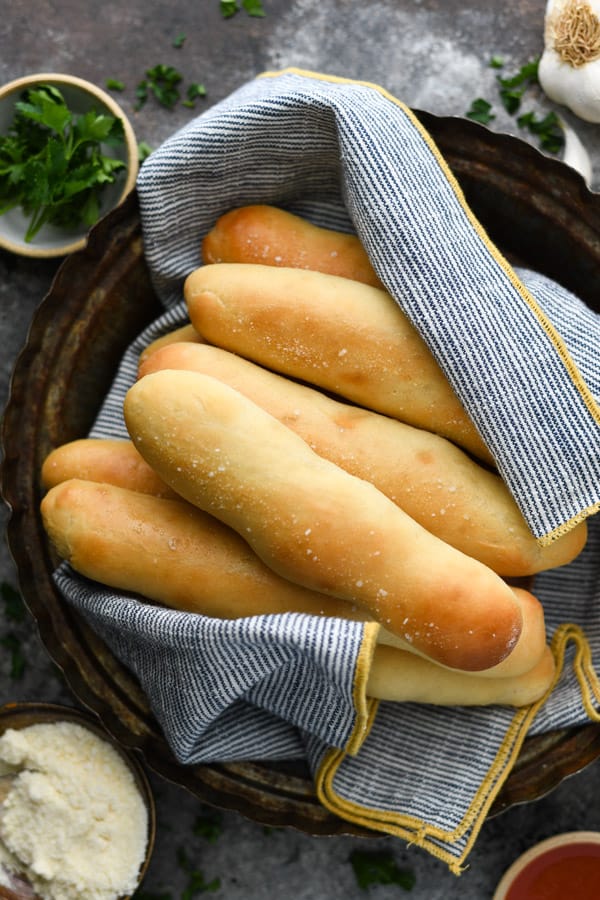
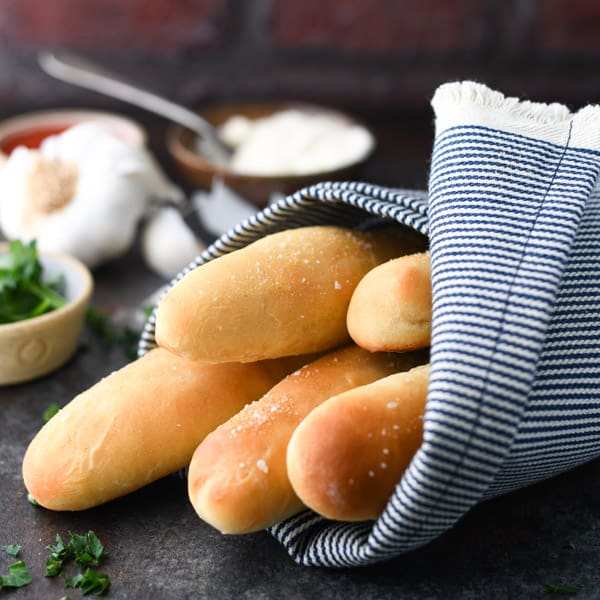
- Brush the breadsticks with melted butter, then sprinkle with a combination of garlic powder and salt.
- Serve them warm, just like at Olive Garden!
What to Serve with Homemade Breadsticks
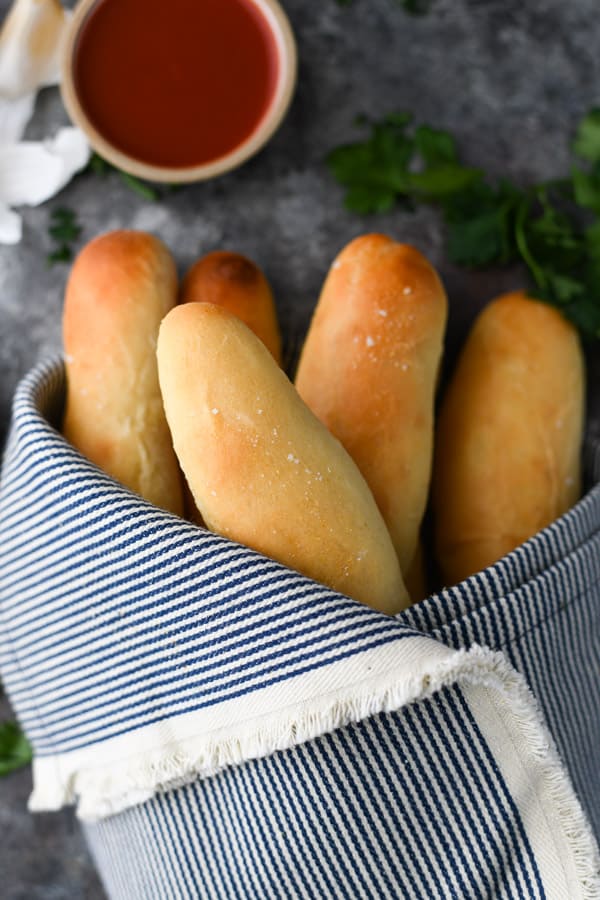
Garlic breadsticks are a perfect companion for a warm bowl of soup or stew, and they’re also delicious served with any of your favorite Italian entrees. Don’t forget some warm marinara, pizza sauce, or herb-seasoned olive oil for dipping, too! Here are a few ideas to pair with your homemade breadsticks:
- Homemade Lasagna with Beef and Sausage or Vegetable Lasagna
- Pasta with Sausage and Spinach, Italian Sausage Pasta, or Italian Casserole
- Quick and Easy Spaghetti Bolognese
- The Best Stuffed Shells or Spinach Stuffed Shells
- Shrimp Scampi or Lemon Chicken Piccata
- Spaghetti and Meatballs
- Chicken Gnocchi Soup
- Olive Garden Zuppa Toscana
- Minestrone Soup
- Pasta Fagioli Soup
- Chicken Tortellini Soup
- Tuscan White Bean Soup with Sausage and Kale
- Italian Wedding Soup
- Grilled Italian Chicken
- Chicken Primavera
Storage
The homemade breadsticks are best served warm, straight from the oven. Leftover breadsticks will keep at room temperature in an airtight container for about 1 day, or wrapped tightly in the freezer for up to 3 months.
How to Reheat Homemade Breadsticks
If you have leftover breadsticks that you’d like to reheat, place them in a 350° F oven just until warmed through (about 5 minutes). If they’re frozen, they will require a few extra minutes. Don’t leave them in for too long or they’ll become dry and toasted. You can also microwave individual breadsticks for about 15-30 seconds, or until warm.
Make Ahead Garlic Breadsticks
Since it’s not always convenient to make the dough just before serving, you can prepare the dough in advance and then bake the breadsticks when you’re ready to enjoy them.
To prepare the dough ahead of time, shape the breadsticks as instructed in the recipe and arrange them on the lined baking sheets. Cover tightly and refrigerate for up to 1 day. About 2-3 hours before you plan to bake the breadsticks, pull them out of the refrigerator and let them rise on the counter before baking.
How to Freeze Breadstick Dough
If you plan to make the dough more than 1 day ahead, it’s best to freeze the dough. To freeze breadstick dough, shape the breadsticks as instructed in the recipe and arrange them on the baking sheets. Cover tightly and freeze until firm. Transfer to airtight freezer containers; freeze up to 4 weeks. When ready to bake, remove the breadsticks from the freezer, arrange on baking sheets, and cover. Place them in a warm spot and let them thaw and rise for 3-4 hours (or until they look puffy). Bake according to the recipe instructions.
Recipe Variations — Homemade Breadsticks
- Homemade Cheesy Breadsticks: Brush with the melted butter, sprinkle with garlic, and add shredded cheese on top before baking. Use any combination of cheeses, such as cheddar, Parmesan and mozzarella.
- Pull-Apart Breadsticks: If you prefer pull-apart breadsticks, arrange the dough close together on the baking sheet so that the sides are touching.
- Cinnamon Sugar Breadsticks: Bake the breadsticks as instructed, brush with melted butter, and then sprinkle with cinnamon sugar.
- Seasoning: Sprinkle the breadsticks with other seasoning blends (besides the garlic and salt). For instance, try everything bagel seasoning, Cajun seasoning, or ranch seasoning.
Tips for the Best Breadstick Recipe
- Bake in the center of the oven to prevent excessive browning on the top or bottom of your breadsticks.
- Store yeast in the freezer. Even unopened packets of yeast with a good expiration date can go bad at room temperature, so I always keep the yeast in the freezer. Old yeast will impact the dough’s ability to rise.
- Rise in a warm spot. If your dough isn’t rising, check the temperature of your kitchen. Ideally, you want to find a spot that’s about 75° F, but this doesn’t have to be exact.
- Properly measure the flour. Always spoon and level the flour — do not scoop it out of the package. Incorrectly measuring the flour will result in dense, hard breadsticks.
- Instant Yeast vs. Active Dry Yeast: This recipe calls for instant (or rapid-rise) yeast, which you can add directly to your dough. By contrast, active dry yeast must be dissolved in warm water (“proofed”) before combining with other ingredients. If you’d like to adapt the recipe to use active dry yeast, check out these tips.
- Make sure that you use warm water when preparing the dough — not too hot and not too cold. You want the water to feel like warm bath water (about 110°F – 115°F). If it’s too hot you will kill the yeast; too cold and the yeast will not be activated.

More Homemade Bread Recipes to Try
- Soft Homemade Dinner Rolls
- Homemade Crescent Rolls {Amish Butterhorns}
- No-Knead Dutch Oven Bread
- Soft Pretzels {Auntie Anne’s Copycat}
- Quick, No-Knead English Muffin Bread
- Easy French Baguette for Beginners

Did you make this recipe?
If you enjoyed this recipe, please leave a comment with a 5-star review at the bottom of the post. Thank you!
Homemade Breadsticks
Ingredients
- 3– 3 ½ cups bread flour (or sub with all-purpose flour)
- 1 ½ tablespoons granulated sugar
- 1 ½ teaspoons salt
- 1 ½ teaspoons instant “rapid rise” yeast
- 1 cup plus 2 tablespoons warm water (about 110° F – 115° F)
- 1 tablespoon canola oil
For Topping:
- 2 tablespoons butter, melted
- ½ teaspoon kosher salt
- ¼ teaspoon garlic powder
Instructions
- In a large bowl, whisk together 1 ½ cups of bread flour, sugar, salt and instant yeast. Stir in warm water and oil and beat until smooth. Stir in enough remaining flour, ½ cup at a time, to form a soft dough. It should come together in a ball.
- In a stand mixer fitted with the dough hook or on a floured surface, knead the dough until elastic and smooth, about 6-8 minutes.
- Transfer the dough to a lightly oiled bowl and cover with plastic wrap. Let rest in a warm place until doubled in size, about 1 ½ – 2 hours.
- Cut the dough into 12 equal pieces. Knead each piece slightly and shape into a 7-inch-long breadstick. Arrange the breadstick dough 2 inches apart on parchment-lined baking sheets. Cover with plastic wrap; let rise in a warm spot until puffy and almost doubled, about 1 hour.
- Preheat the oven to 400° F.
- Remove cover and bake the breadsticks until they’re a light golden brown, about 12-15 minutes. Meanwhile, combine the salt and garlic powder. Immediately brush the warm breadsticks with melted butter and sprinkle with the garlic and salt.
Notes
- Bake in the center of the oven to prevent excessive browning on the top or bottom of your breadsticks. I like to bake one tray at a time for even cooking, but you can rotate the trays halfway through, if desired.
- Store yeast in the freezer. Even unopened packets of yeast with a good expiration date can go bad at room temperature, so I always keep the yeast in the freezer. Old yeast will impact the dough’s ability to rise.
- Rise in a warm spot. If your dough isn’t rising, check the temperature of your kitchen. Ideally, you want to find a spot that’s about 75° F, but this doesn’t have to be exact.
- Properly measure the flour. Always spoon and level the flour — do not scoop it out of the package. Incorrectly measuring the flour will result in dense, hard breadsticks.
- Instant Yeast vs. Active Dry Yeast: This recipe calls for instant (or rapid-rise) yeast, which you can add directly to your dough. By contrast, active dry yeast must be dissolved in warm water (“proofed”) before combining with other ingredients. If you’d like to adapt the recipe to use active dry yeast, check out these tips.
- Make sure that you use warm water when preparing the dough — not too hot and not too cold. You want the water to feel like warm bath water (about 110°F – 115°F). If it’s too hot you will kill the yeast; too cold and the yeast will not be activated.


I’d like to freeze the breadsticks before baking, to save time.
Would I let them rise the 1st time, shape them, then place on parchment baking sheet and freeze? Placing into freezer bags/containers once frozen.
Then remove from freezer, thaw, double in size and bake?
Thanks
Hi Barb,
To freeze breadstick dough, shape the breadsticks as instructed in the recipe and arrange them on the baking sheets. Cover tightly and freeze until firm. Transfer to airtight freezer containers; freeze up to 4 weeks. When ready to bake, remove the breadsticks from the freezer, arrange on baking sheets, and cover. Place them in a warm spot and let them thaw and rise for 3-4 hours (or until they look puffy). Bake according to the recipe instructions. Hope this helps!