Disclosure: This post may contain affiliate links. I may earn a small commission for my endorsement, recommendation, testimonial, and/or link to any products or services from this website.
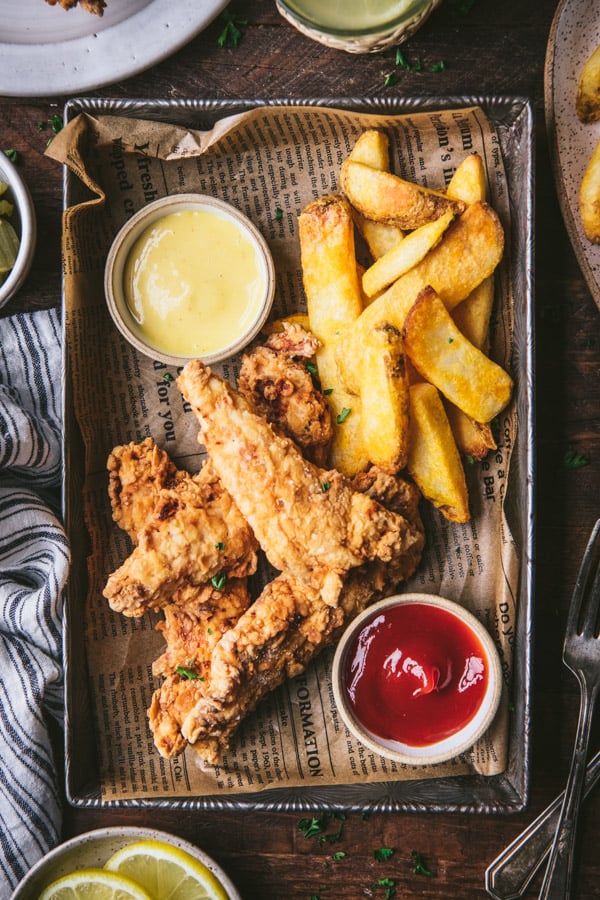
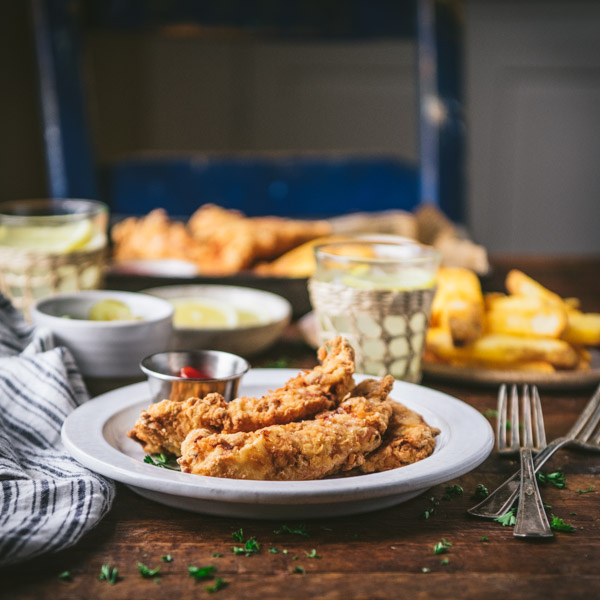
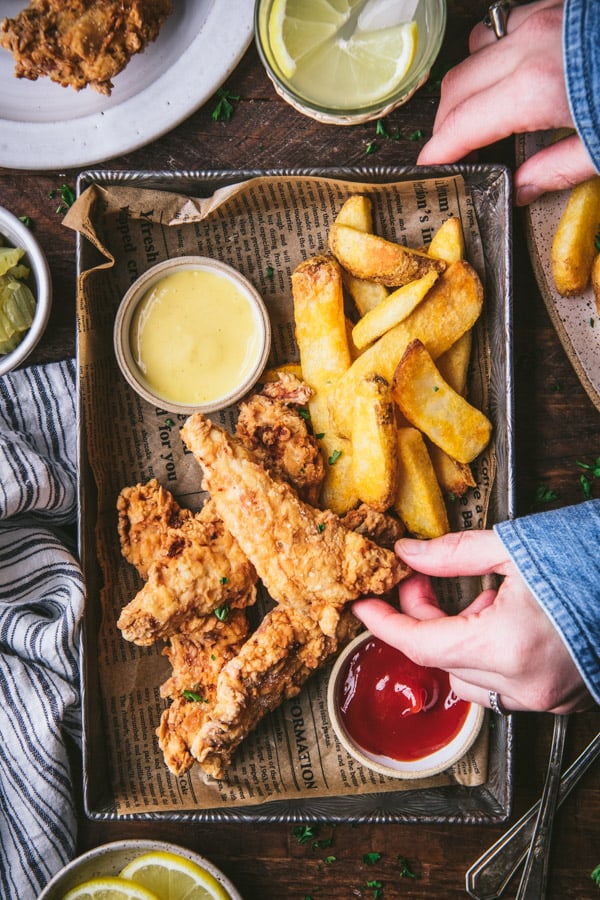
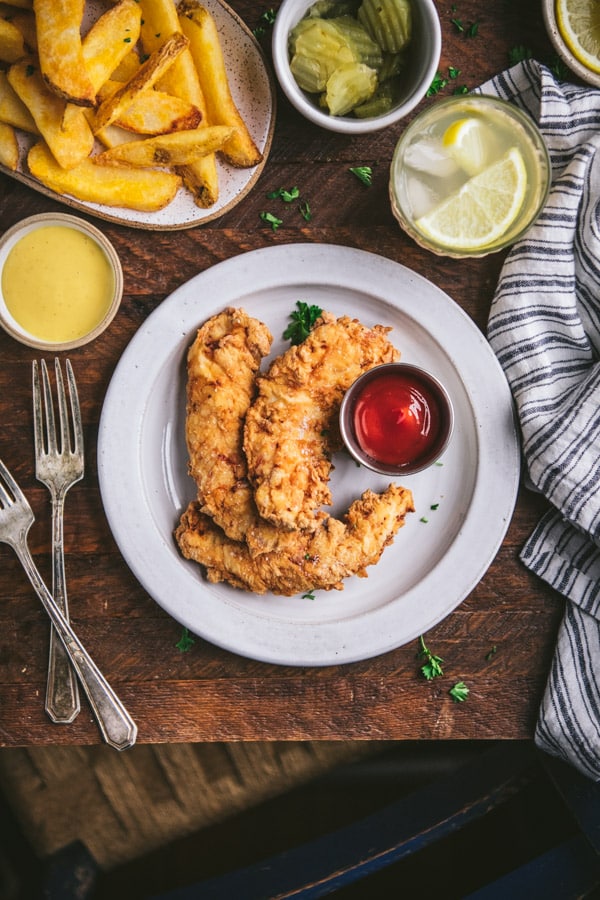
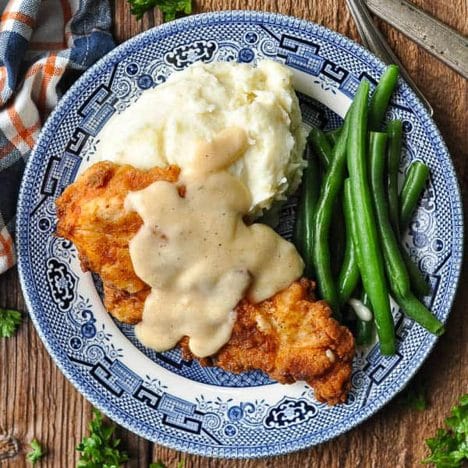
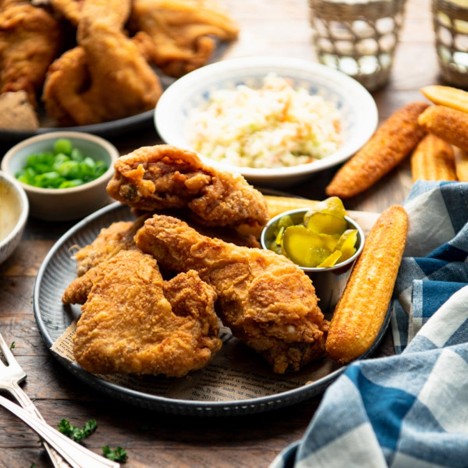
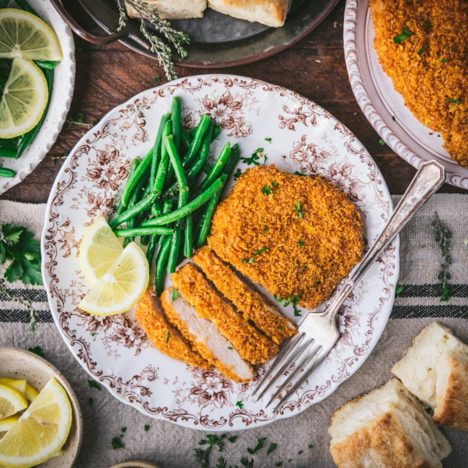
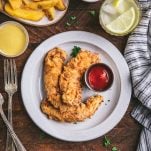
Whether you use a cast iron skillet or a deep-fat fryer, you can’t beat the classic taste of crispy fried chicken tenders! These chicken strips are dipped in buttermilk and dredged in seasoned flour for a family-friendly, easy dinner that’s ready in about 30 minutes. Serve them with mac and cheese, biscuits, cornbread, potato wedges, green beans, and any of your other favorite sides!
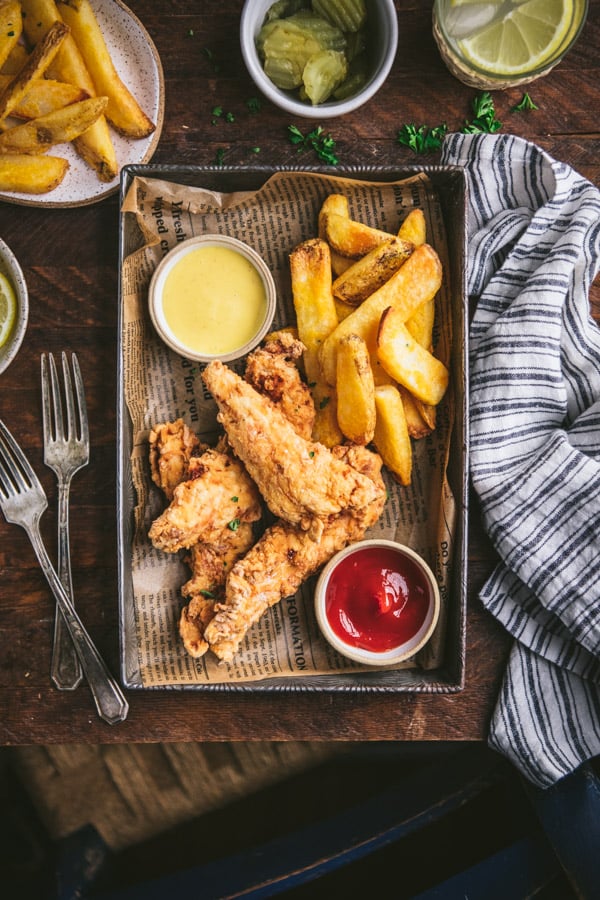
Table of Contents
How to Make Fried Chicken Tenders
Odds are good that my kids will order fried chicken fingers whenever we go out to a restaurant. While I sometimes bake chicken fingers or chicken nuggets at home for a healthier option, nothing compares to the original: buttermilk fried chicken tenders! I’ll show you how to make this quick lunch or dinner at home with just a handful of very basic ingredients.
What’s the difference between chicken tenders and chicken strips?
Chicken strips are slices of the whole chicken breast. The chicken tender (pectoralis minor) is the tender muscle located underneath each of the chicken breasts. For this fried chicken tenders recipe, I always purchase a package of boneless, skinless “chicken tenderloins” in the meat section at the grocery store. To make the fried chicken fingers, you just dip the chicken in a buttermilk and egg mixture, dredge in seasoned flour, and fry for about 6 minutes. So simple!
My kids love these chicken tenders even more than regular fried chicken because they don’t have to navigate any bones. Plus, they can eat the chicken with their hands!
Ingredients for a Fried Chicken Tenders Recipe
This is just a quick overview of the ingredients that you’ll need for a batch of crispy fried chicken tenders. As always, specific measurements and complete cooking instructions are included in the printable recipe box at the bottom of the post.
- Eggs: helps the breading adhere to the meat.
- Buttermilk: adds a slightly tangy flavor, tenderizes the meat, and helps the breading adhere.
- All-purpose flour: the coating that gives the chicken a crispy exterior.
- Garlic salt: for more flavor in the buttermilk mixture.
- Kosher salt and ground black pepper: to season the chicken tenders.
- Chicken tenderloins: you can substitute with boneless skinless chicken breasts that you slice into strips.
- Oil: pick a neutral oil for frying the chicken.

The Best Oil for Fried Chicken Tenders
Use either peanut oil, vegetable oil, canola oil, or vegetable shortening to fry the chicken. I typically use peanut oil because it’s affordable, it has a high smoke point, and it will not flavor your meat.
So long as you don’t smoke the oil or use it to fry fish, it’s fine to strain the oil and reuse it. Just refrigerate the strained oil and reuse it up to 3 times.
What does buttermilk do for fried chicken?
I always use buttermilk for the best chicken tenders because it adds flavor, it tenderizes the meat, and it keeps the chicken juicy. If you don’t have any buttermilk on hand, you can make your own buttermilk by placing 1 tablespoon of white vinegar or lemon juice in a liquid measuring cup and adding enough milk to measure 1 cup. Stir, then let stand for 5 minutes.
How to Fry Chicken Tenders
This easy fried chicken tenders recipe only requires a few minutes of prep and a few minutes in the fryer. The instructions work well for either pan fried chicken tenders or for deep fried chicken tenders, so pick your preferred method.
The detailed directions are included in the recipe card below, but here’s the quick version:
- Dip. Dip each chicken tender in a combination of eggs, buttermilk, and garlic salt in a shallow dish.
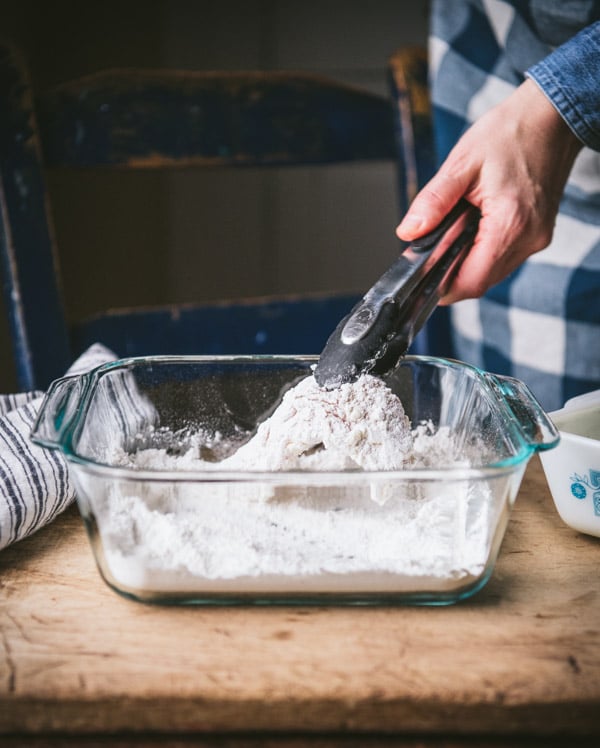
- Dredge. Next, dredge the chicken in a combination of flour, salt, and pepper.
- Rest. Place the coated chicken tenders on a wire rack to rest (and dry a little bit) while you heat the oil.
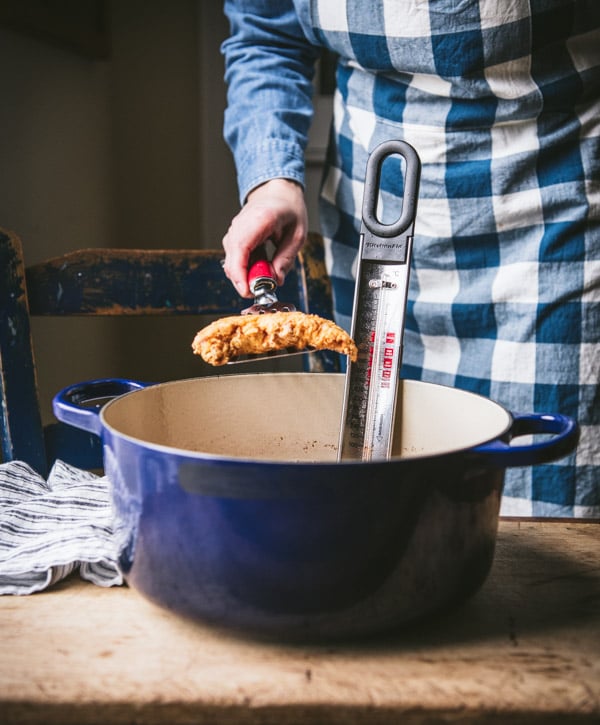
- Fry. In an electric skillet, cast iron skillet, Dutch oven, or deep-fat fryer, heat 2-inches of oil to 375°F. Fry the chicken tenders, a few pieces at a time, for about 3-4 minutes per side. They should look golden brown and crispy! Transfer the chicken to a paper towel lined plate and season with additional salt, to taste.
When to Season
You’ll add flavor and seasoning to the chicken in layers — before dipping, with the garlic salt in the egg mixture, with the salt and pepper in the flour, and then again at the end. Once the crispy chicken is fried and still warm, you can season it with a little bit more salt and pepper if you like.
How to Keep Fried Chicken Tenders Warm
Once the cooked chicken fingers drain on paper towels, transfer them to a wire rack on top of a baking sheet. Place the baking sheet in a 200°F oven to keep them warm while you continue frying the remaining batches.
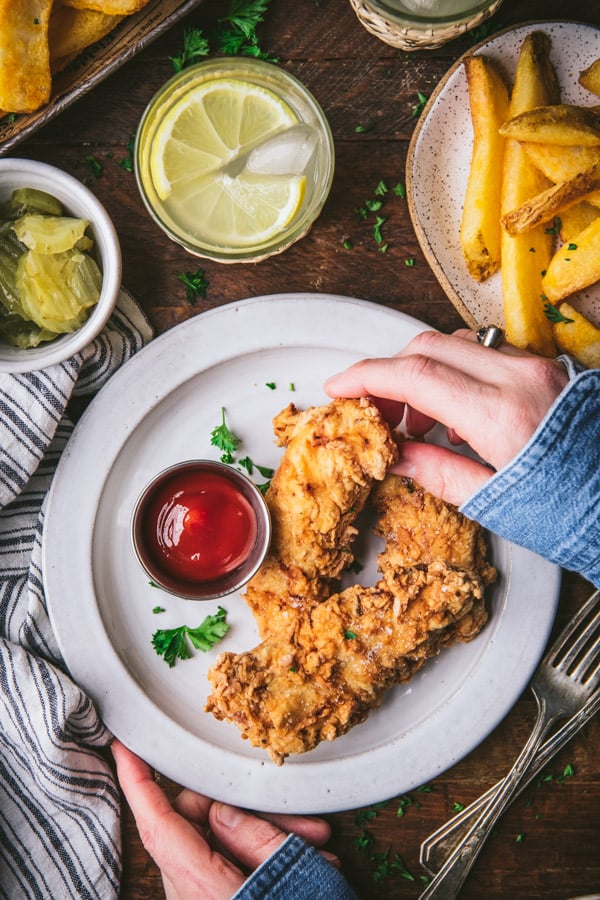
What to Serve with Buttermilk Fried Chicken Tenders
Dip the crispy breaded chicken in honey mustard sauce, ketchup, barbecue sauce, or ranch dressing. Fried chicken tenders go well with just about any of your favorite sides, too. Here are a few easy ideas:
- Hush Puppies
- Coleslaw or Vinegar Coleslaw
- Refrigerator Dill Pickles
- Hoe Cakes
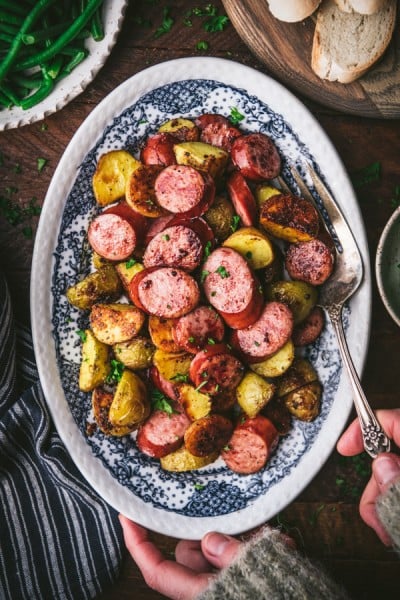
- Baked Potato Wedges
- Cast Iron Cornbread, Cake Mix Cornbread, Broccoli Cornbread, Skillet Cornbread, Bakery-Style Corn Muffins, Honey Cornbread, Old-Fashioned Corn Sticks, Sweet Cornbread Muffins, or Jiffy Cornbread with Creamed Corn
- Creamy Baked Mac and Cheese, Duke’s Homemade Mac and Cheese, Crock Pot Mac and Cheese, Stovetop Shells and Cheese, or No-Boil Easy Mac and Cheese
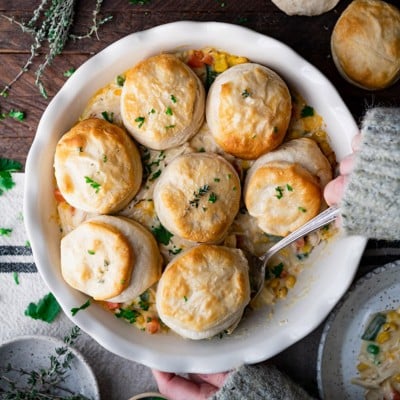
- Southern Buttermilk Biscuits, Flaky Biscuits, 3-Ingredient Buttermilk Biscuits, Sweet Potato Biscuits, Cheese Biscuits, Easy Drop Biscuits
- Pumpkin Bread or Pumpkin Muffins
- 3-Ingredient Sour Cream Muffins
- Honey Beer Bread
- Wedge Salad, Classic Caesar Salad, House Salad with Candied Pecans, or a Green Salad with Red Wine Vinaigrette
- Easy Potato Salad
- Arkansas Green Beans with Bacon or Southern-Style Green Beans
- Broccoli Cauliflower Salad
- Fried Apples or Baked Apple Slices
- Southern Succotash
- Southern Collard Greens
- Fried Okra
- Broccoli and Cheese
- Easy Pasta Salad
- Homemade Baked Beans with Bacon
- Charleston Red Rice
- Okra and Tomatoes
- Southern Squash Casserole
- Cheese Grits
- Fried Cabbage with Apples and Onion, Braised Red Cabbage, or Roasted Cabbage

Nutrition
It’s difficult to calculate the exact nutrition facts for homemade fried chicken tenders, since the amount of oil absorbed and the amount of breading that adheres to each piece will vary. The nutrition provided below is merely an estimate; the numbers assume that about ½ cup of oil is absorbed by the chicken in the cooking process.
Preparation and Storage
- Fried chicken is best when it is fresh and crispy. Leftovers will keep in an airtight container in the fridge for 2 to 3 days; however, the skin will not be as crispy when reheated.
- How to Freeze: Store the cooked chicken tenders in the freezer for up to 3 months. You do not need to defrost them before reheating.
- How to Reheat: Preheat the oven to 400°F. Meanwhile, place the chicken on a wire rack over a baking sheet. Reheat the chicken until the breading feels hot and very crispy, about 10 minutes for room temperature chicken fingers or about 20 minutes for frozen chicken tenders (flip halfway through).
Recipe Variations
- Season the chicken with other herbs and spices. For instance, add paprika, garlic powder, onion powder, or cayenne pepper to the flour, or season the chicken with a bbq rub before dredging.
- For even more flavor, add herbs, shallots, or onion to the buttermilk. The flavors will infuse the meat and add unique taste to your crispy fried chicken.
- Instead of using chicken tenderloins, you can purchase boneless skinless chicken breast that you slice into strips at home.
- Deep Fried Chicken Tenders Recipe: I love to use the deep fryer for these chicken tenders because it takes out all of the guesswork. Just set the temperature to 375°F, and cook the chicken fingers for about 6 minutes per batch. You do not need to flip the chicken halfway through if it’s in a deep fryer.
Tips for the Best Fried Chicken Tenders Recipe
- Never cover your warm fried chicken tenders with foil. This traps steam and moisture, which will make your chicken soggy.
- If you’re using a meat thermometer to know when the chicken is done, the white meat tenders will be best at 165°F.
- You don’t need a thermometer to fry the chicken. Instead, when the oil is hot (but not smoking), add a drop of water to the pan — if it sizzles, the oil is hot enough for the chicken. You want to maintain a fairly steady temperature as the chicken cooks, so don’t overcrowd the pan with too many pieces at once (which will bring down the temperature). If the oil is really flying and it seems to be too hot, you can turn down the temperature slightly.
- To ensure crispy fried chicken fingers and to avoid soggy fried chicken, it’s important to keep the temperature of your oil at a steady 375°F. That’s why you don’t want to overcrowd the pan by trying to cook too many tenders at once. If the oil is too cool, the chicken will absorb the oil and have a soggy texture when done. We’re looking for that great crunch on the outside!
- Season the warm chicken with a bit of extra salt as soon as it comes out of the oil.
More Fried Chicken Recipes to Try
Fried Chicken Tenders
Ingredients
- 2 lbs. chicken tenderloins
- Kosher salt and ground black pepper, to taste
- 2 eggs
- ¾ cup buttermilk
- 1 teaspoon garlic salt
- 1 ½ cups all-purpose flour
- Oil for deep-fat frying (such as peanut oil or vegetable oil)
Instructions
- Season chicken lightly with salt and pepper.
- In a shallow bowl, whisk together eggs, buttermilk, and garlic salt.
- In a separate shallow bowl, combine the flour, ¾ teaspoon of salt, and ¼ teaspoon pepper.
- Working with one piece of chicken at a time, dip the chicken in the egg mixture, and then dredge in the flour mixture. Let the chicken rest on a wire rack for a few minutes while you heat the oil.

- In an electric skillet, cast iron skillet, Dutch oven, or deep-fat fryer, heat about 2 inches of oil to 375°F. Fry chicken, a few pieces at a time, for 3-4 minutes on each side, or until crispy and golden brown. The chicken is done when it reaches an internal temperature of 165°F.
- Transfer the chicken to a paper towel-lined plate and season with a little more salt. Keep warm in a 200°F oven while you fry the remaining batches.


Video
Notes
- If you don’t have any buttermilk on hand, you can make your own buttermilk by placing 1 tablespoon of white vinegar or lemon juice in a liquid measuring cup and adding enough milk to measure 1 cup. Stir, then let stand for 5 minutes.
- Never cover your warm fried chicken tenders with foil. This traps steam and moisture, which will make your chicken soggy.
- If you’re using a meat thermometer to know when the chicken is done, the white meat tenders will be best at 165°F.
- You don’t need a thermometer to fry the chicken. Instead, when the oil is hot (but not smoking), add a drop of water to the pan — if it sizzles, the oil is hot enough for the chicken. You want to maintain a fairly steady temperature as the chicken cooks, so don’t overcrowd the pan with too many pieces at once (which will bring down the temperature). If the oil is really flying and it seems to be too hot, you can turn down the temperature slightly.
- To ensure crispy fried chicken fingers, and to avoid soggy fried chicken, it’s important to keep the temperature of your oil at a steady 375°F. That’s why you don’t want to overcrowd the pan by trying to cook too many tenders at once. If the oil is too cool, the chicken will absorb the oil and have a soggy texture when done.
- Season the warm chicken with a bit of extra salt as soon as it comes out of the oil.
Nutrition
This recipe was originally published in July, 2020. The photos were updated in June, 2022.


Can’t wait to try. Had your french onion chicken last night for 3rd time as family loves it and it comes out tender and flavorful every time.
Oh, good! I hope that you enjoy the tenders. I need to make the French Onion Chicken again soon — I had forgotten about that gem! 🙂