Disclosure: This post may contain affiliate links. I may earn a small commission for my endorsement, recommendation, testimonial, and/or link to any products or services from this website.
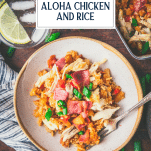
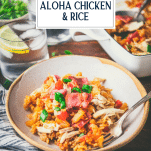
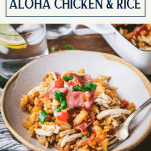
This dump-and-bake aloha chicken and rice is an entire dinner that cooks in one dish! With just 10 minutes of prep you can stir together this easy, Hawaiian-inspired meal that tastes like chicken and pineapple fried rice — without the work!
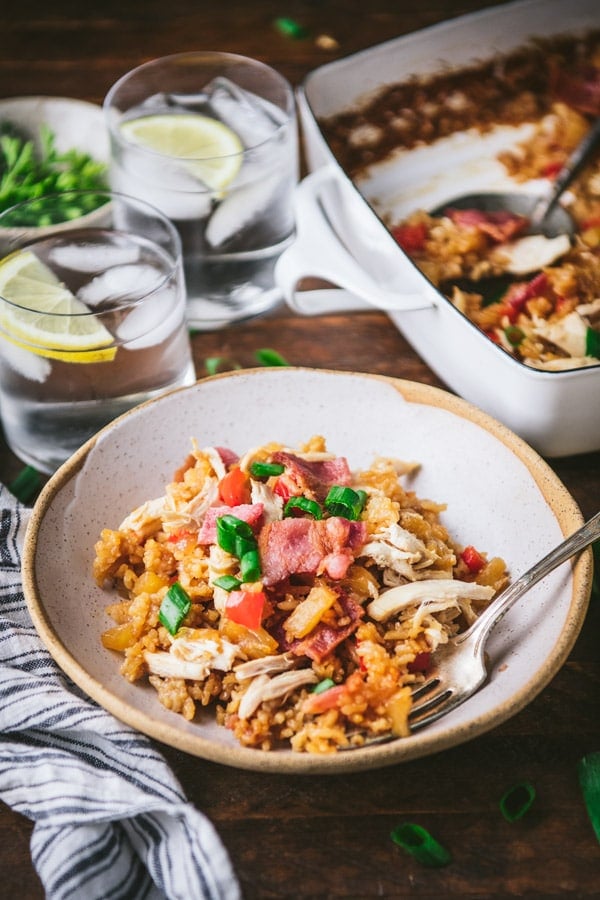
Table of Contents
Chicken and Rice Bake
Chicken and rice is a classic pairing — from a traditional casseroles to soups and one-pan dump-and-bake dinners. This particular dish adds a unique twist to the traditional comfort food meal, as the chicken and rice cook alongside pineapple, bell pepper, onion, and a sweet-and-savory sauce. There’s a hint of sweetness from brown sugar and pineapple juice, plus a salty, savory flavor from soy sauce and bacon.
Best of all, for this chicken and rice bake, you don’t even have to boil the rice or pre-cook the vegetables. Plus, there’s only one dish to wash at the end! Bulk it up with fresh veggies and you’ve got a delicious one-dish meal that everyone at the table can agree on!
Ingredients
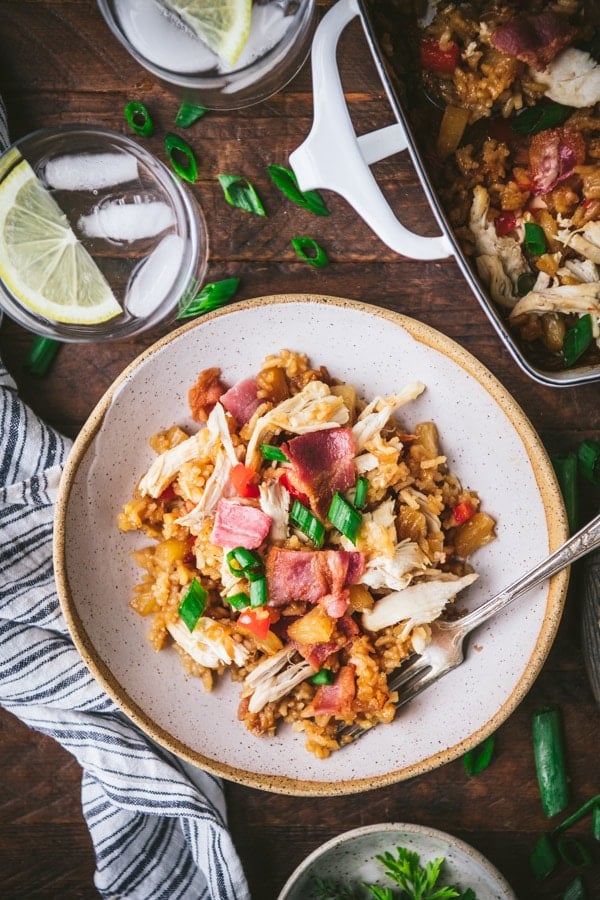
This is a quick overview of the ingredients that you’ll need for an Aloha chicken and rice casserole. As always, specific measurements and complete cooking instructions are included in the printable recipe box at the bottom of the post.
- Brown sugar: for sticky sweetness in the sauce.
- Soy sauce: gives the sauce salty, umami flavor. I recommend less-sodium soy sauce so that it’s not too salty.
- Onion, bell pepper, and garlic: aromatics that give the dish savory flavor.
- Chicken broth: use low-sodium chicken broth so that the dish isn’t too salty. The rice will absorb the broth, soy sauce, and pineapple juice as it bakes, resulting in a very flavorful dish!
- Pineapple: a can of pineapple tidbits, with the juice, cooks right in the dish with the rice. Sub with larger pineapple chunks if you like.
- Chicken: I’m using 2 cups of cooked chicken here, but you can even start with 1 pound of raw boneless skinless chicken breasts or thighs (see my notes below for those instructions).
- Bacon: a crispy, salty topping that adds delicious smoky flavor to the dish and pairs nicely with the sweet pineapple.
Can you use raw chicken in a casserole?
Yes, you can! I have made this casserole with both raw chicken and cooked chicken — either will work.
I prefer the cooked rotisserie chicken, since you can add it at the end and ensure that it’s not overdone by the time the rice is tender. That said, if you only have raw meat on hand and you want a truly dump-and-bake meal, that will also work.
If starting with raw chicken, you will need 1 lb. of boneless, skinless chicken breasts or chicken thighs diced into bite-size pieces. Add the raw chicken to the dish at the very beginning so that it bakes in the pan with the rice.
Do you cook rice before putting it in a casserole?
While most casserole recipes call for cooking the rice before mixing it into the dish, this particular recipe is designed specifically for uncooked rice. That means that you do not boil the rice in a saucepan on the stovetop before adding it to the casserole dish. Instead, the rice cooks right in the oven with the rest of the ingredients. This requires extra liquid in the pan (since the rice absorbs a lot of liquid as it cooks), and extra cooking time to make sure that the rice is tender.
How to Make Aloha Chicken and Rice
The rice and vegetables cook together in one dish, absorbing the flavors of the pineapple juice, soy sauce, and broth. By the end of the cooking time, the rice will be flavorful and tender, and the liquid will be absorbed. It tastes like a big pan of chicken and pineapple fried rice — without any hands-on effort!
I’ve included detailed directions in the recipe card below, but here’s the quick overview:
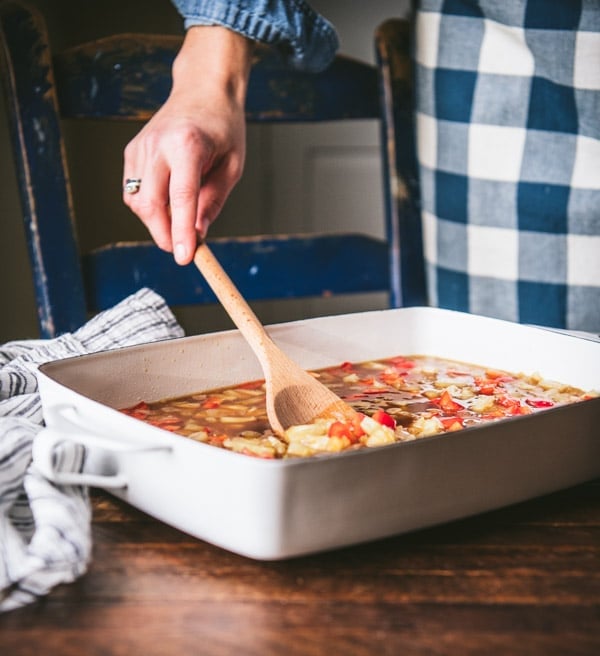
- Whisk together the brown sugar, soy sauce, garlic, and chicken broth.
- Add the uncooked rice, onion, bell pepper, and pineapple (with juice). Give the rice mixture a good stir.
- Cover the dish tightly and bake for 55 minutes.
- Uncover the dish, use a fork to fluff the rice, and stir in the cooked chicken.
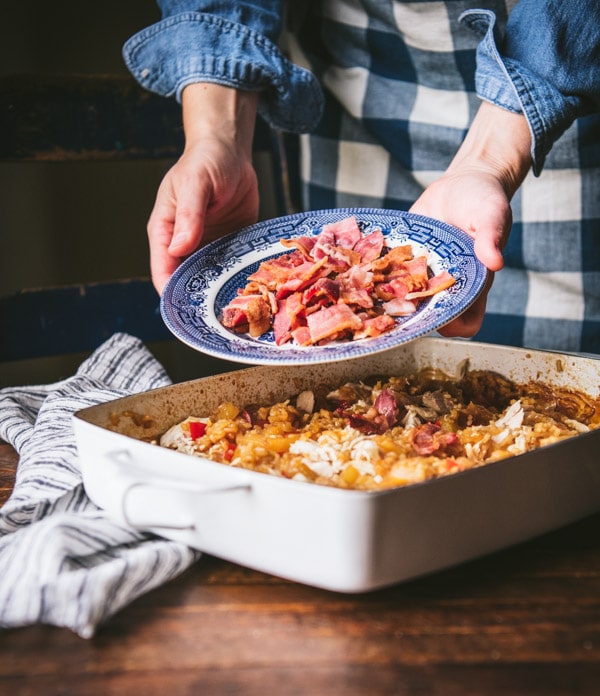
- Sprinkle cooked, chopped bacon on top.
- Return the dish to the oven, uncovered, and bake for an additional 5-10 minutes, or until the chicken is warmed through, the rice is tender, and the bacon on top is crispy.
- Garnish with sliced green onions or fresh herbs and serve!
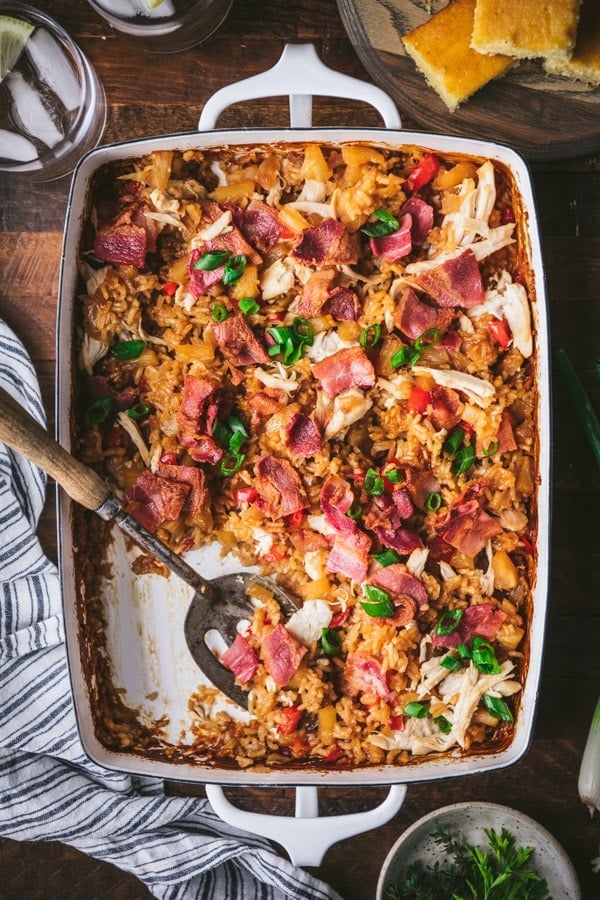
What to Serve with Hawaiian Chicken and Rice
This is truly a one dish meal, since it already includes a starch, protein, and vegetables. You really don’t need anything more! That said, if you’d like to serve an additional item on the side, try these options:
- 3-Ingredient Sour Cream Muffins
- Homemade Crescent Rolls or Soft Dinner Rolls
- Aunt Bee’s 3-Ingredient Buttermilk Biscuits, Flaky Buttermilk Biscuits, Cheese Biscuits or Drop Biscuits
- Skillet Cornbread, Honey Cornbread or Corn Muffins
- Pumpkin Bread or Pumpkin Muffins
- Wedge Salad, Classic Caesar Salad, House Salad with Candied Pecans, or a Green Salad with Red Wine Vinaigrette
- Fennel Salad with Apples and Creamy Cider Dressing
- Roasted Cabbage or Braised Red Cabbage
- Homemade Applesauce or Fried Apples
- Garlic Bread, Homemade Focaccia, Breadsticks, Jalapeno Cheddar Bread, or a crusty loaf of No-Knead Dutch Oven Bread
- Sauteed Asparagus
- Roasted Brussels Sprouts
- Brown Sugar Glazed Carrots
- Sauteed Spinach with Garlic
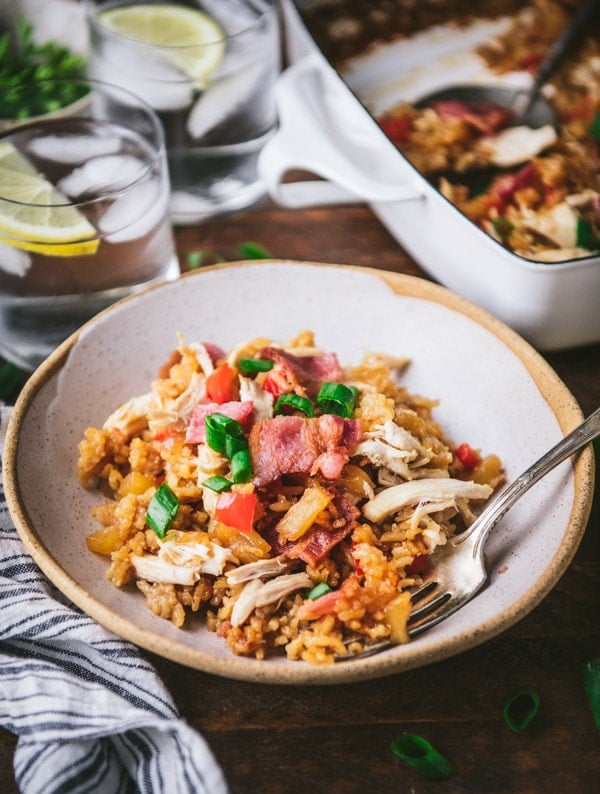
Preparation and Storage Tips
- The leftover chicken and rice bake will keep in an airtight container in the refrigerator for 3-4 days.
- I do not recommend freezing these leftovers, as rice tends to get mushy when thawed.
- How to Reheat: Cover and reheat leftovers in a 350°F oven for 20-25 minutes, or until warmed through. You can also reheat individual portions in a microwave for 1-2 minutes on high power.
Recipe Variations
- For a slightly less-sweet dish, decrease the brown sugar to ⅓ cup or ¼ cup.
- Start with raw chicken instead of adding the cooked chicken towards the end. You’ll need about 1 pound of diced boneless, skinless chicken breast or thighs. Add the raw chicken to the pan at the very beginning so that it has time to cook through.
- Season the dish with extra flavor by adding grated gingerroot or ground ginger, sesame oil, or paprika. Add extra spice with crushed red pepper flakes.
- Mix other vegetables into the dish. Try a similar dish with fresh summer veggies, stir frozen peas or corn into the dish towards the end (when you add the cooked chicken), or you can start with raw broccoli florets or green beans at the beginning.
- Top the finished casserole with sliced or chopped peanuts or almonds. That extra salty crunch adds a nice touch to the dish!
- Cooking for a smaller family? Cut all of the ingredients in half and bake the casserole in an 8-inch square dish. The cooking instructions remain the same.
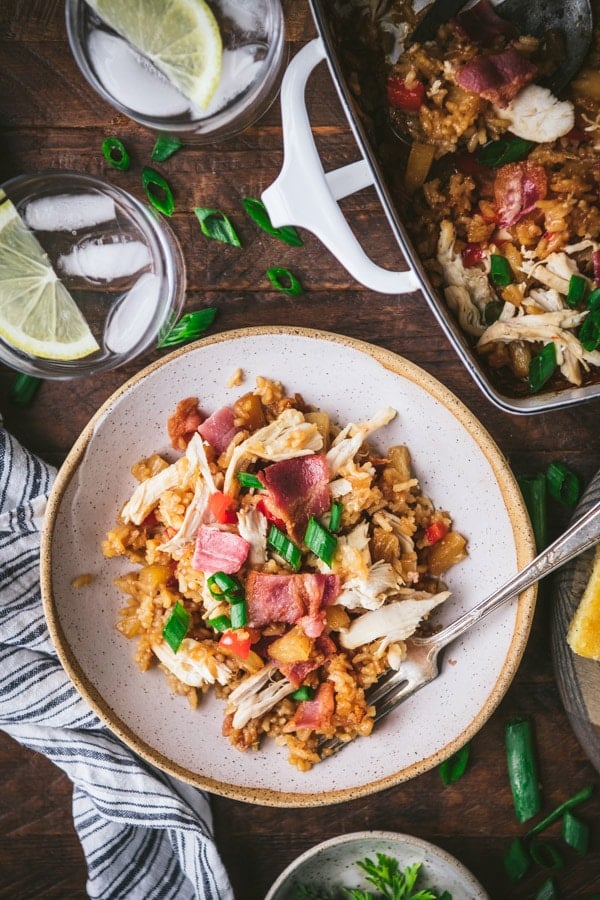
Tips for the Best Aloha Chicken Recipe
- Do not substitute with other varieties of rice, such as brown rice or instant rice. These other types of rice have different cooking times and require different amounts of liquid than the long grain white rice that’s indicated in the recipe.
- Use the meat from a store-bought rotisserie chicken for a flavorful shortcut. If you’re really in a time crunch, you can even purchase fully-cooked bacon so that you don’t have to worry about that extra step!
- Make sure to cover your dish tightly with foil so that none of the liquid or steam escapes during cooking. The rice needs to absorb the liquid as it bakes.
- The total cooking time will vary on a number of factors, including the type of pan that you use and your individual oven. Glass or ceramic baking dishes will take longer than metal pans, for instance. To know when your casserole is done, taste a bite of the rice. The rice should be tender and the liquid should be absorbed.
- Be careful not to overcook the casserole, or the rice will become mushy and gummy.
- Use reduced-sodium soy sauce and chicken broth so that the final dish isn’t too salty. You can always add extra seasoning at the end.
- Garnish the casserole with fresh herbs like parsley or chives, or sliced green onions for a bright, fresh touch.
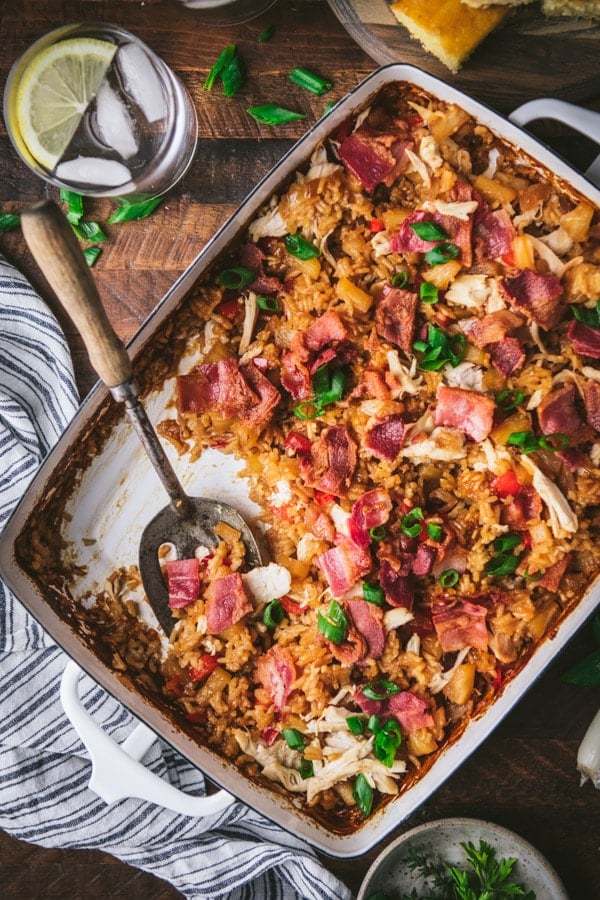
More Dump-and-Bake Chicken and Rice Recipes
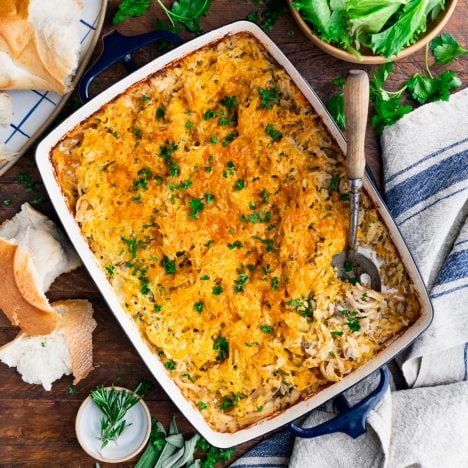
Dump-and-Bake Cheesy Chicken and Rice
1 hour hr 5 minutes mins
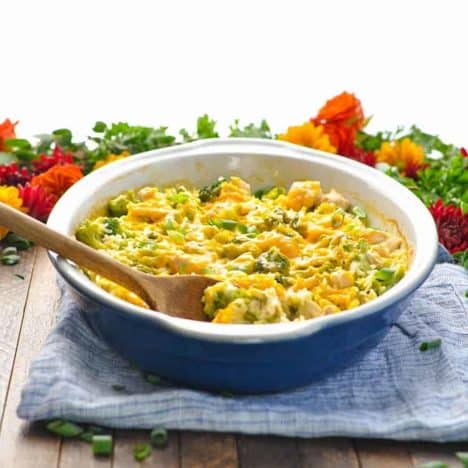
Dump-and-Bake Chicken Broccoli Rice Casserole
1 hour hr 10 minutes mins
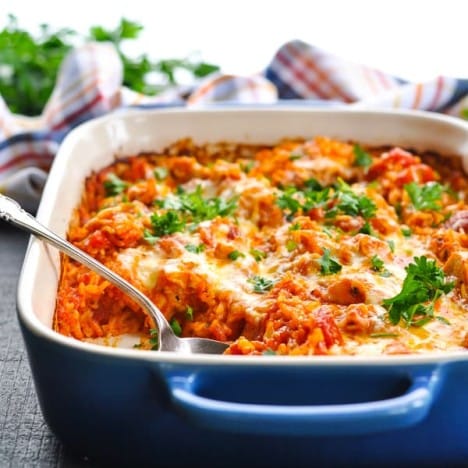
Dump and Bake Italian Chicken and Rice
50 minutes mins

Dump-and-Bake Aloha Chicken and Rice
Ingredients
- ½ cup brown sugar (or decrease to ⅓ cup or ¼ cup of brown sugar for a less-sweet dish)
- ½ cup less sodium soy sauce
- 1 ½ cups less sodium chicken broth
- 2 teaspoons minced garlic
- 1 cup uncooked long grain white rice
- 1 cup diced onion (I use frozen diced onion for a shortcut)
- 1 red bell pepper, finely chopped
- 1 (20 ounce) can pineapple tidbits in juice, not drained
- 2 cups cooked, shredded or diced chicken (such as the meat from a rotisserie chicken)
- 6 slices cooked bacon, chopped or crumbled
- Optional garnish: sliced green onions, chives, or fresh herbs
Instructions
- Preheat oven to 425°F (220°C). Grease a 9 x 13-inch baking dish.
- In the prepared dish (or in a separate bowl), whisk together brown sugar, soy sauce, garlic, and chicken broth. Add uncooked rice, onion, bell pepper, and pineapple (with its juice).
- Cover the dish tightly with foil. Bake for 50-55 minutes. Uncover the dish and use a fork to fluff the rice. At this point, the rice should be almost tender and most of the liquid in the dish should be absorbed. If the rice is still very firm, or if there's still a lot of sauce in the dish, cover and return it to the oven for 5-10 more minutes, or until the rice is just about done.
- Stir in the cooked chicken. Sprinkle the cooked, chopped bacon on top.
- Return the dish to the oven, uncovered, and bake for an additional 5-10 minutes, or until the chicken is warmed through, the rice is completely tender, and the bacon is crispy.
- Garnish with chopped green onions, chives, or herbs, if desired.
Notes
- Do not substitute with other varieties of rice, such as brown rice or instant rice. These other types of rice have different cooking times and require different amounts of liquid than the long grain white rice that’s indicated in the recipe.
- Use the meat from a store-bought rotisserie chicken for a flavorful shortcut. If you’re really in a time crunch, you can even purchase fully-cooked bacon so that you don’t have to worry about that extra step!
- Make sure to cover your dish tightly with foil so that none of the liquid or steam escapes during cooking. The rice needs to absorb the liquid as it bakes.
- The total cooking time will vary on a number of factors, including the type of pan that you use and your individual oven. Glass or ceramic baking dishes will take longer than metal pans, for instance. To know when your casserole is done, taste a bite of the rice. The rice should be tender and the liquid should be absorbed.
- Be careful not to overcook the casserole, or the rice will become mushy and gummy.
- Use reduced-sodium soy sauce and chicken broth so that the final dish isn’t too salty. You can always add extra seasoning at the end.
- Start with raw chicken instead of adding the cooked chicken towards the end. You’ll need about 1 pound of diced boneless, skinless chicken breast or thighs. Add the raw chicken to the pan at the very beginning so that it has time to cook through.
- Season the dish with extra flavor by adding grated gingerroot, sesame oil, or spicy crushed red pepper flakes.
- Mix other vegetables into the dish. You can stir frozen peas or corn into the dish towards the end (when you add the cooked chicken), or you can start with raw broccoli florets or green beans at the beginning.
- Top the finished casserole with sliced or chopped peanuts or almonds. That extra salty crunch adds a nice touch to the dish!
- Cooking for a smaller family? Cut all of the ingredients in half and bake the casserole in an 8-inch square dish. The cooking instructions remain the same.
Nutrition
This post was originally published in June, 2017. It was updated in January, 2022.








I just love the name of the dish! Makes it sound so bright and cherry haha. And I love the flavors too…definitely what I need for more easy meals!
Thanks, Gayle! Happy food for sunny days! 🙂
Omg mrs Blair I just made ur recipe and it is the best!! Thank u so much for sharing. Can’t wait to try some other recipes you have!!????????
Wonderful! I’m so glad that you enjoyed it, Jason! 🙂 Thanks for letting me know!
Ellen what altitude do you live at? I live at 5000 ft and it takes a considerable amount of time for me to cook these dishes but mine turned out perfect. Hmm
This would have so much flavour! I love anything with pineapple so I think we’ll have to try this soon!
Thanks, Kristy! It’s a salty-and-sweet dream! 🙂
I have a fresh pineapple I’ve been needing to use. This recipe sounds so great, but I won’t have the juice form the can. Could I substitute something for it?
Hi, Stephanie! That should work fine! I would just add a splash of fruit juice (do you have orange juice or something similar in the refrigerator)? I’d use about 1/4 cup of the juice. If you don’t have any fruit juice, then you can try about 1/4 cup of chicken broth or other liquid — it just won’t be as sweet as the pineapple juice. Hope that helps!
Making this tonight for dinner, I added a little teriyaki sauce and used instant brown rice! I’m thinking of just serving it with a side salad since it has so many other components. My husband LOVES anything with rice. I can’t wait to taste it, my kitchen smells delicious! I also added a tiny dash of red pepper flakes.
Hi, Stephanie! No worries — the regular soy sauce will work perfectly. The lite soy sauce is just lower in sodium, but you can use an equal amount of the regular without any problem. Enjoy!
I used regular soy sauce and found it extremely salty. Next time I would try to get the lite.
When I dont have low sodium soy sauce I only use half of what the recipe calls for and the other half water. Hope that helps in the future!
That’s a great tip, Emily. Thank you!
Curious as to whether anyone has substituted the chicken for seafood like shrimp or scallops.
Hi, Sherri! I haven’t tried that, but if you decide to use the shrimp or scallops, I would wait to add them to the dish at the very end since shrimp cooks really quickly and will only need a few minutes in the oven.
I have regular rice, so I cooked it first, which worked fine except there was a lot of extra liquid when it was done. If you do it that way, I’d cut the liquid by half. Still tasted good, however. I also only had half a bell pepper, so I tossed in some leftover corn and broccoli to make up for it. The bacon was a nice touch, perfect compliment to the sweetness from the pineapple. I’d definitely make this again.
Hi, Tami! Thanks for that note — it’s helpful to know that the cooked rice worked well, too. Yes, you will definitely need to decrease liquid with cooked rice since it doesn’t absorb the liquid in the same way that the uncooked rice does. Again, glad that you enjoyed the flavors and thanks so much for letting me know!
Made this tonight and loved it. Granted I cooked mine on the stovetop in a large cast iron, used 1 full cup long grain rice, added 2 Tbsp cider vinegar and a few dashes of red pepper flakes. Kept the liquids the same and didn’t add the veg until last 10 min of cooking. It turned out perfectly. Thanks for a keeper!
Kris, I’m so glad that you enjoyed it! Thank you very much for sharing your changes — I know that other folks will find that helpful!
Hi Blair. Could this recipe work in the crock pot as well?
Oops, nevermind. I found someone already asked that question.
Can you do this in the crockpot?
Hi, Ashley! Yes, I think you could — but I’ve never actually tried it. You’d have to keep an eye on it to see when the rice is done cooking — I would guess it would take about 4 hours on low? Total guess, though! 🙂 Also, the bacon won’t get crispy on top at the end the way that it does in an oven…
Hello,
Has anyone tried this with quinoa?
Hi! No, I haven’t tried that so I have no idea how it would work. Let me know if you end up giving it a shot, Tanisha! 🙂
Good grief, helps to spell my own name correctly!! 🙂
Let me try this again. Has anyone tried this with quinoa? What adjustments did you make?
I did make it with quinoa since it was the grain I had on hand. I used extra liquid to match the amount needed according to the packaging. It was something like 3/4 cup soy sauce and 1 cup broth. Figuring it was 1/2 cup liquid in the pineapple. It worked took at least an hour if not a little longer.
For an easy dish this was tasty and different from my usual options. Definitely making it again. I found it needed something though. The bacon and green onions were necessary not just garnishes. I might try it with ham but would have to be careful about salt levels
Sounds great! Thanks for letting me know, Erin!
Would you change the cooking time if you were to double the recipe?
Hey, Megan! The chicken and rice should still take about the same amount of time, even when the recipe is doubled. You may need to add about 5 minutes or so, but it shouldn’t be too different at all. 🙂
I always love the colorful recipes. This looks so tasty. I can’t wait to give it a try 🙂
Thanks, Vivian! I agree — colorful recipes are pleasing to the eye and to the tastebuds! 🙂
I made this tonight, followed the recipe exactly and in a 9×13 inch dish…it made a lot and was delicious!
Awesome! Thanks so much for letting me know, Melanie! 🙂
Do you think a shredded rotisserie chicken
Would work ok? This looks amazing, can’t wait
To make it.
Absolutely, Marsha! That’s often what I use! 🙂 Enjoy!
I made this tonight in a rice cooker with regular rice instead of instant rice. I also used spam instead of chicken/bacon because SPAM. My family likes leftovers for lunch and for meals on weekends (so I don’t have to cook!). I used 2 cans of Spam (again, SPAM!) and pan fried them first. Threw it in the rice cooker. Cut up a large onion, 2 bell peppers and added the pineapple from some pineapple chunks to the rice cooker (reserving the juice). I put in 4 cups of dry white rice). Put the juice from the pineapple in a measuring cup and added 1 cup brown sugar, 1 cup low sodium soy sauce and 4 cups of chicken broth, which yielded 6.5 cups liquid. Dumped it in the rice cooker and voila! It cooked up wonderfully. Rice was tender, but not mushy, and rice absorbed just enough liquid to leave the rice “creamy.” So YUMMY! Just sliced some green onions and it was fantastic! Made a HUGE rice cooker full – so plenty of leftovers. Thanks!!!
Hi, Mimi! You’re a genius! Thanks so much for sharing your adaptation! I would have never thought to use my rice cooker for a full meal like this, but I’m glad that it worked well and that you enjoyed the flavors. Thanks again for taking the time to let us know!
This was delicious! My husband thought it was too sweet so I’m making it again and reducing the sugar. ????
Perfect! That sounds great, Ashley! I’m glad that you enjoyed it!
My wife got some boneless skinless chicken breast but no side dishes to go along with it, and she said to do what ever I wanted to do with it. I wanted to do something different something we never had before, and to tell you the truth I’m kind of burnt out on BBQ chicken and I didn’t know what else to do with it until i saw this recipe. When I saw this recipe I said to myself wow this sounds really good and easy to make so I tried it, and I’m glad I did because this dish was freaking awesome. Anyways I just wanted to say thank you and I will definitely be making this dish again in the future.
Awesome, Jesse! I’m so glad that you enjoyed it! 🙂 Thanks for letting me know!
Hi, can I use water instead of broth?
Laura
Hi, Laura! Yes, you can. It won’t have as much flavor, but the texture and cooking process will work fine. Think of it like soup that you use water instead of broth for (the recipe will work the same for the cooking process, but the soup wouldn’t have nearly as much flavor, right?). Hope that helps! 🙂
Hey,
If I don’t want to use soy sauce, should I change anything else?
Thank you.
Hi, Elsa! If you leave out the soy sauce, it will significantly change the taste of the entire dish. The soy sauce adds savory, salty, umami flavor to the sauce that the rice cooks in. You will need to replace the 1/2 cup of soy sauce with some other liquid, so you might try tamari sauce or coconut aminos. Again, it won’t be quite the same, but it would be better than just leaving it out altogether. Hope that helps!
Hi can I mix the ingredients ahead of time so all my husband has to do is put it in the oven or will the rice absorb all of the liquid before it cooks? Thank you
Hi, Diana! I think it would be *okay,* but I would worry about the rice absorbing some liquid and then having a bit of a mushier texture when it’s done baking. I don’t think it would be awful or inedible, just not ideal.
If I were you, I would prep all of the ingredients and stir everything together in a large bowl. Cover and keep that in the refrigerator until your husband is ready to prepare the meal. Then just instruct him to stir in the rice and transfer everything to the baking dish, cover, and bake. That way he adds the rice at the last minute, but everything else is ready to go. 🙂
I really enjoyed this recipe. I have a two week old and needed to whip something up for dinner quickly in between feedings and this was perfect. I had to bake the chicken for an additional 10 minutes, but it turned out well. My mother was visiting and really liked it, too. I’ll be making this again, thanks for the recipe!
Perfect! The dump-and-bake recipes are ideal for busy new moms like you, Jessica! 🙂
I followed the recipe exactly (well, not exactly – husband does not like garlic), and it was a success. When people go back for 2nd’s, you know it is good.
That’s great, Mary! Thanks for letting us know. I’m so glad that it was a hit!
Uh oh. I just went to stir and set for the last ten minutes and realized I never covered it.
I also cooked in a 9×13 dish.
Guess we’ll find out how it goes!
It was a dark in color due to the lack of cover, but still a hit.
Will definitely be making this again.
Oh, good! Glad that it worked! 🙂
I love love you pictures and can’t wait to try this recipe. Thanks.
Hi, Linda! No, I don’t think anyone has mentioned testing it with the instant brown rice.
Great! Glad to know that it worked with the instant brown rice, too!
I just made this tonight and only had instant brown rice on hand and used a 9×13 pan. Did end up cooking (covered) much longer. Approximately 50 minutes, stirring every 10 minutes after the initial 20. There was A LOT of liquid, but seemed to start absorbing quickly the toward the end. Cooked uncovered for the recommend 10 minutes then let sit. Turned out very well, seconds were had.
Fantastic! I am trying to convert to “mostly” Mediterranean diet so the brown rice works.
Excellent!
Has anyone tried to do this in the instant pot?
I was wondering the same thing.
I haven’t tried it in the Instant Pot, but y’all have inspired me to do so. I’ll report back when I get a chance! 🙂
Hey, Susan! The recipe was updated to use long grain white rice (rather than the original that called for instant rice), for two reasons: (1) I found that a lot of readers were asking how to adapt the recipe for regular rather than instant rice; and (2) I found that the regular rice gave a better texture in the end than the instant rice. When adjusting for regular vs. instant rice, you also have to increase the amount of liquid that you use (because the regular rice absorbs more liquid as it cooks). So the updated recipe includes more soy sauce and more chicken broth. I’m not sure why your recipe came out sticky and dark brown — did it look like the dish in the photos? I can’t say what you did differently (if anything), but it should turn out as shown in the post if you follow those instructions.
No, it didn’t look like the pictures, which is why I wondered if I had done something wrong. It looked pretty over cooked. I am cooking more rice to mix in, and will probably add more juice or water to make it saucier. Thanks for your help.
Okay! I’m not sure what the difference may have been, but I hope that you can get it to work for you!
Can i use instant rice as well?
Hi, Jennifer! I’ve used instant rice in the past (with a different ratio of liquid because instant rice doesn’t absorb as much liquid), but I find that it doesn’t work as well — which is why I recommend the regular long grain rice here.
Is it possible to use frozen chicken breast tenderloin or should it be thawed out first? If possible without thawing, how much time should be added?
Hi, Jenny! The problem with using frozen chicken is that it will require longer to cook — which will then likely result in overcooked rice. The timing is about the same for the thawed chicken and the white rice, which is why this works well. If you want to use frozen chicken, I would suggest using brown rice because the brown rice has a much longer cooking time than the white rice (and will therefore be done at about the same time as the chicken). Hope that helps!
I made this last night for myself, husband and 3 25 year old guys. We all loved it. I was about 45 minutes into baking and remembered that I forgot to cover the pan with foil!! I really thought that I ruined the dish and was very upset. I took it out at that point, stirred it and the rice was almost cooked. I added about 1/2 cup more water, covered and put in for about 15 more minutes. It was still excellent! I skipped the bacon because I just didnt feel like cooking it and we didnt miss it. This will definitely be made again! Cant wait until my US Marine son comes home from Hawaii so I can make Aloha Chicken and rice for him!
That’s awesome, Barb! I’m so glad that it worked out — even without the cover for the first 45 minutes. You were smart to add that extra water! 🙂
If I used brown rice in place of white, could I partially cook the brown rice ahead of time and then stir it in with the other ingredients listed in Step 2 and bake for the same time that is listed in the recipe?
Hi, Willadale! If you pre-cook the brown rice, then it will not absorb as much liquid in the dish. As a result, you’ll need to decrease the amount of liquid in the recipe or you’ll end up with more of a “soupy” finished product.
I cooked this tonight and mine turned out the exact same way. IF I choose to make this again I will cut the soy sauce in half. I can tell it has potential but what I got tonight looked nothing like the picture and was way too salty!!
Wow! I made this last night and it was soo delicious! It was a perfect week night meal with no fuss, but full of flavor. I added cashews and it was yummy. Thank you!
Wonderful! Thanks, Cindy!
So only 1 cup of rice is needed for this recipe? Does that make plenty of rice for the dish?
Yep, this recipe is just for 1 cup of uncooked rice. 🙂
My daughter likes her veggies not ‘mushy’ when cooked. Any advise on adjusting the recipe so the veggies are not too soft.
Recipe sounds great. Can’t wait to make it!
Hey, Catherine! You can just stir the veggies into the dish once it has started cooking (maybe about halfway through). That way they won’t cook as long, so they will stay crisp-tender. 🙂
Very delicious recipe. I made some changes to make it not as sweet and salty. I omitted the broth and used water instead. I reduced the brown sugat to a 1/3 cup. I used only half a cup of
Soya sauce and added half a cup of water to make up the liquid
portion of the recipe. I didn’t use red pepper but substituted a
bag of frozen Asian veggies. A healthy version in my opinion.
Thanks, Catherine! Your changes sound great!
Thanks for such a great recipe – Pineapple & chicken are great together. I knew the recipe (as written) would be too sweet for our taste so I made the following changes:
*Brown sugar (1/4 cup)
Pineapple tidbits (7 oz approx – half the tidbits in 20 oz can)
Pineapple Juice (1/4 cup approx – half the juice in 20 oz can)
Water, chicken broth or white wine (1/4 cup)
Frozen peas & carrots
Jalapeno pepper (1 ea finely chopped)
*It’s a great meal but still a little sweet for our taste but I’ll definitely make it again omitting the brown sugar completely.
I’m so glad that you enjoyed it, Carol! Your changes sound perfect! 🙂
Yes, I don’t recommend using brown rice that reason. It just takes way too long to cook.
This was fantastic!
Yay! So glad that you liked it, Rebecca! 🙂
Thoughts on using cauliflower rice as well as a sugar substitute?
Hi, Brittany! The regular rice absorbs a lot of liquid as it cooks in the dish, and it releases starches that naturally thicken the sauce. If you use cauliflower rice, the cauliflower will not absorb any liquid (it will actually release liquid in the pan), so it will completely change the consistency of the meal. If you want to make it with the cauliflower rice, I would just suggest playing around with the amount of soy sauce and chicken broth that you use (you’ll need to significantly decrease those liquids).
As far as the sugar substitute goes, that’s totally a personal preference. The recipe will work fine with the substitute, but I find that those substitutes often have a much sweeter taste than regular sugar. As a result, you’ll need to find one that you like the taste of and that you may decrease in amount so that the recipe isn’t too sweet. Hope that helps! 🙂
Made this this afternoon and vegetarianized it by using veggie broth, omitting the chicken and added cooked vegetarian “chicken” fingers diced right before serving. Also garnished with parsley instead of green onion, personal preference. It’s so good, I feel like I was kinda in a rut lately with cooking and the flavour of this was such a nice unique change, will definitely be writing this down to make again in the future. Thanks for a fab recipe!
Thanks, Rebecca! I love how you made the recipe work for you — sounds like a great vegetarian option! 🙂
Do you know if I can cook this recipe in the slow cooker, sans the bacon? I could add the bacon in at the end right before serving.
Hi, Jenni! I haven’t tried it myself, but I think it would work fine. Since you’re not baking in the oven with the cover off at all, you won’t have any opportunity to let the sauce thicken (so the dish might be more “saucy” than in an oven), but it should work fine otherwise. You’ll just need to keep an eye on the rice to make sure that it doesn’t over-cook and become mushy. I don’t know exactly how long to suggest you put it in the Crock Pot because I haven’t actually tested it that way.
No, you weren’t supposed to use instant rice. It just sounds like the rice wasn’t fully cooked, so it needed to stay in the oven a little longer.
Thanks for taking the time to leave a note, Karen! I’m so glad that you enjoyed it. 🙂
I’m excited to try it because I had all the ingredients in the house. Don’t you love when that happens?! I cut the recipe in half since I’m cooking for 1, made one, froze one for later (rice, pineapple and juice, veggies, and chicken and marinade in separate baggies). I used jasmine rice. I kept the ingredients and liquids the same, but I added shredded carrots, chopped sugar snap peas, and some chopped Napa cabbage because I had some to use up. I won’t be doing the bacon because I don’t want to cook it. It’s in the oven now. I’ll let you know how it goes!
Oh I forgot, I added sesame oil too and some hot chili flakes.
Sounds great! Thanks, Jenn!
It was good, next time I’ll halve the sugar, and only do 1/3 cup soy sauce.
Making this right now with brown rice and running into the same issur. Not great when you’re trying to feed hungry children.
Hi, Cindy! It sounds like you just needed to cook it for a little bit longer. As the rice finishes cooking, it should absorb more liquid and become more tender — solving both of your issues here. Hope that helps for next time!
I followed the recipe exactly and it was delicious, however your picture looks very bright and appetizing and mine looked very dark like a casserole of baked beans. What could be the difference?
Hi, Bev! I don’t know! Maybe the lighting in the photo vs. your kitchen? I’m glad that it tasted good, though! 🙂
I made this tonight! Since a few others said it was too salty I reduced the soy sauce to a half cup. I also tweeted it a little and added some minced ginger (about a tblsp) and I added a half cup of Orange/pineapple juice …..it turned out really well! Rice was perfect and chicken was moist. I’d definitely make it again!
Thanks, Sophie!
Thanks, Tiffaney!
Save some pineapple to add in the past 5-10 minutes.
Made this dish tonight with 1/2 cup of sodium reduced soy sauce. I also used jasmine rice as I didn’t have raw rice. Cooked it for 50 mins due to the rice substitution. Rice was sticky as jasmine tends to be but otherwise it tasted delicious and hubby liked it as well.
Thanks, Cathy! I’m glad that it worked well!
Terrific recipe! So easy to make as a mom with a newborn and a toddler. I followed the recipe exactly (only limiting the brown sugar), but next time I would check it again around 40mins because the rice was a little soft. But still delicious! The whole family loved it, great with some hot sauce on top.
Thank you, Anna!
Hi, I’ve made this a few times and my family loves it. I was thinking about making this for a new mom and was wondering if it would freeze well? If so, at what point would you freeze it? Thanks!
Hi, Jackie! I haven’t tried freezing it before baking, so I’m not sure if that would work or not. It would freeze okay after baking, but I find that rice tends to be mushy when thawed — not ideal. I think it’s really best when stirred together and baked right away. 🙂 So glad that you enjoy the dish!
This is one of our family’s favorites!! The first time I made it, everyone asked if I could make it again the next night. I found this about a year ago and we have it at least every other week. SO GOOD!!!!
Wow! Thank you so much, Christine!
Was to sweet the pineapple could I omit it and just add
juice
Sure! That will work fine, Cynthia. 🙂
Honestly, instead of leaving out the pineapple, I’d half the brown sugar. The pineapple is a key component……Aloha Chicken.
Can this be baked ahead and then reheated in microwave for serving later in the day?
Hi, Kris! Yes, you can definitely do that. I find that rice and pasta dishes tend to get a little bit dry when reheated, so you might want to add a bit more broth, soy sauce, or even warm water to loosen it up if necessary. Also, make sure that you don’t reheat it for too long or the rice will be overdone and gummy or mushy. 🙂
Can I make this the day before and cook it the next day ?
Hi, Kelley! Yes, I think that would probably be fine. The rice might absorb some of the liquid and soften as it sits overnight, so you might be able to reduce the total baking time the next day. I would keep an eye on it so that the rice doesn’t get overdone and mushy before the end of the recommended time.
Haven’t tried the recipe yet, but is on for this week. Just wanted to say “Thanks” for the serving adjuster. What a great aid for those of us who cannot eat a 9 x 13 pan full of food in even 2 days!
I’m so glad that’s helpful, Sharon! Hope you enjoy the meal!
I tried this recipe tonight and it was ok and I think it was because I listened to some posters about it being too wet so I did not use all the liquid from the pineapples to prevent this and this was a big mistake because it turned out too dry … Im not sure why people said it was too sweet because it definitely was not sweet they must’ve used sweetened pineapples. I also used poblano’s instead of green peppers due to being allergic and long grain rice which cooked fine.
I will try this again soon with all the liquid.
I’m planning on making this dish tonight. I only have fresh pineapple on hand. How mush extra liquid should I use to make sure rice cooks all the way?
Hi, Erin! I think it’s about 1/2 cup of juice, so I would add about 1/2 cup of extra liquid to the dish. Hope you enjoy the meal!
Do you have any direction or tips if I wanted to make this using my instapot?
Hi, Bethany! I’m sorry, I don’t. I don’t use an Instant Pot much, so I’m not a great person to give specific cooking instructions for that equipment here.
I made this with the less sweet version. 1/4 cup brown sugar. I only had brown long grain rice. Which made it look very unappetizing (completely taking that blame myself). Plus no chicken on hand but had shredded pork. My family just stared at it when I served it. The flavors and taste turned out AMAZING! I will definitely use white rice next time though to make it look more appealing. Thank you!
Thank you, Megan!
Can I double this?
Yes, ma’am! You’ll either need a very large, very deep casserole dish, or I would just bake it in two separate 13 x 9-inch pans. If you bake it in one very large dish, you’ll likely need to increase the baking time.
I rarely comment on blogs, but this was my first recipe from your site and was a complete hit in my house! I did make some adjustments for what I had on hand. Used bone-in chicken thighs and cooked them on top of the rice, following the recipe as written until the chicken was cooked through and rice was tender. Folded bacon & peas in at the end. We also added a small splash of Sriracha into the rice mix too to balance the heat. This was a true winner!
Sounds perfect! Thank you!
Turned out perfect!! I used raw cut up chicken and cooked it in the bacon grease after cooking the bacon. Added chicken at the end like instructed. Rice was cooked perfectly. Thank you for a new family favorite.
Awesome, Rachel! We’re so glad you enjoyed it!
I made this for dinner tonight. I used fresh, chopped chicken that cooked in the pan. I also used fresh, diced pineapple, so I added an extra 1/2 cup chicken broth to make up for the pineapple juice. The flavor was really tasty, but the texture of the rice was not fluffy but soft and there was no bite to the rice. It was rather disappointing. I’m not sure if there was too much liquid, if I overcooked it (50 minutes), or if the rice was not right (I used jasmine rice). I will have to make some adjustments to this before trying again.
Hi Laura,
We’re sorry this did not turn out for you. Jasmine rice should work just fine. We do recommend using canned pineapple if you can, and make sure to cover the dish very tightly so that none of the steam escapes!
This was delicious. I used thawed frozen pineapple from Trader Joe’s (1 1/2 bags), and pancetta instead of the bacon because I didn’t have any. Instead of using foil, I cooked the rice mixture in a Dutch oven with lid. Came out perfect in the same amount of time. I had no leftovers. It was gobbled up by all. Thank you for a fantastic recipe!
Sounds perfect! Thanks for letting us know, Kim!
I made this for my family last night and WOW- so good!! I used 1/4 cup of the brown sugar and topped with turkey bacon instead of pork. My kids (3.5 and 16 months) both had 3 servings, and my husband went back for seconds. Everyone wants me to make this again and I am already excited for my leftovers today!!
Amazing! We’re so glad it was a hit, Melissa!
My store does not sell pineapple tidbits. If I cut up pineapple chunks, about how big should the pieces be? I assume you don’t mean crushed pineapple?
Just bite-sized! As big or as small as you like should be just fine.
Thanks!
Easy & delicious
Thank you, Crystal!
We try sooooo many recipes from the internet and are frequently disappointed. This one is a keeper! Might reduce the brown sugar next time, but otherwise perfect as written!
Thank you, Lori! We’re so glad you enjoyed it.