A staple in Appalachian cuisine and now popular throughout the South, cathead biscuits are an easier, larger, more rustic version of the traditional buttermilk biscuit. There’s no need to roll or cut the dough. Just pinch off portions, drop them in a skillet, and pop them in the oven!
Buttermilk biscuits find their way onto our breakfast or dinner table at least once or twice a week. From my great Aunt Bee’s 3-ingredient biscuits to easy drop biscuits, there’s a recipe for every mood and occasion. These fluffy, oversized cathead biscuits are a personal favorite since they taste delicious and come together so easily!
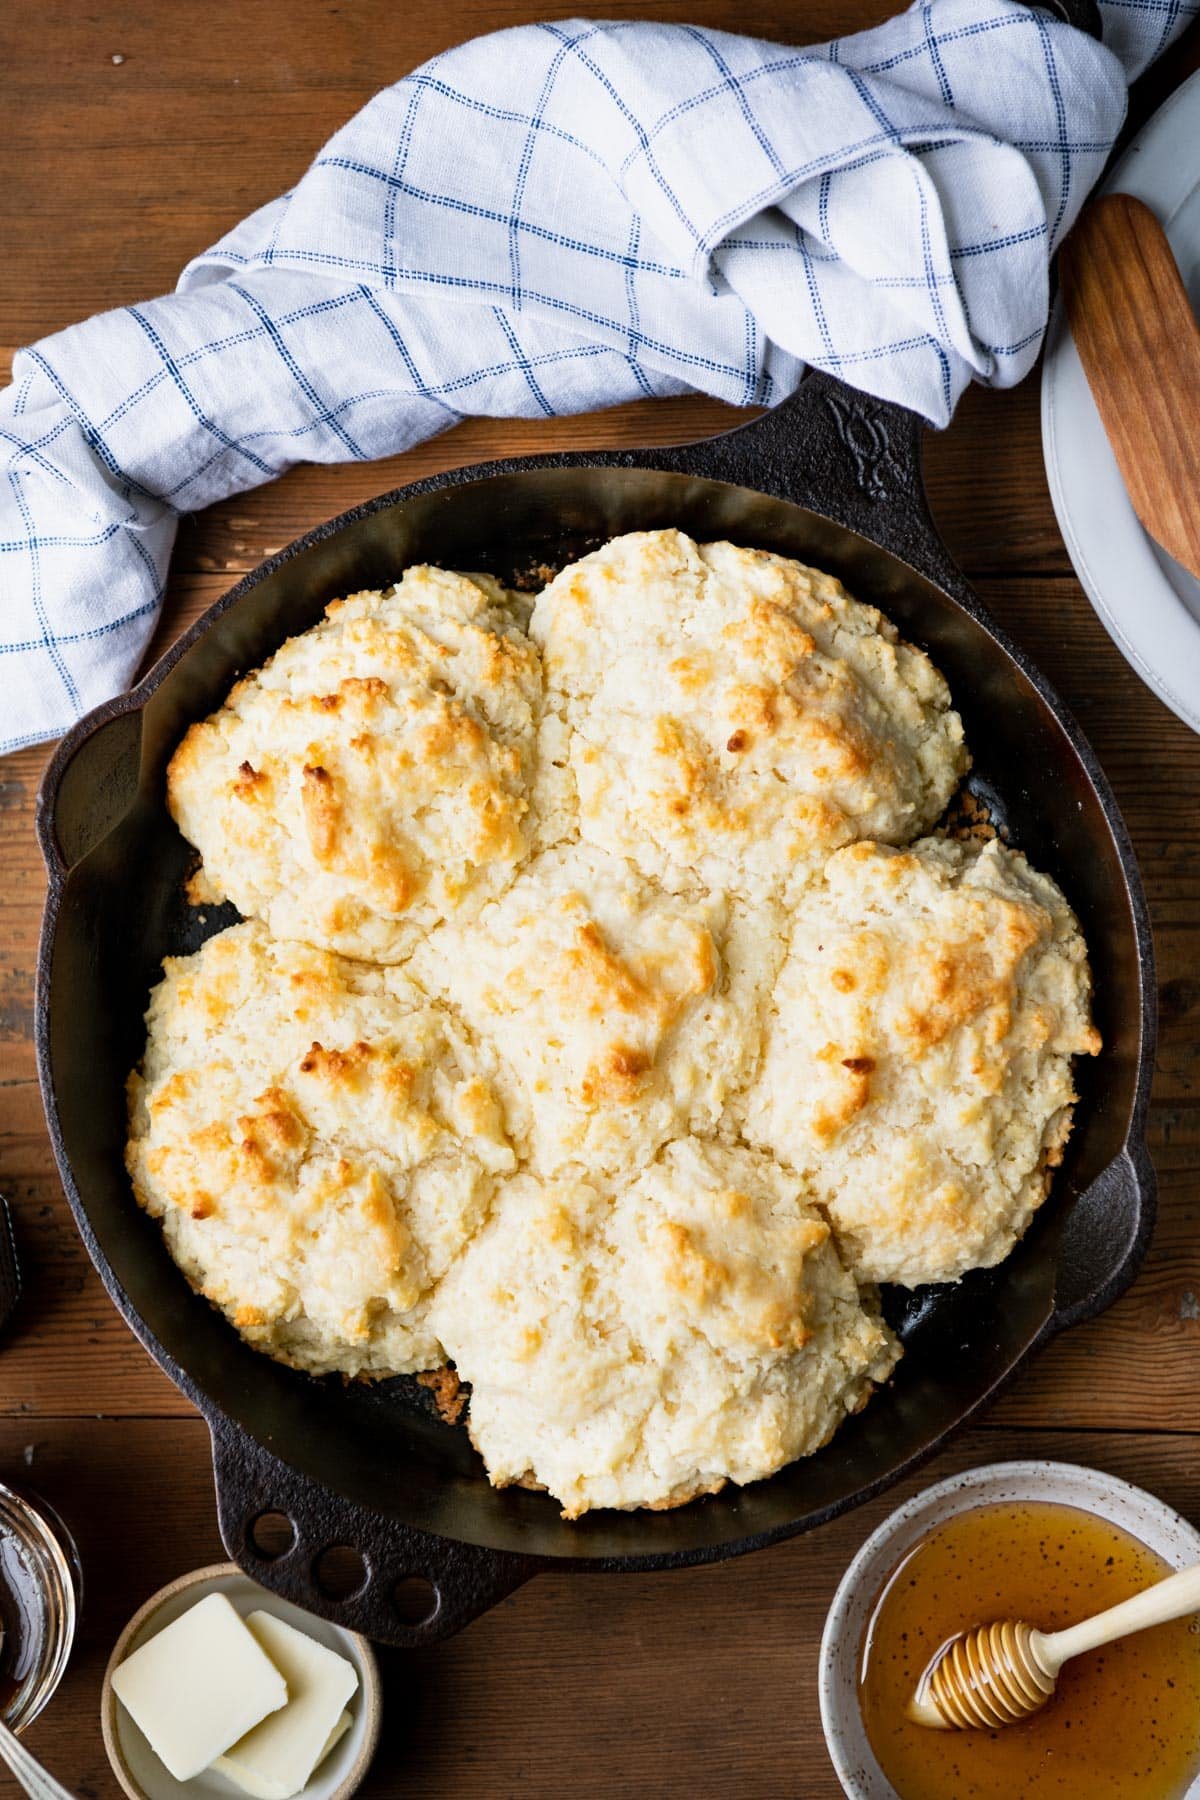
Table of Contents
What is a Cathead Biscuit?
According to Joseph Dabney’s tome on the folklore and art of Southern Appalachian cooking, Smokehouse Ham, Spoon Bread & Scuppernong Wine, cathead biscuits are an “Appalachian phenomenon.” Distinguished from more traditional buttermilk biscuits, most “cats” were made by pinching off handfuls of dough rather than rolling it out and using a biscuit cutter.
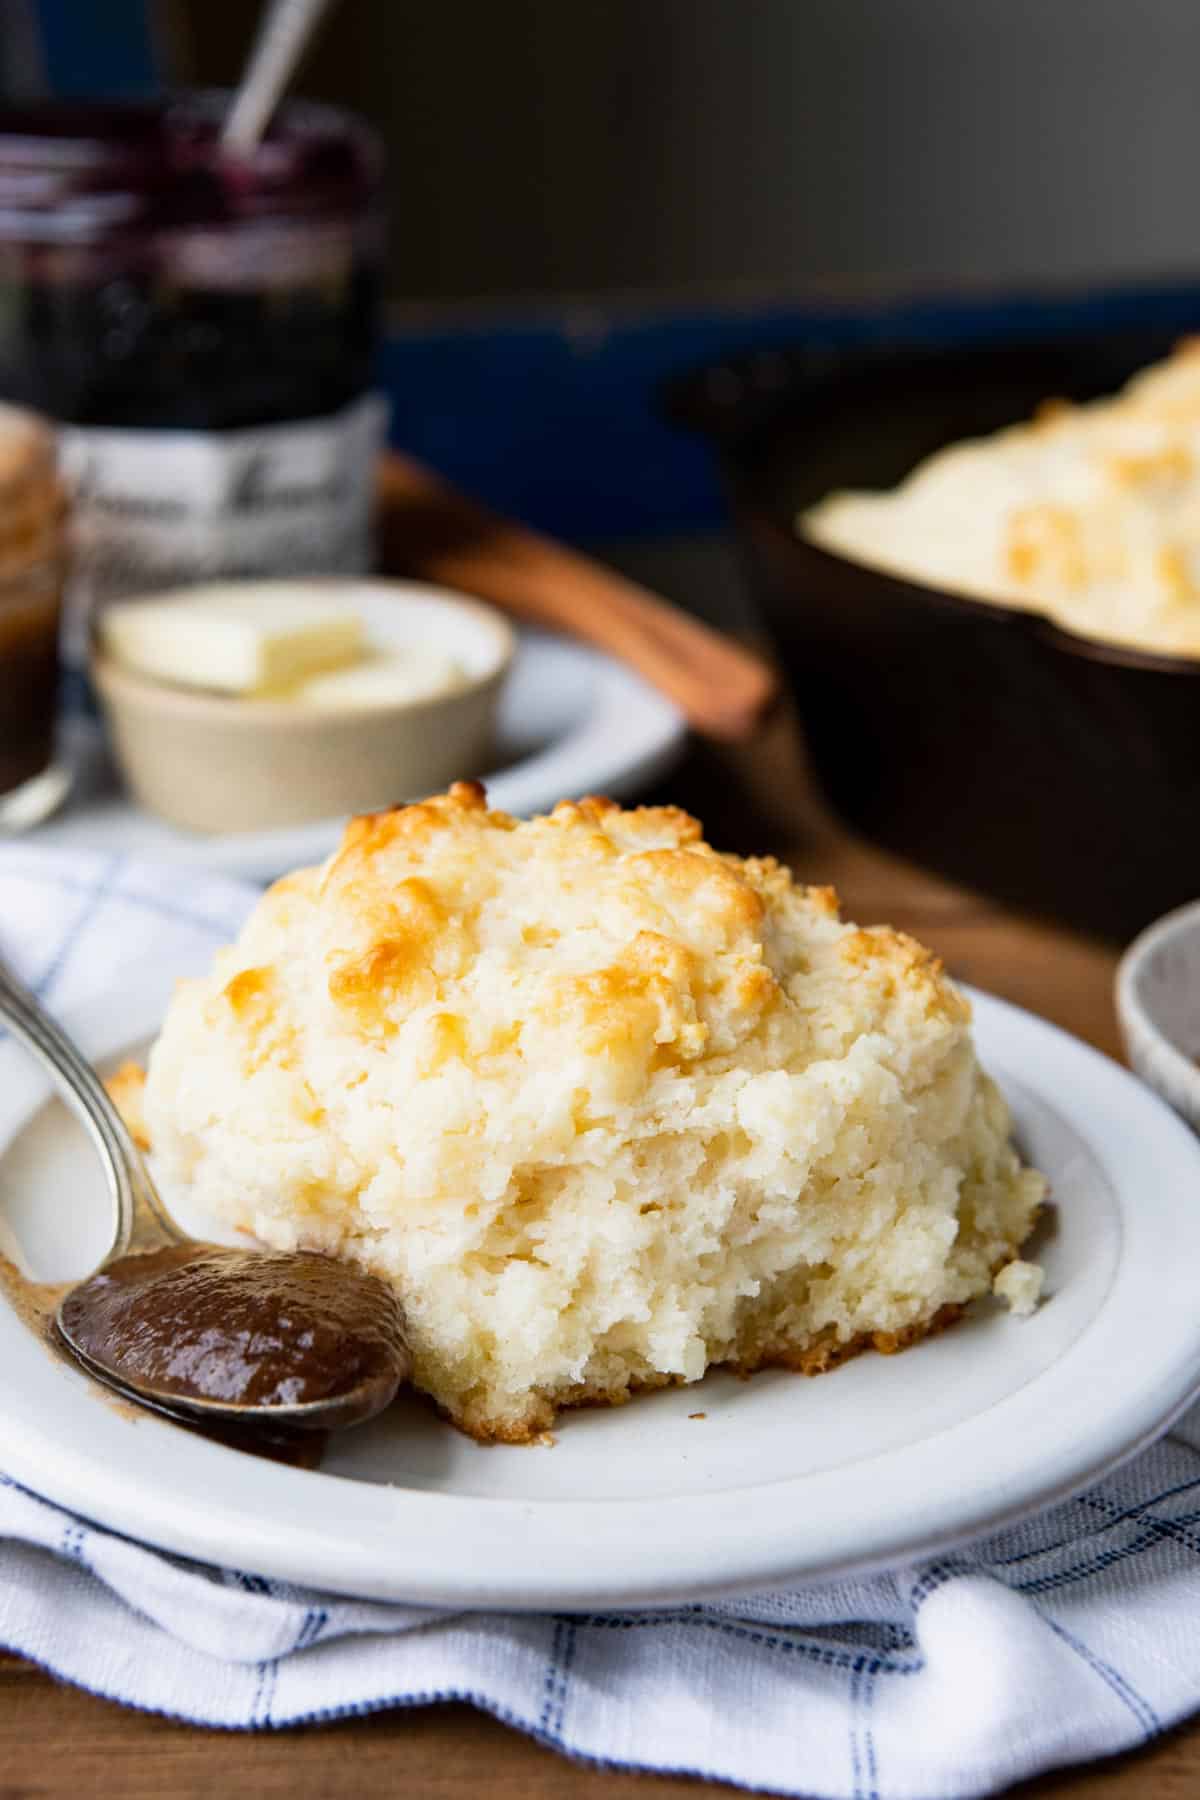
In other words, cathead biscuits are big, fluffy buttermilk drop biscuits! They get their name because they’re as big as a cat’s head. The Appalachian mountain people were particularly partial to these giant biscuits, traditionally served with sawmill gravy, butter, or a generous portion of homemade apple butter.
Unlike flaky biscuits that require very cold butter and careful layering, cathead biscuits are all about simplicity. The texture is tender and fluffy rather than layered, and the rustic, shaggy shape is part of their charm.
Before You Get Started
A few key tips will help you get perfectly fluffy cathead biscuits every time:
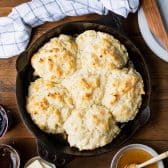
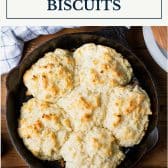
- Bake in a cast iron skillet. A 10-inch cast iron skillet gives you the best texture. It retains and distributes heat evenly, so the biscuits get crispy on the outside while staying soft and fluffy inside.
- Do not overwork the dough. This is the most important rule! Use a wooden spoon or your hands to combine the ingredients just until you no longer see dry pockets of flour, then stop. Over-mixing activates the gluten in the flour, which leads to tough, dense, or dry biscuits instead of light and fluffy ones.
- Use a soft, low-protein flour if you can. I prefer an extra-fine soft winter wheat flour made by White Lily. This low-protein, low-gluten flour gives biscuits that perfectly crisp-on-the-outside, light-on-the-inside texture. All-purpose flour works fine, but Southern flour makes a difference.
- Use both butter and shortening (or lard). The shortening helps the biscuits get nice and puffy in the oven, while the butter adds rich flavor. Traditional Southern cooks often used lard, which you can substitute if you prefer.
How to Make Cathead Biscuits
These fluffy cathead biscuits come together easily and don’t require a rolling pin or a biscuit cutter. Here’s how to make them:
Step 1: Prep Your Pan and Oven
Place the oven rack in the upper-middle position and preheat to 425°F. Grease a 10-inch cast iron skillet or spray with cooking spray.
If you don’t have a cast iron skillet, a deep 9-inch or 8-inch cake pan or another 2-quart baking dish will work.
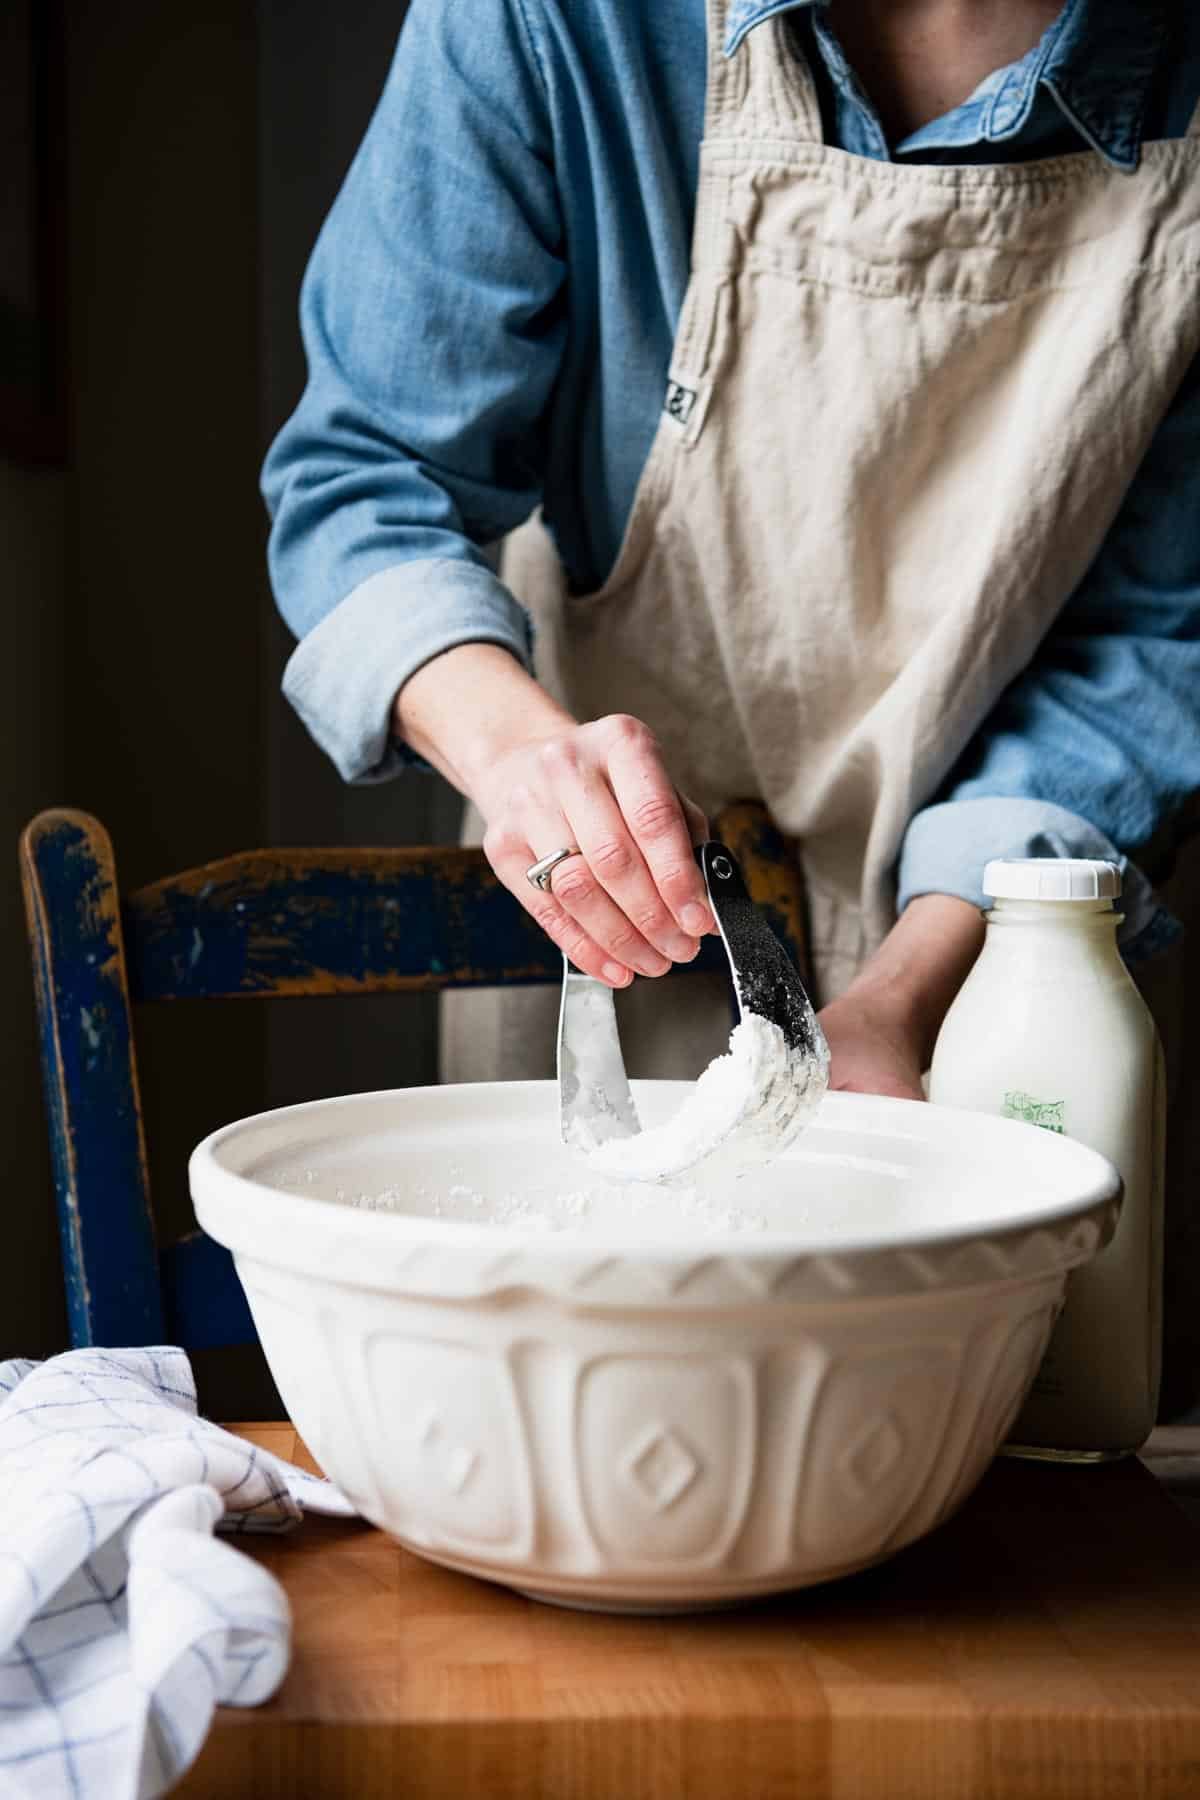
Step 2: Mix the Dry Ingredients
In a large bowl, whisk together the flour, baking powder, baking soda, and salt. The combination of baking powder and baking soda works with the acidic buttermilk to give these biscuits their signature lift and fluffiness.
Step 3: Cut in the Fat
Add the diced butter and diced shortening to the flour mixture. Use your fingers, a pastry cutter, or a fork to work the fat into the flour until it resembles a coarse meal.
You’ll see pea-sized bits of butter throughout, and that’s exactly what you want.
** Quick Note: Since we’re going for fluffy (not flaky), there’s no need to keep your ingredients ice cold like you would for layered biscuits. Room temperature butter that’s been diced works just fine.
Step 4: Add the Buttermilk
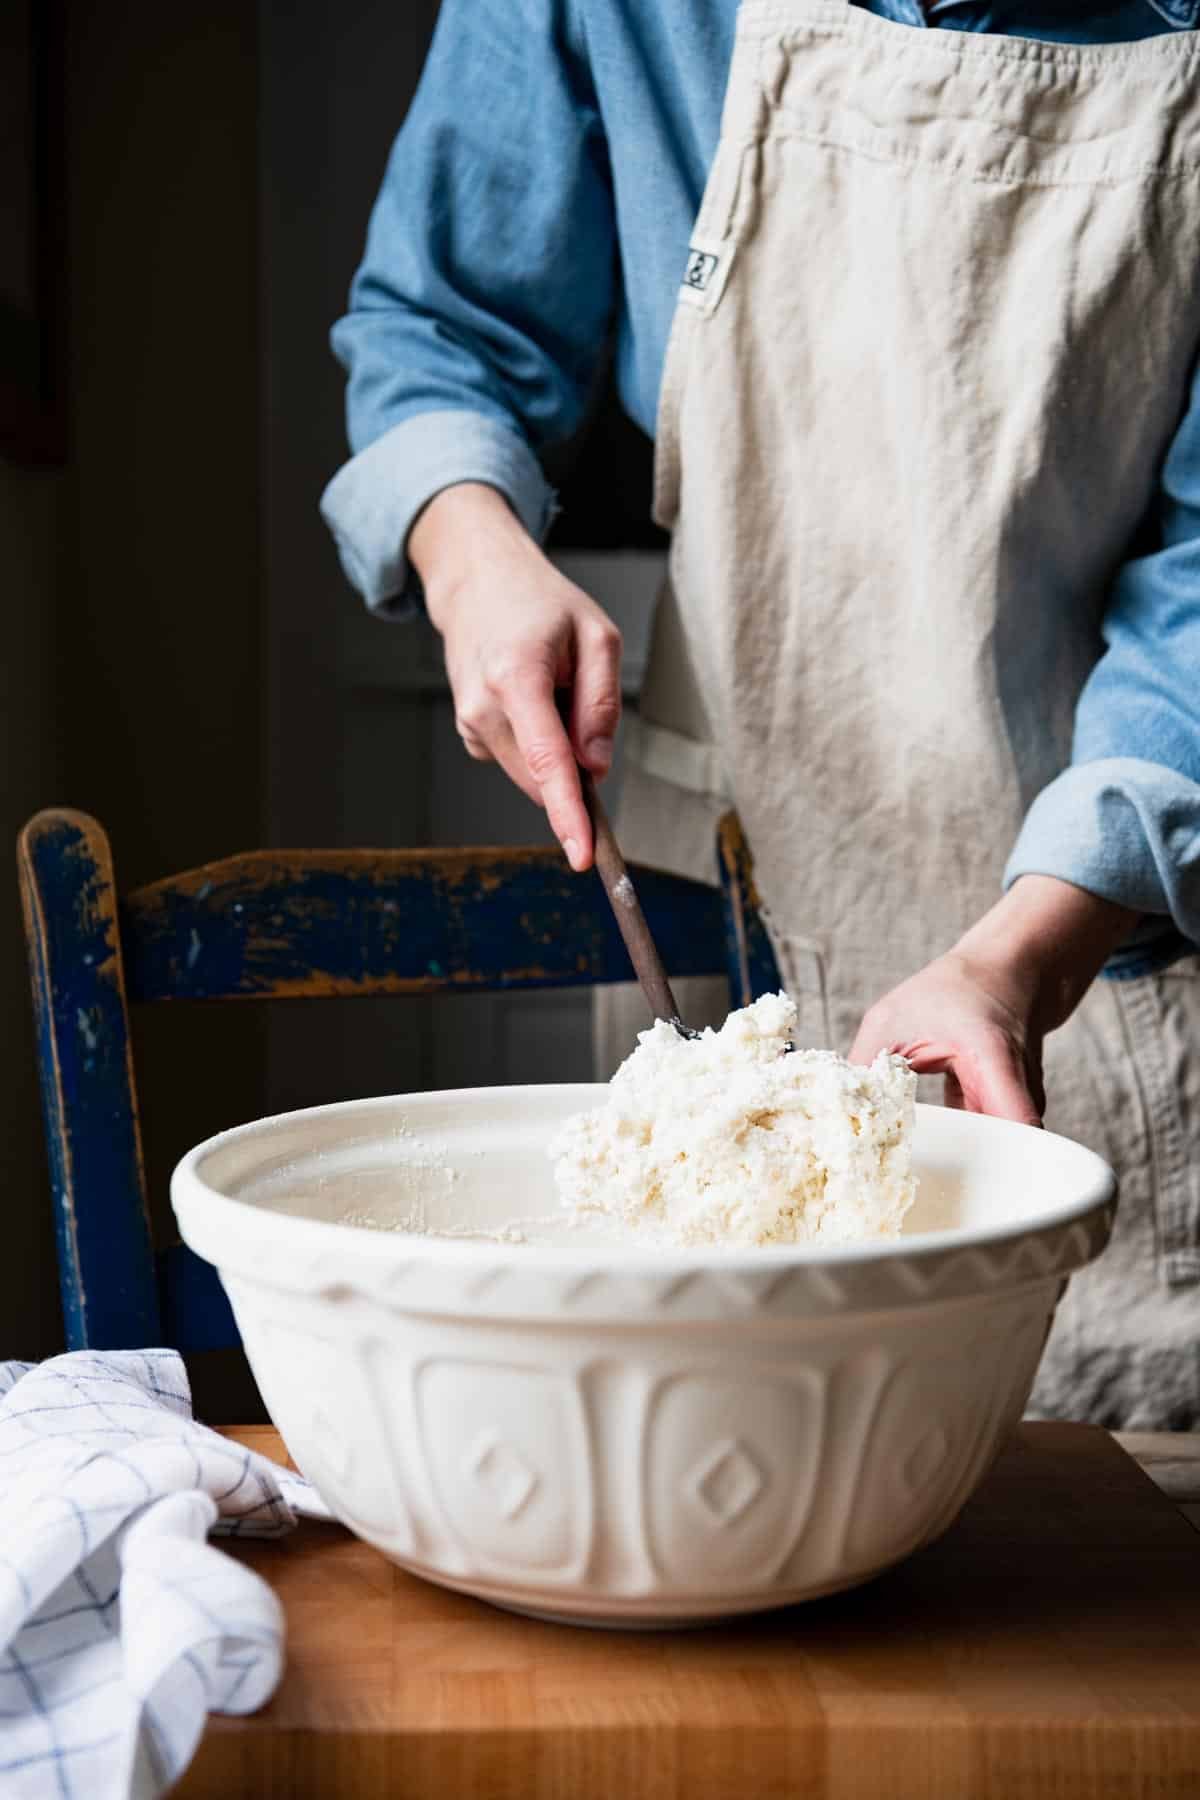
Pour in the cold buttermilk and stir with a wooden spoon until a soft, shaggy, sticky dough comes together. Stop as soon as you don’t see dry pockets of flour.
The dough should look a little rough and messy. That’s perfect!
** TIP: Use a wooden spoon rather than an electric mixer or food processor. The wooden spoon makes it easier to stop mixing at the right moment and avoid overworking the dough.
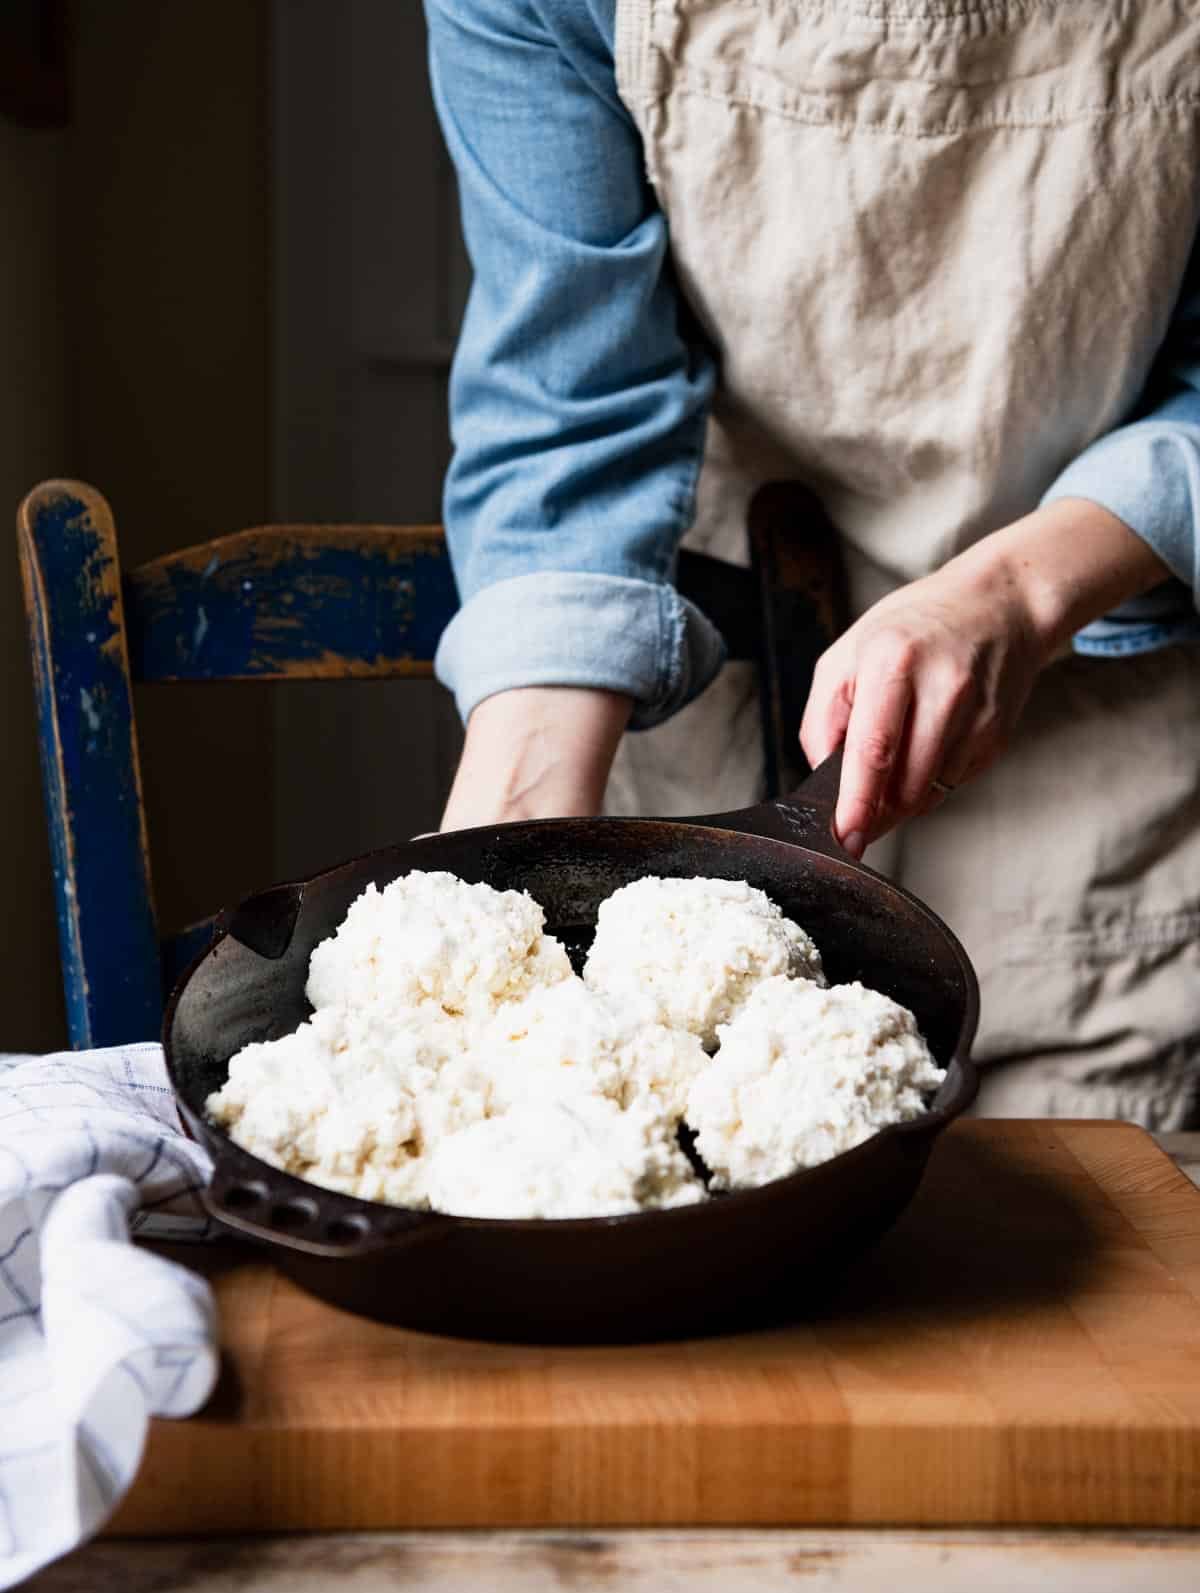
Step 5: Shape and Drop the Biscuits
Drop six equal mounds of dough into the prepared skillet. These can be rustic and shaggy; there’s no need to roll, smooth, or shape them.
The biscuits should be touching slightly in the pan, which helps them rise up tall rather than spreading out.
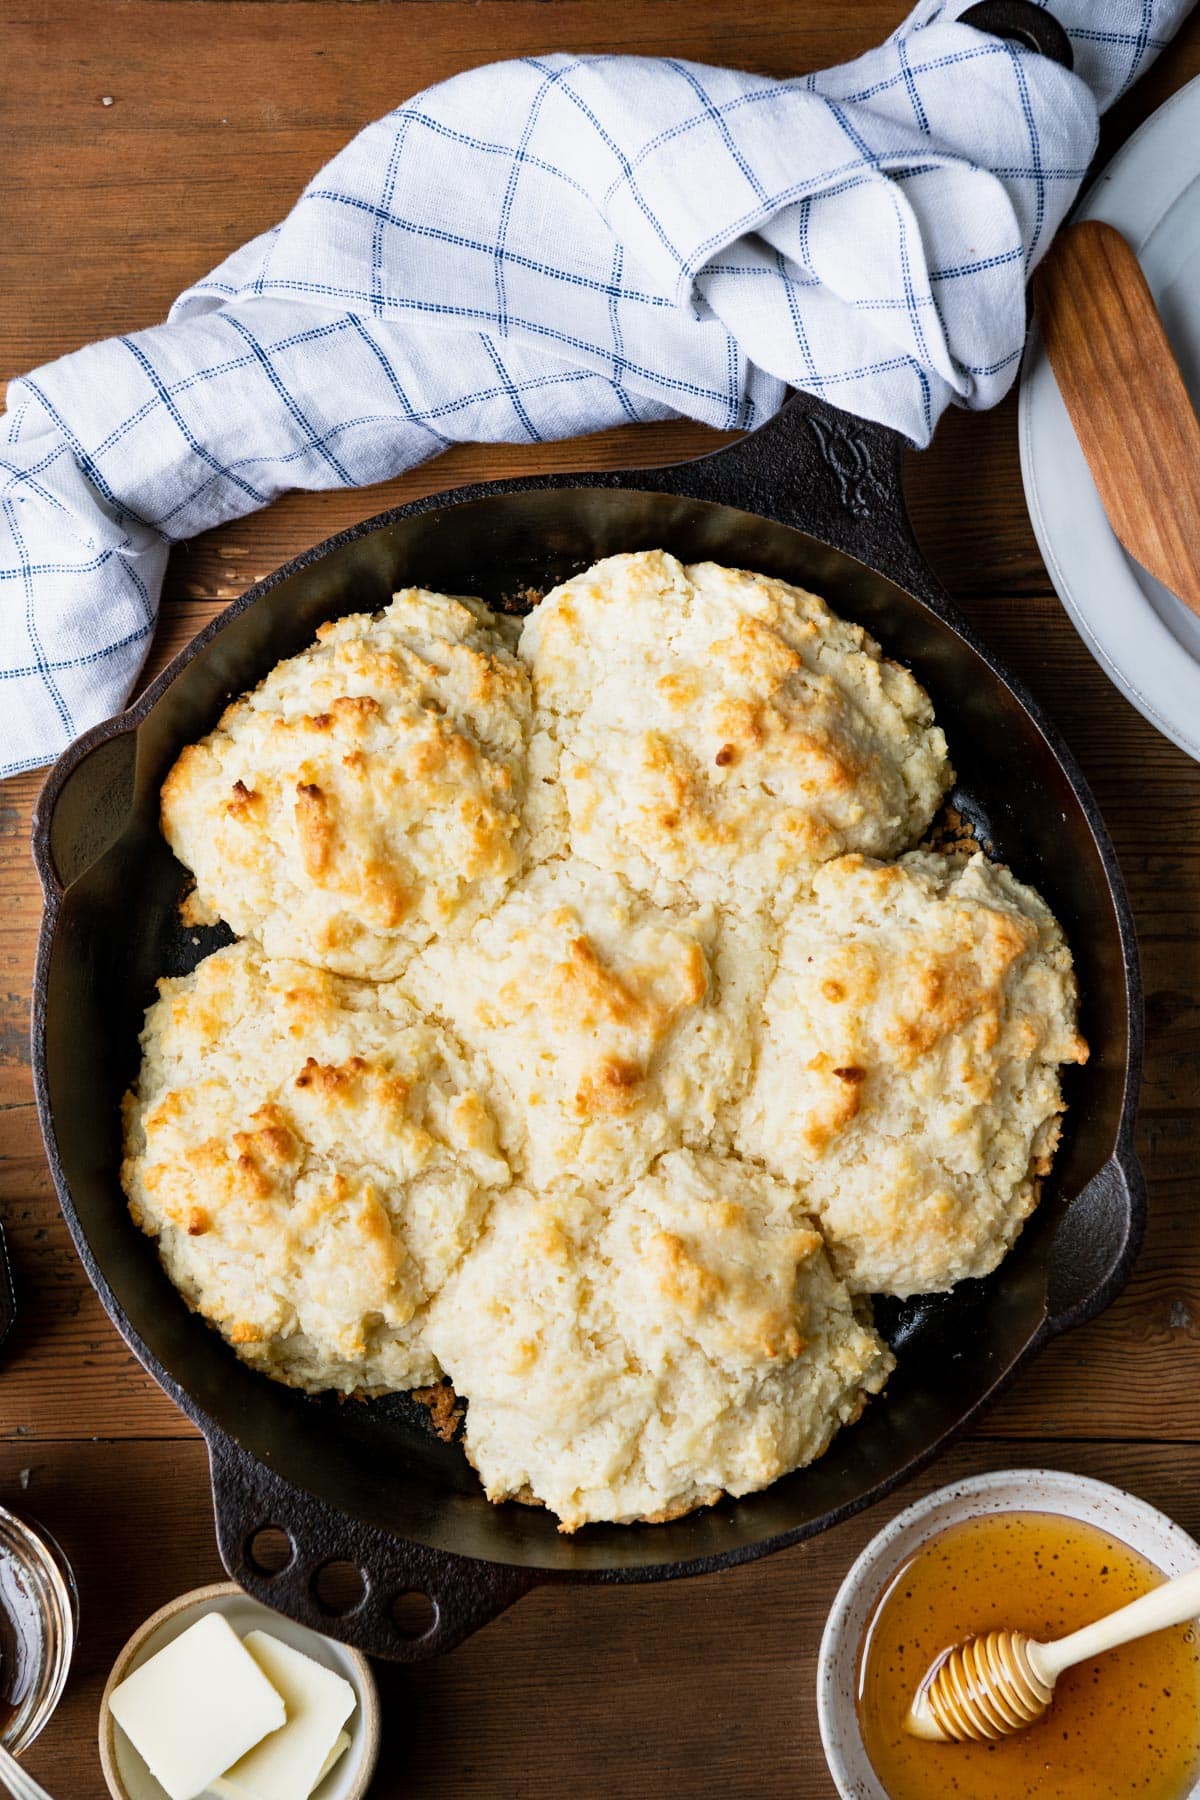
Step 6: Bake Until Golden
Transfer the skillet to the oven and bake until the tops are golden brown, about 20-25 minutes. The biscuits should have risen significantly and feel set when you gently press the top.
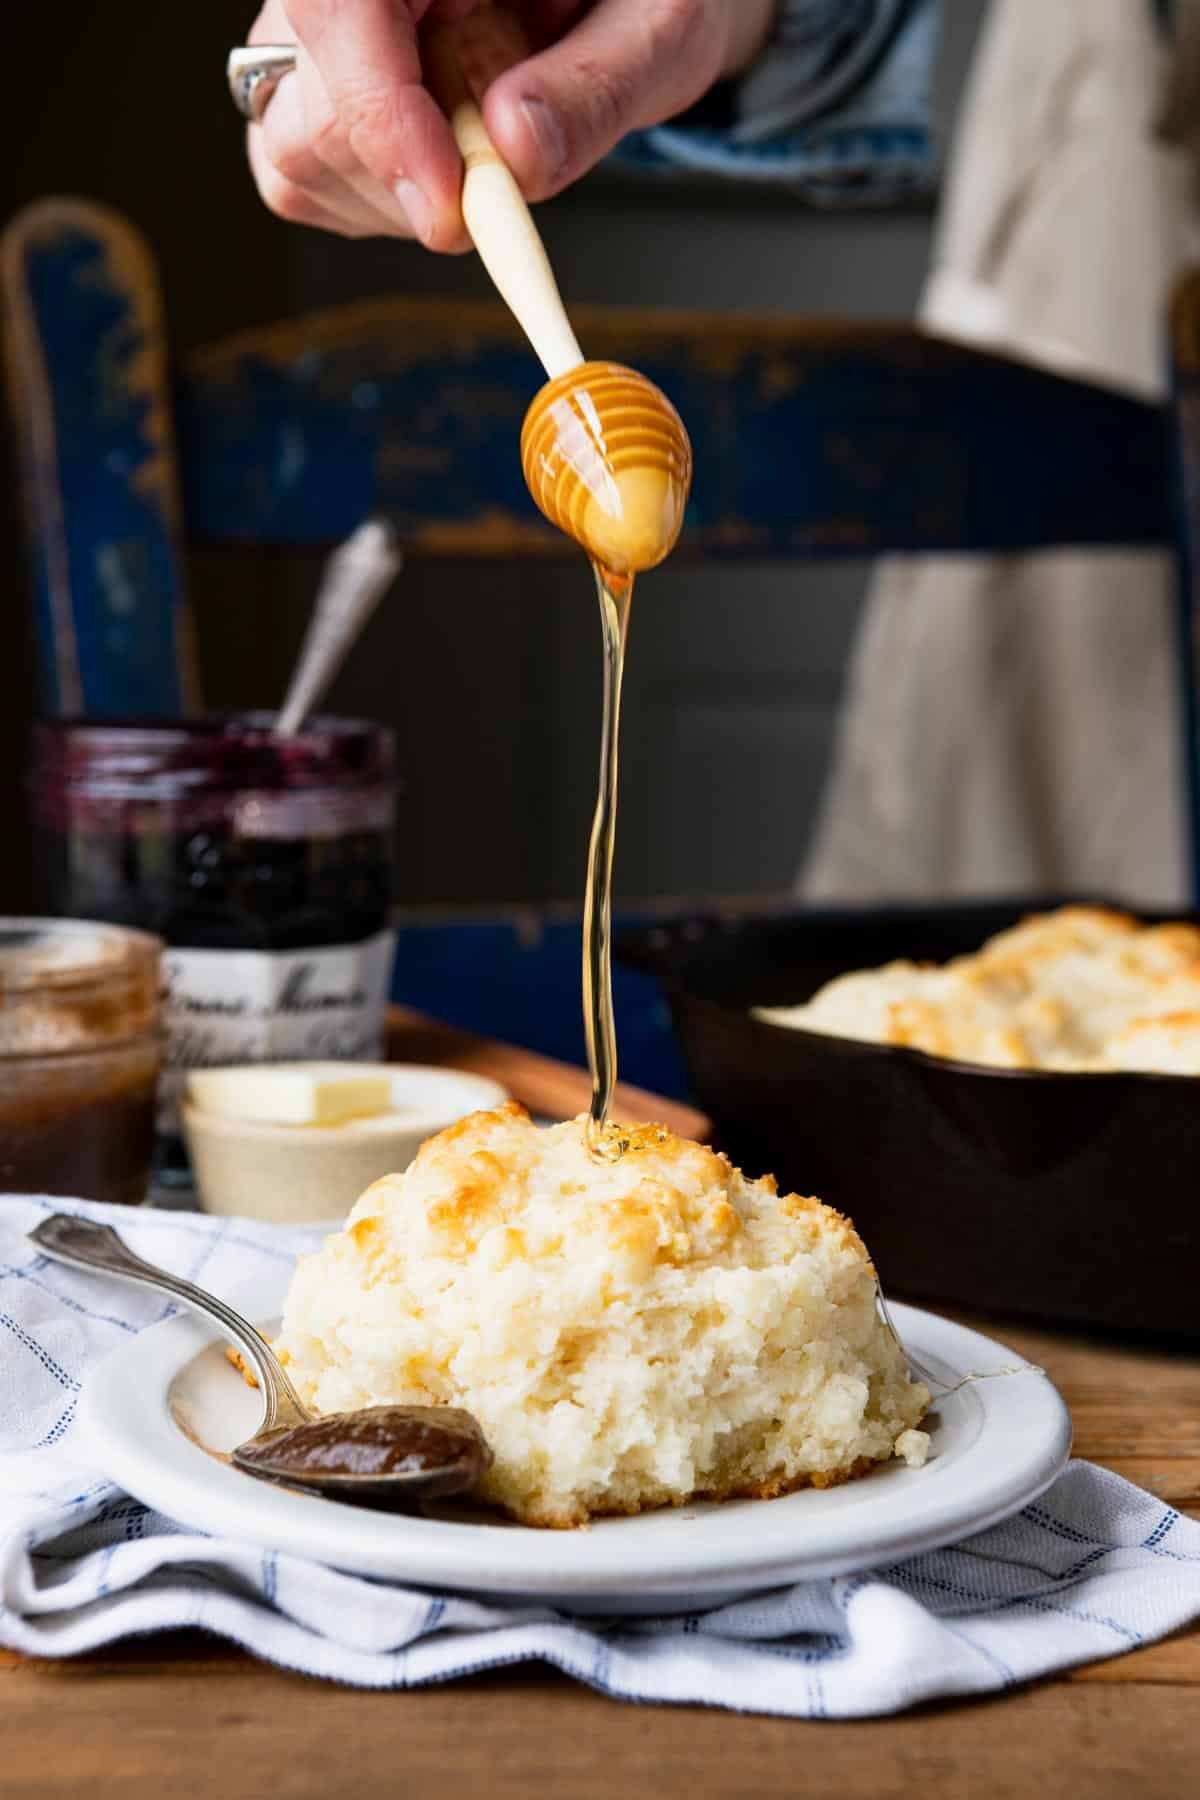
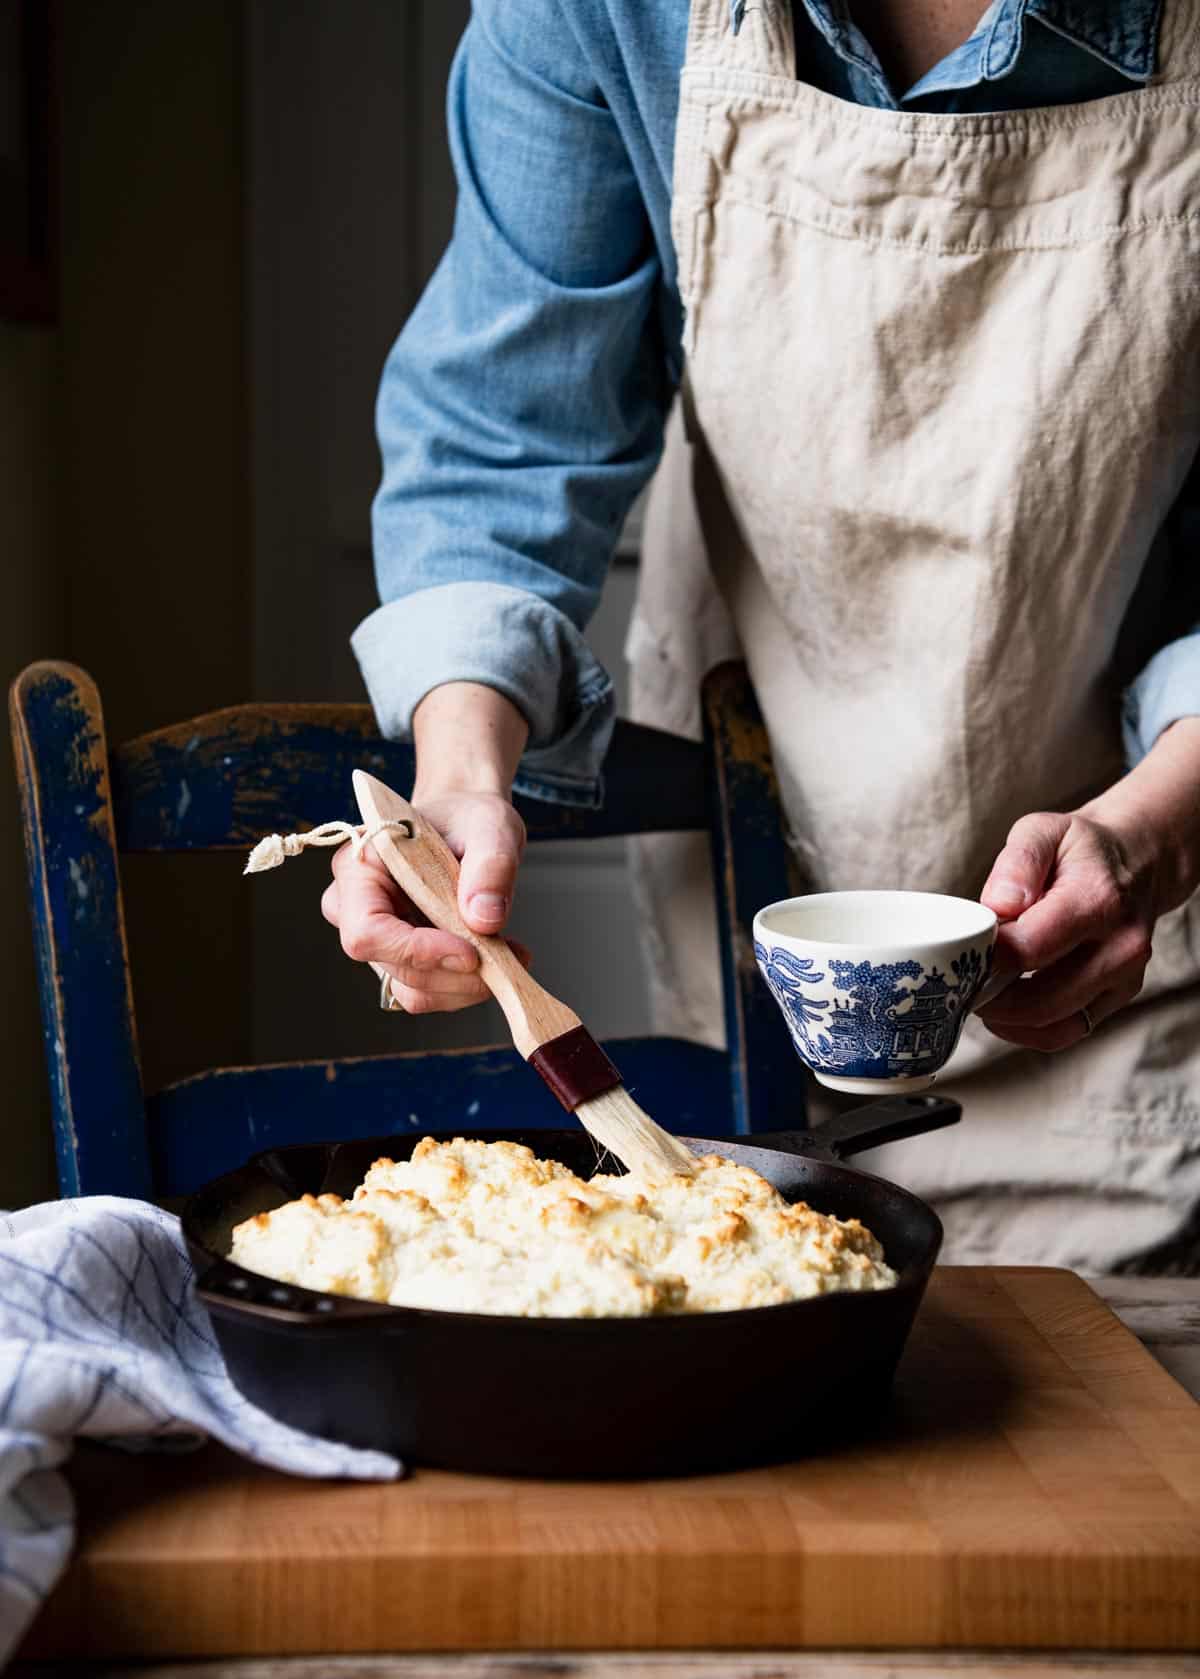
Step 7: Brush with Butter and Serve
Remove from the oven and immediately brush the warm biscuits with melted butter. This adds a ton of rich flavor and gives them a beautiful shine.
Let stand for about 5 minutes, then serve warm.
What to Serve with Cathead Biscuits
A cathead biscuit is one of those great comfort foods that’s suitable for just about any meal, at any time of day.
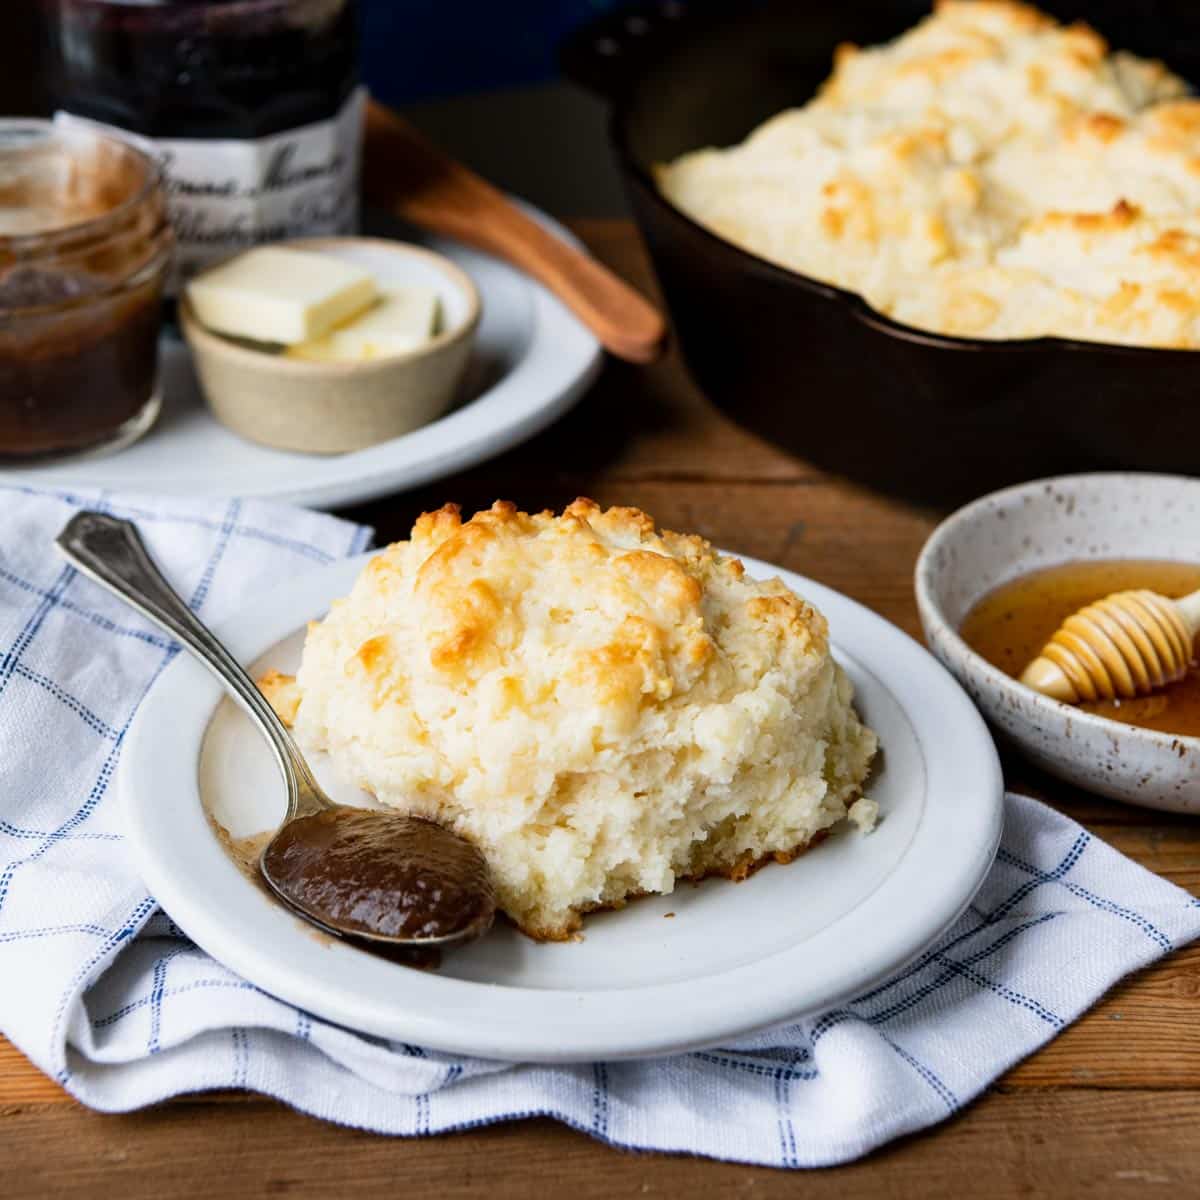
For breakfast, serve them with honey butter, apple butter, or your favorite jam. They’re also perfect split and filled with eggs, sausage, bacon, or cheese for a hearty breakfast sandwich. In Virginia, country ham biscuits are a classic! And of course, warm biscuits smothered in sausage gravy is a Southern breakfast staple.
For dinner, cathead biscuits are wonderful alongside a hearty chili, soup, or stew. They’re also great with barbecue, fried chicken, Dutch oven pot roast, slow cooker pot roast, corn chowder, hamburger casserole, chicken and dumpling soup, or any meal that needs a warm, buttery bread on the side.
Preparation and Storage Tips
Make Ahead: While they’re best served warm straight from the oven, you can bake the biscuits up to 3 days in advance. Store them in an airtight container at room temperature.
Reheat: Place day-old biscuits on a baking sheet in a 300°F oven for about 10 minutes to warm through and refresh.
How to Freeze: Allow the biscuits to cool to room temperature, then wrap tightly in an airtight container or freezer bag and store in the freezer for up to 3 months. Thaw on the counter overnight or in the microwave for a few seconds before reheating.
Recipe Variations
Buttermilk substitute: In a pinch, you can make your own buttermilk at home. Pour 1 ½ tablespoons of freshly squeezed lemon juice or white vinegar into a large measuring cup. Add enough milk to equal 1 ½ cups of liquid. Stir, let it sit for about 5 minutes, then use as directed.
Cathead biscuits without shortening: I use Crisco shortening for that great puffy, fluffy texture, but you can substitute lard or extra butter. If using all salted butter, decrease the salt slightly (try 1 teaspoon instead of 1 ¼ teaspoons).
Cathead cheese biscuits: Add 1 ½ cups of grated sharp cheddar cheese to the dough. You might also mix in a bit of garlic powder, thyme, rosemary, or chives for extra flavor.
Frequently Asked Questions
What is the difference between cathead biscuits and regular biscuits?
Cathead biscuits are larger, more rustic drop biscuits. Instead of rolling out the dough and cutting it with a biscuit cutter, you simply pinch off portions and drop them into a pan. They’re also typically fluffier and more tender than flaky, layered biscuits.
What kind of flour is best for cathead biscuits?
A soft, low-protein flour like White Lily gives the best results. It produces a lighter, more tender biscuit. Regular all-purpose flour works too, but Southern soft wheat flour makes a noticeable difference in texture.
Why are my biscuits dense instead of fluffy?
The most common cause is overworking the dough. Mix just until the ingredients come together and you don’t see dry flour, then stop. Adding too much flour can also make biscuits dense, so measure carefully and don’t add extra.
Can I make cathead biscuits without buttermilk?
Yes! Make a quick substitute by adding 1 ½ tablespoons of lemon juice or white vinegar to a measuring cup, then filling with milk to reach 1 ½ cups. Let it sit for 5 minutes before using.
How big should cathead biscuits be?
True to their name, cathead biscuits should be about the size of a cat’s head! This recipe makes 6 large biscuits. They’re meant to be substantial, so don’t be shy about making them big.
More Southern Biscuit Recipes
- Flaky Biscuits
- Angel Biscuits
- Cheddar Biscuits with Chives and Bacon
- 7UP Biscuits
- Southern Buttermilk Biscuits
And if you’re looking for more Southern comfort food to serve alongside, try Slow Cooker Chili, Ham and Beans, Virginia Brunswick Stew, or Crockpot Brunswick Stew.

Did you make this recipe?
If you enjoyed this recipe, please leave a comment with a 5-star review at the bottom of the post. Thank you!
Cathead Biscuits
Ingredients
- 3 cups all-purpose flour (I prefer White Lily brand)
- 1 tablespoon baking powder
- ½ teaspoon baking soda
- 1 ¼ teaspoons salt
- ½ cup (1 stick) salted butter, diced into small pieces
- 3 tablespoons shortening (such as Crisco), diced into small pieces
- 1 ½ cups whole buttermilk, well shaken
- 2 tablespoons melted salted butter, for brushing the tops
Instructions
- Place the oven rack in the upper-middle position. Preheat the oven to 425°F. Grease a 10-inch cast iron skillet or spray with cooking spray (or use an 8-inch or 9-inch round cake pan instead). Set aside.
- In a large bowl, whisk together flour, baking powder, baking soda, and salt. Add the diced butter and diced shortening. Use your fingers, a pastry cutter, or a fork to work the butter and shortening into the flour mixture until it resembles a coarse meal.
- Add the cold buttermilk; stir with a wooden spoon until the dough is combined (do not overmix). It will be sticky, which is fine!
- Drop six equal mounds of dough into the prepared skillet (these can be rustic and shaggy – no need to roll or smooth them out).
- Transfer the skillet to the oven and bake until golden brown, 20-25 minutes.
- Brush the warm biscuits with the melted butter. Let stand for about 5 minutes, and then serve warm.
Notes
- Do not overwork the dough. Use a wooden spoon or your hands to combine the ingredients just until you no longer see dry pockets of flour, then stop. Overmixing leads to dry, dense, or tough biscuits.
- Use a 10-inch cast iron skillet for the best texture. The cast iron retains and evenly distributes heat, so the biscuits get crispy on the outside while staying fluffy and soft inside.
- No cast iron? Drop the biscuit dough into a deep 9-inch or 8-inch cake pan or another 2-quart baking dish.
- Brush with melted butter right out of the oven. A quick swipe adds rich flavor and a beautiful golden shine.
- Buttermilk substitute: Pour 1½ tablespoons of lemon juice or white vinegar into a measuring cup, add milk to reach 1½ cups, stir, and let sit 5 minutes before using.
- Cathead cheese biscuits: Add 1½ cups of grated sharp cheddar cheese to the dough. Garlic powder, thyme, rosemary, or chives are nice additions too.
- Without shortening: Substitute lard or add 3 extra tablespoons of butter. If using all salted butter, reduce salt to 1 teaspoon.
- Flour matters: A soft, low-protein flour like White Lily gives the lightest, most tender biscuits. All-purpose works but Southern soft wheat flour makes a difference.
- Recipe slightly adapted from Smoke, Roots, Mountain, Harvest by Lauren McDuffie.
Nutrition
Originally published in July, 2023, this post was updated in December, 2025.


I was disappointed in this recipe due to the weightiness of the biscuits. I found the dough to be a bit too dry and crumbly to easily place in the pan. I used an iron skillet as recommended.
Biscuits weighty? That’s because you overworked the dough and developed too much gluten. Try using a spatula next time to bring the dough together – gently! I found the biscuits to be extremely light and fluffy. Too dry and crumbly? Add a touch more buttermilk. Scooping them out with an ice cream scoop – use the #12 green handle scoop – makes life easier. I got 10 nicely shaped biscuits with the #12 – 8 around the perimeter and 2 in the centre. Nice recipe – definitely a keeper. I like this style biscuit a lot more than the flaky variety.
Great tips, Bryan. Thank you!
Sorry, these biscuits were disgusting. They did not stick together at all. And no, I didn’t overwork the dough. They ruined my beef stew