Disclosure: This post may contain affiliate links. I may earn a small commission for my endorsement, recommendation, testimonial, and/or link to any products or services from this website.
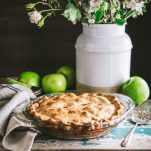
My mom’s easy apple pie recipe is the dessert that I grew up on, and my own children now love it as well! This simple, quick treat takes advantage of a shortcut store-bought crust and a flavorful no-cook filling — and nobody will ever know! With plenty of fresh apples and warm spices, plus a scoop of vanilla ice cream or a drizzle of caramel, this is the best apple pie recipe you’ll ever taste.
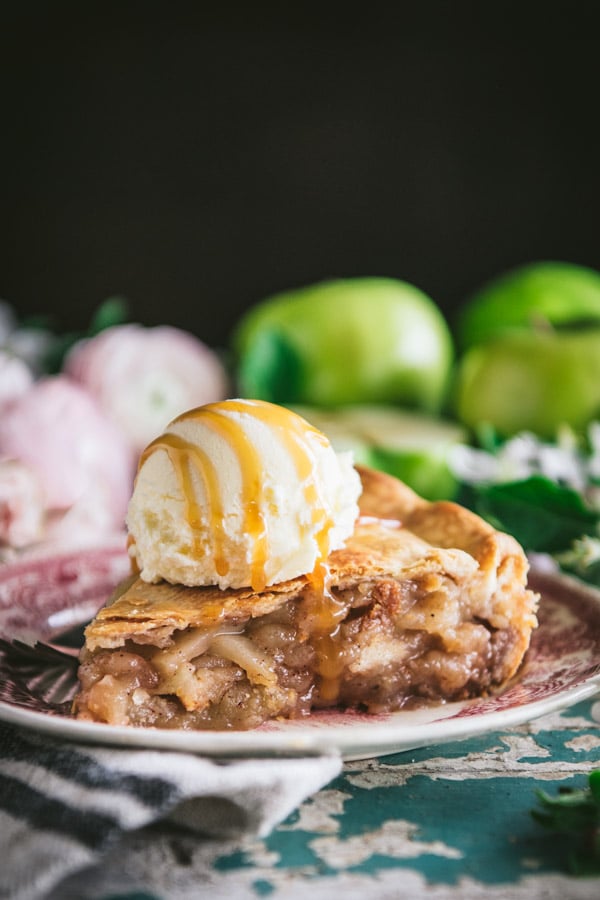
Table of Contents
- How to Make Easy Apple Pie | 1-Minute Video
- Why You’ll Love this Easy Apple Pie Recipe with Store Bought Crust
- Ingredients for Apple Pie
- The Best Apples for Apple Pie
- How to Make this Easy Apple Pie Recipe
- Preparation and Storage Tips
- Recipe Variations
- Tips for the Best Apple Pie Recipe
- Mom’s Easy Apple Pie Recipe
Love easy pie recipes as much as we do? Be sure to try this chocolate pudding pie, our favorite Dutch apple pie (apple crumble pie), and an easy peanut butter pie, too!
How to Make Easy Apple Pie | 1-Minute Video
Why You’ll Love this Easy Apple Pie Recipe with Store Bought Crust
This is an easy homemade apple pie recipe for those days when you don’t have time to whip up a buttery, flaky crust from scratch. The filling comes together in minutes with warm spices and loads of fresh apples, so it tastes like it came from Grandma’s kitchen. Best of all, you don’t need to pre-cook the crust or the apple filling before assembling the pie. It’s fool-proof…and it comes out perfectly every single time!
Whether it was intentional or by observation, I learned just about everything that I know in the kitchen from my mom. She is an amazing home cook, and she has always used smart, simple shortcuts to create easy recipes with minimal effort. When I moved into my first apartment as a 21-year-old who had just graduated from college, my mom gifted me this little journal that is full of her hand-written recipes from my childhood. She picked my favorites and she put them all in one place. How awesome is that?
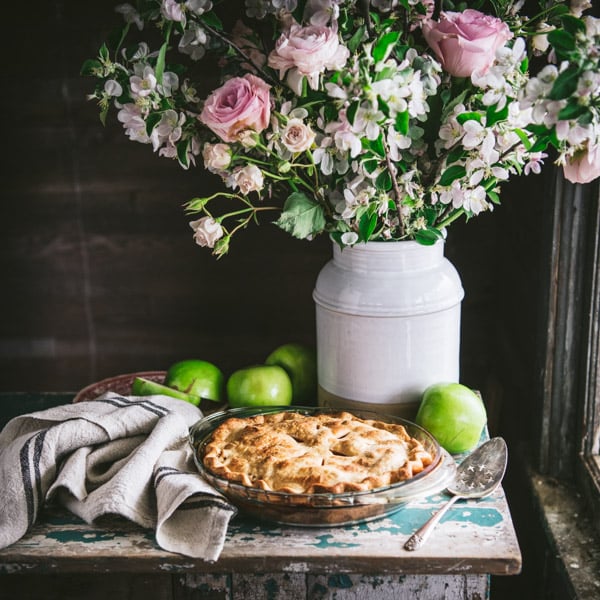
I cook from my mom’s recipes on a regular basis, and this easy apple pie is a consistent winner. I bring it to potlucks, share it at cookouts, and offer it as a dessert to finish off meals with friends and family. It’s ideal for that dinner party or Thanksgiving supper that you’re hosting, because you can bake the pie in advance and leave it sitting on your countertop until you’re ready to serve it. No last-minute hassle!
My mom made this pie so often when we were growing up that it kind of became her “signature” dessert. It was the treat that we eagerly expected — especially in the fall — whenever there was a special occasion. I have since learned that “Mom’s” apple pie recipe is just slightly adapted from a Pillsbury recipe that she got many years ago — but in my mind, Mom deserves all of the credit!
Ingredients for Apple Pie
This is just a quick overview of the simple ingredients that you’ll need for a classic apple pie recipe. As always, specific measurements and complete cooking instructions are included in the printable recipe box at the bottom of the post.
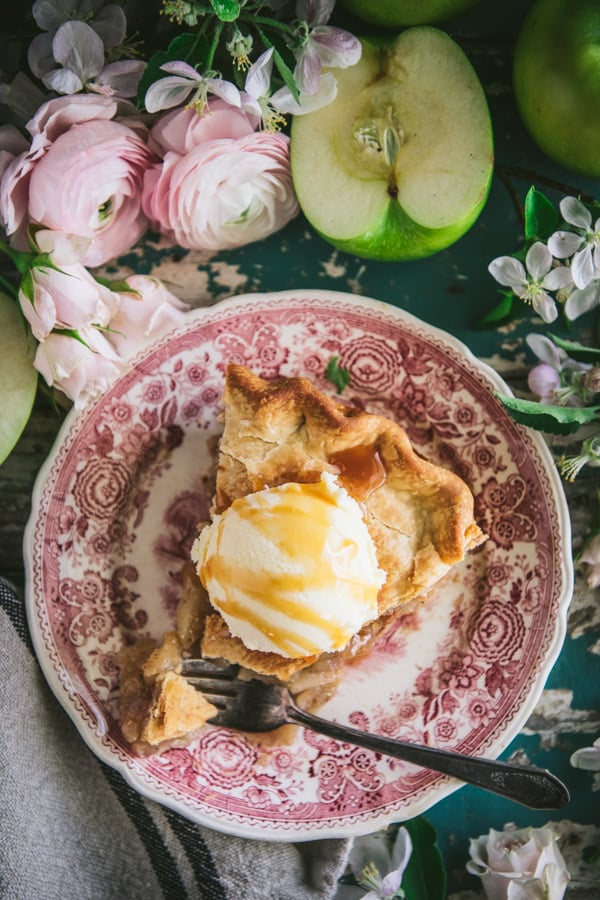
- Pie crust: your favorite pie crust will work, so feel free to make it from scratch if you like. My mom always uses a box of refrigerated Pillsbury pie crusts, so that’s what I’ve shown here. If you prefer a homemade crust, here is my favorite from-scratch all-butter double crust recipe.
- Apples: sweet-and-tart Granny Smith apples work best for the filling.
- Granulated sugar: to sweeten the filling.
- All-purpose flour: to thicken the filling.
- Lemon juice: a bright, acidic touch. It balances the sweetness of the fruit and enhances the apples’ natural flavors.
- Warm spices: I’ve added a few more warm spices to jazz it up a bit, while Mom’s original recipe used just cinnamon and nutmeg. You can adjust the seasoning as you like, using whatever you have on hand. My preferred “apple pie spice” blend includes cinnamon, nutmeg, allspice, ginger, and cardamom.
- Salt: balances the sweetness in the filling and enhances the other flavors.
The Best Apples for Apple Pie
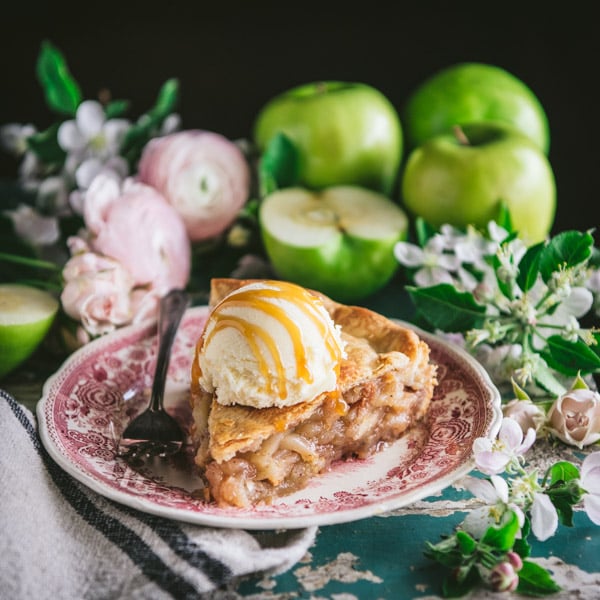
This is important, friends! My mom insists that you only use Granny Smith apples for two main reasons:
- they offer a nice balance of sweet-and-tart flavors; and
- the Granny Smith apples have a firm flesh that doesn’t break down and turn to mush as they bake.
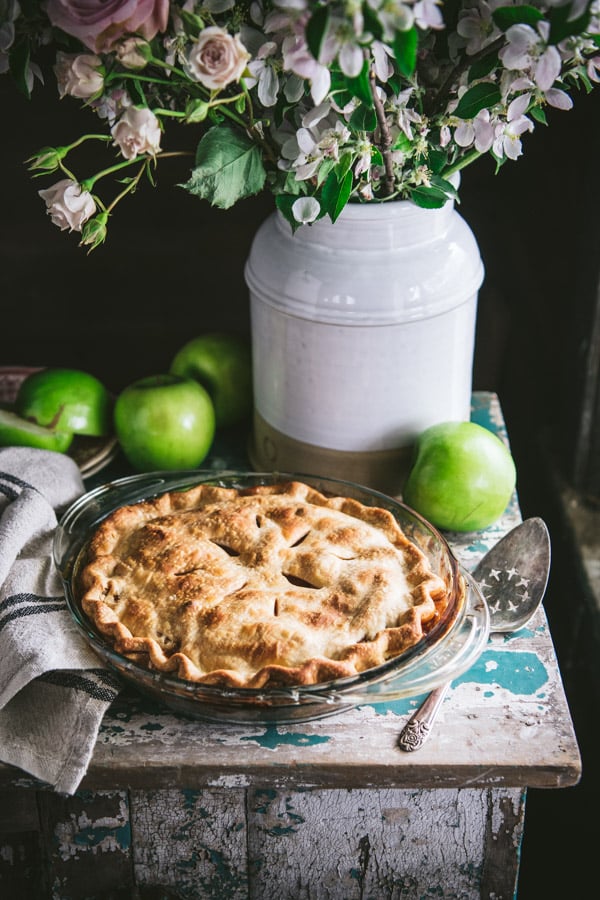
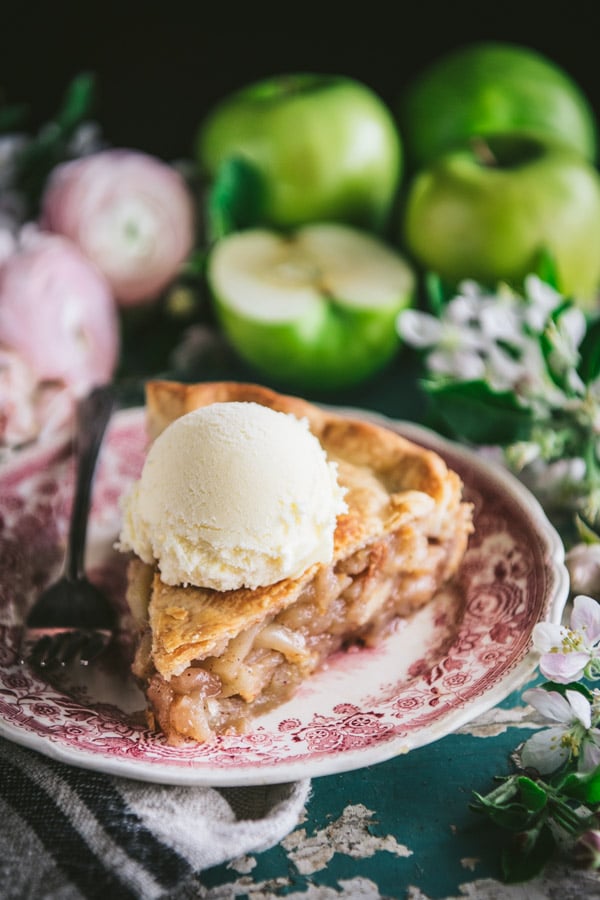
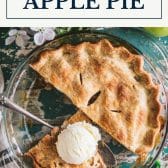
Can you see the nice slices of apple in this pie? They’re tender, but still in tact. Nobody wants applesauce in a pie (which is what you’ll get if using softer apples, such as golden delicious)!
That said, if you’re looking for a good substitute for the Granny Smith apples, I would suggest another similar variety with a firm flesh that won’t break down too easily. Other good baking apples include Honey Crisp, Fuji, Braeburn, Winesap, Pink Lady, and Jonagold.
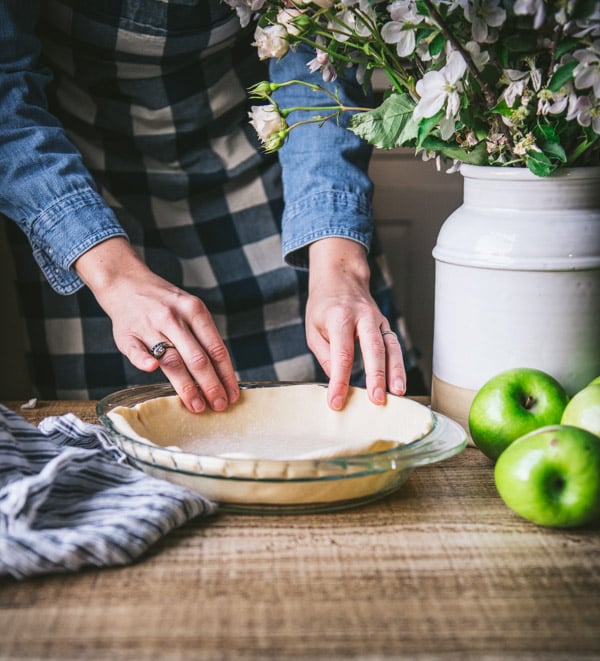
How many apples for apple pie?
The recipe calls for 6 cups of thinly sliced, peeled tart apples. The total number of apples will vary depending on the size of the fruit. In general, for this pie you will likely need about 5-6 medium-sized apples, or about 2 pounds weighed before peeling and slicing.
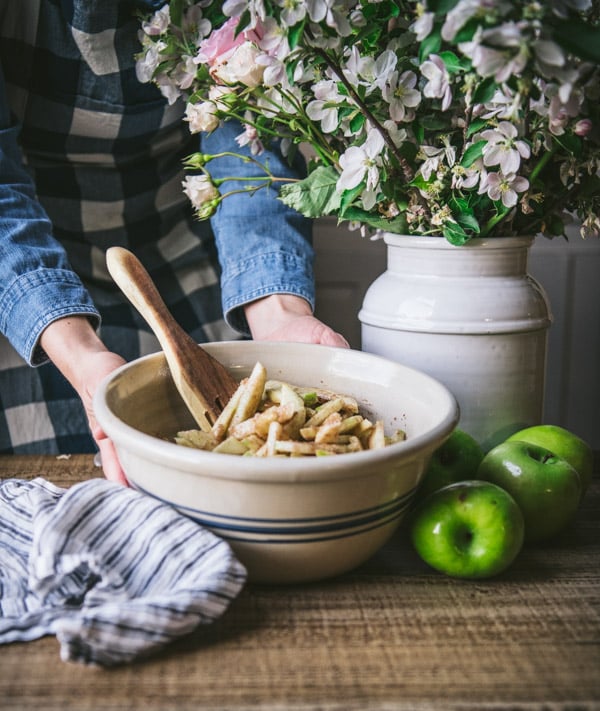
Do you cook apples before making a pie?
No, you don’t. Yet another reason this pie is so darn easy. While you do have to peel the apples, you don’t have to pre-bake the crust (heck, you don’t even need a rolling pin) and you don’t have to pre-cook the apple slices. Both the crust and the filling bake together in the oven.
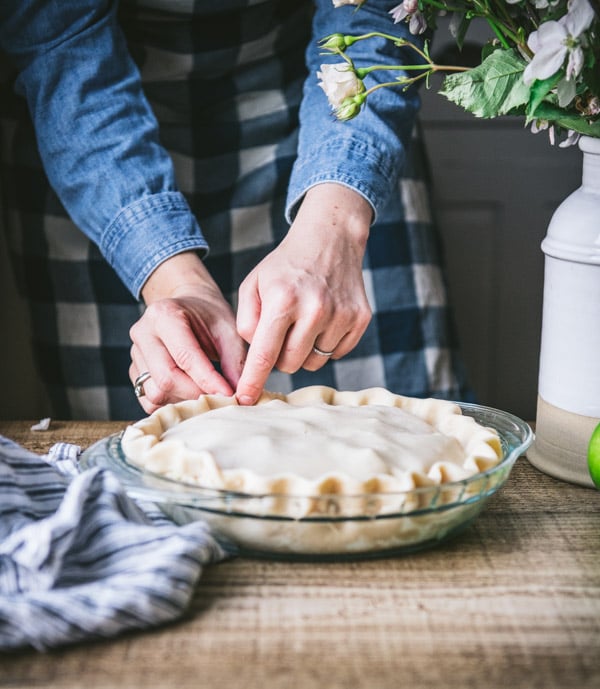
How to Make this Easy Apple Pie Recipe
Bring the pie crust to room temperature before you get started so that it’s easier to unroll without ripping. You’ll find detailed directions in the recipe card below, but here’s the quick version:
- Press one pie crust into the pie plate. Cover with plastic wrap and chill while you prepare the filling.
- Stir together the apple pie filling.
- Transfer the apple mixture to the crust in the pie pan.
- Place the second pie crust on top of the fruit.
- Crimp the edges of the crust, then cut slits in the top to vent. Place the pie plate on a rimmed baking sheet to catch any juices that bubble over, if desired.
- Bake until the apples are tender and the crust is golden brown.
- Cool for at least 2 hours before slicing and serving.
Preparation and Storage Tips
This pie does not need to be refrigerated right away. According to the U.S. Department of Agriculture, fruit pies made with sugar can be stored at room temperature for up to two days. We typically store the pie in the fridge after the first day, and then reheat individual slices in the microwave as necessary. The pie will keep for 3-4 days, but the crust tends to get soggy as it sits.
You can also freeze apple pie. Wrapped tightly, the baked apple pie will last for up to 4 months in the freezer. Thaw the pie at room temperature, then reheat in a 350°F oven until warmed through (about 30 minutes).
Recipe Variations
- Use a homemade pie crust instead of store-bought. This is my favorite all-butter double crust pie dough recipe.
- Use a variety of apples for more complex flavor. Just make sure that you’re picking firm apples that won’t break down during baking. For instance, try a combination of Granny Smith and Honeycrisp apples.
- Adjust the spices. My mom originally just used cinnamon and nutmeg, but I’ve added a handful of other warm spices for an even more flavorful filling. Feel free to omit those spices that you don’t have on hand, or use others that you enjoy. A touch of cloves is also a nice addition!
- For a “fancy” touch, brush the top crust with an egg wash (this helps it brown more and gives it a little shine) and sprinkle with coarse sugar and cinnamon before baking.
- If you have a few extra minutes, you can follow these instructions to create a lattice crust on top of your pie.
Tips for the Best Apple Pie Recipe
- Let the pie crust come to room temperature before you try to unroll it. Otherwise the cold pastry may tear or crack.
- Once the dough is unrolled, I like to cover the pie dish and chill it in the refrigerator for about 10-20 minutes before I add the filling. This isn’t necessary, but the colder pastry yields a flakier pie crust! You can do the same for the top layer — unroll the dough at room temperature, then cover and chill the dough before topping the pie.
- You do not need to prick the bottom crust with a fork, since you’re not blind-baking the crust.
- Halfway through the baking time (after 15-20 minutes), I suggest that you lightly cover the edges of the crust with strips of aluminum foil. This will prevent the edges from burning or getting too dark while the rest of the pie bakes.
- Allow the pie to sit on the counter on a wire rack to cool for about 2 hours before slicing. This gives the filling a chance to set.
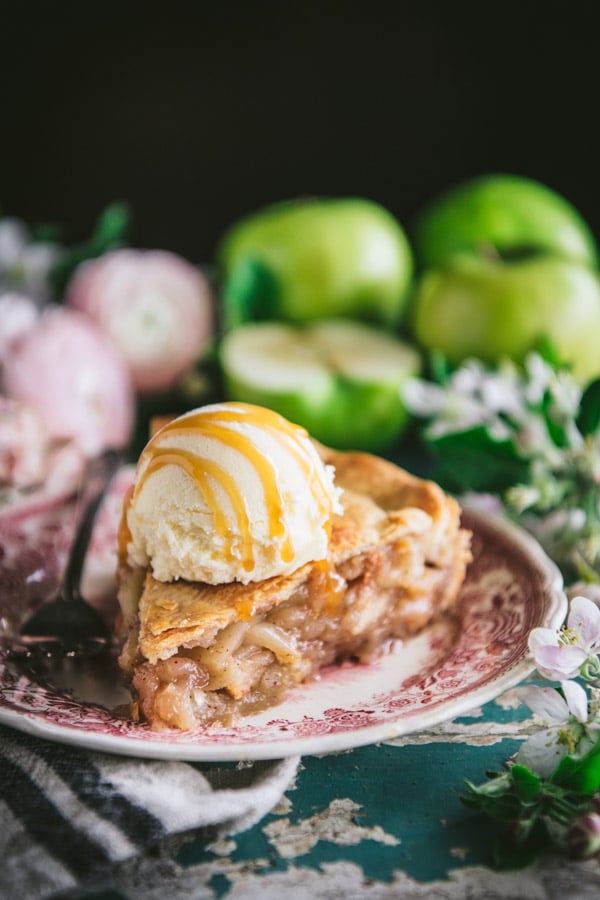
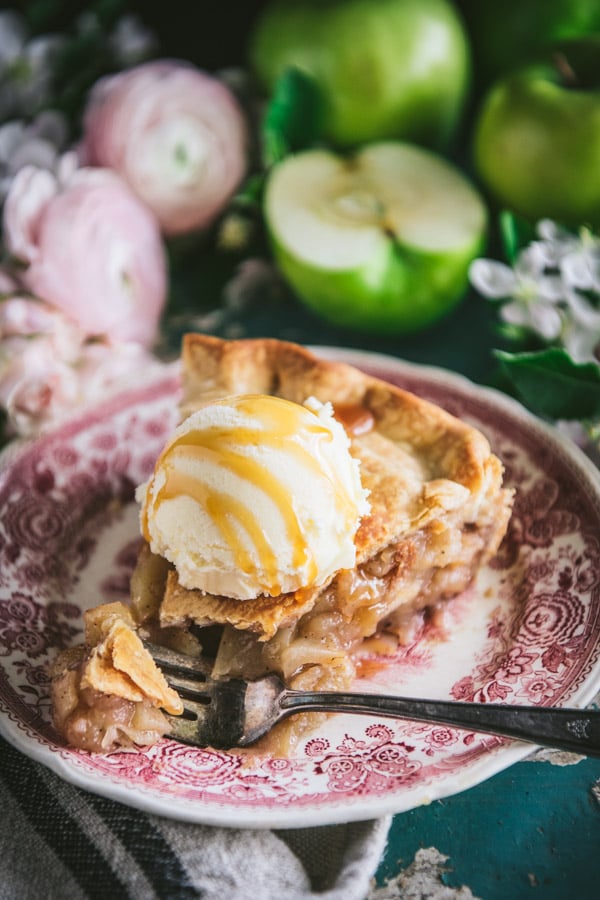
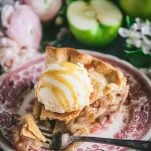
- Top each slice of pie with vanilla ice cream or butter pecan ice cream, freshly-whipped cream, or a drizzle of caramel sauce for a real treat!
This homemade easy apple pie recipe is the definition of All-American comfort food, and it certainly wins a blue ribbon in our minds. I hope that your family enjoys it as much as we do!
More Easy Apple Dessert Recipes to Try
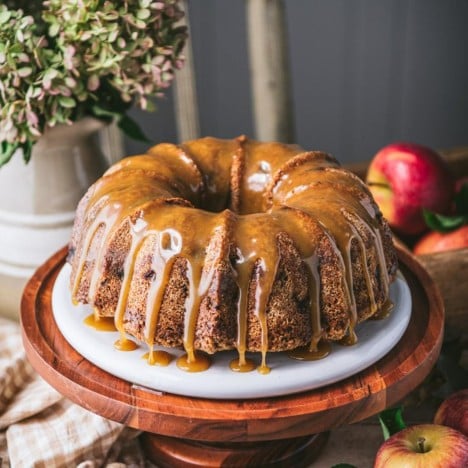
Apple Bundt Cake {Apple Dapple Cake}
3 hours hrs 30 minutes mins
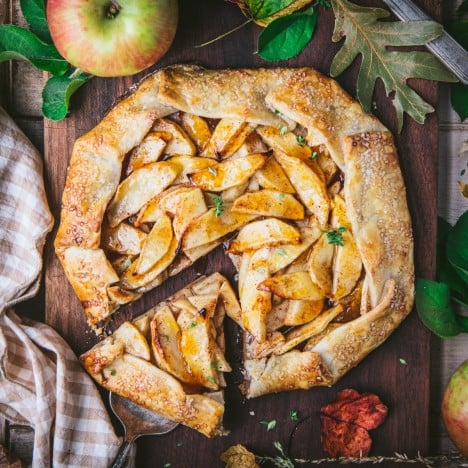
Apple Galette {Quick and Easy!}
3 hours hrs
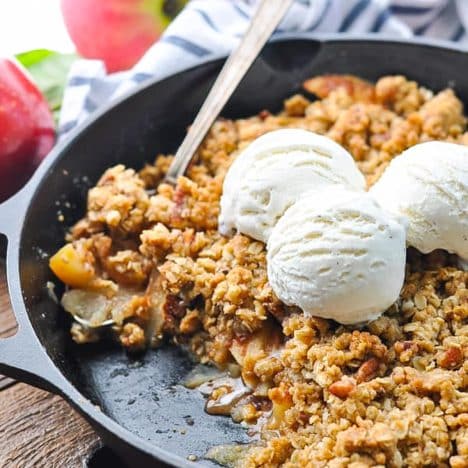
Easy Apple Crisp
1 hour hr 20 minutes mins
Mom’s Easy Apple Pie
Ingredients
- 1 (14.1 oz.) box refrigerated pie crusts (I use Pillsbury brand, which has 2 crusts in each box)
For the Filling:
- 6 cups peeled, thinly sliced Granny Smith apples (about 5-6 apples; approximately 2 lbs. before peeling and slicing)
- ¾ cup sugar
- 2 tablespoons all-purpose flour
- 1 tablespoon lemon juice
- 1 teaspoon ground cinnamon
- ¼ teaspoon ground allspice
- ¼ teaspoon ground ginger
- ¼ teaspoon ground nutmeg
- ¼ teaspoon salt
- ⅛ teaspoon ground cardamom
- Optional for serving: vanilla ice cream or whipped cream; caramel sauce
Instructions
- Preheat oven to 425°F. Bring refrigerated pie crusts to room temperature.
- Unroll 1 pie crust and press it into a 9-inch glass pie plate. Cover and chill the crust for 10-15 minutes while you prepare the filling (the cold pastry will yield an flakier crust).
- In a large bowl, toss together all of the filling ingredients.
- Transfer filling to the pie plate. Unroll the second pie crust and place it on top of the apples. Tuck the extra top crust under the bottom crust edge, pinching together with your fingers to seal or crimp. Cut slits in the top of the pie (to allow the steam to vent).
- Bake for 40-45 minutes, or until apples are tender and crust is golden brown. About halfway through the baking time, cover the edge of the crust with strips of aluminum foil to prevent the edges from becoming too dark.
- Cool pie on a wire rack for at least 2 hours before slicing and serving.
Video
Notes
- Let the pie crust come to room temperature before you try to unroll it. Otherwise the cold pastry may tear or crack.
- Once the dough is unrolled, I like to cover the dish and chill it in the refrigerator for about 10-20 minutes before I add the filling. This isn’t necessary, but the cold pastry yields a flakier pie crust! You can do the same for the top layer — unroll the dough at room temperature, then cover and chill the dough before topping the pie.
- Halfway through the baking time (after 15-20 minutes), I suggest that you lightly cover the edges of the crust with strips of aluminum foil. This will prevent the edges from burning or getting too dark while the rest of the pie bakes.
- Allow the pie to sit on the counter on a wire rack to cool for about 2 hours before you slice it and serve it. This gives the filling a chance to set.
- Top each slice of pie with vanilla ice cream or freshly-whipped cream for a real treat! A drizzle of caramel sauce is also great.
- Make your own pie crust from scratch. This is my favorite all-butter double crust recipe.
- Use a variety of apples for more complex flavor. Just make sure that you’re picking firm apples that won’t break down during baking. For instance, try a combination of Granny Smith and Honey Crisp apples.
- Adjust the spices. My mom originally just used cinnamon and nutmeg, but I’ve added a handful of other warm spices for an even more flavorful filling. Feel free to omit those spices that you don’t have on hand, or use others that you enjoy. A touch of cloves is also a nice addition!
Nutrition
This post was originally published in August, 2018. It was updated in June, 2022.








Can I make this Apple Pie a lattice top? Will it make a difference if i make it that way? PLEASE respond ASAP
Thanks 🙂
Hi, Marybel! I imagine that it would work just fine! I’ve never tried it that way, only because I don’t have the patience to weave the lattice. 🙂 Otherwise, I think it would be delicious.
I’m 24 and this is my first pie! This perfectly simple recipie is exactly what I was looking for! It’s baking now but I can’t wait to try it! Thanks for sharing!
That’s wonderful, Jadeesha! This is the first pie that I ever made, too. You’ll love it!
This is the same recipe on the crust box.
Thanks for letting me know, Tad! That’s probably where my mom originally got it! 🙂 I will make a note of that in the post!
This looks delicious! I have a question I’m taking this to an event and would rather use the aluminum metal pans would this change anything?
Hi, Liz! No, I don’t think it should change the instructions at all. 🙂
I just made three of these pies one that is going to be consumed tomorrow and two on Thanksgiving should I wrap them after the cooking period and leave them out on counter or put them in fridge?
Hi, Robyn! You can keep baked apple pies at room temperature for up to two days. If the pie has been sliced, cover loosely with foil or plastic wrap. Apple pie will keep for an additional 2-3 days in the refrigerator, loosely covered with foil or plastic wrap.
Did you use a regular dish for baking or deep pie plate? Also can i use a ceramic dish? Thanks
Hey, Jessica! I used a regular pie plate (not deep dish). You can definitely use the ceramic dish, you just might have to adjust the cooking time slightly, so keep an eye on it. 🙂
My Pyrex pie dish is 91/2 in. Can I use that?
Thank You
Yes, I think that should be fine! 🙂
I am baking this Apple pie first thing in the morning to go with our after lunch with friends. I’ll let you know how things turn out. Thanks again. By: Pam
Awesome! Enjoy, Pam! My son loves it for breakfast. 🙂
What a gorgeous pie! It really is such a wonderful feeling when you pull a mountain of a pie out of the oven and it’s all golden brown and perfect!
I’m 28 and this is my first pie! This perfectly simple recipe is exactly what I was looking for! It’s baking now but I can’t wait to try it! Thanks for sharing!
I hope that you enjoyed it, Helena! It’s the first pie that I ever made, too. Such a great recipe to start with! 🙂
Two people with the same reviews word for word
Would the recipe be the same /cooking time etc… if I made with fresh blackberries (which I have on hand from our garden!)?
Hi, Brandy! I’ve honestly never tried this pie recipe with berries, so I’m not sure how it would work. If I have fresh blackberries, I always make this cobbler — it’s the BEST!!! https://www.theseasonedmom.com/the-best-berry-cobbler/ 🙂
Love this recipe!!
Thanks, Kelly! I’m so glad to hear that! 🙂
I’m 24 and this was my first pie… it turned out so well and tastes AMAZING! I cut into it a little early because I couldn’t wait, and it is a little runny but I think the syrup will thicken up as it sits. 10/10, can’t wait to make it again!
Thanks, Hailey!!
I added some salted caramel chips to the apple mixture. And, because I didn’t want to make my pie crust from scratch tonight, I used the second crust in a pack of two frozen crusts, rolled it out a bit, and used it for the top crust. We are looking forward to enjoying pie tonight for dessert.
Sounds great, Valerie! I hope you enjoyed that pie! 🙂
Hi Blair!!
I’m making the pie now, Its been in the over for 40 minutes, but I took it out to do the foil strips as you suggested, so I gave it an extra 15 minutes, as it was looking quite pale still!
How should the pie coloring look like when it is ready? Kindly let me know, as really I have no idea!
With muffins, I know!
Sami
Thanks
Hi, Sami! The pie should be a deep golden brown and flaky. Pale isn’t good, but neither is burned. 🙂 It’s similar to muffins or cookies — golden brown. Hope that helps, and enjoy the pie!
I have made my number 4 apple pie n I didn’t have any grannysmiths apples I only pink lady’s n fugi n little red apples so I tried my luck with the pink lady’s n the fugi apple n it was very good when it got done but it got kinda( just little bit) scorched on one side on the bottom but it didn’t change the taste of the pie at all n I just that changing the apples didn’t cause that n that’s it’s ok to change the apples bc I only can do with what I have n I still got more apples n right now I got some pink ladies n some little red apples will they be ok to use next time thanks for this recipe n my mom begged to make another bc it’s been awhile since I had made one by the way can you send me some easy recipes to my email on other pie’s I would greatly appreciate it if you could send me some bc I’m getting into all this baking stuff lol n I’m cooking type
Hi, Rose! I’m so glad that you and your mom enjoy the pie! You can find all of the pie recipes on my site at this link: https://www.theseasonedmom.com/?s=pie
Hope that helps!
Is the pie crust sweet pastry or?
Thank you
Hi, Doriette! No, the pie crust is not sweet. It’s just a regular buttery, flakey pastry crust.
Hi, thanks for the recipe,
As it was branded as an easy apple pie, I had a go at it even though I had never tried it before. Disaster! No one told me to put a tray or foil under the glass pie plate. During baking, some of the apples seeped over the edge of the plate and onto the bottom of the oven, where it proceeded to burn and cover our whole apartment in thick smoke. So please please please , if you are catering to inexperienced cooks, please mention these little details for us newbies.
Thanks, Paul
As a ps, the pie came out great, the kids loved it! Totally worth the little hiccup.
Thank you! 🙂
This is my first apple pie.. the recipe was very easy to follow I just hope it turns out like your pics. Thank you and your mother
Thanks, Angie! I hope you enjoyed the pie!
Super easy and made for a great first pie. I will definitely be using this recipe again, but mine turned out a bit sour for my taste. Do you find that yours is also on the tarte side or maybe I should just choose a different apple other than granny smith for my own tastes?
Hi, Sheyla! The Granny Smith apples definitely give it a slightly tart taste, which we prefer as a contrast to the sweet pie. You can absolutely use a different apple if you don’t love that sweet-tart taste. I would recommend another firm-flesh apples (like Honeycrisp) so that the apple slices don’t turn to mush in the oven. 🙂
Can’t wait to try this recipe! I remember my mom putting a coat of butter or egg wash (can’t remember) on top before it goes in the oven, do you suggest that or go in dry? I wonder what difference it makes? Thanks!
Hi, Kelley! An egg wash or butter will help the crust to brown more. It won’t hurt anything, but I don’t think you need it here, because the crust tends to get plenty brown on its own. 🙂
I’m mad. My pie crust on the bottom was not cooked. The inside of the pie was all watery. Not happy. Worst. Pie. Ever.
Single dad here…
Im going to try this for Thanksgiving, for my two sons and I.
Can i add sugar, or butter, or egg wash to the crust? Or should I leave it alone?
Oooops, I just saw the post above mine in October where egg wash is mentioned
Hi, Richard! You can definitely add some sugar to the crust. I don’t think it needs any extra butter, but if you want a shiny browned finish, you can certainly use an egg wash. Totally up to you — but I think it’s perfect as it is. 🙂
Do I cook filling first before putting in crust ? I did not see this in instructions?
Nope, the apples will cook inside the crust in the oven. 🙂
Do I cook filling on stove . Before I put filling in crust??
Hi, Patsy! No, you don’t need to cook the filling before you put it in the pie crust. The filling will cook in the oven with the crust. Enjoy!
Love love this recipe! A very big thanks to your mom for taking the time to make your recipe book and you for sharing it with the world! AMAZING!
Thank you so much, Julie! It makes me happy to know that others are enjoying our favorite recipes, too. 🙂
This pie is really delicious! The lemon is so bright and the Granny Smith are just the right amount of tart! Thanks for sharing! It will a staple pie for me, and as a beginner baker, I appreciate the simplicity, yet full flavored punch this pie brings! Good job mama! 🙂
Wonderful! I’m so glad that you liked it, Hope, and that it worked for you! I’m a “beginner” pie baker too, and this is always my go-to recipe. So simple!
Hi!
This will be my first pie! Was wondering if I can put that course sugar on top, like some pies you’d find in a bakery? And if so, when should I add it?
Thanks!
Yes! You can definitely add sugar to the top. I would add it just before baking so that it sticks to the dough. Enjoy! 🙂
I JUST DID THIS PIE. MY BOYFRIEND LOVED IT!! I GUESS THIS WILL BE MY GO TO RECIPE NOW ON EVERY THANKSGIVING. Thank you so much.
Yay! I’m so happy to hear that, Gabriela!
Does this pie freeze well?
Yes, you can freeze this pie either before OR after baking. It’s often best to freeze an unbaked pie, though, so that its texture and consistency later will be more like fresh pie.
This is a great recipe that I botched up by neglecting to put foil over the top so the crust was a bit more done than I wanted. Even so, it is so good I don’t even need to eat it with the vanilla ice cream I bought to go with it.
Thank you! 🙂
Hi, you mention vanilla ice cream as a topping, would whipping cream be as good ?
Sure! Either will be great!
I tripled the recipe and split it between two deep dish pie crusts. I lowered the temperature to 375 degrees and cooked it for an hour to allow the apples to fully cook. Now I just have to wait for the results! Thanks for the recipe. Oh, and I just had to add 1/4 tsp of cloves per recipe for my personal taste.
Sounds delicious. Let me know how that works out, Jeffrey! 🙂
Hi Blair, excited to make your apple pie recipe for a dinner party tomorrow night… U mentioned to preheat oven at 425 degrees, at what temperature do I bake it? Thank you so much!!!!
Hi, Sula! The pie bakes in the 425 degree F oven. Enjoy!
Fantastic, easy, delicious recipe…. It is the perfect combo of sweet & tart. I have made this numerous times since I first found it (I have it memorized now 😉 ) and everybody loves it! My family thinks I’m a genius xoxo
Thanks, Annemarie! That makes me so happy to hear. Thank you for taking the time to leave a note!
First time ever baking an apple pie. Recipe seems easy enough- pie in oven, can’t wait to taste it! Looks delicious! Thanks!
Wonderful! Hope you enjoyed it, Martha!
Would i leave some filling out if i use a 8 3/4 in pie dish?
Hi, Andres! Nope, that should work fine. Enjoy!
I’m gonna try to bake your apple pie receipt but I don’t have lemon juice or nutmeg can I substitute allspice for the nutmeg n will store bought pie crust be fine bc I don’t think I can make pie crust from scratch n it’s my first time making an apple pie n I have 8 apples to do this with omg I hope I can pull your receipt off just let me know if that is ok to leave out the lemon juice substitute the allspice for the nutmeg I have everything else thanks Rose
Hi, Rose! I think those changes will be fine. Enjoy!
That is helpful to me too, thank you.
I haven’t cooked this recipe yet, browsing. I don’t have store crust, I wish u slipped in the alternative ‘home made’ crust also lol. My 1st apple pie was at 11 yrs old- 40 yrs ago!!! Can I shave walnuts in? Oatmeal crisp pie? I have 8 bags of apples lol.
Hi! Yes, you can definitely use a homemade crust — any that you prefer. I don’t have a favorite crust recipe to recommend. Definitely try the walnuts, too. I’m sure they would be delicious!
I did this this morning. This was the first time I’ve ever done a homemade pie. I’m in my 40s and I just don’t cook or bake. My mom took my girls Apple picking last weekend so I needed to do something. I found your recipe and “easy” caught my eye. I didn’t peel the apples cause well, lazy and didn’t have any nutmeg. So I was a bit nervous to try. This came out amazing and I’m so impressed with myself! Thank you!
That’s amazing! I’m so glad that you gave it a shot and that it worked out well! 🙂
Boy I hope that these 2 apple pies come out good I tried to double your recipe but I don’t think it’s right bc there’s a lot of of cinnamon lol but I hope it’ will be ok this my 3rd time making your recipe lol I still don’t have nutmeg yet n I’m still using the all spice in it n it don’t seem to make a difference I guess but everyone loves it so we will see on these 2 pies how well they go over n if they don’t go over well I know not to try to double it next time thanks Rose
Hi, Rose! Glad that it’s worked for you in the past. Hope your double recipe turned out well, too. 🙂
This pie was fantastic! This was the first pie I ever made , it was super easy! I can’t wait to try your apple cranberry crisp. I froze one of the pies before I baked it. When I bake it do I have to thaw the pie first? Or can I bake it frozen?
Hi, Lisa! I would bake the pie directly from the freezer — don’t thaw first. You’ll need to increase the baking time, so cover loosely with foil when it starts to get dark on top. Hope you love that apple cranberry crisp. It’s one of my favorite fall desserts!!
Well my apple pies are in the oven as we speak n they are smelling good n last night I went ahead n mixed the dry ingredients up so it would save me me some time bc it takes me forever to peel apples n core them to n all that said n I hope that didn’t mess up anything by doing that bc when I mixed up the apples together with the ingredients it’ was kinda syrupy but I made sure everything was mixed very well n the crust looks amazing right now so I will let you know how it taste when it’s ready n my mom can’t wait until it’s time for her to dig in lol bc she loves it when I bake them n her bday is on Wednesday so this is her birthday gift from me Rose
That’s great, Rose! Baking for my friends and family is my favorite way to show love. Such a lovely gift for your mom. 🙂
Made this for Thanksgiving! It was simple and DELICIOUS!
Thank you!!!
Wonderful! Thanks for letting me know. Happy holidays!
Just popped one in the oven, but I’m trying it with Autumn Glory apples this time. While it cooks, I’m prepping for a blackberry cobbler, per your recipe. Made one Thursday morning & was gone by Friday morning, had the last little bit for breakfast! I must say, I’ve tried a few different recipes, but yours comes the closet to the homemade blackberry cobblers I grew up enjoying along the banks of the Shenandoah river as a child, Thank you!
That’s wonderful to hear, Kathryn! Thank you so much for your kind note!
This apple pie was a hit, delicious!!
I made a little change, I used gala apples because that is all I had. I added about a 1/4 cup of brown sugar and 1/4 teaspoon of vanilla. Gala apples are sweet so next time I am
going to reduce white sugar to half a cup.
Sounds great! Thank you, and I’m so glad that you enjoyed it! 🙂
My daughter and I made this and it is yummy! Wanted a simple recipe and this was perfect! We will make 2 next time! Thank you for posting!!!!
Excellent! Thanks for letting me know!
Since quarantine of course I have to cook/bake more. This is actually my first apple pie, the recipe was super easy. I used brown sugar instead. Looks good can’t wait to taste it, waiting for it to cool. I will have my daughter do it with me next time.This is going to be the longest 2 hours. Thanks for making my first pie experience quite simple.
Wonderful! I’m so glad that it worked well for you. I agree — it’s a perfect recipe to start with. Enjoy the pie!
Can I use Fuji apples instead?
Hi, Nikki! Yes — fuji are a nice firm apple, so they should work well here. They’re just sweeter than the Granny Smith so the pie won’t have that slightly tart taste. Totally a matter of personal preference, so use whichever you prefer (or a mix of the two). 🙂
When I set out my pie shells should I wait until I’m about done cutting my apples before I do that bc the last 2 pies crust was kinda hard n got kinda got scorch in some places on the bottom n the only way to keep them from being so hard was to heat them up little bit n maybe I should’ve left them out of the fridge to right huh
Yes, in general it’s best to keep pie crust (and any pastry) cold until the last minute. 🙂
Can you use frozen pie crust? Do I thaw pie crust first?
Hi, Julie! Yes, you can use a frozen pie crust too. I would thaw it in the fridge first. Enjoy!
Quick question: can you lattice the Pillsbury pie crusts over the top of the pie by cutting strips and laying them on top? Also, do you need an egg wash before baking that way? Thanks for the recipe, making at Thanksgiving!
Hi, Cecily! Yes, I think the lattice top should work fine! The egg wash isn’t necessary, but you can add it if you like. An egg wash just helps the crust turn an even deeper brown and gives it shine. Just a matter of personal preference, but either way works. Hope you enjoy the pie!
First Apple Pie i have made. Was very easy and absolutely great! I will make many more before i kick off. Thanks much!!
Thank you, Jeffrey! I’m so glad to hear that! 🙂
Will anything change if I were to use an aluminium pie pan? I don’t have the glass pans. And to reduce the mess and dish load I figured aluminum would be better. Thoughts? Any adjustments to cooking time?
Hi, Kelly! I don’t think you should need to do anything different with the aluminum. It’s not too dark, so it shouldn’t cook any faster. Just be careful because those foil pans can be really flimsy. 🙂
I use the piecrust that comes already in those aluminum pans n yes they are flimsy but I try to be very careful with them it’s best to have a cookie sheet under your pie when cooking bc it’s tends to leak out n I’m getting ready to make another n I hope that this comes out better than the last 2 I made my mom loves them every time I make them I don’t feel that way about them every time but she does good luck if you have not done it yet n if you already done made your pie I hope it was a success Rose Stines
I have a question for you can I cut up the apples n put them in water so I can have them ready for the next day ? Fix the rest of it next day since everything takes me awhile to do like cutting the apples that’s what takes me so long bc my hands don’t work like they used to n do I need to add something to the water so they don’t turn on me please let me know soon thanks Rose Stines
Hi, Rose! I’ve never tried soaking the apples in water to keep them from browning before using in a pie, so I can’t speak to whether or not that would work. I think it would probably be fine to prep the apples the night before, toss them with a bit of lemon juice (which will help to prevent some browning), and store them in a Ziploc bag or other airtight container. They will brown some, but that shouldn’t matter since you’re baking them anyway. Hope that helps!
I have to make a homemade pie crust tomorrow…..do I have to pre bake it before I add the apples? I’m making your delicious apple pie for Thanksgiving. Thank you!
Hi, Julie! No, whether you use a store-bought crust or a homemade crust, there’s no need to par-bake the crust before adding the filling in this recipe. Happy Thanksgiving!
Thank you so much! I’m so thankful you answered me in time!
Happy Thanksgiving and thank you again!
Of course. Have a great holiday!
So I accidentally used 2/4 too much nutmeg… I added an extra 1/4 of cinnamon. Do you think it will still taste okay?? This is my first time baking a pie and I really want it to taste good… Christmas Eve is tomorrow and I don’t have time to make another before having dinner at my brothers. Please tell me I didn’t ruin the whole thing.
Hi, Christina! The extra cinnamon is absolutely no problem. I don’t know how much nutmeg you used, but a little more spice should be totally fine. Hope you have a Merry Christmas!
I’ve been using this pie recipe since I found you and my family loves it. The best!!
Yay! I’m so happy to hear that. Thank you for letting me know!
I don’t have foil. Could I turn oven temp down or… any ideas
Hi, Dana! I wouldn’t turn the temp down. You should be fine without the foil. I don’t always cover the edges, and the edges of the crust don’t burn. They just get a bit darker than the top…hopefully you won’t mind! 🙂
Hi, Sam! I noted that in the recipe and gave credit to the original Pillsbury recipe in both the post and in the recipe. 🙂
If you use an all encompassing “apple pie spice” instead of the individual spices, how much should you use?
Hi, Lauren! I would use about 2 teaspoons!
hi! first time pie-baker here. what do you suggest i bake this pie at? also, how can i make a homemade crust? and lastly, what do i bake this in? sorry i bet you can tell i am lost. thanks though. -carmen
Hi, Carmen! This is a great recipe to start with. If you prefer to use homemade crust rather than store-bought, here is my favorite made-from-scratch crust recipe: https://www.theseasonedmom.com/buttermilk-pie/ You’ll need to double the crust so that you have a top and bottom, though. Bake at 425 degrees F in a 9-inch glass pie plate (those instructions are all specified in the printable recipe box above). Hope that helps!
Great pie
Thanks, Pat!
easy and delicious!
Thank you, Susannah!
Question:
We are traveling 5 hours for Thanksgiving, could I prep the pie first and travel with it, and bake there, or would you suggest cooking first and freezing then travel?
Hi, Jaymee! I would NOT assemble the pie and bake it there. If made ahead without baking, the pastry crust can become too wet and end up soggy after baking.
Your best bet is to bake the pie in advance, cool it, and pop it in the freezer. Once you’re ready to serve, simply allow it to thaw at room temperature. You can also reheat the pie for 15 minutes (or until warmed through) in a 425 F oven so everyone gets a nice warm slice after dinner.
Hi! I am going to make your pie for Thanksgiving and this will be my first time making on? If I buy the apple pie spice do I still need to add all the other spices listed in tve recipe or not? And also how much apple pie spice should I use if not? I was thinking of using cinnamon and apple pie spice. Thanks!
Hi, Sarah! No, if you buy the apple pie spice, then you don’t need to use the other spices (since apple pie spice already includes cinnamon, nutmeg, etc.). I would use a total of 2 teaspoons of apple pie spice. Hope you enjoy!
Hey Blair,
I have been baking pies for years! I recently stumbled across your website (I love to browse but mostly love the ratings). I was interested to know if there were many recipes that had the same qualities as your apple pies with some adaptations to the apples. I was very please to see that some viewers were using Gala Apples. Yes there are!
One tip I can leave with you is regarding the tin foil around the edge of the pie crust while baking. If you are using store bought pie crusts in foil: Cut out the bottom of the top foil plate and just invert it over the baking bottom crust. I find this is so much easier and works great!
Thanks for the tip, Wendy!
I cook a lot, but rarely do I bake. This was my first time making a pie. I was able to find frozen pie crust in the freezer and I had four red apples. I followed the recipe otherwise. After 40 minutes in the oven I took out the pie. I have to say that the pie was truly amazing. My family and kids loved it. I did use fresh ground nutmeg and cardamon. You for sure should try this recipe.
Thank you, Adam! We’re so happy to hear this turned out well for you.
Loved the ease of this recipe. My only complaint was gosh it was so tart!! Almost too tart. I used Granny Smith as the recipe calls, but I used coconut sugar instead of granulated sugar. Maybe that was the reason?
Loved the ease of this recipe. My only complaint was gosh it was so tart!! Almost too tart. I used Granny Smith as the recipe calls, but I used coconut sugar instead of granulated sugar. Maybe that was the reason?
Hi Kelly! The coconut sugar might have been the issue. It tends to act more like brown sugar than granulated. Also, it’s always possible to have a batch of extra tart apples!
This Apple pie recipe is so good. It’s actually perfect easy to do, taste is perfection. Thank you.
Thank you, Nikkie!
Excellent. Right amount of spices and turned out like you hope a good apple pie should taste. Easy to fix. Peeling apples is the time consuming task.
Thank you, Henry!
I made this pie for Christmas dinner and it was delicious! I used fresh ginger instead of dried and it had a lovely flavor. Thank you.
That’s so good to hear, Alicia! Merry Christmas!