Apple cobbler is fresh fruit baked under a buttery biscuit topping, and this one comes together without a mixer, a rolling pin, or a single pre-cooked apple! You just stir, scoop, and bake. Serve it warm with vanilla ice cream and it tastes like the best part of fall!
More Apple Favorites:

Which Apples are Best?
Apples are the pride and joy of autumn here in Virginia, and not every variety behaves the same way in a hot oven. You want one that holds its shape through 50 minutes of baking! Grab one from each list below and you cannot go wrong.
Tart and firm: Granny Smith, Braeburn, Winesap, and Pink Lady
Sweet and firm: Honeycrisp, Jonagold, and Gala
⇢ Granny Smith and Honeycrisp are my usual pair, one for structure and one for sweetness. Steer clear of soft, mealy apples like Red Delicious, which collapse into applesauce under the topping.
Use two varieties if you can. One tart and one sweet gives the filling more dimension than a single apple ever will.
Before You Get Started
Three things make the difference between a good cobbler and a great one. None of them take extra time, they just take a little attention:
- Slice the apples ¼ inch thick. Even slices finish cooking right as the biscuit topping turns golden, so nothing is crunchy or mushy.
- Let the filling rest 10 minutes. The sugar pulls juice out of the apples, which is what gives you a saucy filling instead of a dry one.
- Grate the butter frozen. Cold shreds stay solid in the dough and steam into pockets, and that is what makes the topping light.
⇢ Cobbler, crisp, or crumble? The topping is the only real difference. Cobbler gets dropped biscuit dough, Apple Crisp gets a buttery oat streusel, and a crumble gets streusel without the oats.
How to Make Apple Cobbler
There’s no pre-cooking the fruit, no electric mixer, and no rolling and cutting dough! Here is how it comes together:
Step 1: Toss the Filling
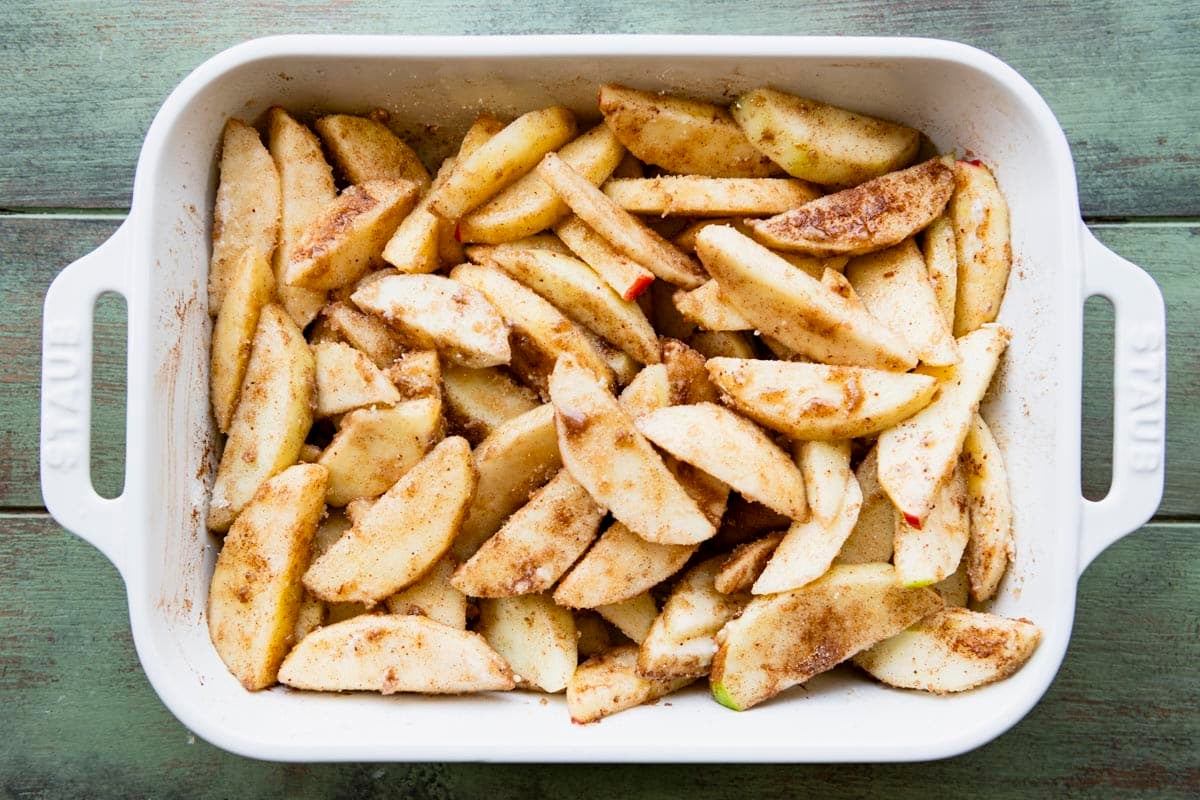
Slice your apples straight into a greased 2-quart baking dish, then add the brown sugar, granulated sugar, flour, lemon juice, vanilla, cinnamon, ginger, nutmeg, allspice, and salt.
Stir until every slice is coated and let it sit while you make the topping.
That flour is doing quiet but important work! As the apples release their juices, it thickens them into a glossy sauce instead of letting them pool at the bottom of the dish.
⇢ Swap in other fall fruit: Replace a cup or two of the apples with peeled, sliced pears or pitted plums. A handful of fresh or dried tart cranberries is also lovely here.
Step 2: Mix the Biscuit Topping
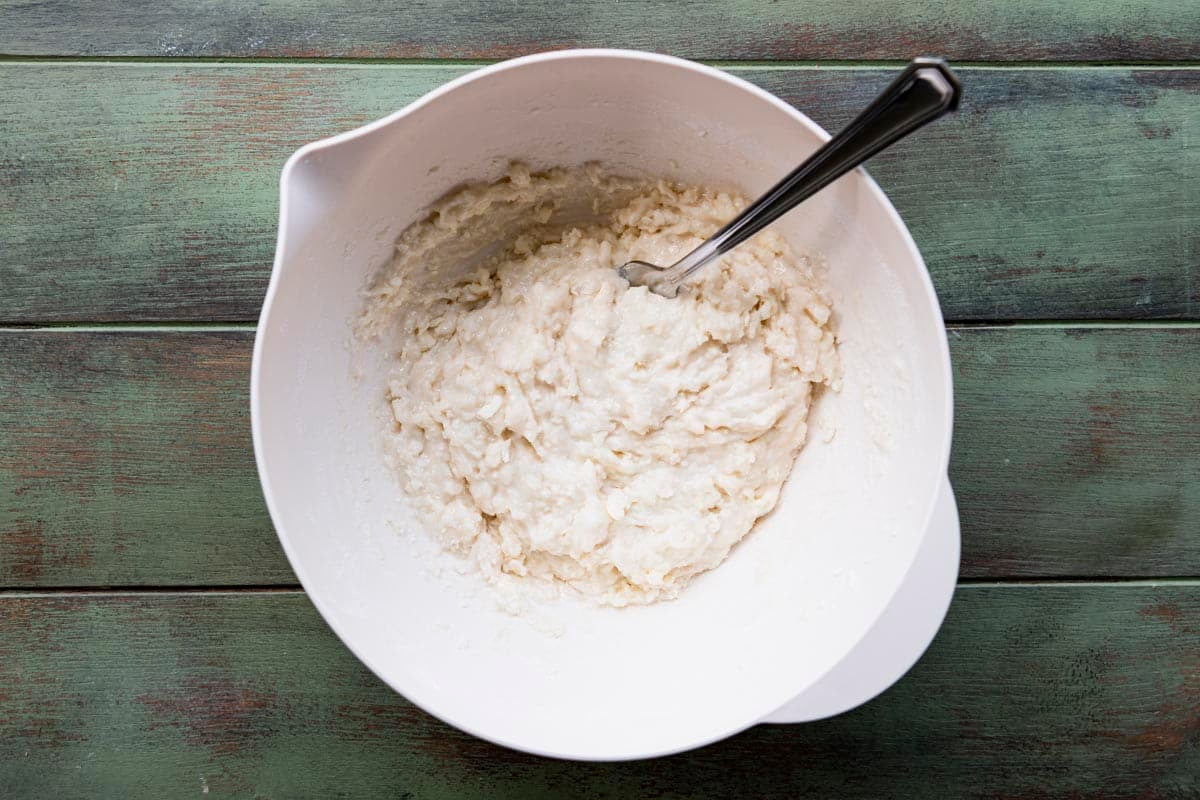
Whisk the flour, sugar, baking powder, and salt together in a medium bowl. Add the grated butter and toss gently so every shred is coated in flour. The mixture should look like coarse crumbs with visible bits of butter throughout.
Pour in the milk or cream and stir with a fork just until a sticky dough comes together. It will feel wetter than traditional biscuit dough, somewhere between biscuits and cake batter. That is exactly right.
Don’t Overmix: Stop stirring as soon as it holds together, because overworking it will make the topping tough.
Step 3: Drop the Dough
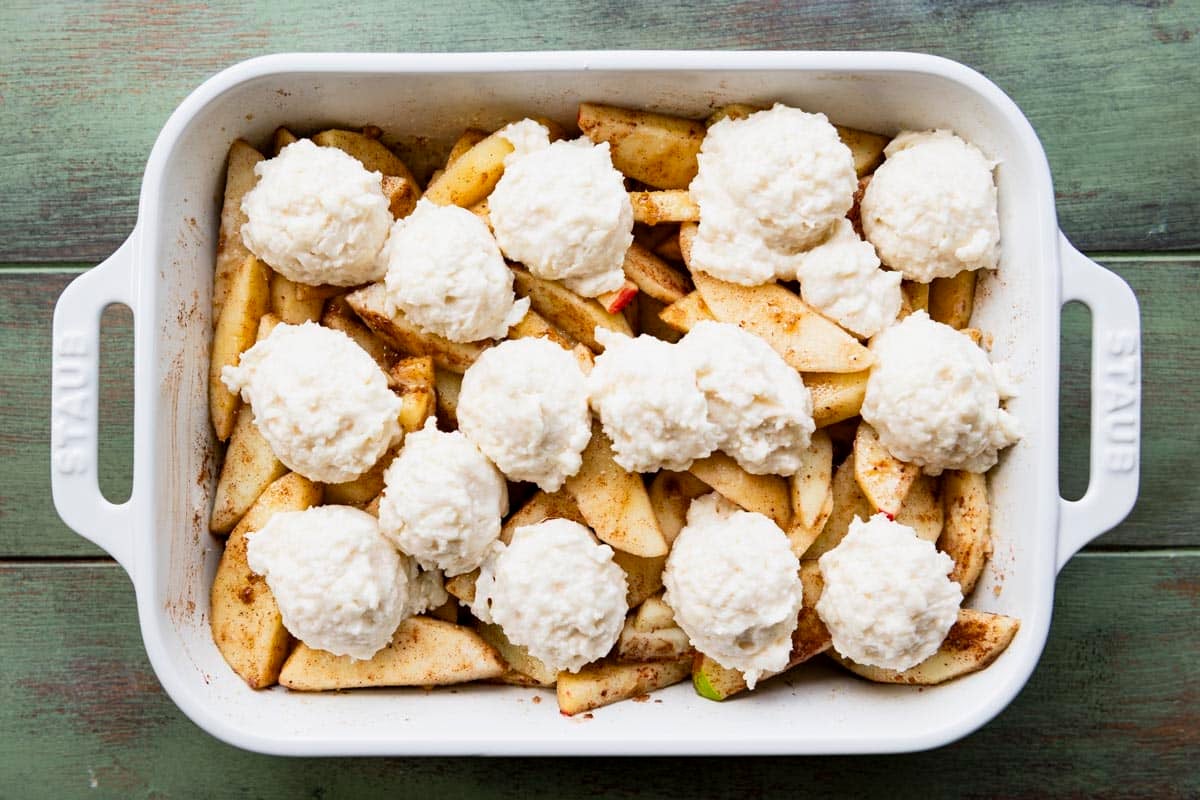
Drop the dough by heaping tablespoonfuls over the apples. It will not cover the fruit completely, and it should not. The dough spreads as it bakes and knits together into that hallmark cobbled crust.
Finish with a sprinkle of coarse sparkling sugar, which bakes into a crackly, sweet top.
⇢ Rustic is the goal here: The dollops do not need to be even or pretty. I use a cookie dough scoop, but two spoons work just as well.
Step 4: Bake Until Bubbling
Bake at 350°F for 45 to 50 minutes, uncovered, until the topping is deep golden and the filling bubbles up around the edges. Bubbling matters as much as color. It tells you the fruit is fully cooked and the flour has thickened the juices.
The topping is the part most likely to fool you. Biscuit dough browns on top well before the center is cooked through, so slide a toothpick into the thickest dollop. If it comes out clean, you are done. If the top is browning too fast, tent the dish loosely with foil for the last 10 minutes or so.

Step 5: Serve It Warm
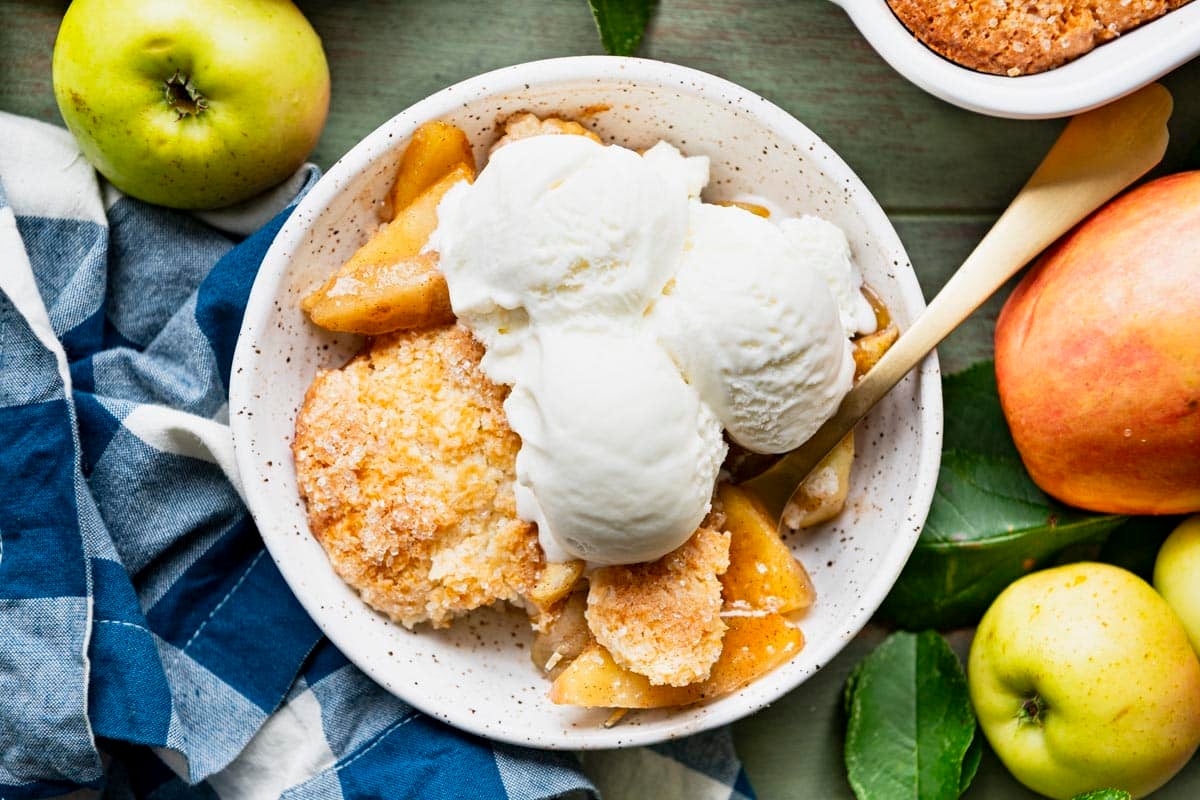
Let the cobbler sit for 10 minutes so the filling can settle, then scoop it into bowls with a generous spoonful of both fruit and topping. Vanilla ice cream is the classic finish, and an extra pinch of cinnamon or a drizzle of caramel sauce over the top does not hurt.
⇢ Try it cold the next morning: Leftover cobbler at room temperature with a cup of coffee is one of the greatest pleasures of apple season!
Shortcut Cobbler
This version is made entirely from scratch, and the biscuit topping is worth the ten extra minutes. But some nights call for something faster!
If you want a mix-based topping, my Bisquick Peach Cobbler uses the same dump-and-bake method with a fraction of the measuring. For the true no-effort route, my Apple Dump Cake starts with canned apple pie filling and a box of cake mix!
Storage and Reheating
Store: Cover leftovers and keep them at room temperature for up to 12 hours, or transfer to an airtight container in the refrigerator for 4 to 5 days.
Freeze: Wrap the cooled cobbler tightly and freeze for up to 2 months. Thaw overnight in the refrigerator before reheating.
Reheat: Cover loosely with foil and warm in a 350°F oven for about 20 minutes. Individual servings reheat in the microwave in 15 to 30 seconds.
You can also bake this cobbler earlier in the day and serve it at room temperature. The topping stays best in the first several hours, so if you are making it ahead for company, aim for the morning of rather than the night before.
More fruit cobblers to try:
Frequently Asked Questions
Can I use canned apples or apple pie filling instead of fresh?
You can, though you will want to make one adjustment. Canned pie filling is already sweetened and thickened, so skip the brown sugar, granulated sugar, and flour in the filling entirely and just stir the spices and lemon juice into two 21-ounce cans. The filling will be softer and sweeter than the fresh version, and you might be able to reduce the bake time since the fruit is already cooked.
Plain canned apple slices packed in water are the better shortcut if you can find them, because you keep control of the sweetness.
Do I have to peel the apples?
No, and plenty of people skip it. The skins soften considerably during baking, but they never fully disappear, so you end up with a chewier texture running through the filling. I peel mine because I like the filling smooth against the biscuit topping, but if you are working through a big batch of apples and want to save the time, leave them on.
How do I keep the bottom of the cobbler from getting soggy?
Three things prevent it, and this recipe already builds in all of them. The flour tossed with the apples thickens their juices as they cook. The 10-minute rest lets the sugar draw out that juice before it hits the oven, so it thickens evenly. And baking uncovered lets steam escape rather than condensing back into the dish.
The one thing that will cause a soggy result is pulling it out before the filling bubbles, so wait for that visual cue even if the topping already looks done.
Why is my biscuit topping doughy in the middle?
It came out of the oven too early. Biscuit dough browns on the surface well before the interior sets, which makes color an unreliable doneness signal on its own. Insert a toothpick into the center of the thickest dollop; it should come out clean. If the top is already dark but the center is still wet, tent the dish loosely with foil and give it another 8 to 10 minutes.

More Tasty Apple Recipes

Did you make this recipe?
If you enjoyed this recipe, please leave a comment with a 5-star review at the bottom of the post. Thank you!
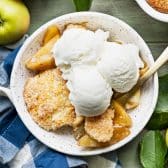
Easy Apple Cobbler
Ingredients
FILLING:
- 6 cups peeled, cored, and thinly sliced apples (about 5-6 apples or 2 lbs.); I like a combination of Granny Smith and Honey Crisp apples
- ½ cup firmly packed light brown sugar
- 2 tablespoons granulated sugar
- 2 tablespoons all-purpose flour
- 1 tablespoon lemon juice
- 1 teaspoon vanilla extract
- 1 teaspoon ground cinnamon
- ¼ teaspoon ground ginger
- ¼ teaspoon ground nutmeg
- ⅛ teaspoon ground allspice
- ⅛ teaspoon kosher salt
TOPPING:
- 1 ¼ cups all-purpose flour
- ½ cup granulated sugar
- 1 ½ teaspoons baking powder
- ¾ teaspoon kosher salt
- 6 tablespoons very cold (or frozen) salted butter, coarsely grated on the large holes of a box grater
- ½ cup whole milk, half-and-half, or heavy whipping cream
- 1 tablespoon white sparkling sugar
- For serving: vanilla ice cream
Instructions
PREPARE THE FILLING
- Toss the apples with the sugars and spices. Preheat the oven to 350°F. Spray an 11 x 7-inch baking dish (or other 2-quart dish) with nonstick cooking spray. Place the apples in the prepared pan. Sprinkle with brown sugar, granulated sugar, flour, lemon juice, vanilla extract, cinnamon, ginger, nutmeg, allspice, and kosher salt. Stir to combine and let rest while you make the topping.


PREPARE THE TOPPING
- Cut the grated butter into the dry ingredients. In a medium bowl, whisk together the flour, granulated sugar, baking powder, and kosher salt. Add the grated butter and toss gently to combine, so that all of the butter is coated in the flour mixture. The mixture should resemble coarse crumbs with visible bits of flour-coated butter throughout.
- Stir in the milk just until the dough comes together. Add the milk or cream and stir gently with a fork until a sticky dough forms. It will be wetter than traditional biscuit dough. Do not overmix.
- Drop the dough over the fruit and add sparkling sugar. Drop the dough by heaping tablespoonfuls evenly over the apple filling. It will not cover the fruit completely. Sprinkle with the sparkling sugar.


BAKE THE COBBLER
- Bake until golden and bubbling. Bake for 45 to 50 minutes, until the fruit filling is bubbling at the edges and the topping is golden brown and cooked through. A toothpick inserted into the thickest dollop should come out clean. Tent the dish loosely with foil toward the end of baking if the top starts to get too dark.
- Rest, then serve warm. Let the cobbler sit for about 10 minutes so the filling settles. Serve warm or at room temperature with vanilla ice cream.


Notes
- Choosing apples: Use firm varieties that hold their shape, such as Granny Smith, Honeycrisp, Braeburn, Winesap, Pink Lady, Jonagold, or Gala. A mix of one tart and one sweet gives the best flavor. Avoid soft, mealy apples like Red Delicious.
- Slice thickness: Cut the apples about ¼ inch thick and keep the slices uniform so they finish cooking at the same time as the topping.
- Let the filling rest: The 10-minute rest while you mix the topping lets the sugar draw juice from the apples, which is what gives you a saucy filling rather than a dry one.
- Keep the butter frozen: Grate the butter straight from the freezer and work quickly. Cold butter is what creates steam pockets and a light topping.
- Rustic dollops are correct: The dough does not need to cover the fruit or look even. It spreads in the oven into that hallmark cobbled crust. A cookie dough scoop makes quick work of portioning.
- Doneness cues: Wait for the filling to bubble at the edges and check the thickest dollop of topping with a toothpick. Golden color alone is not a reliable signal.
- Peeling is optional: Leaving the skins on works fine and saves time, though the texture will be chewier.
- Storage: Covered at room temperature for up to 12 hours, refrigerated in an airtight container for 4 to 5 days, or wrapped tightly and frozen for up to 2 months. Reheat covered at 350°F for about 20 minutes, or microwave individual servings for 15 to 30 seconds.
Nutrition
Originally published in September, 2022, this post was updated in September, 2026.











I love all of your recipes .
Thank you so much, Kathryn!
I’m wondering, since this looks great, how would I bake it in a 13 x 9 pan…. how would I adjust the recipe for that? I’m having company visiting for the weekend, and would like to make it in that size. I don’t have a 11 x 7 pan
Thanks for all your great recipes!
Hi Cam! We haven’t tested it but think you should be able to multiply the ingredients by 1.5. Then, just keep a close eye on your oven! We would love to know how it goes if you do try it out.
Can’t wait to try this one. Many thanks for your wonderful recipes and well laid out format
for those of us not handy in the kitchen ! Lorraine
I’m so glad you’ll give it a try, Lorraine. Thanks for your note, and enjoy!