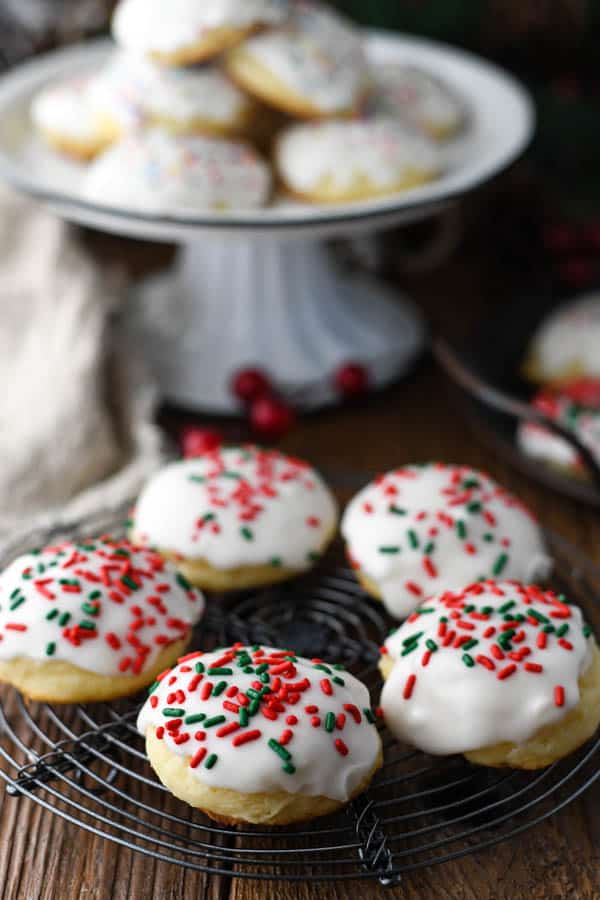
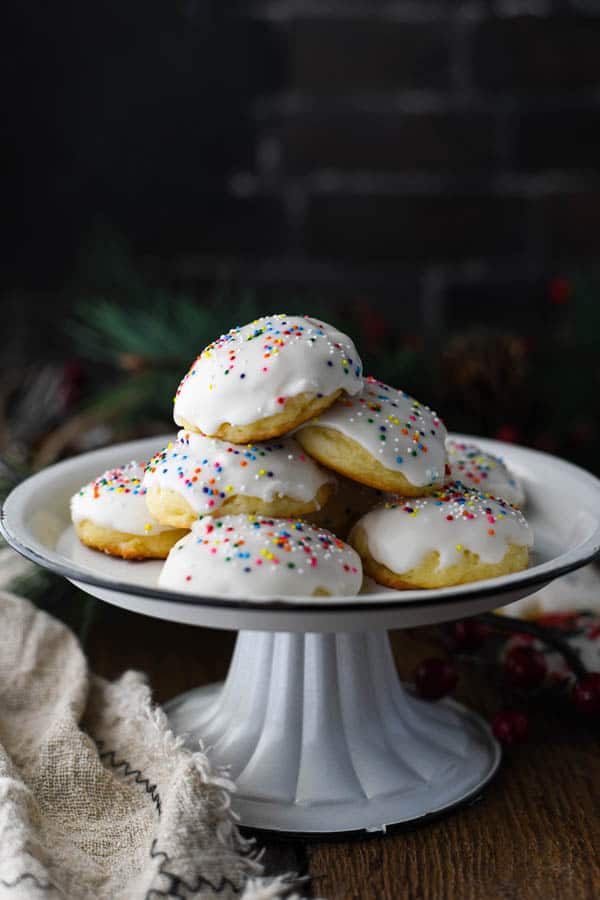
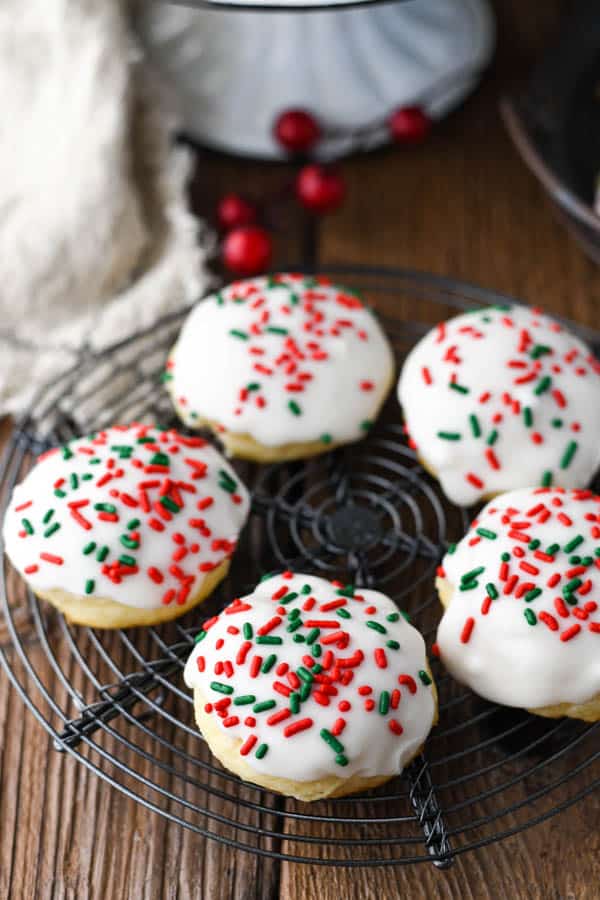
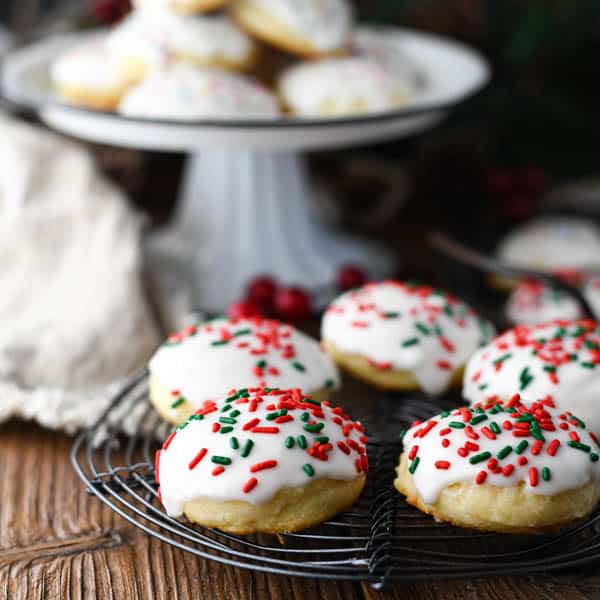
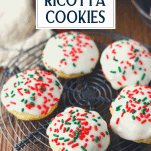
These traditional Italian Ricotta Cookies are soft, moist and coated with a thick frosting! Garnish the little gems with red and green sprinkles for your Christmas cookie tray, or use rainbow sprinkles to enjoy them year-round for any special occasion. It’s a simple, make-ahead dessert that’s perfect for sharing with loved ones!
Ricotta Cookies Recipe
The kids (and adults) go crazy for these delicious ricotta cheese cookies! They’re thick, soft, sweet and festive — what’s not to love? Plus, you can prepare the dough in advance and keep it in the fridge or store the baked cookies in the freezer. They’re such a convenient way to prep for the holidays, and a beautiful addition to your Christmas cookie tray!
What are ricotta cookies?
If you’ve never sunk your teeth into a classic Italian Christmas cookie, then be prepared for a wonderful surprise! Ricotta cookies are soft, moist, cake-like sugar cookies with a simple glaze and plenty of colorful sprinkles. The cookies do not taste like cheese! Instead, the ricotta adds moisture and gives the cookies a soft, rich texture. They’re light — not dense — puffy little pillows of sweetness!
How to Make Ricotta Cookies from Scratch
Every Italian Nonna likely has her favorite version of a classic ricotta cookies recipe. Some include lemon or orange flavor, while others use almond extract. This particular version is simple: a vanilla-flavored cookie with a glaze that’s flavored with both almond and vanilla extracts. The recipe comes from the Italian representative for the International Children’s Festival, and was included in a travel guide and cookbook called Eat & Explore Virginia. I’ve tweaked the recipe slightly — using baking powder to help them rise, chilling to prevent spreading, and adding a simple powdered sugar glaze — but the essential Italian cookie remains the same. They’re easy and they can be made in advance, so they’re a great option to suit your busy holiday schedule!
Ingredients
- Butter
- Ricotta cheese
- Vanilla extract
- Sugar
- Eggs
- All-purpose flour
- Baking powder
- Salt
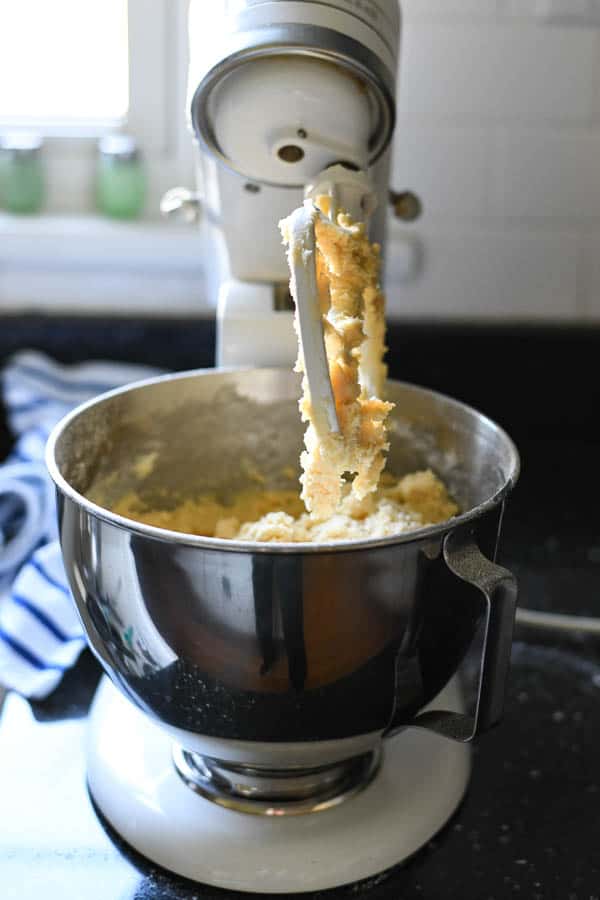
Step 1: Make Dough
Use an electric mixer to combine the dough.
Step 2: Chill
The dough will be soft and somewhat sticky, so it’s best when chilled before scooping and baking. Cover the bowl of dough and refrigerate for at least 2 hours (or overnight).
Step 3: Bake
Once the dough is nice and cold, scoop into rounds (I use a cookie scoop like this) and arrange on parchment or silicone-lined baking sheets.
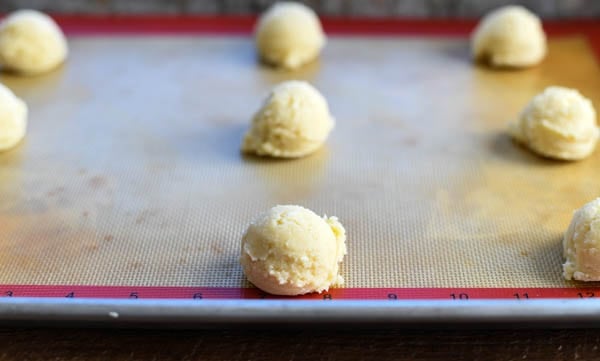
Bake in a 350 degree F oven for about 12-14 minutes. The tops will still be pale, but the bottoms should be lightly browned.
Step 4: Frost
Make a simple glaze with melted butter, confectioners’ sugar, almond extract, vanilla extract and milk. Dip the tops of the cookies in the glaze, then place on wire racks. Garnish with sprinkles immediately, since the glaze starts to set right away.
Make Ahead
Prepare the dough in advance and keep it covered in the refrigerator for up to 24 hours before scooping and baking. You can also bake the cookies in advance and freeze them before icing. Wrapped tightly, the baked cookies will keep in the freezer for up to 2 months. Thaw on the counter and glaze when ready to enjoy!
You can freeze the cookies after they’re glazed, but the thawed glaze and sprinkles don’t tend to look as good.
Storage
Store the glazed cookies in an airtight container at room temperature for 3-4 days. You can also refrigerate the cookies for up to 1 week.
Recipe Variations
- Lemon Ricotta Cookies: add 1 teaspoon of lemon zest to the cookie dough, and use lemon juice (instead of milk) in the glaze.
- Add ½ teaspoon of almond extract to the cookie dough.
- Taste the glaze and add more almond extract, if necessary, to reach desired flavor.
- Use different colored sprinkles for different festive occasions. For instance, red and green work well for Christmas, while rainbow-colored non-pareils work well for birthdays.

Tips for the Best Italian Ricotta Cookies Recipe
- Use full-fat ricotta cheese for best results. The fat in the cheese creates rich, moist cookies, so you don’t want to water them down with less-flavorful, low-fat ricotta.
- Keep the dough as cold as possible before baking in order to prevent the cookies from spreading in the oven.
- Before glazing the cookies, place a wire rack on top of a foil-lined rimmed baking sheet. Dip the cookies in the glaze, then arrange them on the wire rack. The foil-lined pan will catch any extra glaze that drips off and will corral any stray sprinkles that might otherwise fall onto the counter. It makes cleanup really easy!
- The glaze should be very thick so that it doesn’t slip right off the sides of the cookies. Add just enough milk to thin, and if the glaze seems too thin, you can always whisk in extra confectioners sugar to reach the desired consistency.

More Classic Cookie Recipes You’ll Love
- 3-Ingredient Scottish Shortbread Cookies
- Russian Tea Cakes {Snowball Cookies}
- Soft Gingerbread Men
- Old-Fashioned Williamsburg Gingerbread Cookies
- Snickerdoodle Cookies
- Cranberry White Chocolate Chip Cookies
- Peanut Butter Blossoms
- Cut Out Sugar Cookies

Did you make this recipe?
If you enjoyed this recipe, please leave a comment with a 5-star review at the bottom of the post. Thank you!

Italian Ricotta Cookies
Ingredients
For the Cookies:
- 1 cup (2 sticks) salted butter, softened at room temperature
- 1 cup ricotta cheese, at room temperature
- 2 teaspoons vanilla extract
- 2 cups sugar
- 2 eggs, at room temperature
- 4 cups all-purpose flour
- 2 ½ teaspoons baking powder
- 1 teaspoon salt
For the Glaze:
- 1 tablespoon salted butter, melted
- 3 ¾ cups confectioners sugar
- ½ teaspoon almond extract
- 1 teaspoon vanilla extract
- 4-6 tablespoons milk
Instructions
- Using an electric mixer, cream together butter and ricotta. Add vanilla; mix well. Gradually add the sugar, mixing well to combine. Add eggs, one at a time, mixing well after each.
- In a separate bowl, whisk together flour, baking powder and salt. Gradually add the dry ingredients to the wet ingredients; mix until combined. Cover and chill in the refrigerator for at least 2 hours, or overnight.
- Preheat oven to 350 degrees F. Line baking sheets with parchment or silicone mats.
- Drop dough in rounded tablespoons onto prepared baking sheets. You want the dough really cold when it goes into the oven so that the cookies don’t spread, so if the dough seems a bit soft, put the baking sheets back in the refrigerator (or even in the freezer) for about 10 minutes before baking. Bake for 12-14 minutes, or until the bottom of the cookies are golden brown (the tops will still be pale). Cool on the baking sheets for about 5 minutes, then transfer to wire racks to cool completely.
GLAZE:
- In a medium bowl, whisk together all of the glaze ingredients until smooth. Use 4 tablespoons of milk to start, and add more to thin if necessary. The glaze should be very thick. Dip the tops of the cookies in the glaze, then set on a wire rack. Immediately add sprinkles. Let the cookies rest at room temperature until the glaze sets.


Instead of baking then freezing, could you pre-shape and then freeze the dough and then bake/glaze when you need them?
Yes, that should work really well, Joanne. Just bake directly from frozen and add 1-2 extra minutes to the baking time called for in the recipe since you’re starting with frozen dough. Enjoy!
I made these cookies today and they are really good! My husband is a lemon lover, so I added the lemon zest and lemon juice, like you suggested, and he loves them! Thank you for this recipe!
That’s great, Carol! Thanks for taking the time to let me know. I’m so glad that your husband approved, too! 🙂
My family gave them two thumbs up! We are a gluten free family and we used Cup 4 Cup Gluten Free Flour because it doesn’t have a gritty texture and we absolutely loved them!
Thanks, Dominique! I’m so glad to know that they work with gluten-free flour, too. That’s helpful for other readers, I know!
Loved this recipe. Made some plain and made some with chopped dried cranberries and pecan pieces. Both were eaten in no time. I think I like the ones with cranberries and pecans without the glaze. Yummy.
That version sounds delicious, Adele! Thank you!
Hi,
Any thoughts on subbing with cottage cheese? The only reason I ask is because I have some I need to use up.
Thanks!
We haven’t tested it and cannot attest to the results, but it should work! Please let us know how it goes if you do give it a try.
Well that was a waste. These were not good; the dough was very sticky. I refrigerated overnight. I couldn’t use my cookie scoop as the dough just stuck. I ended up rolling them into balls and refrigerating before baking. 14 minutes left them not fully cooked in the middle(I have an oven thermometer to make sure I’m baking at the correct temperature.) I followed the recipe exactly. In reading other recipes a full container of ricotta was used, as well as more vanilla. The baking time was also a bit longer. I found the cookies very bland and I’m used to European deserts that are far les sweet than in the U.S. I felt like the glaze was overpowered by the almond extract. Oh well, I tried something new and it didn’t work.
Someone needs a cooking lesson
so happy to find your recipes and will try the gingerbread cake thanks anna
We’re happy to have you here, Anna! We hope you enjoy.