Disclosure: This post may contain affiliate links. I may earn a small commission for my endorsement, recommendation, testimonial, and/or link to any products or services from this website.
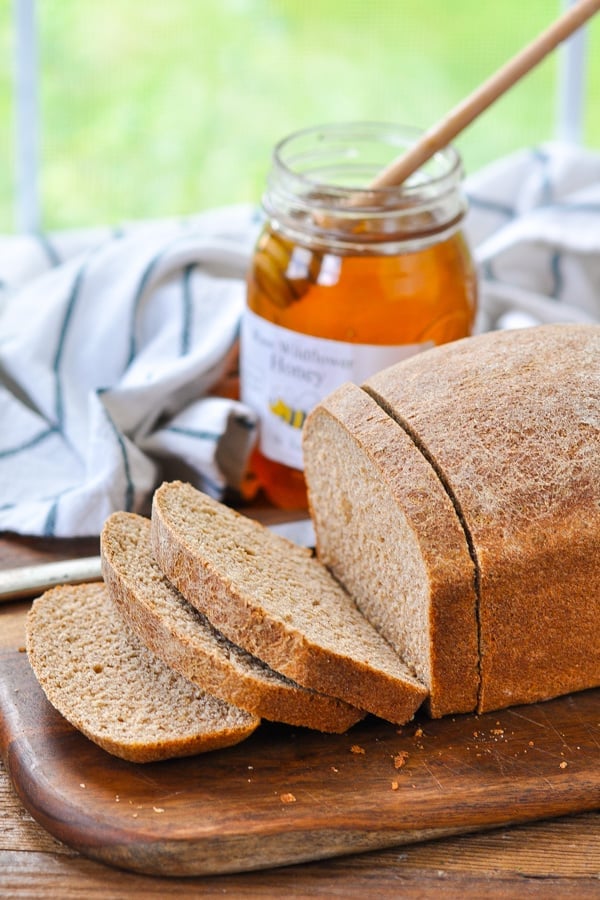
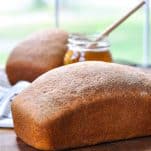
Soft and fluffy, nothing compares to the slightly sweet, nutty taste of a loaf of homemade Honey Wheat Bread! This easy recipe yields two loaves of wheat bread that are perfect for sandwiches, toast, or a side dish with dinner. Best of all, it’s 100% kid-approved!
Our family has been obsessed with my No-Knead Bread over the past few months, so I’ve been stirring together about a loaf every other day while we’re all at home. But you know what my kids love even more than the no-knead bread? This easy honey wheat bread recipe!
While the no-knead process yields a delicious artisan bread recipe with a thick, chewy crust (my personal fave), this easy homemade bread recipe is softer, has a thinner crust, and boasts an even fluffier texture. It’s just a really simple, classic whole wheat bread that your family will love!
What is Honey Wheat Bread?
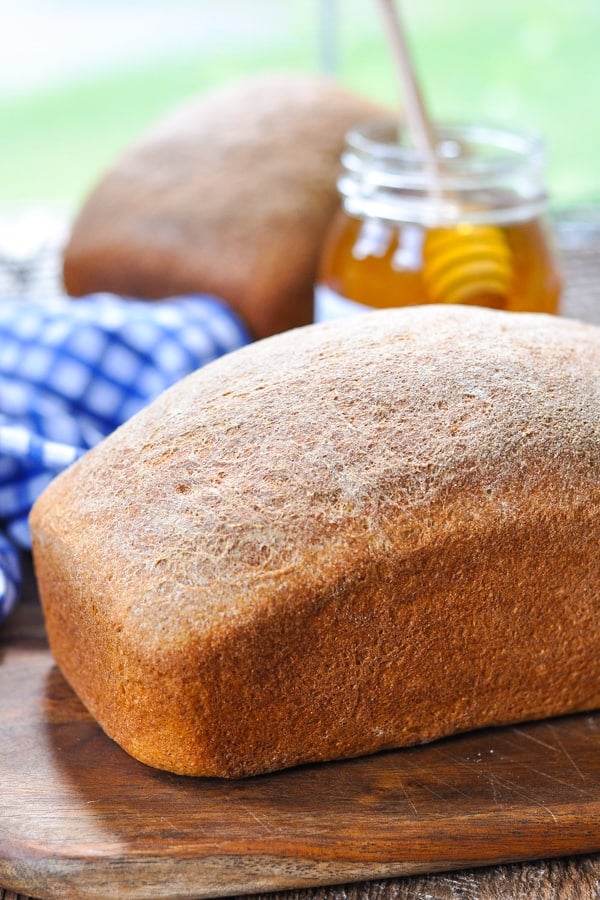
My boys’ #1 top choice for sandwich bread has always been Nature’s Own Whole Wheat Bread — until now! This is my best effort at recreating that store-bought loaf that they love…and the homemade version is way better (of course). Honey Wheat Bread is a basic homemade bread made with wholesome ingredients such as stone ground whole wheat bread flour and milk. It is shaped into two loaves and lightly sweetened with honey. The crust is thin and soft, and the inside is light and fluffy — making it the perfect sandwich bread. You can’t beat a PB&J on homemade honey wheat bread. Such a treat!
Why this is the Best Ever Homemade Wheat Bread:
Here are just a few reasons that you need to give this easy homemade bread recipe a try today:
- The bread rises high!
- The texture is soft and fluffy, with a very subtle, sweet taste.
- The crust is thin — not too tough or chewy (kids love it)!
- It’s super-simple — you don’t need any special equipment, any fancy ingredients, or any special baking skills. Follow the directions and it’s practically impossible to mess up!
- The bread is relatively quick to prepare. Unlike my no-knead bread that needs to rise overnight, you can have this easy homemade bread recipe ready for the table in one morning.
- You get two loaves for one effort, so you can share one with a friend or stash the extra loaf in the freezer for another day.
How to make Honey Wheat Bread:
This easy Honey Wheat Bread recipe is just a slight adaptation of my favorite basic homemade white bread. There’s nothing difficult about this process. Just gather your ingredients and follow the recipe directions carefully. Baking is an exact science, so I do not recommend tweaking the measurements or substituting with different ingredients until you’ve tried it at least once. Let’s get started!
Ingredients for Honey Wheat Bread from Scratch:
- Whole wheat bread flour and white bread flour
- Honey
- Salt
- Instant (rapid-rise) yeast
- Warm milk
- Melted butter
- Oil (for greasing the bowl)
Step 1: Whisk Together Dry Ingredients
In a large bowl, whisk together the whole wheat bread flour, salt and instant yeast.

Step 2: Add Wet Ingredients and Remaining Bread Flour
Add the warm milk, honey and melted butter; then beat until smooth. Stir in enough white bread flour, ½ cup at a time, until a soft dough forms.
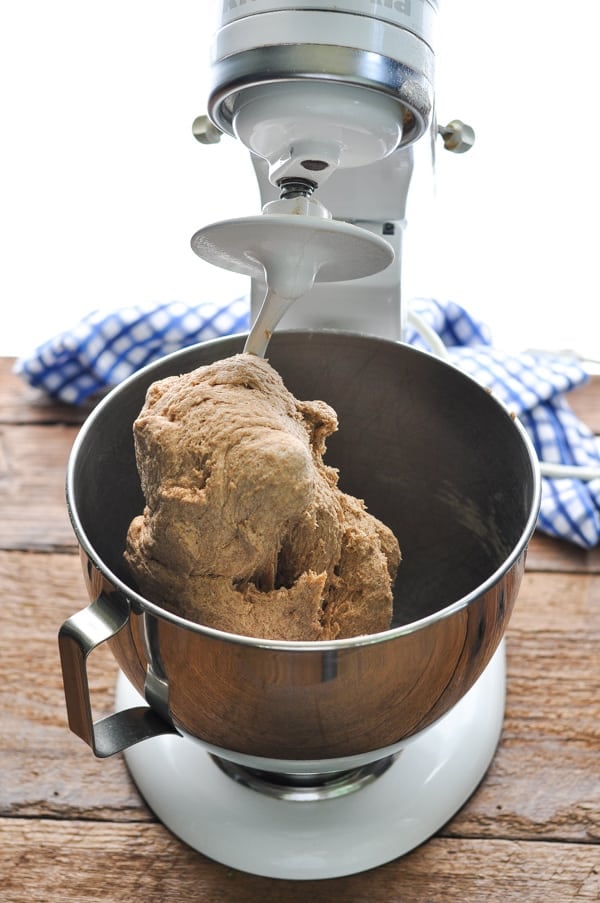
Step 3: Knead Dough
In a stand mixer fitted with the dough hook attachment or on a floured surface, knead the dough until it’s elastic and smooth (about 8-10 minutes).
Step 4: Proof Dough
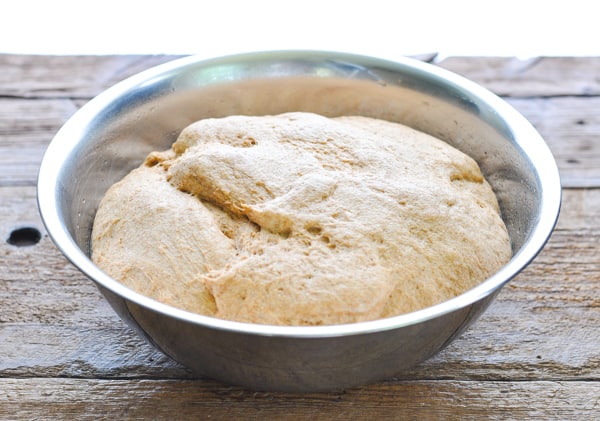
Place the dough in a large, greased bowl, cover, and let rise for about 2 hours.
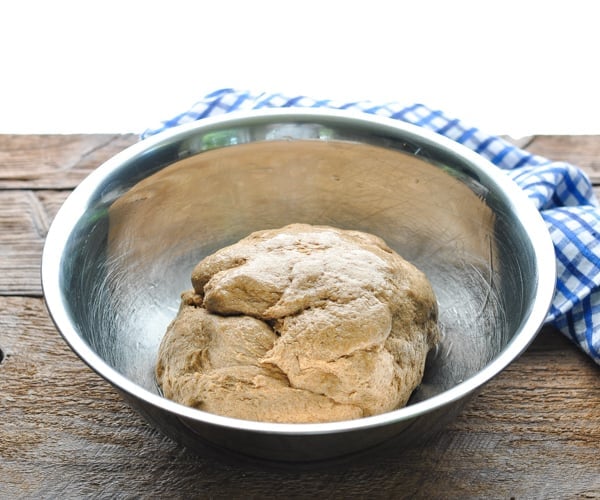
After the dough rises it should be puffy and doubled in size!
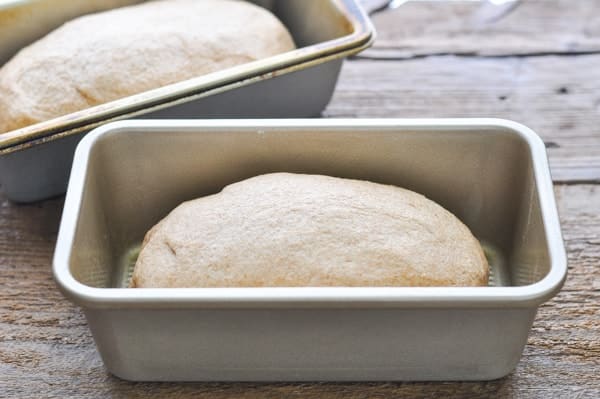
Step 5: Place Dough in Loaf Pans
Punch down the dough in the bowl, and then turn it out onto a floured surface. Cut the dough into two equal parts. Shape each piece into a loaf and place the loaves in two greased 9 x 5-inch loaf pans.
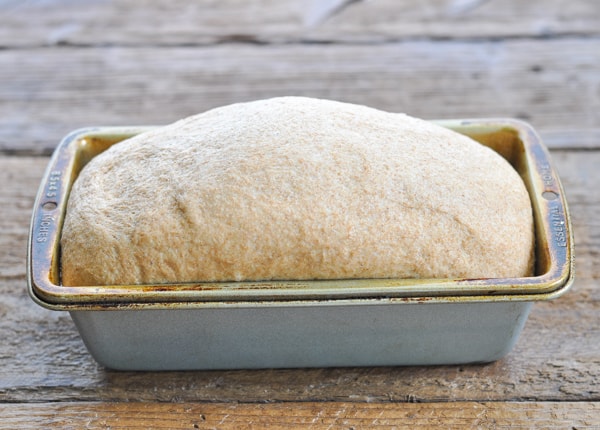
Step 6: Let Dough Rise Again
Cover the pans and let the dough proof once more. This rise will be shorter — about 1 hour — and the dough will double in size again.
Step 7: Bake Honey Wheat Bread
Bake in a 375 degree F oven for 30-35 minutes, or until the loaves are golden brown and they sound hollow when tapped.
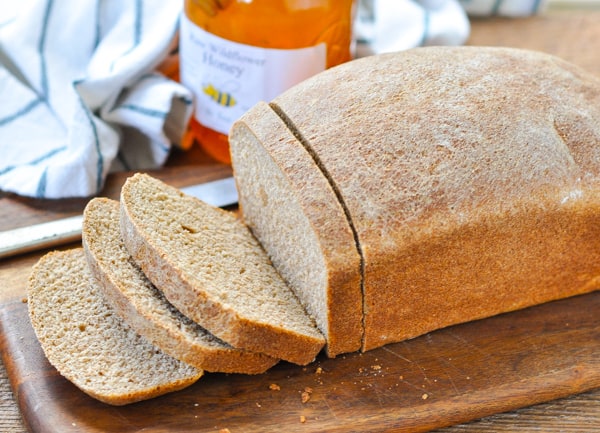
Step 8: Cool, Slice and Serve!
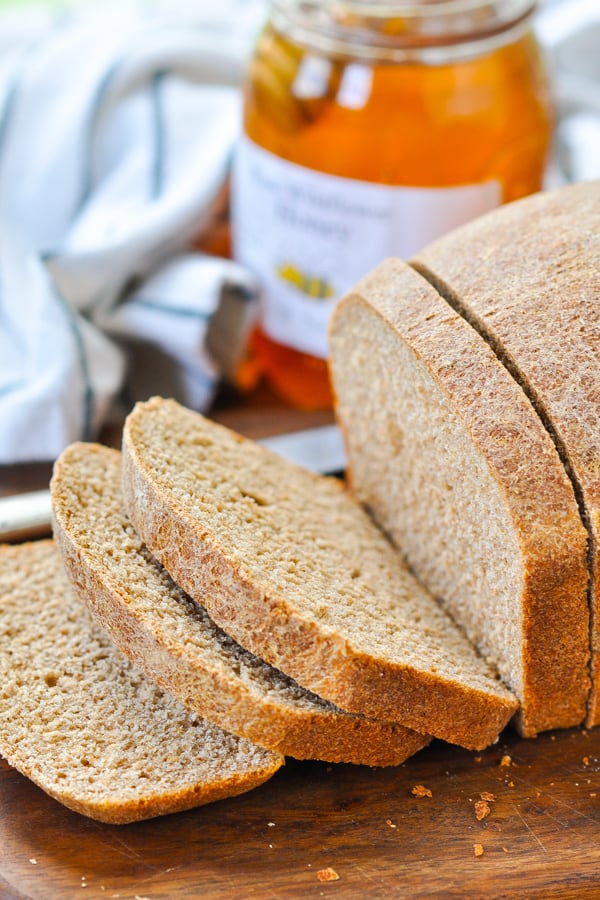
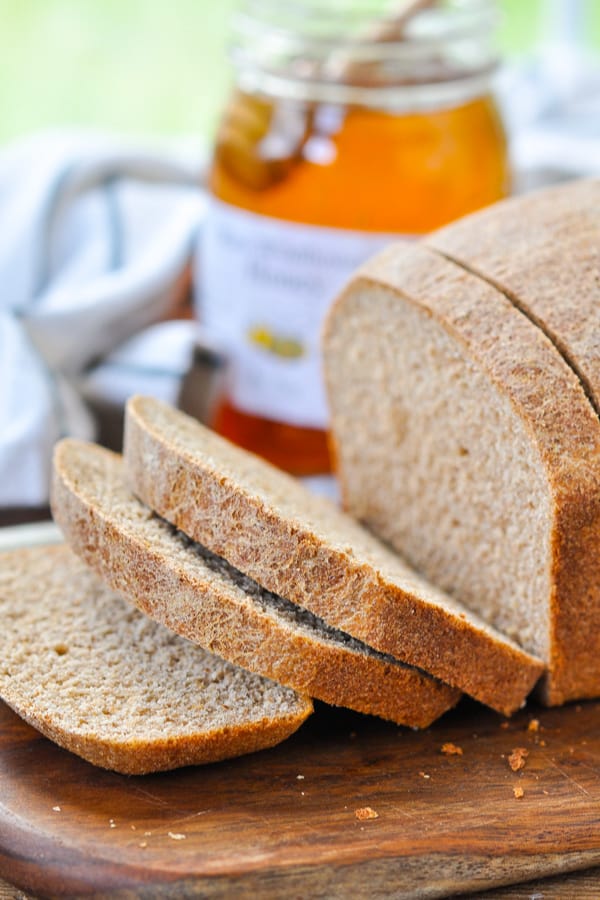
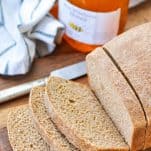
Allow the loaves to cool on a wire rack for about 1 hour before slicing and serving. For an even softer crust, brush the tops of the bread with melted butter while it’s still warm!
The honey wheat bread is perfect for sandwiches or when served warm with butter and honey, apple butter, or jam. Truly, there’s nothing better than wheat toast for breakfast!

How to Knead Bread:
Kneading the dough makes bread light, airy and chewy by developing the gluten. Strengthening the gluten strands gives your bread structure. Don’t worry — kneading dough is really easy!
To knead the dough by hand, flour the worktop, and then push, pull and stretch the dough. When it’s properly kneaded, the dough should be elastic and smooth.
If you’re fortunate enough to have a stand mixer, simply use the dough hook attachment to knead the bread in the mixer. This is my preference, because it’s hands-off — just let the machine run for about 8-10 minutes.
How to Proof Bread:
Proofing bread is when you give the yeast time to do its work to help the bread rise. To proof bread, place the dough in a greased bowl and let the dough rest in a warm, humid environment until it doubles in size.
Having trouble proofing the bread? Check the temperature of your kitchen. If your kitchen is a little too warm (above 75-80 degrees F) or a little too cool (below about 65 degrees F), it might be affecting the proofing stage.
When your kitchen is on the warm side and you end up with a dense loaf, it’s likely that the bread over-proofed, the yeast got too active, and it produced so much gas that the dough effectively popped like a balloon.
If it’s too cold, then the opposite might have happened. The yeast didn’t get a chance to become active enough and create enough gas to lift the dough. You should try letting it sit out a little longer.
How to Tell When Homemade Bread is Done:
The bread should be a beautiful golden brown color when it comes out of the oven. Tap the top of the loaf lightly — it will sound hollow when it’s done. If you have an instant-read thermometer, the internal temperature of the bread should be about 200 degrees F.
How to Cut Homemade Bread:
Allow the bread to cool for at least 1 hour to complete the cooking process before slicing (otherwise the bread may be dense inside and will rip or tear). Using a long serrated bread knife, slice in clean back-and-forth motions like a saw with as little downward pressure as possible. Each loaf yields between 14 and 16 thin slices of bread.
How to Store Honey Wheat Bread:
You can store homemade honey wheat bread in a plastic bag or a bread box at room temperature. The bread will last for 1-2 days. To help it last longer, wrap the loaf tightly in plastic or in a Ziploc freezer bag and store in the freezer for up to 3 months.
When to Freeze Homemade Bread:
Allow the bread to cool completely on the counter for at least a couple of hours. Then freeze the bread before slicing to preserve the loaf at its peak freshness.
Why Homemade Bread Doesn’t Rise:
If your bread does not rise properly, it could be due to any number of reasons. For instance, your yeast may not be fresh. Even with a good expiration date, yeast has a short shelf life once a package is opened (I recommend keeping it in the freezer). It’s also possible that your milk was the wrong temperature (see my note above regarding milk temp) and therefore did not activate the yeast. I almost always use a thermometer to check the temperature of my milk before adding it to the dough (it needs to be around 110 degrees F).
What Makes Wheat Bread Dense, Heavy or Tough:
There are a variety of reasons that you might end up with a loaf of dense, heavy bread.
- Not kneading the dough long enough to fully activate the gluten;
- Not baking the bread long enough. When the bread comes out of the oven, it’s still “cooking” and steaming. That’s why it’s important to wait and let the bread sit for at least an hour before slicing into it.
- The flour’s protein content is too low. This is why I recommend bread flour rather than all-purpose flour or regular whole wheat flour.
- You didn’t proof it for long enough. Not giving the bread enough time to rise and double in size may yield a dense loaf or proofing for too long can also yield a dense loaf (see my note above about the proofing stage).
- If you choose to use 100% whole wheat bread flour (rather than a combination with white bread flour), the loaf will naturally be more dense — but the recipe will still work!
Is Honey Wheat Bread Healthy?
In general, homemade bread is healthier than the packaged, store-bought variety because you can control the ingredients that go into each loaf. This easy recipe uses just a handful of very basic wholesome ingredients — no preservatives, artificial colors or flavors. Each slice of the homemade honey wheat bread has about 157 calories, 30 grams of carbohydrates, 2 grams of fat and 5 grams of protein. The whole wheat flour adds additional health benefits to this bread, since whole grains have been linked to numerous health benefits, including a decreased risk of type 2 diabetes, heart disease, and certain cancers (source).
Cook’s Tips and Recipe Variations:
- The Best Flour for Honey Wheat Bread: I always recommend using bread flour (rather than all-purpose flour or regular whole wheat flour) when baking bread. Regular all-purpose flour has between 8 and 11 percent protein, while bread flour contains between 12 and 14 percent protein. The extra protein in bread flour results in a higher rise and a lighter loaf. For this recipe, I suggest a combination of whole wheat bread flour and white bread flour. I do not recommend using regular whole wheat flour, which has very little gluten and will yield a dense, heavy loaf.
- Instant Yeast vs. Active Dry Yeast: This recipe calls for instant (or “rapid-rise”) yeast, which you can add directly to your dough. By contrast, active dry yeast must be dissolved in warm liquid (“proofed”) before combining with other ingredients. If you prefer to use active dry yeast, you can find helpful instructions for making that substitution in this article from Cook’s Illustrated.
- Make sure that you use warm milk when preparing the dough — not too hot and not too cold. You want the milk to feel like warm bath water (about 110-115 degrees F). If it’s too hot you will kill the yeast; too cold and the yeast will not be activated. While it’s not necessary, I usually use a thermometer to test the milk’s temperature before adding it to my dough.
- I recommend using 2% milk or whole milk (not a reduced-fat version such as skim milk). The fat in the milk helps to keep the bread soft.
More bread recipes that you might enjoy:
- Basic Homemade White Bread
- No-Knead Bread
- No-Knead No-Yeast 3-Ingredient Beer Bread
- Cinnamon Sugar Amish Friendship Bread
- Irish Soda Bread
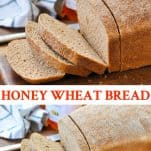
Honey Wheat Bread
Ingredients
- 3 cups whole wheat bread flour
- 1 tablespoon salt
- 1 ¾ teaspoons instant (“rapid rise”) yeast
- 2 ¼ cups warm milk (110 degrees F – 115 degrees F)
- ¼ cup honey
- 2 tablespoons melted butter, plus extra for brushing the crust (if desired)
- 3 – 3 ½ cups white bread flour
- 2 teaspoons canola oil, for greasing the bowl
Instructions
- In a large bowl, whisk together the 3 cups of whole wheat bread flour, salt and instant yeast. Stir in warm milk, honey and melted butter. Beat until smooth. Stir in white bread flour (or additional whole wheat bread flour), ½ cup at a time, to form a soft dough.
- In a stand mixer fitted with the dough hook or on a floured surface, knead the dough until elastic and smooth, 8-10 minutes.
- Use the oil to grease a large mixing bowl. Place the dough in the greased bowl, turning once to grease the top. Cover and let rise in a warm place until doubled, 1 ½ – 2 hours.
- Punch down dough. Turn onto a lightly floured surface and cut the dough into two equal parts. Shape each piece of dough into a loaf. Place in two greased 9 x 5-inch loaf pans. Cover and let rise until doubled, 1 – 1 ½ hours.
- Bake at 375 degrees F for 30-35 minutes, or until the loaves are golden brown and they sound hollow when tapped. Remove from the pans and cool on a wire rack for at least 1 hour before slicing.
- Tip: for a super-soft crust, brush the tops of the bread with melted butter while the bread is still warm.
Notes
- The Best Flour for Honey Wheat Bread: I always recommend using bread flour (rather than all-purpose flour or regular whole wheat flour) when baking bread. Regular all-purpose flour has between 8 and 11 percent protein, while bread flour contains between 12 and 14 percent protein. The extra protein in bread flour results in a higher rise and a lighter loaf. For this recipe, I suggest a combination of whole wheat bread flour and white bread flour. I do not recommend using regular whole wheat flour, which has very little gluten and will yield a dense, heavy loaf.
- Instant Yeast vs. Active Dry Yeast: This recipe calls for instant (or rapid-rise) yeast, which you can add directly to your dough. By contrast, active dry yeast must be dissolved in warm liquid (“proofed”) before combining with other ingredients. If you prefer to use active dry yeast, you can find helpful instructions for making that substitution in this article from Cook’s Illustrated.
- Make sure that you use warm milk when preparing the dough — not too hot and not too cold. You want the milk to feel like warm bath water (about 110-115 degrees F). If it’s too hot you will kill the yeast; too cold and the yeast will not be activated. While it’s not necessary, I usually use a thermometer to test the milk’s temperature before adding it to my dough (you’d be surprised by how warm 110 degrees actually feels).
- I recommend using 2% milk or whole milk (not a reduced-fat version such as skim milk). The fat in the milk helps to keep the bread soft.


I really wanted to try to bake this bread but OMG the whole wheat bread flour is expensive! Guess I’ll have to stick with your awesome white bread recipe.
Hi, Barbara! I buy my stone-ground whole wheat bread flour at a local country market up the street in bulk. When I get it there, it’s not too much more than regular bread flour. Maybe check in your local shops to see if you can buy it at a cheaper price? That’s frustrating, I know. But I’m glad you like the white bread! 🙂
I am going to make this bread but at this time (Covid) my shopping places are limited to drive up pick up almost always . Couldn’t I use (white) bread flour and regular whole wheat flour plus some wheat gluten in order to add gluten to the mix to lighten it up?
Hi, Pat! Yes — that should work fine! I haven’t tested it myself with the gluten, so let me know how it turns out. 🙂