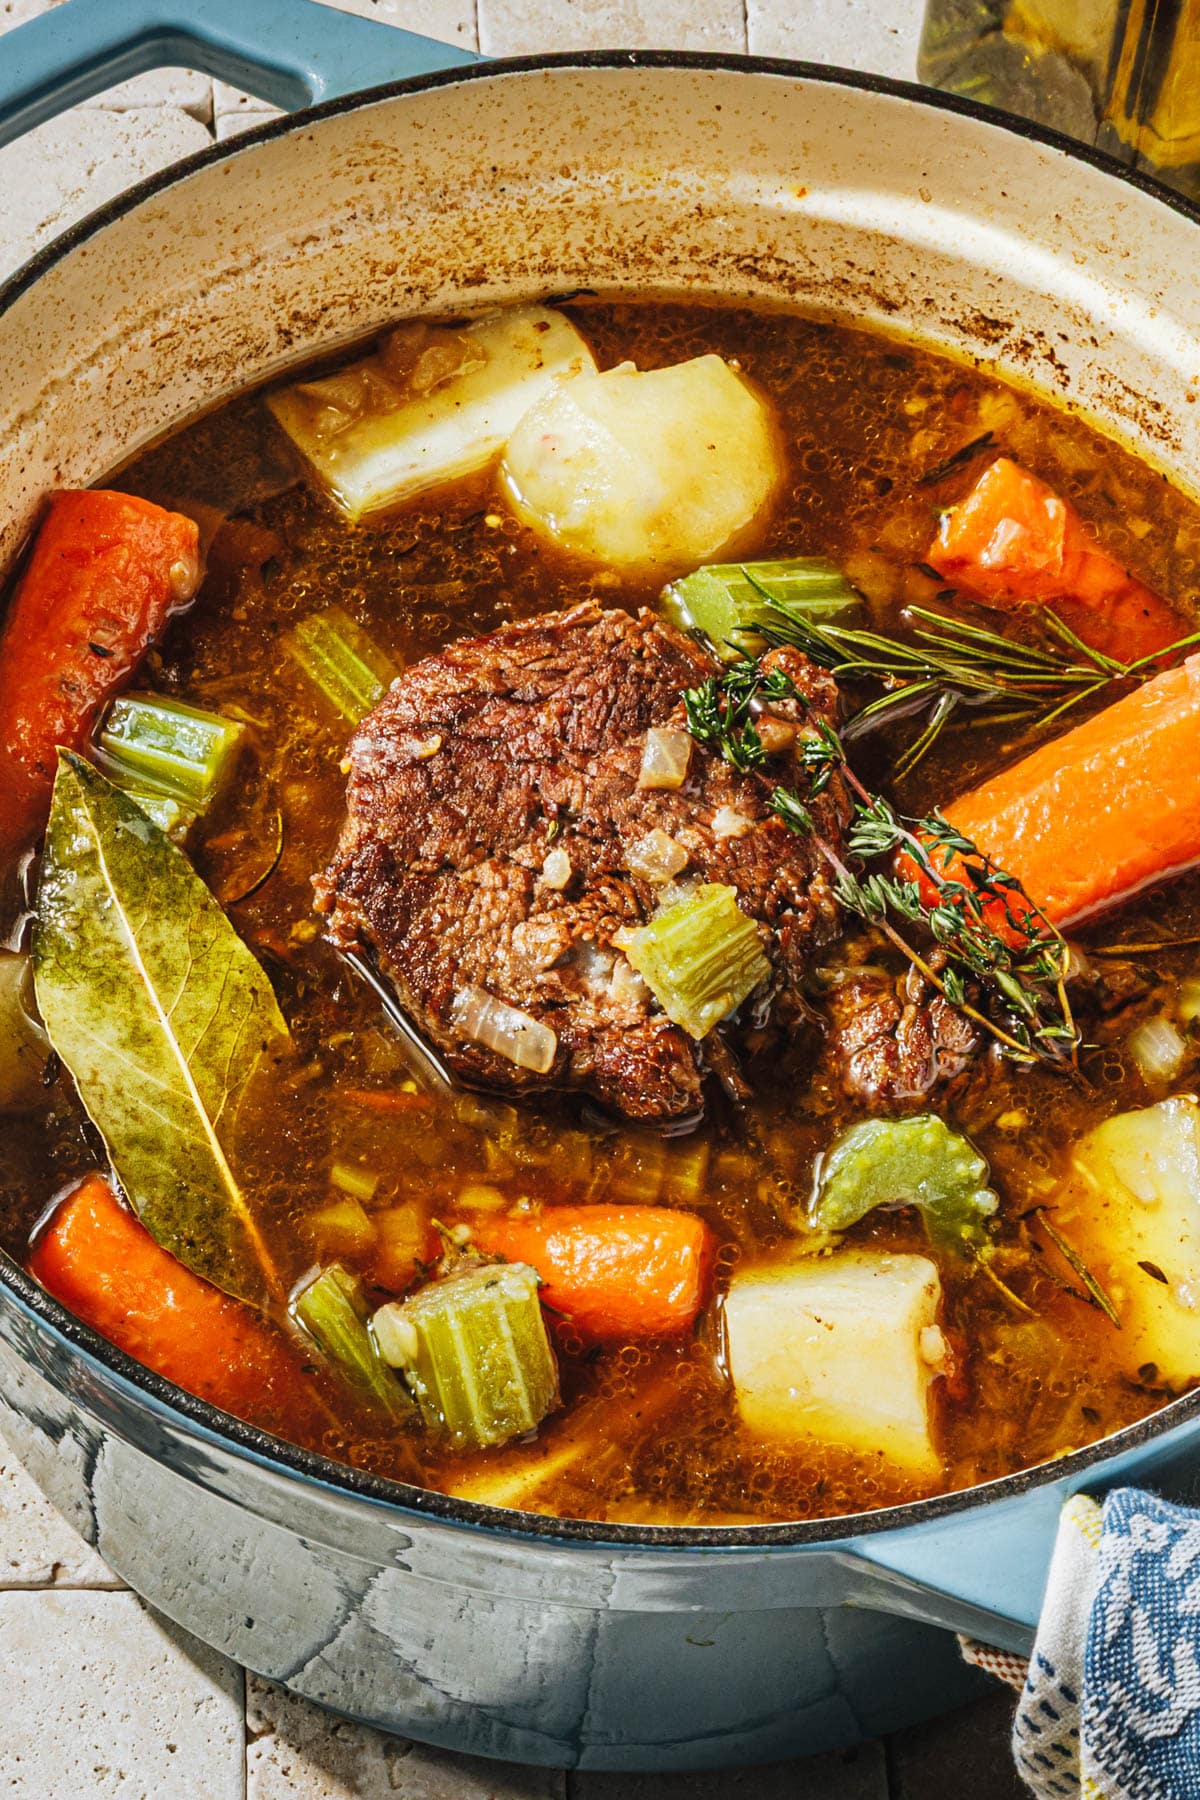
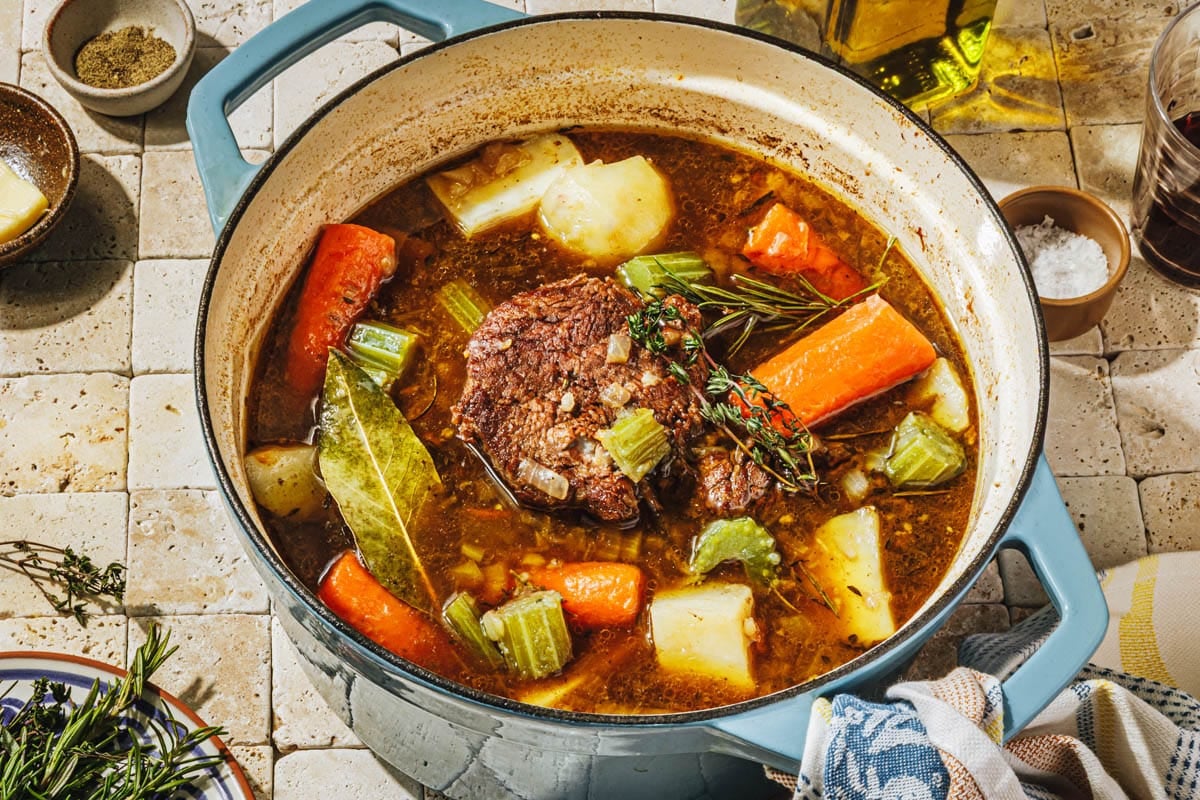
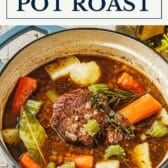
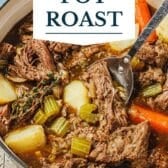
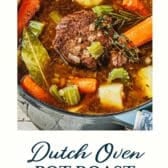
Tender and juicy, this Dutch oven pot roast transforms an affordable cut of meat into a delicious comfort food dinner. The beef slowly bakes with potatoes and carrots for an easy one pot meal. Your whole family will love this classic Sunday supper!
If you’re looking for more Dutch oven favorites, try our Dutch Oven Beef Stew or Dutch Oven Pork Roast (with Gravy). You’ll find even more hearty one-pot meals in our Cast Iron and Dutch Oven Recipes collection.
Photography by BEA MORENO.
Table of Contents
Before You Get Started
- Use a heavy Dutch oven with a tight-fitting lid. Cast iron retains heat evenly and the sealed lid traps moisture for the juiciest roast. Aluminum foil doesn’t create the same effect. If you’re in the market for a new Dutch oven, check out this helpful roundup of the best Dutch ovens you can buy.
- Choose a boneless chuck roast (3-4 lbs). Chuck has great marbling that becomes tender when braised low and slow. You can use bone-in chuck if available (adds flavor), brisket, or round roast, but cooking times may vary.
- If your roast is tough, it’s undercooked. Put it back in the oven to continue braising. Tougher or larger cuts need more time for the fibers to break down.
- Don’t overcook. Braising too long (especially at higher temps or in slow cookers) can dry out the meat. Check for doneness starting around 2.5 hours and pull it when fork-tender.
- Sear the roast for maximum flavor. Browning creates a caramelized crust that adds rich, deep flavor to the finished dish. Don’t skip this step.
Just made this today and it was phenomenal. I’ve made pot roasts before but always used a slow cooker, and they always came out dry, even though I used the Low setting…Definitely making again.
– John
How to Make Dutch Oven Pot Roast
The oven does most of the work for this easy one-pot meal!
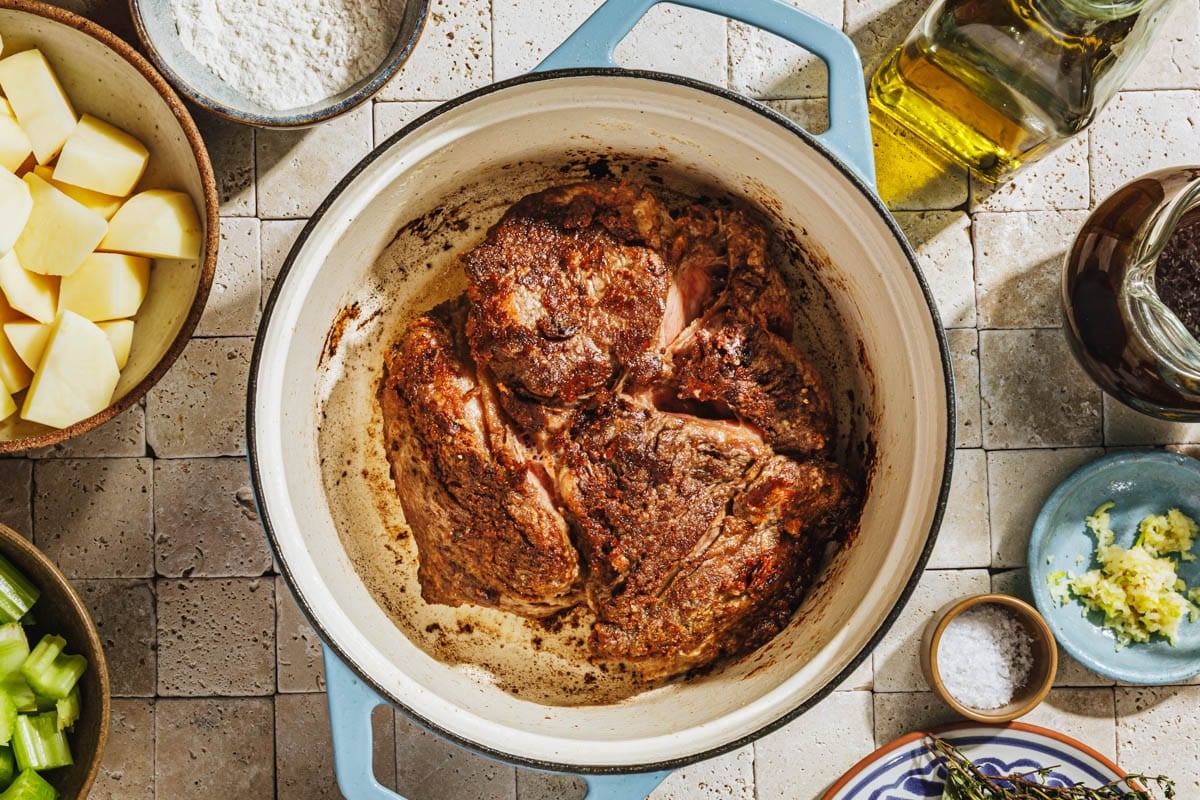
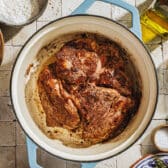
Step 1: Sear the Roast
Dredge the beef in seasoned flour and brown it in oil and butter in a large Dutch oven on the stove top.
Dredging the meat in the flour before browning adds body to the finished sauce. Searing locks in juices and creates caramelized bits (fond) that add incredible depth to your gravy.
Remove the meat to a plate.
** Pro Tip: Pat the roast completely dry before dredging. Moisture prevents proper browning.
Step 2: Deglaze the Pot and Sauté the Vegetables
Pour one cup of the beef broth into the pot and use a wooden spoon to scrape up the bits from the bottom of the pan. These browned bits add great flavor to the liquid in the pot. Add the onions, carrots, celery, and garlic to the pot, cooking and stirring for about 10 minutes.
** Quick Note: Those browned bits on the bottom aren’t burnt; they’re flavor gold. Scrape them all up.
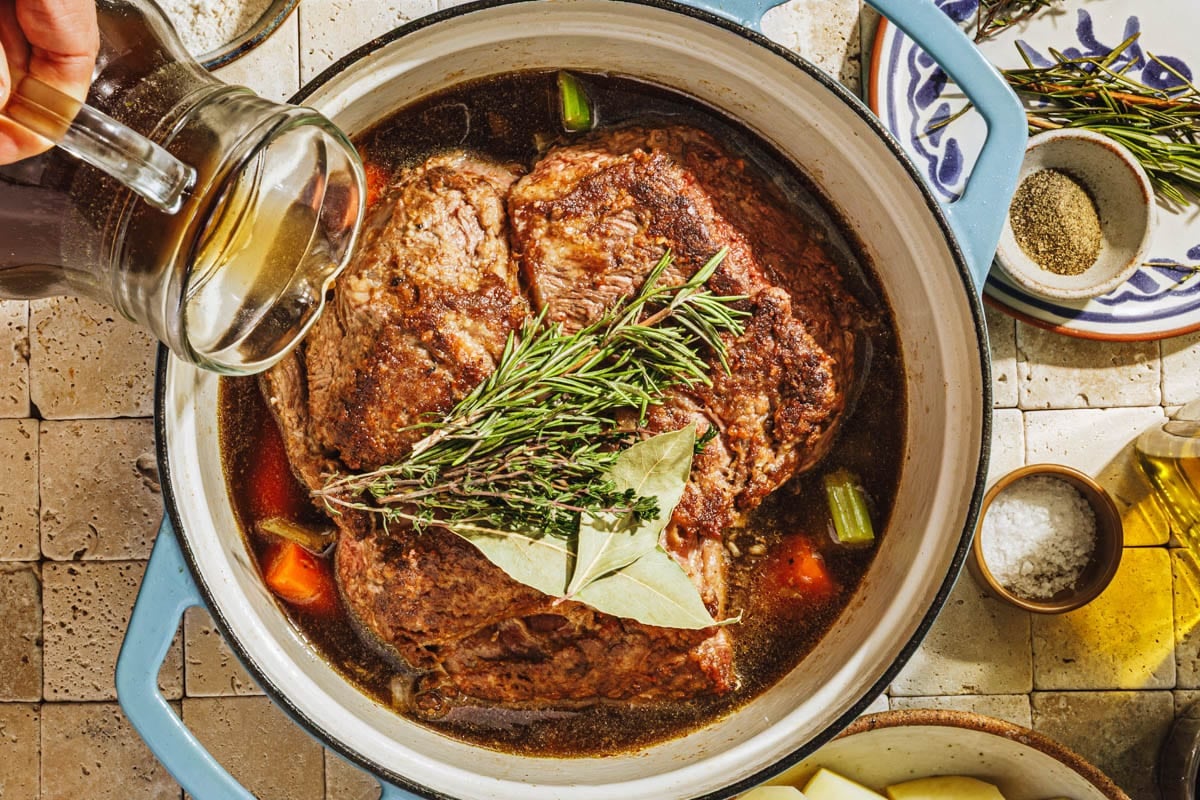
Step 3: Add Liquids and Aromatics
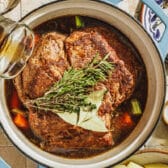
Once the onions are translucent, place the roast on top of the vegetables, add the remaining broth, red wine, fresh herbs, and bay leaves. The red wine adds depth of flavor, but you can sub with additional beef broth when necessary.
** Pro Tip: A splash of Worcestershire or balsamic vinegar adds complexity.
Wine vs. Broth
- What red wine does: Adds depth, richness, and subtle acidity that balances the beef’s richness. Dry red wines (like Cabernet, Merlot, or Pinot Noir) work best.
- When to use broth instead: If you prefer to skip alcohol or don’t have wine on hand, use an equal amount of beef broth or stock. The roast will still be delicious; just slightly less complex in flavor.
- Pro Tip: If using wine, let it simmer for 2-3 minutes before covering to cook off the raw alcohol taste.
Step 4: Braise Low and Slow at 275°F
Season liberally with salt and pepper, cover the Dutch oven, and bake in a 275°F oven for 2 hours. We use 275°F instead of the more common 325-350°F. This lower temp takes a bit longer but ensures the meat stays incredibly moist and tender without drying out.
** Quick Note: Higher temps (325-350°F) work too and cut cooking time by 30-45 minutes, but watch closely to avoid drying.
** Pro Tip: If the top of the roast looks dry, baste it once or twice during cooking.
Plan for about 3-3.5 hours total for a 3 lb. roast.
Step 5: Add Potatoes
While the beef is in the oven, peel and dice the potatoes. We wait to stir the potatoes into the pot towards the end of the cooking time (after the first 2 hours) so that they don’t get too mushy.
** Pro Tip: Yukon golds don’t need peeling and hold their shape well.
** Quick Note: If the liquid reduces too much during cooking, add ½ cup more broth.
Delicious! Love that this recipe calls for putting the potatoes in toward the end – they were the perfect texture!
– Monica
Step 6: Check for Doneness
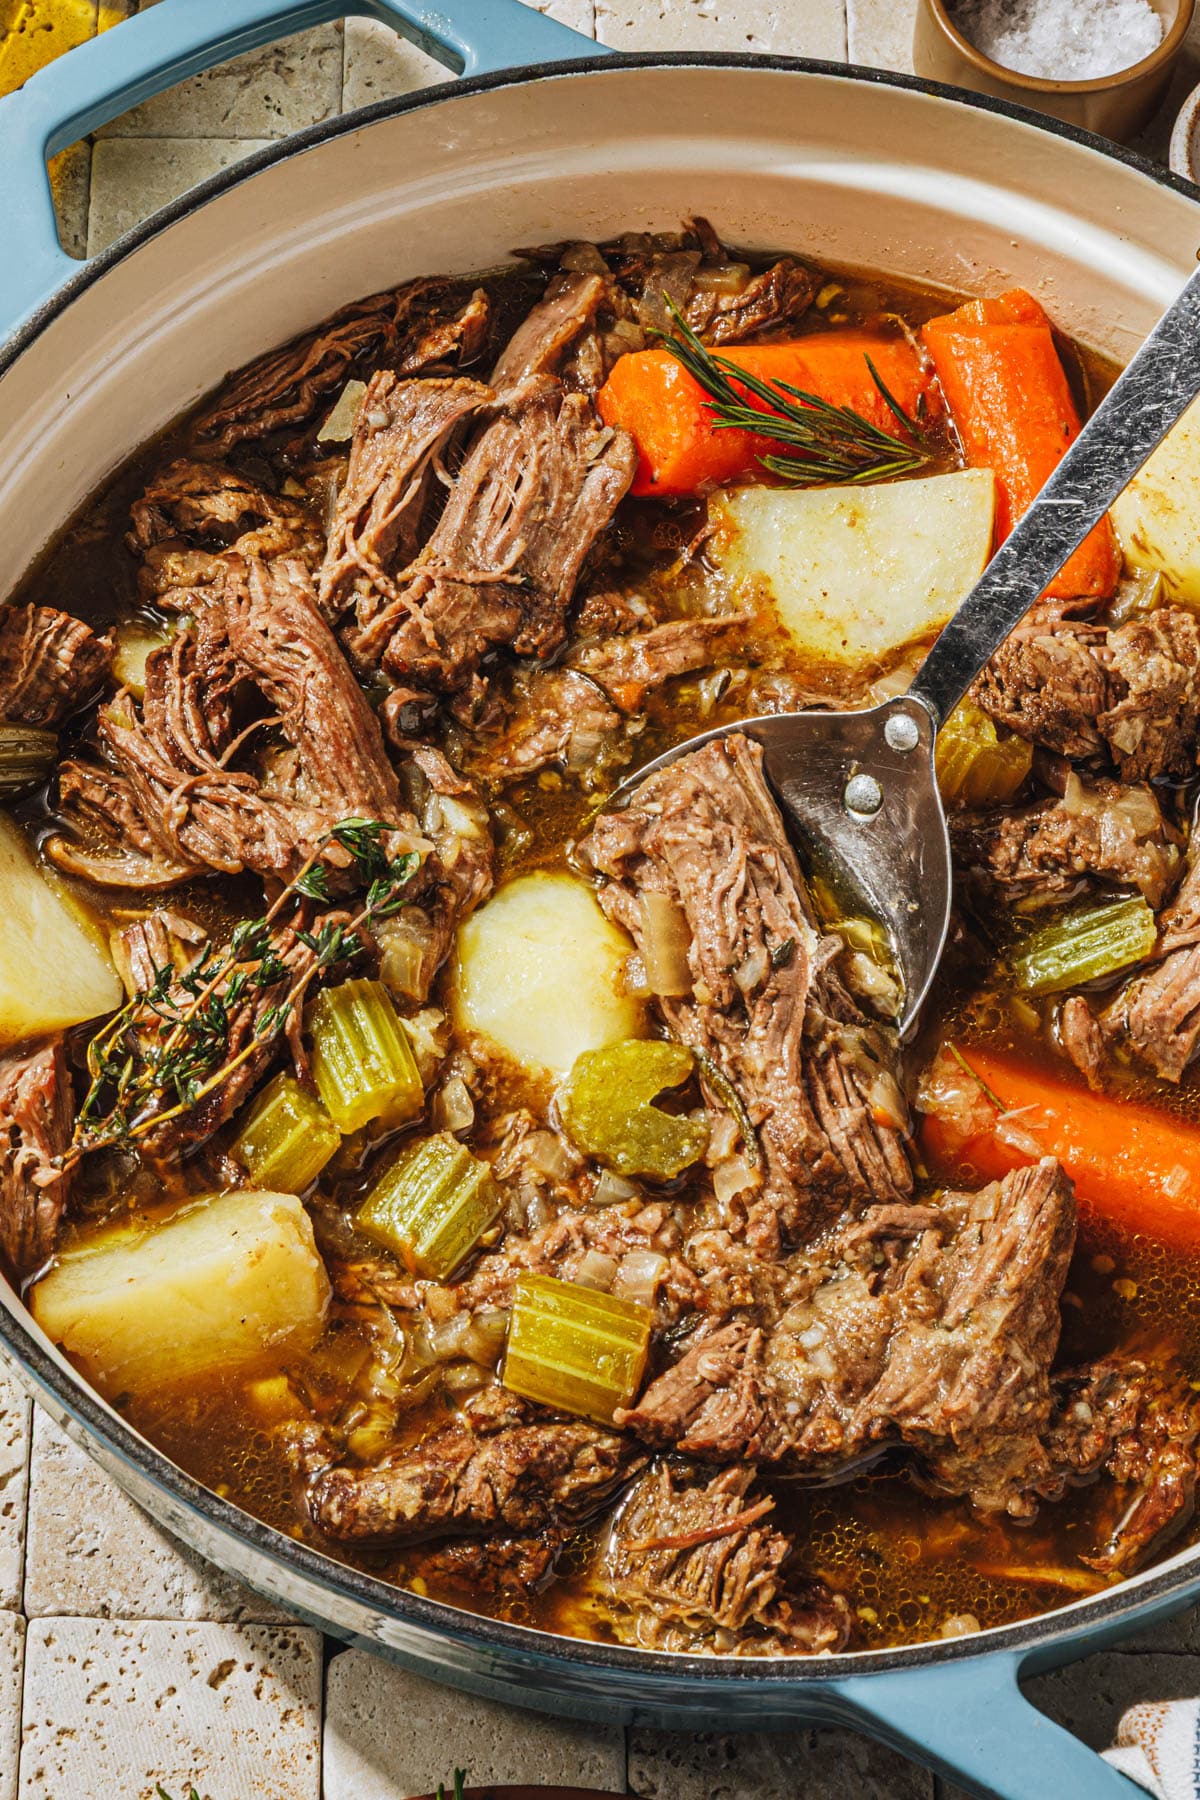
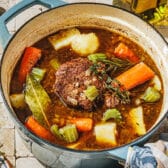
Cover the pot again and return it to the oven to continue baking for an additional 45 minutes – 1 hour, or until the potatoes are fork-tender and the roast is done. The roast is done when it pulls apart easily with a fork and registers 195-205°F internally. It should feel tender, not tough or rubbery. That’s the point where it practically melts in your mouth!
** Quick Note: The meat is done when the fibers separate easily, the meat has a slight shred when pulled, and the color is a deep brown throughout (not pink or gray).
** Time-per-pound guidance: Approximately 1 hour per pound at 275°F, but use visual and texture cues as your best guide.
Making Gravy from Pan Drippings
- After removing the roast and vegetables, strain the liquid from the pot.
- Melt 2 tablespoons of butter in a skillet over medium heat, whisk in 2 tablespoons of flour, and cook for 30 seconds.
- Gradually whisk in 1-1.5 cups of the strained drippings until smooth.
- Simmer 1-2 minutes until thickened. Season with salt and pepper.
- Quick Note: If the gravy is too thin, simmer longer. If too thick, add more drippings or broth.
Serving Suggestions
Serve the beef, potatoes, and vegetables with a homemade gravy and rice or egg noodles, if you’d like. On the side, try Aunt Bee’s 3-ingredient biscuit recipe, cathead biscuits, Southern cornbread, Southern-style green beans, or coleslaw. Then, add a chocolate bundt cake using cake mix for dessert!
Storage and Make-Ahead Tips
- Prep Ahead and Reheat: If you prepare the roast a day ahead, cover and refrigerate it overnight. The next day, skim off any solidified fat and reheat it gently in a warm oven or over low heat on the stovetop.
- Store leftover pot roast in an airtight container in the refrigerator for up to 3 days.
- Wrapped tightly, you can freeze the leftovers. Freeze the sliced beef in its gravy for best results. Thaw overnight in the fridge and reheat gently on the stovetop or in a 300°F oven. I don’t recommend freezing the cooked vegetables or potatoes; however. They tend to have a mushy and watery texture when thawed.
- How to Use Leftovers: Make pot roast sandwiches on crusty bread, a beef and vegetable skillet hash, tacos, or nachos with the leftover shredded beef.
This recipe was delicious. I have made pot roast a variety of ways, but this recipe had a lot of flavor and my family really enjoyed it!!! This will be on my winter rotation for sure!!!
– Mary
Recipe Variations
- Omit the potatoes in your pot, and instead serve the finished dish over a plate of sour cream mashed potatoes instead.
- Most grocery stores sell boneless chuck roasts that weigh about 3 pounds. Those are perfect for this recipe! I have also used a 4-lb. bone-in chuck roast from a local farm, which requires about the same cooking time as a 3-lb. boneless roast. The bone adds a lot of rich flavor to the juices in the pot, but the bone-in chuck roasts are harder to find in stores. If you use larger boneless roasts (such as 4-5 lbs.), you’ll need to increase the cooking time by about 1 hour.
- This recipe is optimized for Dutch oven braising. For slow cooker or pressure cooker methods, try slow cooker pot roast with Coke instead.”
- Swap or add other root vegetables like parsnips, turnips, or sweet potatoes along with (or instead of) the carrots and potatoes.
Frequently Asked Questions
How long does pot roast take in a Dutch oven?
Plan for about 1 hour per pound at 275°F. A 3-lb roast takes approximately 3-3.5 hours total. The roast is done when it’s fork-tender and pulls apart easily.
What temperature is best for Dutch oven pot roast?
This recipe uses 275°F for the moistest, most tender results. You can use 325-350°F to save 30-45 minutes, but watch closely to avoid drying out the meat.
Do I have to sear the roast first?
Searing isn’t mandatory, but it’s highly recommended. Browning the meat creates a flavorful crust and develops fond (browned bits) that enrich your gravy and the entire dish.
Why is my pot roast tough and chewy?
It’s undercooked. Return it to the oven and continue braising until it’s fork-tender. Tougher cuts or larger roasts need more time for the connective tissue to break down.
Can I make this ahead?
Absolutely. Prepare the roast up to 1 day ahead, refrigerate overnight, skim off solidified fat, and reheat gently before serving.
Related Recipes

Did you make this recipe?
If you enjoyed this recipe, please leave a comment with a 5-star review at the bottom of the post. Thank you!
Watch How to Make It
Dutch Oven Pot Roast
Equipment
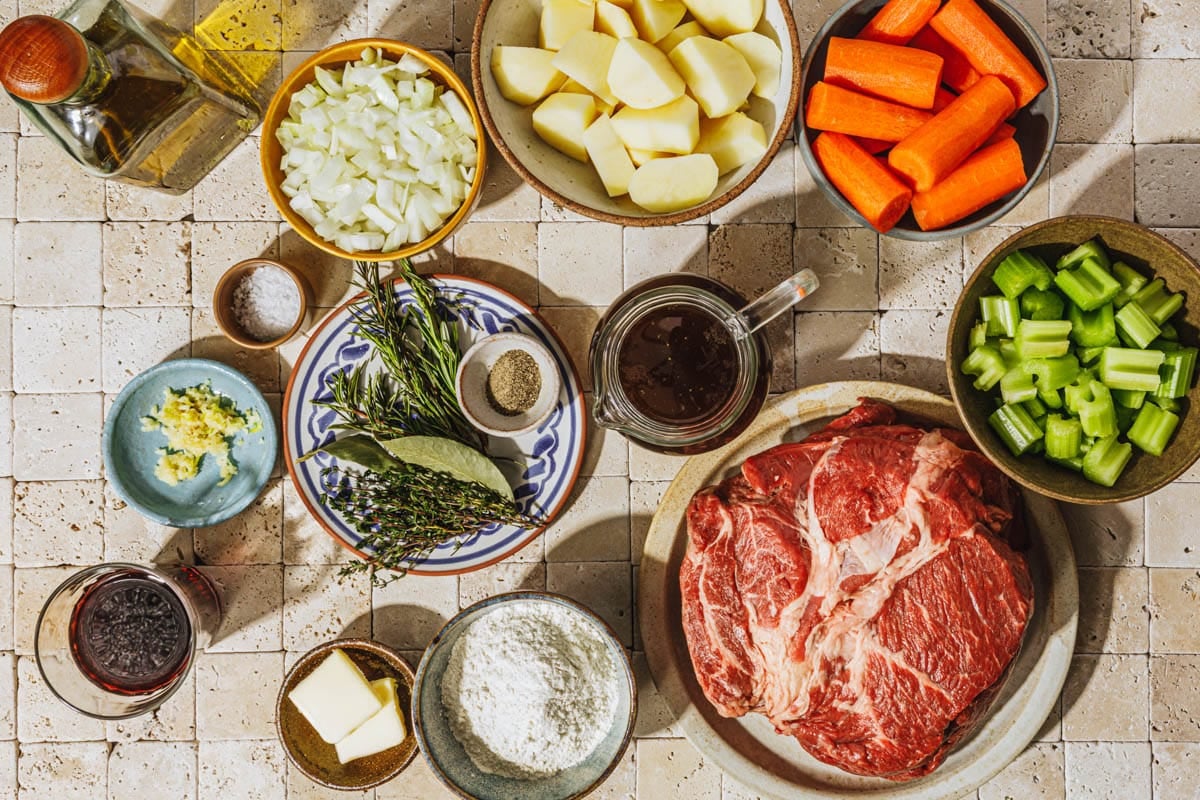
Ingredients
- ⅓ cup all-purpose flour
- Kosher salt and ground black pepper, to taste
- 1 (3 lb.) boneless chuck roast
- 1 tablespoon butter
- 2 tablespoons olive oil
- 2 onions, thinly sliced
- 5 carrots, peeled and cut into 2-inch pieces
- 4 large ribs celery, cut into ½-inch crescents
- 2 cloves garlic, minced
- 3 cups beef broth, divided
- ½ cup red wine (or additional beef broth)
- 2 sprigs fresh thyme (or ¼ teaspoon dried)
- 2 sprigs fresh rosemary (or ¼ teaspoon dried)
- 2 bay leaves
- 3 medium Russet potatoes, peeled and cut into eighths
Instructions
- Preheat oven to 275°F. Mix the flour with a generous amount of salt and pepper on a sheet of waxed paper. Pat the roast dry; dredge it in the flour mixture on all sides. Heat butter and olive oil in a large Dutch oven over medium-high heat until it is hot but not smoking. Brown the meat to give it nice color (about 5 minutes per side). Transfer the meat to a plate.
- Reduce the heat to medium and add 1 cup of the beef broth, scraping with a wooden spoon to deglaze the pan (loosening all of the browned bits from the bottom).
- Add the onions, carrots, celery and garlic to the pot. Cook, stirring, until the onions are translucent (about 10 minutes). Place the roast on top of the vegetables.
- Add the remaining two cups of beef broth, red wine, thyme, rosemary, and bay leaves. Season with salt and pepper, cover, and bake in the 275°F oven for 2 hours.
- After 2 hours, add the potatoes to the pot, mixing them into the liquid. Cover and return to the oven for another 45 minutes – 1 hour, or until the potatoes are soft and the meat is fall-apart tender.
Notes
- Use a heavy Dutch oven with a tight-fitting lid for even heat and moisture retention.
- Pat the roast dry before searing for better browning.
- Scrape up all the browned bits when deglazing (they add tons of flavor).
- This recipe uses 275°F for extra-moist meat. Higher temps (325-350°F) work but reduce cooking time by 30-45 minutes.
- Plan for about 1 hour per pound. Check for doneness starting at 2.5 hours.
- The roast is done when fork-tender and pulls apart easily (internal temp: 195-205°F).
- Red wine adds depth; substitute with additional beef broth if preferred.
- Don’t add potatoes at the start; they’ll get mushy. Add them during the last 45-60 minutes.
- If liquid reduces too much, add more broth. If the roast looks dry on top, baste it once or twice.
- Leftover beef freezes well in its gravy for up to 2 months. Don’t freeze cooked potatoes/vegetables.
- See the post above if you’d like to make a gravy with the pot drippings.
Nutrition
Originally published in August, 2020, this post was updated in December, 2025.


Made this yesterday. It turned out awesome. The meat was tender and the flavor was amazing. Definitely will be making this again.
Yay! Thanks, Michele!
I’m making this a day in advance. Any tips for storing and reheating?
Hi, Sam! That will work fine! Here are the make-ahead instructions:
If you prepare the roast a day ahead, cover and refrigerate it overnight. You can just leave it in the same Dutch oven, but let it cool to room temperature before placing it in the fridge. The next day, skim off any solidified fat and reheat it gently in a warm oven or over low heat on the stovetop.
I usually find these blog recipes somewhat disappointing. This turned out absolutely incredible. Will be making this often.
I did the potatoes separately (mashed) and used apple cider because I didn’t have any red wine around.
I’m so glad that it was a hit, Kyle. Thank you!
It’s been years since I’ve done a pot roast and I decided to use this recipe for Christmas dinner – it turned out great! The roast was about 4 1/2 pounds for 8 people and there was enough left over for MAYBE one lunch today. Everyone raved about the roast (none of us are big red meat eaters so that’s a great compliment!) One question – after taking everything out of the pot there was SO much liquid left – I know the lid was on the whole time, but doesn’t some of that liquid cook away?
Thanks for a great recipe!
Hi, Cynthia! That’s good — you want plenty of liquid in the pot, since you need it to braise the meat. The vegetables and meat release a lot of liquid as they cook, and since the lid is on the pot nothing evaporates. You can use some of the drippings and liquid from the pot to make a gravy, if you like!
This is the best roast recipe I’ve ever made. I cook it a little longer than called for, but the recipe is perfect. ♥️
Yay! Thank you, Cindy!
Good morning. How do I make beef broth to add to the recipe please? I plan on making pot roast with your recipe today and prefer not to use store bought broth. Many thanks.
Hi Laura,
Here is a good recipe for homemade beef broth. We hope you enjoy the recipe!
Thanks a bunch for this recipe. I just got my oven repaired this morning so I’m going to try this recipe today.
We’re glad to hear your oven is working, Susan. We hope you enjoy the recipe!
This is the best recipe for pot roast. I’ve made it over 6 times so far. It’s excellent. Thank you for sharing it ❤️
Thank you so much, Melissa!
Nice post!
Thank you!
Thank you so much! Aalikinfo.com
Great taste and super easy.
Thank you, Penny!
Hi Blair! Because I’ve read a number of recipes for Pot Roast in a Dutch oven, I loved the image and imagined aroma your recipe produced just from reading it! Question, my hubby and I are empty nesters and would only have a 2 pound Chuck Roast for dinner and leftovers (if they’re available). So, how long would our roast take given for this reduced size of roast? There would still be plenty of yummy (red) potatoes, carrots, celery, onions, etc., plus red wine, beef broth and seasonings added in to dazzle our tongues! Many thanks!
Hi Shari,
We haven’t tested this recipe with a 2-pound roast and can’t attest to the results. We recommend using a 3-pound roast and storing the leftovers for another day to ensure your roast has enough time to become tender and juicy! A smaller cut is likely to overcook and dry out before the rest of the ingredients are ready.
This might be a very good recipe, however there are so many ads on this page that cover most of the recipe up that I have given up.
We’re sorry you feel this way, Sue. We do try to keep ads to a minimum, but they are how we are able to continue to put out recipes for free. You can also click the “jump to recipe” button at the top of any page to skip down to the recipe card and skip the bulk of the ads. We do hope you give the recipe a try!
Hi. I need to cook this totally on the stove top, as I don’t have a working oven large enough for my cast iron dutch oven. Should I just follow the instructions and leave it on the stovetop? Or do I need to do something different.
Thank you
Hi, Carol! No problem — you can follow these general cooking times: https://www.theseasonedmom.com/stovetop-pot-roast/
Oh, also, I’ll be using a lamb roast and using all Moroccan spices to flavor it…
Let us know how it turns out!
I just bought a new Dutch oven a week ago and was looking for a first recipe to make in it. I found your Juicy Pot Roast recipe and, based on the rave reviews, decided to buy the ingredients I needed to make it. I followed the instructions exactly and my husband and I were pleasantly surprised at how very tasty and tender the Chuck roast was. I did use dried herbs and may opt for fresh the next time. Thank you for this delicious recipe! I will be making it again next month, no doubt.
We’re so glad you enjoyed the recipe, Marlene! Thank you for trying it out!
TWO onions though? Even after watching your video it looks like half an onion at the very most.
I made this for my daughter and I and it was pretty fantabulous! Thanks for the amazing recipe!
Glad you enjoyed it, Deric!
How would I adjust this recipe if my 3lbs of meat were cut up into one inch cubes?
Hi, Hannah! You might be able to reduce the total cooking time slightly, but you’ll just need to keep an eye on it. You’ll know the meat is done when it’s fall-apart tender. Hope you enjoy!
I don’t know what kind of special cows you have, but the sirloin and short loin are at the back half of the cow, not the front. The chuck roast is near the front.
How would I adjust this recipe if I have meat that’s been cut into 1inch cubes?
This is a fantastic recipe! The technique is easy to follow and almost fool proof. The flavors are amazing and the left over makes great sandwiches on french bread. I’ve made this recipe twice, one exactly as instructed and the other with slight modifications. The first was exactly like the recipe, as to pay respect to the author I try not to modify too much, had excellent results. The second time I used leeks instead of onions, it’s a milder onion flavor and in season at my local farm. I also tossed the chopped vegetables with 3 tbls of flour to have a thicker sauce. Both turned out amazing and just solidified what a complete recipe this is. I will be excited about trying other recipes from this author. Thanks!
Thank you so much for such great feedback, William! We truly appreciate it and are so glad you enjoyed the recipe.