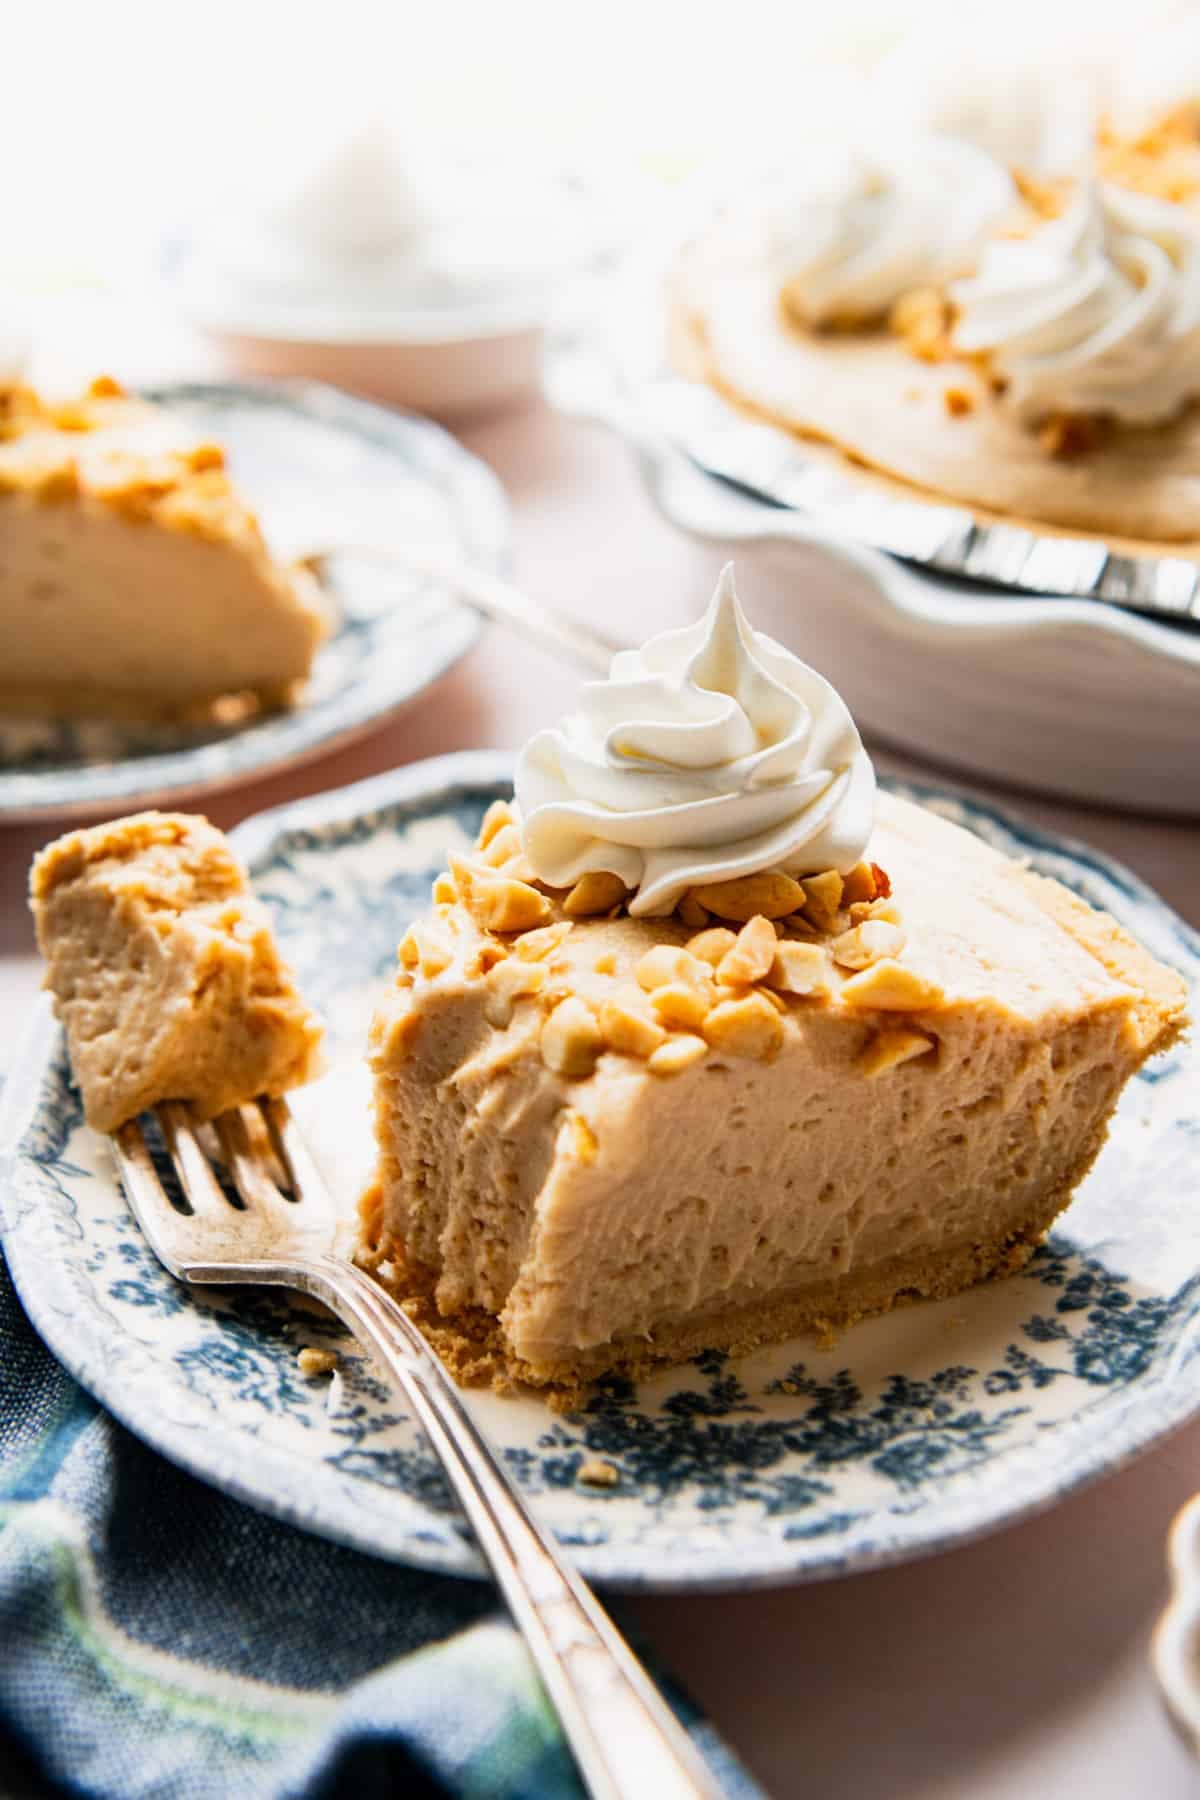
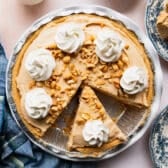
This creamy no-bake peanut butter pie has a graham cracker crust and a light, fluffy filling made with real cream cheese and freshly whipped cream. With just 10 minutes of prep and a store-bought crust, it’s an easy make-ahead dessert that works for everything from holiday tables to summer suppers!
More Easy No-Bake Desserts:
Before You Get Started
A no-bake peanut butter pie is forgiving, but a few small details make the difference between a dreamy, fluffy slice and a runny one. Keep these in mind before you start:
- Use processed peanut butter. Stick with a classic like Jif or Skippy. Natural peanut butter separates and can leave the filling grainy or loose.
- Keep the heavy cream very cold. Pull it straight from the fridge so it whips up quickly and gives the filling its light, fluffy texture.
- Don’t overbeat the filling. Stop the mixer the moment it thickens to soft peaks. Overwhipping breaks the cream and can make the filling grainy.
How to Make No-Bake Peanut Butter Pie
Here’s how the whole thing comes together. Plan for about 10 minutes of hands-on prep and at least 4 hours in the fridge to set.
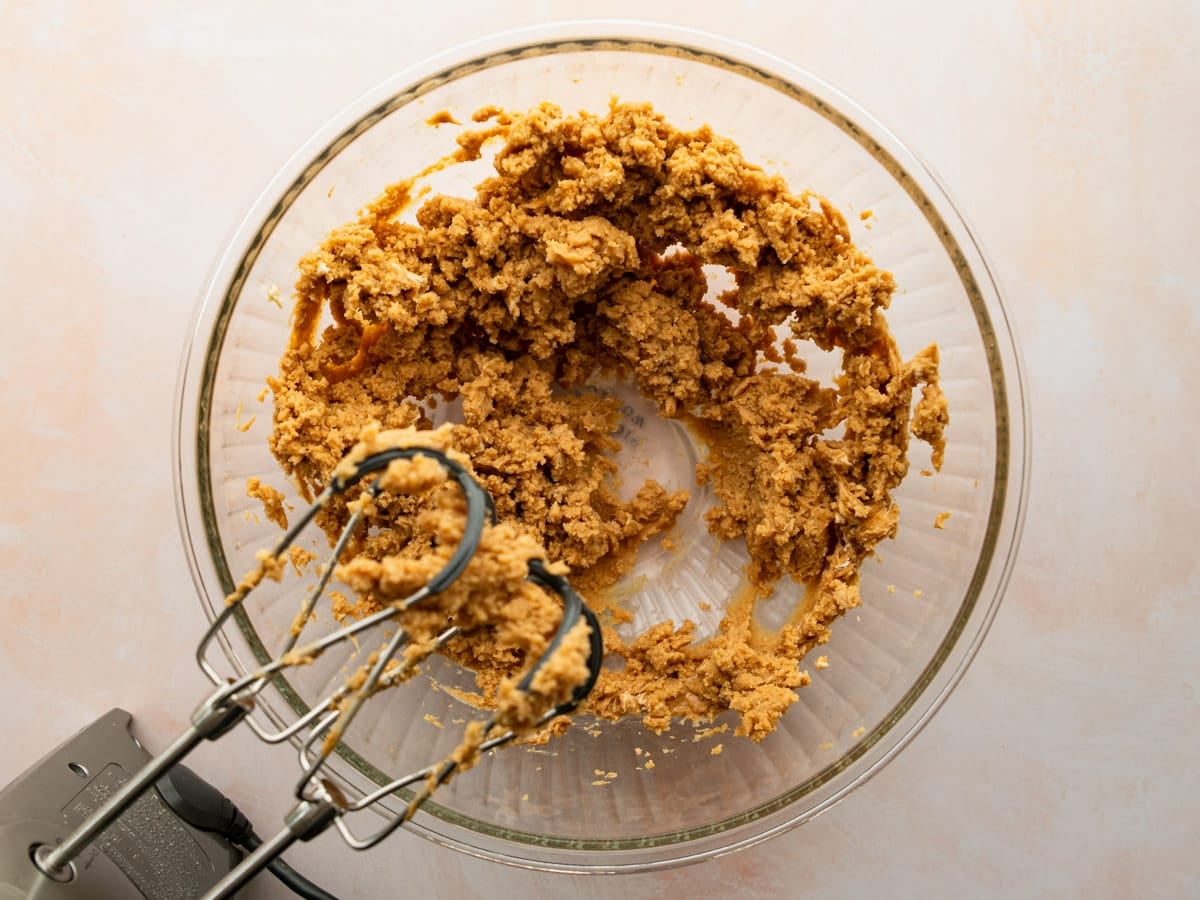
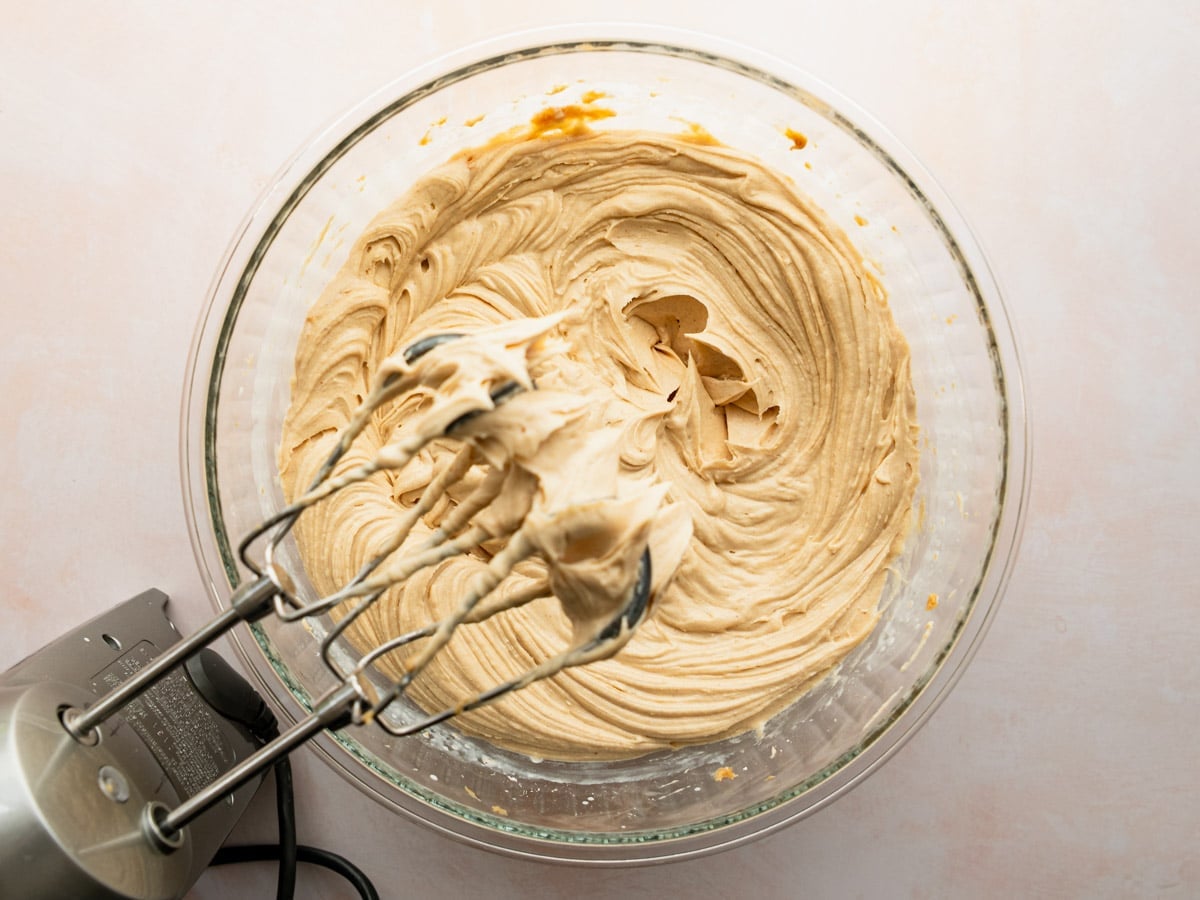
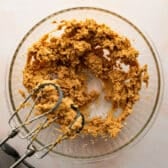
Step 1: Beat the Peanut Butter and Cream Cheese
In a large bowl, beat the peanut butter and softened cream cheese together on medium speed until smooth. Scrape down the sides a couple of times so nothing clings to the bowl.
Mixing these two together first keeps the filling lump free.
⇢ Use a softened block of cream cheese. Pull it out about an hour ahead. Cold cream cheese will leave stubborn lumps in the filling.
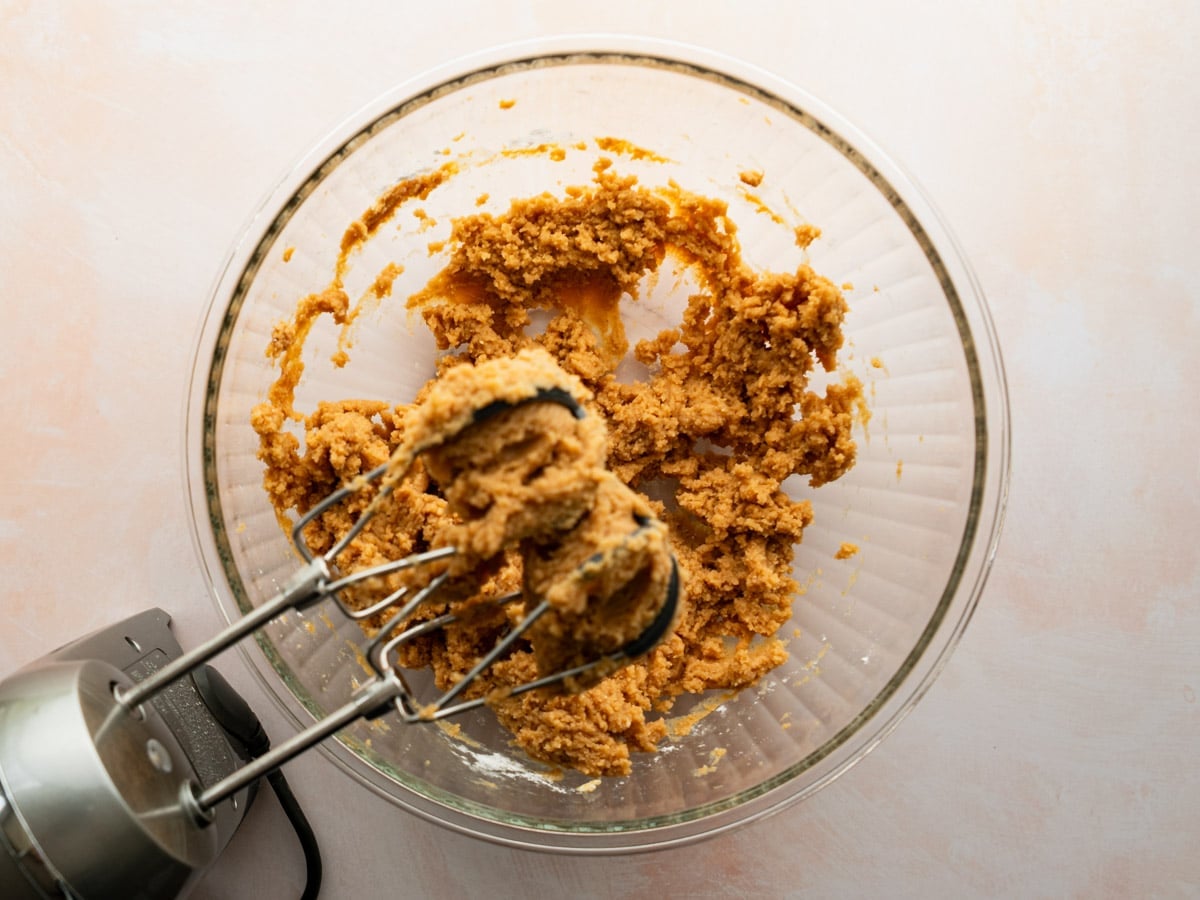
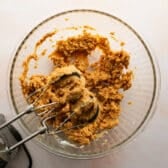
Step 2: Add the Confectioners’ Sugar
Sift the confectioners’ sugar before adding it to the bowl.
Beat on low until combined, then on medium until smooth. The mixture will start to thicken as the sugar blends in.
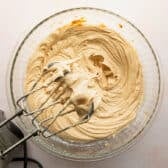
Step 3: Whip in the Cold Cream
Pour in the very cold heavy cream and start the mixer on low just until it combines. Then turn it up to high and watch closely. The filling thickens fast once the cold cream hits the peanut butter mixture.
⇢ Don’t overmix. Stop as soon as you see soft peaks and gentle ripples. Overbeating turns the filling grainy.
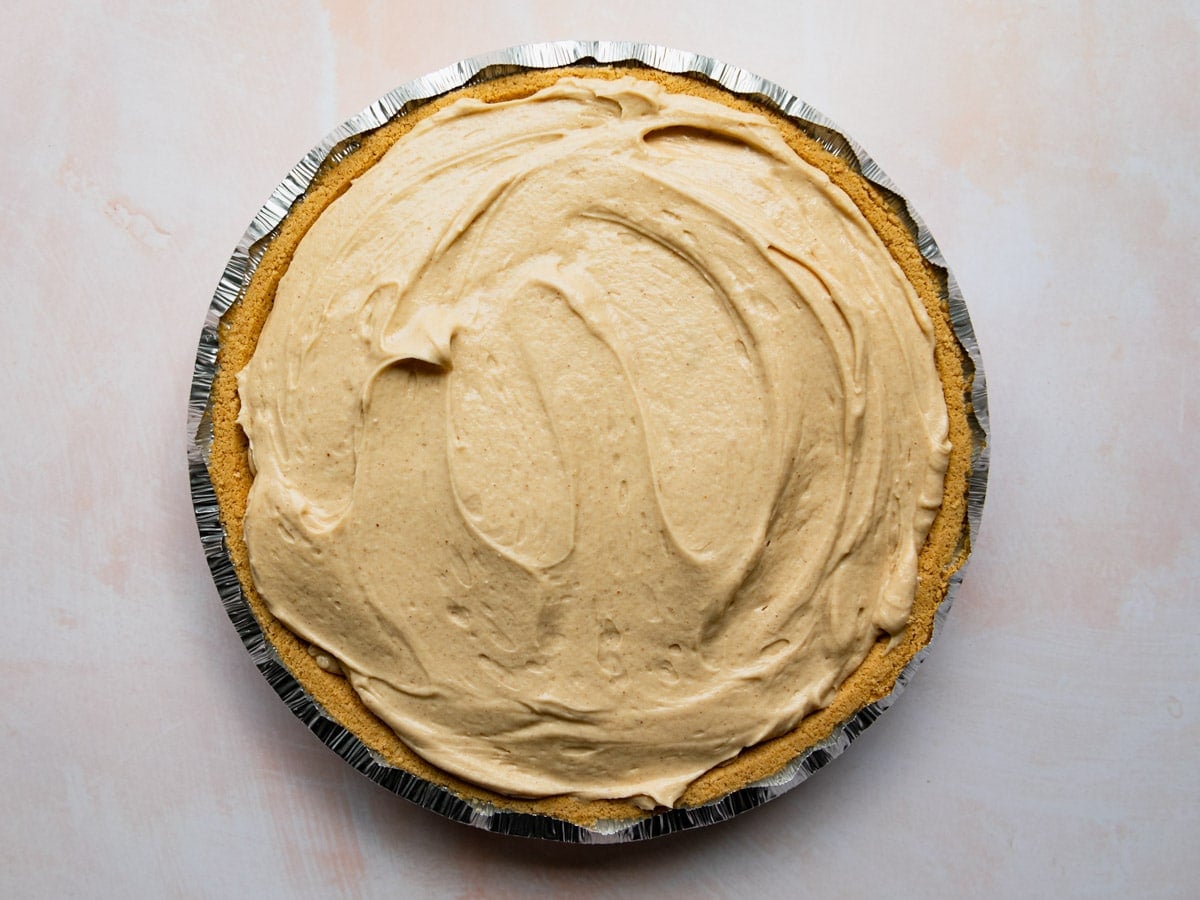
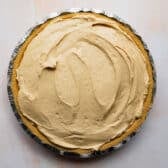
Step 4: Fill the Crust and Chill
Spread the filling gently into a store-bought graham cracker crust. Try not to press too hard or you’ll deflate the whipped cream. You might have a little extra filling that doesn’t fit in the crust.
Tuck it into a small ramekin and refrigerate; it sets up into a delicious peanut butter mousse, perfect for a chef’s treat with a spoon or a few graham crackers.
Cover the pie and refrigerate for at least 4 hours, or overnight. The filling firms up beautifully and slices cleanly once chilled.
⇢ Want a homemade crust instead? A baked vanilla wafer or homemade graham cracker crust works beautifully here. Find the full homemade graham cracker crust recipe in the notes section of the recipe card below. Cool it completely before adding the filling, or it will soften the bottom layer.
⇢ Want a chocolate twist? Drizzle a little melted chocolate or chocolate shell over the filling. It sets into a pretty swirl on top.
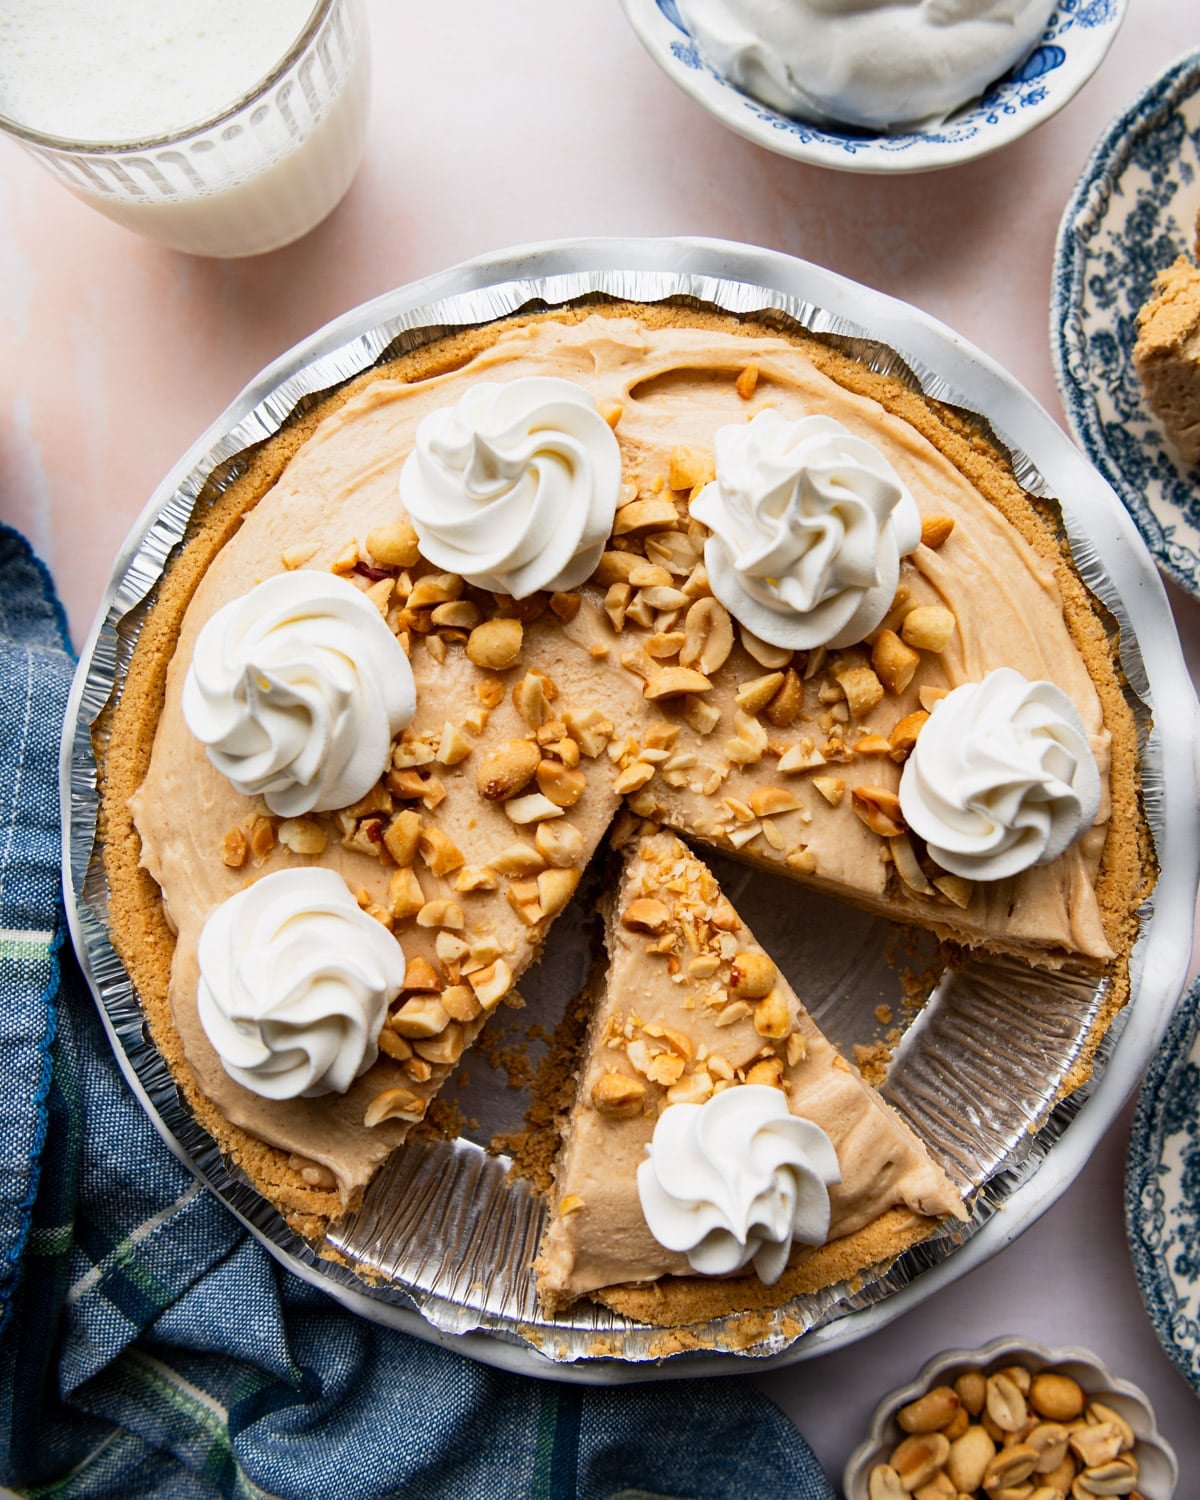
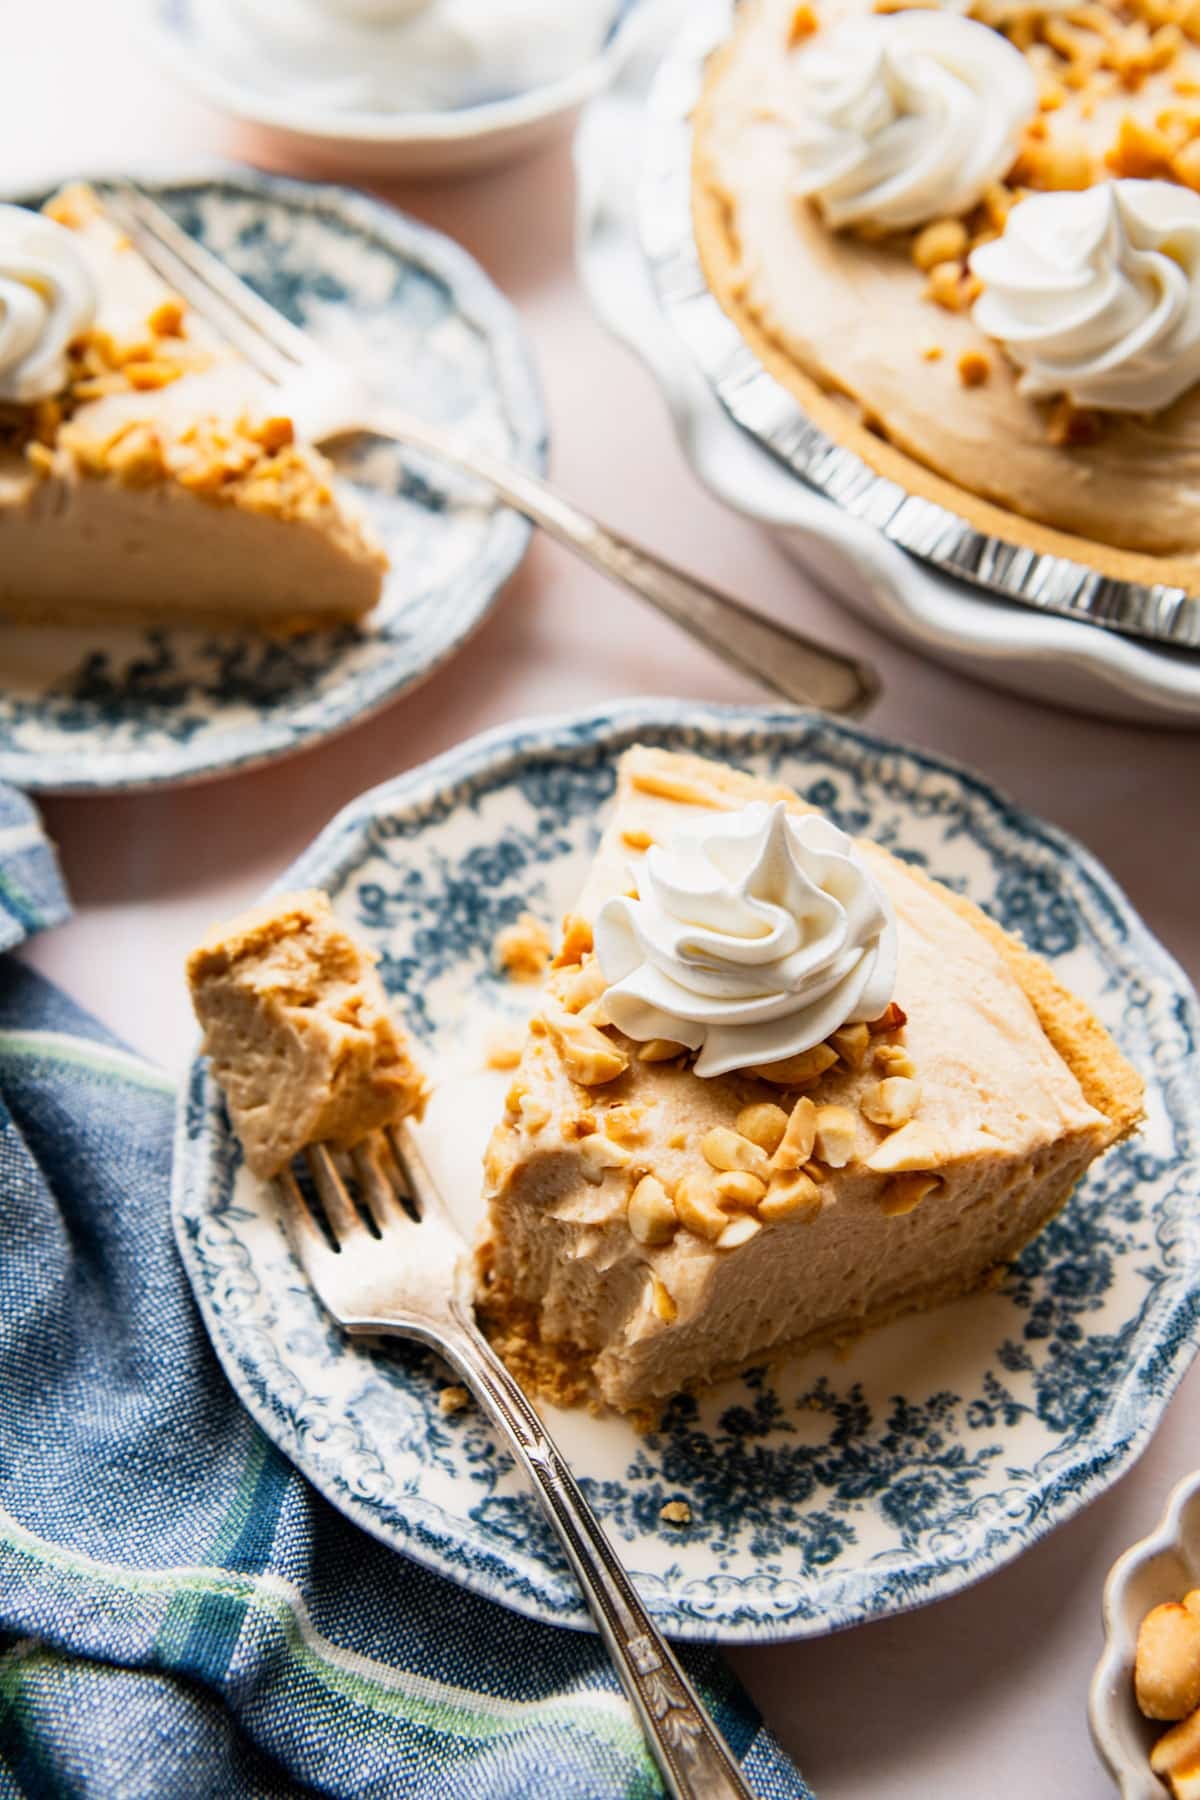
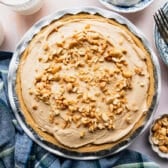
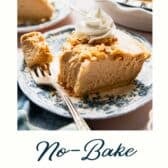
Step 5: Garnish and Serve
Right before serving, top the pie with chopped peanuts and a swirl of whipped cream. Add the peanuts at the last minute so they stay crunchy.
Storage, Freezing, and Make-Ahead
Make ahead: Prep the pie a day in advance for the easiest holiday or dinner-party planning. It actually slices better after a full night in the fridge.
Store the pie covered in the refrigerator for up to 4 days.
Freeze individual slices for 1 to 2 months. Wrap each slice in plastic, then foil. Thaw in the fridge before serving.
Frickin’ amazing! I had a bottle of the chocolate shell topping so I added it to the top. Super yummy, everyone wants more.
– Sarah
Frequently Asked Questions
Why is my peanut butter pie soft or runny?
This usually happens when natural peanut butter is used, the cream isn’t cold enough, or the filling is underwhipped. Stick with processed peanut butter, pull the cream straight from the fridge, and whip until you see soft peaks.
Can I use natural peanut butter?
You can, but it changes the texture. Natural peanut butter separates and won’t whip as smoothly. For the fluffiest filling, stick with a classic processed peanut butter like Jif or Skippy.
Why is my filling grainy?
Graininess usually comes from overmixing or from cold cream cheese. Make sure the cream cheese is softened to room temperature, and stop whipping as soon as the filling thickens to soft peaks.
More Easy Spring and Summer Desserts

Did you make this recipe?
If you enjoyed this recipe, please leave a comment with a 5-star review at the bottom of the post. Thank you!
No-Bake Peanut Butter Pie
Equipment
- Electric mixer or stand mixer
Ingredients
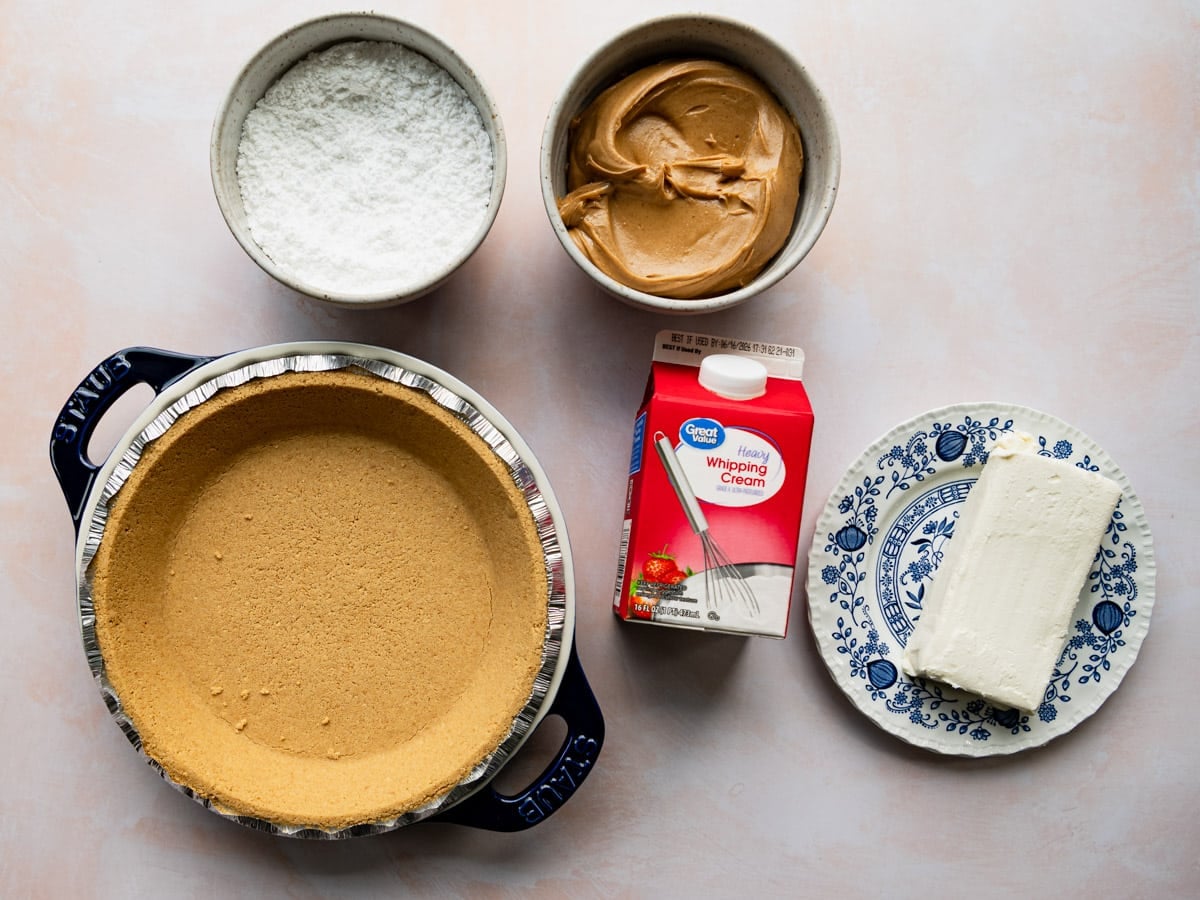
- 1 (9-inch) store-bought graham cracker crust (or see notes below for homemade)
- 1 ½ cups creamy peanut butter (such as Jif or Skippy)
- 1 (8-ounce) block cream cheese, softened at room temperature
- 1 cup confectioners' sugar, sifted
- 2 cups very cold heavy whipping cream
- Optional garnish: chopped peanuts; whipped cream
Instructions
- In a large bowl, use an electric mixer to beat the peanut butter and cream cheese on medium speed until smooth and combined.

- Add the sifted confectioners’ sugar and beat to combine.
- Pour in the cold heavy cream and mix on low just until combined. Increase mixer to high speed and beat just until the mixture thickens to soft peaks. Be careful not to overbeat.
- Spread the filling gently into the graham cracker crust. Refrigerate any extra filling in a small ramekin; it sets up as a delicious peanut butter mousse.
- Cover the pie and refrigerate until firm, at least 4 hours or overnight.
- Just before serving, garnish with chopped peanuts and whipped cream.

Notes
- Peanut butter: Use a processed peanut butter like Jif or Skippy for the smoothest, creamiest filling. Natural peanut butter separates and can make the pie runny.
- Cream cheese: Use a softened block of full-fat cream cheese (not the tub kind). Cold cream cheese leaves lumps in the filling.
- Cold cream is essential. Keep the heavy cream cold until the moment you whip it, so the filling sets up light and fluffy.
- Don’t overmix. Stop the mixer as soon as the filling thickens to soft peaks. Overbeating once the cream is added turns the filling grainy.
- Lighter version: For a lighter filling, you can substitute the whipped heavy cream with thawed Cool Whip. Fold it in gently after the peanut butter, cream cheese, and sugar are combined. The texture will be slightly less rich.
- Crust swaps: A store-bought Oreo crust, vanilla wafer crust, or a homemade graham cracker crust all work beautifully.
- Chocolate twist: Drizzle melted chocolate or chocolate shell topping over the filling before chilling for a pretty swirl.
- Extra filling: Spoon any extra filling that doesn’t fit in the crust into ramekins. It sets up into a peanut butter mousse, perfect with cookies or graham crackers.
- Chill time: Plan for at least 4 hours in the fridge. Overnight is even better; the slices come out cleaner.
- Garnish at the last minute so the peanuts stay crunchy.
- 12 full-size graham crackers, crushed or processed into fine crumbs
- ¼ cup sugar
- 6 tablespoons salted butter, melted
- Preheat the oven to 375°F. Combine the graham cracker crumbs, sugar, and melted butter in a large bowl. Toss until all the crumbs are evenly coated. Set aside 1 to 2 tablespoons of crumbs to garnish the top of the pie, if desired.
- Press the crumbs into the bottom and up the sides of a deep-dish 9-inch pie plate. Use the flat bottom of a measuring cup for an even layer.
- Bake for 8 to 10 minutes, or until golden brown. Let the crust cool completely before filling, or the warm crust will soften the filling.
Nutrition
Originally published in August, 2021, this post was updated in June, 2026.


I followed the instructions of this pie. The only thing I did wrong was, I pressed the crumb crust in hard with the bottom of a flat bottom measuring cup. Made the crust hard. It was in the fridge two days, & it didn’t soften up, like you said it wouldn’t. Other than that, It’s a fabulous pie. The filling is lite & very flavorful. I didn’t add Vanilla Extract. I will make again.
Hi, Barb! Thanks for your note. I’m glad that you liked the pie!
Great recipe so far as I can tell, but I’ve got twice as much filling as I need. I goofed?
Hi, Joel! No, you didn’t do anything wrong! I try to pile as much filling as possible in the crust, and then refrigerate any extra filling — it will set up and be a delicious peanut butter mousse to eat with a spoon or scoop with cookies. The chef’s treat!
Delish!!! Does this pie freeze well?–Penny
Thank you, Penny! Yes, you can freeze leftovers for up to 1 month.
My family loves it ever single time I make it. Here’s my notes:
1) To get 2 cups of vanilla wafer crumbs takes less than an 11 ounce box of vanilla wafers
2) Be sure to evenly spread pie crust in the pan and check every 30-60 seconds towards the end of the 10 minutes bake time to ensure that any thin spots in the crust don’t burn
3) It took about 90 minutes for the pie crust to cool to room temperature (January in Illinois)
4) Use the scraper attachment on the KitchenAid mixer to mix the filling. The whisk attachment will not mix all the peanut butter from the sides of the bowl.
Awesome tips, Donna. Thank you! I’m so glad that your family enjoys it!
Looking good
Is the heavy cream cold or room temp?
I bought a graham cracker crust, will I have too much leftover?
Can I cut down the ratio?
Thanks
Hi, Sandy! The heavy cream should be cold (sorry that wasn’t clear — I added that to the recipe). You will likely have some extra filling, which you can refrigerate. It will set up and be a delicious peanut butter mousse to eat with a spoon or scoop with cookies. The chef’s treat!
Just made this pie today. It was easy, but I have a question….is there any way to lighten it up a bit? It seems awful heavy. I was thinking instead of using the heavy whipping cream, could you use Cool Whip. This is very high calorie, and very heavy. I didnt think that it. would be so heavy, until I picked it up to placd if in the fridge.
Wish there is some way to lighten it up, because I probably won’t make it again. It did have a( very good taste! I cut the pieces very small because we are on lo cal diets, the remainder went to the neighbors minus 2 pics for tomorrow!
Rose….
I did lighten up the heavy recipe.
I see the author didn’t answer,
I used coolwhip instead of the heavy cream.
I cut mostly everything in 1/2. The peanut butter also made it heavy. I beat the heck out of the cream cheese to lighten it with the 10x sugar. Then the peanut butter, whipped it and added coolwhip. Just enough for a prepared frozen pie crust, and it turned out great. Just experiment. It disappeared at the BBQ we had.
So, yes…you can lighten it up.
I taught at the Y a long time ago!
Thank you for for sharing!
Frickin’ amazing! I had a bottle of the chocolate shell topping so I added it to the top. Super yummy, everyone wants more.
Thank you, Sarah!