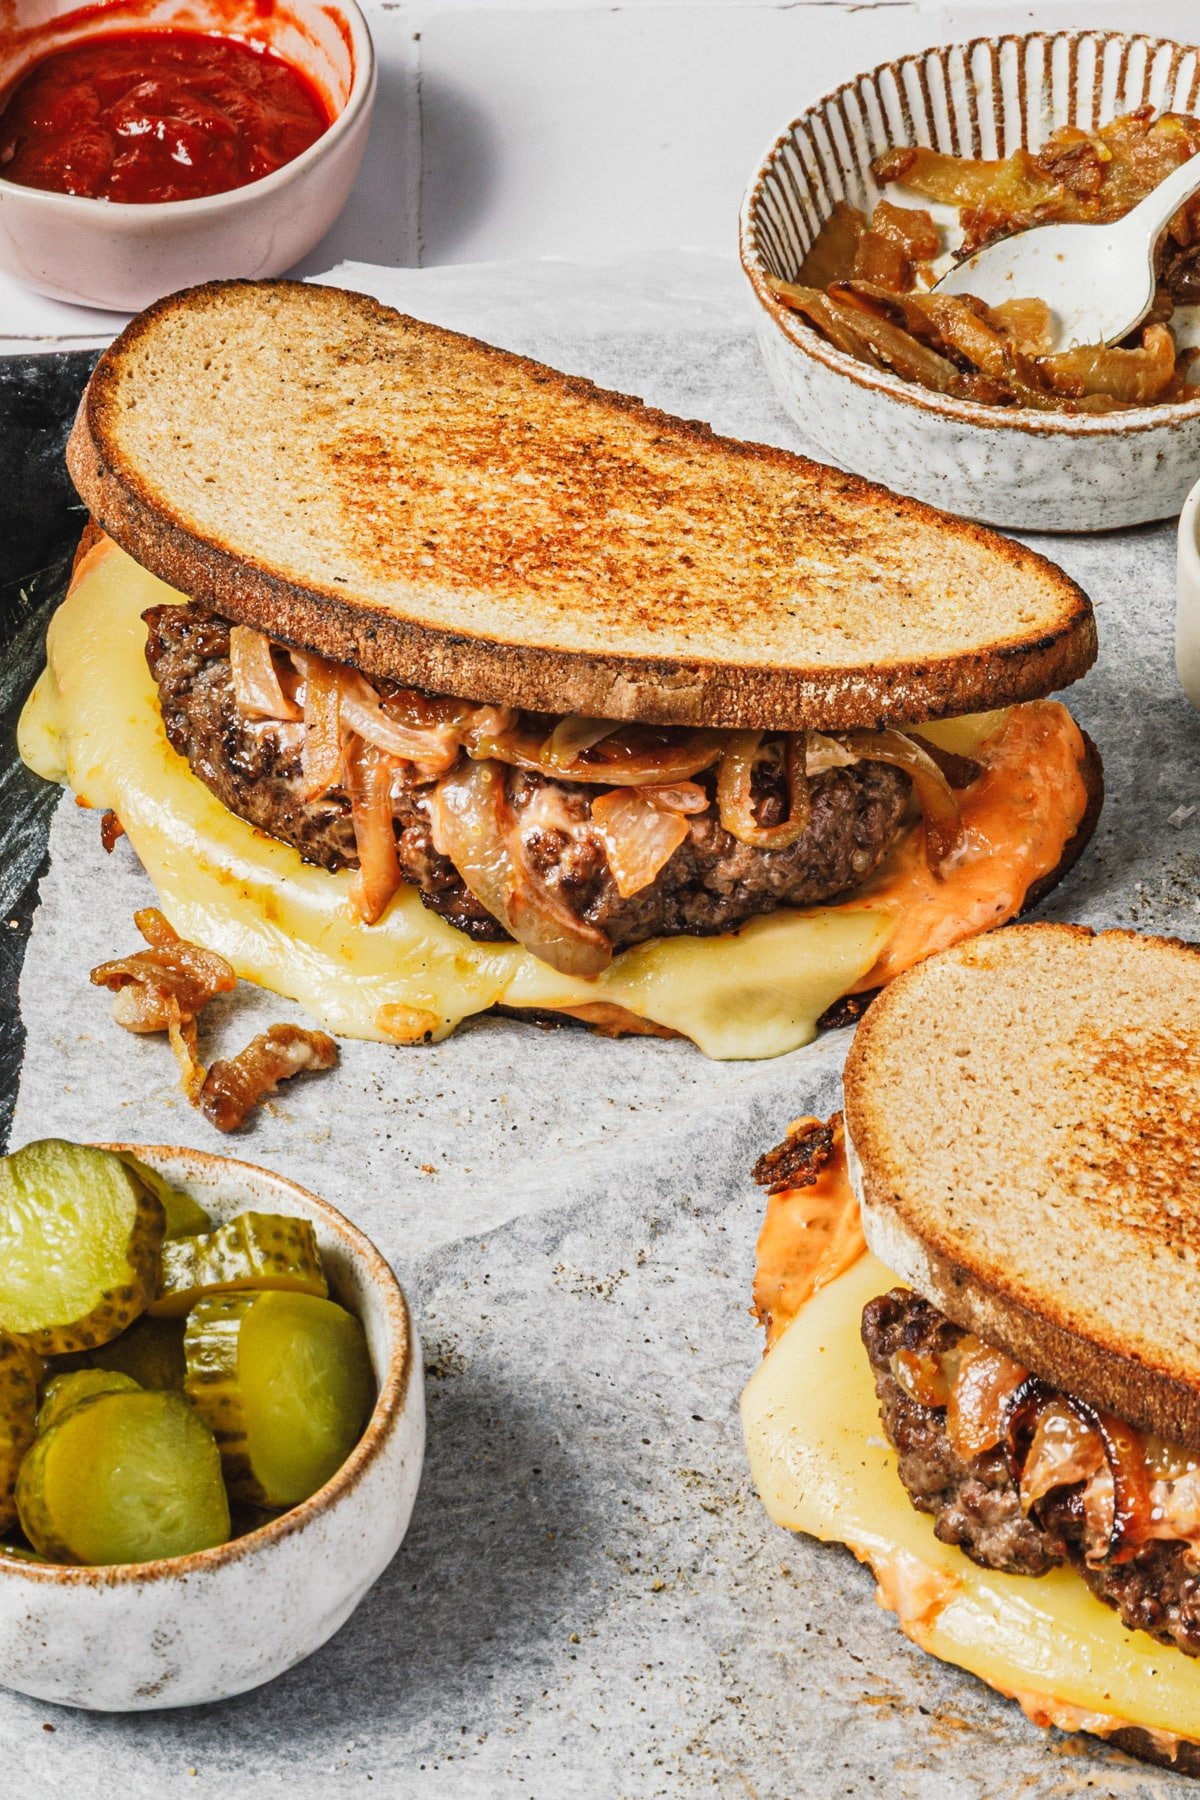
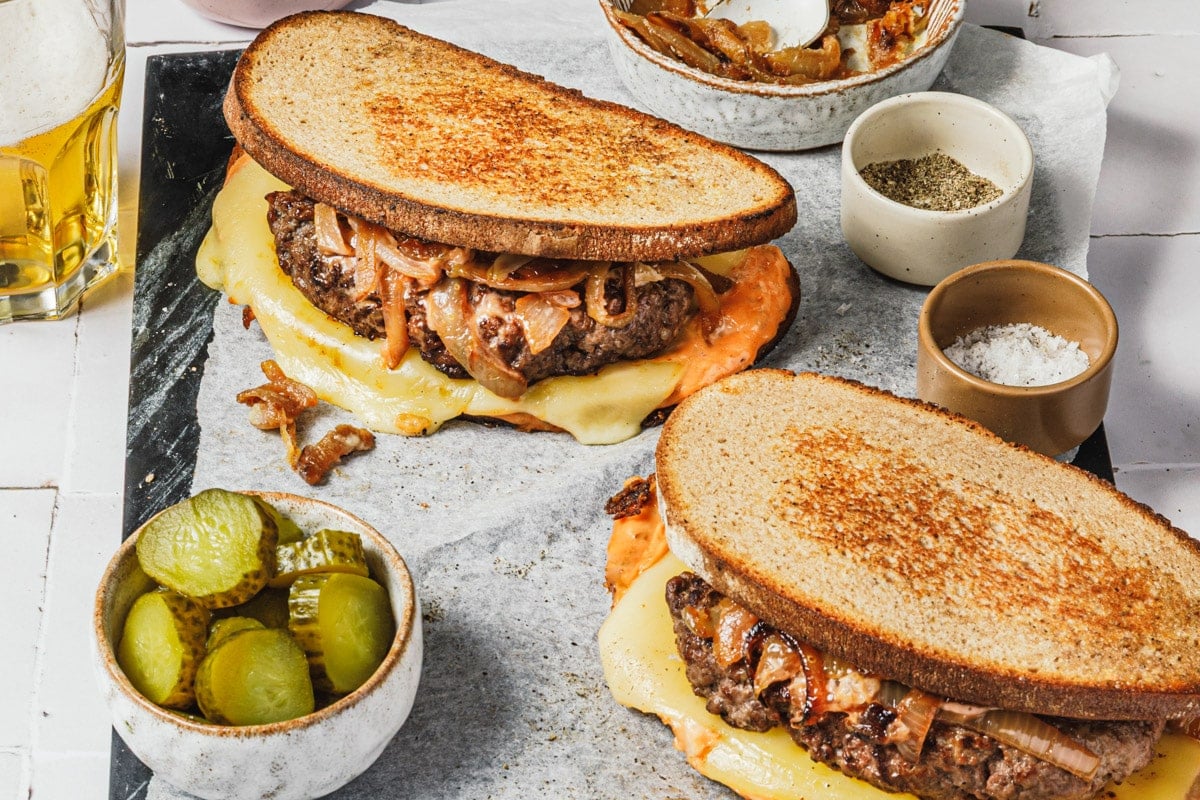
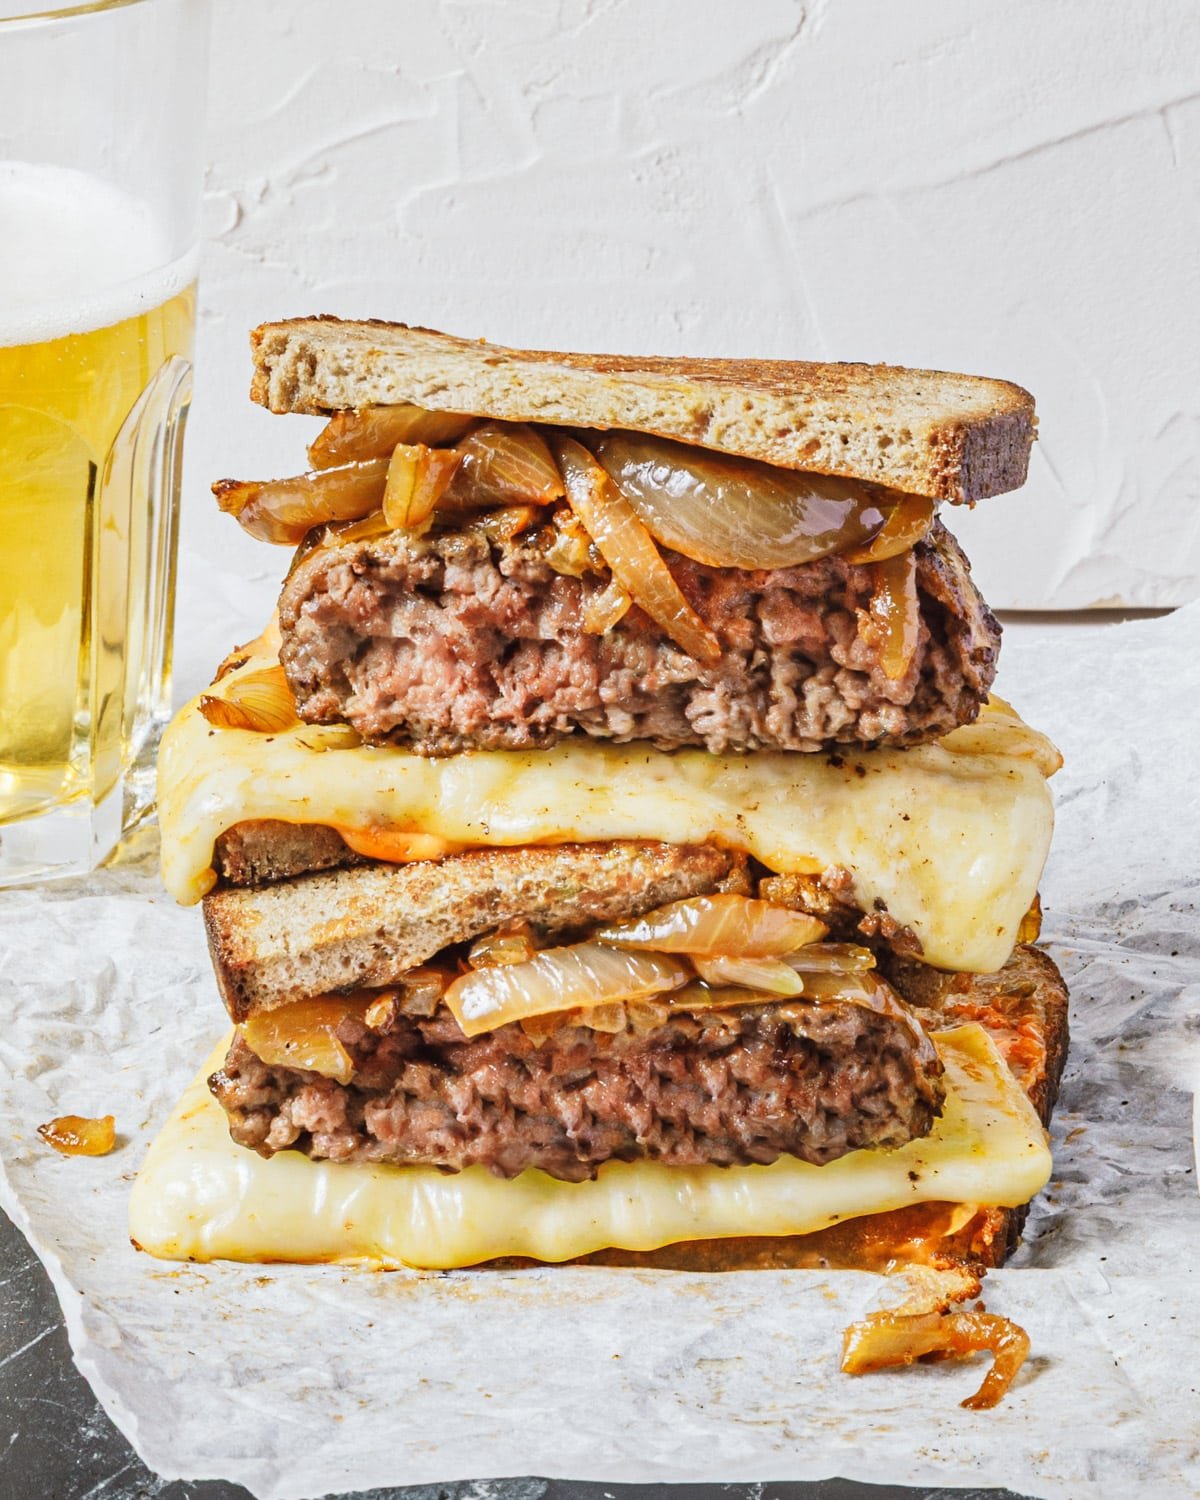
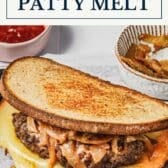
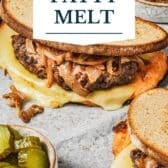
A patty melt is the perfect cross between a hamburger and a grilled cheese sandwich. This diner classic features a seasoned beef patty, melted cheese, and buttery caramelized onions, all sandwiched between two slices of toasted rye bread. The combination of crispy, griddled bread with gooey cheese and savory meat makes everyone happy!
If you love a good sandwich, try our classic tuna melt or these crowd-pleasing ham and cheese sliders. You can also browse more favorites in our Sandwich Recipes hub.
Photography by BEA MORENO.
Table of Contents
Before You Get Started
A few key tips will help you nail this recipe on the first try:
- Shape your patties thin and oval. Aim for about 6 inches by 4 inches. They’ll look large, but they shrink as they cook. Thin patties fit better in the sandwich and cook quickly without drying out.
- Use a sturdy bread. Rye is traditional and holds up well to the juicy filling. Sourdough or Texas Toast also work great. Avoid soft white sandwich bread, which can get soggy.
- Cook in a cast iron skillet. A heavy skillet (or griddle) conducts heat evenly and gives you the crispiest bread and best sear on the meat. This is what creates that diner-style finish.
How to Make a Patty Melt
Skip the fast-food drive-through and make a homemade patty melt instead. You can customize the sandwiches to suit your family’s taste, and the whole meal comes together in about 45 minutes.
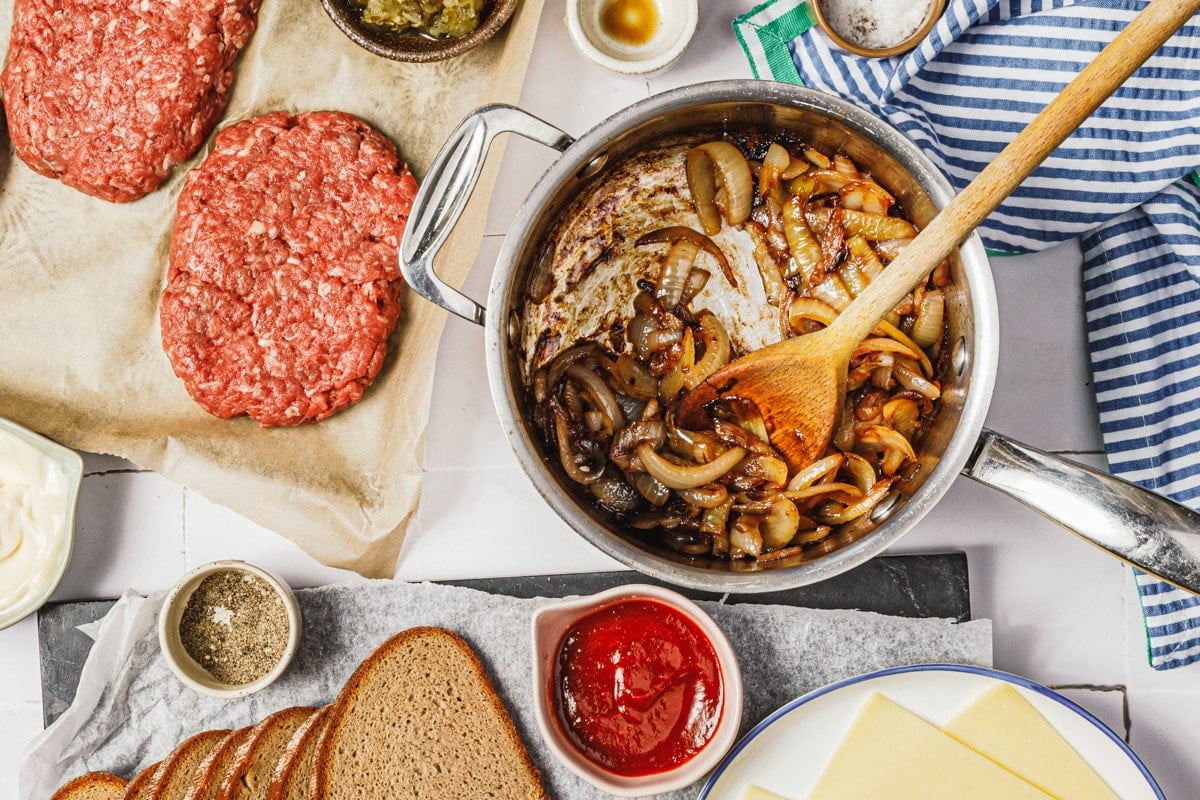
Step 1: Caramelize the Onions
Melt 2 tablespoons of butter in a skillet over medium heat. Add thinly sliced onions and cook, stirring occasionally, until soft and golden brown.
This takes about 25 to 30 minutes, so start here first.
** Quick Note: While the onions cook, you can prep the rest of your ingredients. Just reach over to give them a stir every few minutes. Multi-tasking is key!
Step 2: Shape and Cook the Patties
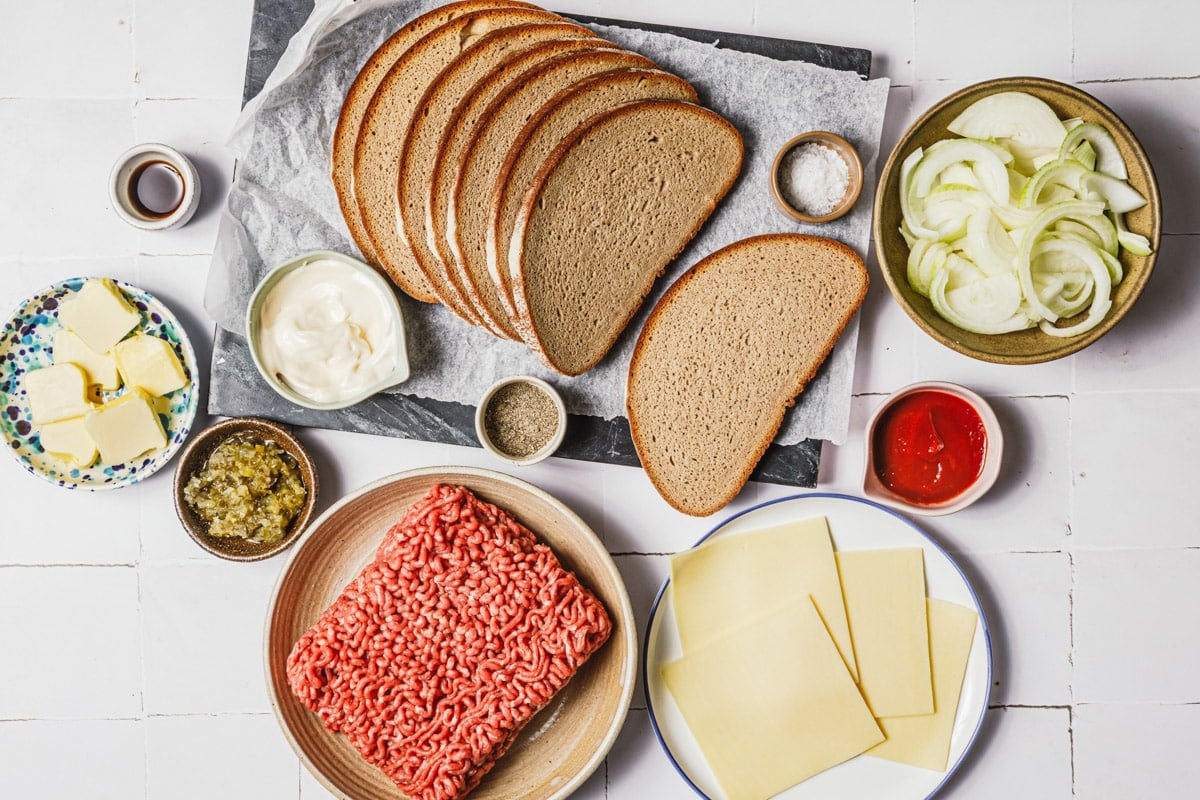
In a large bowl, combine ground beef with Worcestershire sauce, salt, and pepper. Divide the mixture into 4 equal portions and shape into thin, oval patties.
Melt 1 tablespoon of butter in a large cast iron skillet over medium-high heat. Cook the patties for about 2 minutes per side, until nicely browned and cooked through.
Work in batches if needed, adding more butter between batches. Set the cooked patties aside.
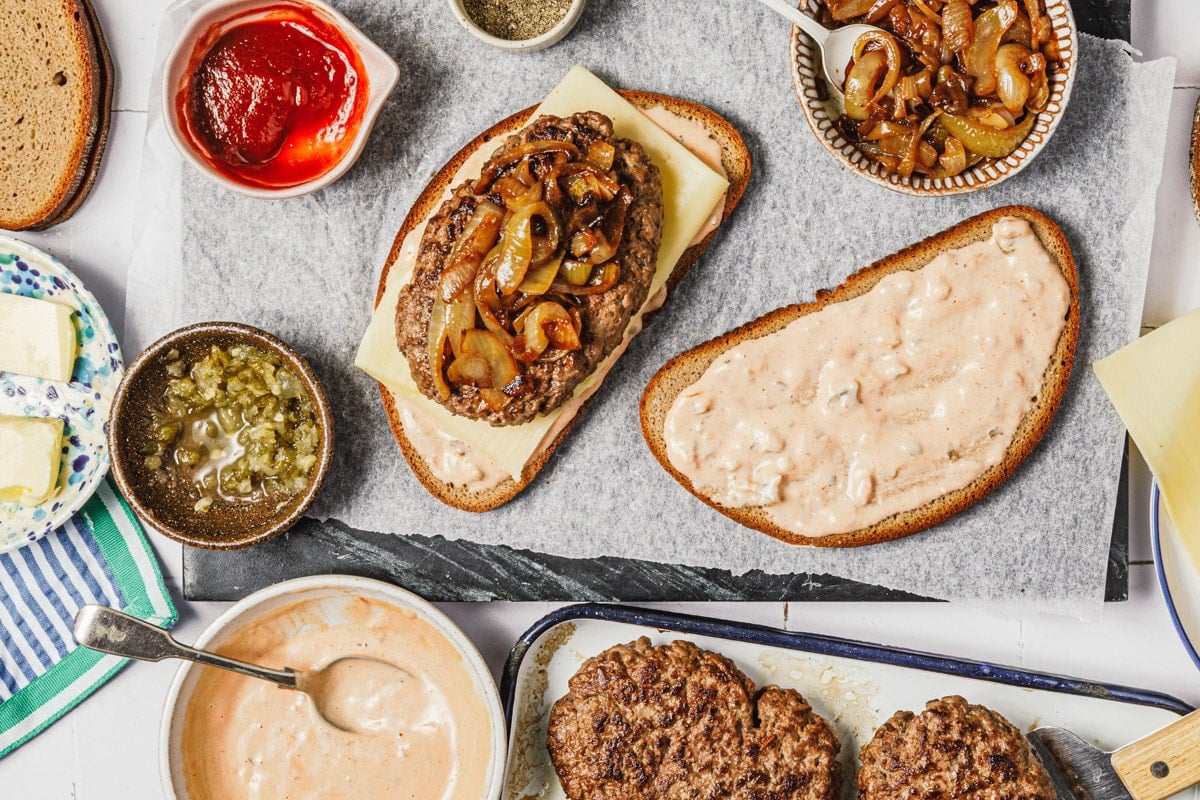
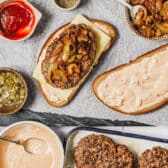
Step 3: Make the Sauce
While everything else cooks, stir together mayonnaise, ketchup, and sweet pickle relish in a small bowl.
This homemade Thousand Island-style sauce adds a creamy, tangy contrast to the savory meat and cheese. Add a little horseradish if you like some extra zip.
Step 4: Assemble the Sandwiches
Layer one slice of bread with about 1 tablespoon of sauce, a slice of cheese, a beef patty, a couple tablespoons of caramelized onions, and another tablespoon of sauce. Top with a second slice of bread. Repeat to make 4 sandwiches total.
** Crisp Outside Tip: Spread a thin layer of softened butter (or even mayonnaise) on the outside of each bread slice before griddling. This adds flavor and helps create an extra-crispy golden crust.
Step 5: Griddle Until Golden
Melt 1 tablespoon of butter in the skillet over medium heat. Add 2 sandwiches and cook until golden brown and the cheese is melted, about 3 to 4 minutes per side.
Flip carefully for even browning.
If the bread starts to brown too quickly before the cheese melts, reduce the heat to medium-low. Transfer finished sandwiches to a baking sheet and keep warm in a 200°F oven while you cook the remaining two.
Recipe Variations
- Cheese options: Swiss is traditional, but sharp cheddar, American, Colby, or Pepper Jack all work well. For an extra-cheesy sandwich, use two slices per patty (one on top, one on bottom).
- Bread swaps: Rye is classic, but sourdough and Texas Toast are also great choices.
- Sauce alternatives: Skip the Thousand Island and use plain mayo, ketchup, mustard, or honey mustard instead.
- Add-ins: Top with sliced pickles or a spoonful of relish for extra tang. A sprinkle of garlic powder in the beef mixture adds another layer of flavor.
Serving Suggestions
Classic patty melts pair perfectly with potato chips or French fries and a cold drink like sweet tea. Here are a few more easy sides that go well with these sandwiches:
- Baked Potato Wedges
- Easy Coleslaw
- Three Bean Salad
- Easy Potato Salad
- Classic Pasta Salad
- Pickles (try my Refrigerator Dill Pickles recipe sometime)
- Wedge Salad
- Homemade Baked Beans
Make Ahead
If you’d like to prep ingredients in advance, you can caramelize the onions up to 2 days ahead. Store them in an airtight container in the refrigerator, then microwave or warm in a skillet before assembling.
You can also shape the patties up to 1 day ahead and keep them loosely covered in the fridge until ready to cook. If you prefer to cook the patties ahead, store them in an airtight container in the refrigerator for up to 2 days. Reheat on the stovetop or in the microwave so they’re warm before assembling.
The sauce can be made a few days in advance, too. Prepping everything ahead makes this a quick weeknight dinner you simply assemble and griddle.
Frequently Asked Questions
What is a patty melt?
A patty melt is a classic American sandwich made with a seasoned ground beef patty, melted cheese, and caramelized onions on griddled bread (usually rye). It’s like a cross between a cheeseburger and a grilled cheese, cooked in a skillet until the bread is crispy and the cheese is melted.
What cheese is best for a patty melt?
Swiss cheese is traditional, but sharp cheddar, American, and Pepper Jack are all great options. Use whatever your family loves. For extra gooey results, use two slices of cheese per sandwich.
What bread works best for patty melts?
Rye bread is the classic choice and holds up well to the juicy filling. Sourdough and Texas Toast are also excellent. Avoid soft white sandwich bread, which tends to get soggy.
Can I make patty melts ahead of time?
You can prep all the components in advance (onions, patties, and sauce), then assemble and griddle when ready to eat. Fully assembled patty melts are best served fresh, but leftovers can be reheated in a skillet over medium-low heat until warmed through and crispy again.
More Delicious Sandwich Recipes
Watch How to Make It

Classic Patty Melt
Equipment
- griddle
Ingredients
- 6 tablespoons salted butter, divided
- 2 onions, halved and thinly sliced
- 1 lb. ground beef
- 1 ½ teaspoons Worcestershire sauce
- ¾ teaspoon kosher salt
- ¼ teaspoon black pepper
- 6 tablespoons mayonnaise
- 2 tablespoons ketchup
- 2 teaspoons sweet pickle relish
- 8 slices rye bread (or substitute sourdough)
- 4 large slices sharp cheddar cheese (or substitute Swiss)
Instructions
- Caramelize the onions: In a medium skillet, melt 2 tablespoons of butter over medium heat. Add onion and cook, stirring occasionally, until soft and golden brown, about 25 to 30 minutes. Remove from heat and set aside.

- Make the patties: In a large bowl, combine ground beef, Worcestershire sauce, salt, and pepper. Shape mixture into 4 thin, oval patties (about 6 inches by 4 inches each).
- Cook the patties: Melt 1 tablespoon of butter in a large cast iron skillet over medium-high heat. Cook 2 patties until well browned on both sides and cooked through, about 2 minutes per side. Transfer to a plate. Repeat with another tablespoon of butter and the remaining 2 patties. Wipe skillet clean.
- Make the sauce: In a small bowl, stir together the mayonnaise, ketchup, and relish. Set aside.
- Assemble the sandwiches: Layer one slice of bread with 1 tablespoon of sauce, a slice of cheese, a beef patty, a couple tablespoons of caramelized onions, and another tablespoon of sauce. Top with another slice of bread. Repeat with remaining ingredients to create 4 sandwiches.
- Griddle the sandwiches: Melt 1 tablespoon of butter in the large skillet over medium heat. Cook 2 sandwiches until golden brown and cheese is melted, about 3 to 4 minutes per side. Transfer to a baking sheet and keep warm in a 200°F oven. Repeat with remaining butter and sandwiches. Serve immediately.


Notes
- Shape patties thin: Aim for 6-inch by 4-inch ovals. They shrink when cooked and need to be thinner than a regular burger to fit nicely in the sandwich.
- Use sturdy bread: Rye or sourdough hold up best. Avoid soft white sandwich bread.
- For extra-crispy bread: Spread softened butter or mayonnaise on the outside of each slice before griddling.
- Cheese options: Swiss is traditional, but cheddar, American, or Pepper Jack all work. Use two slices per sandwich for extra cheesy results.
- Make ahead: Caramelize onions up to 2 days ahead. Shape patties up to 1 day ahead. Make sauce a few days ahead. Store everything in the fridge and assemble when ready.
- Best skillet: A cast iron skillet or griddle gives you the crispiest bread and best sear.
- If bread browns too fast: Reduce heat to medium-low so the cheese has time to melt before the bread burns.
Nutrition
Originally published in December, 2020, this post was updated in January, 2026.


Did you make this recipe?
If you enjoyed this recipe, please leave a comment with a 5-star review at the bottom of the post. Thank you!