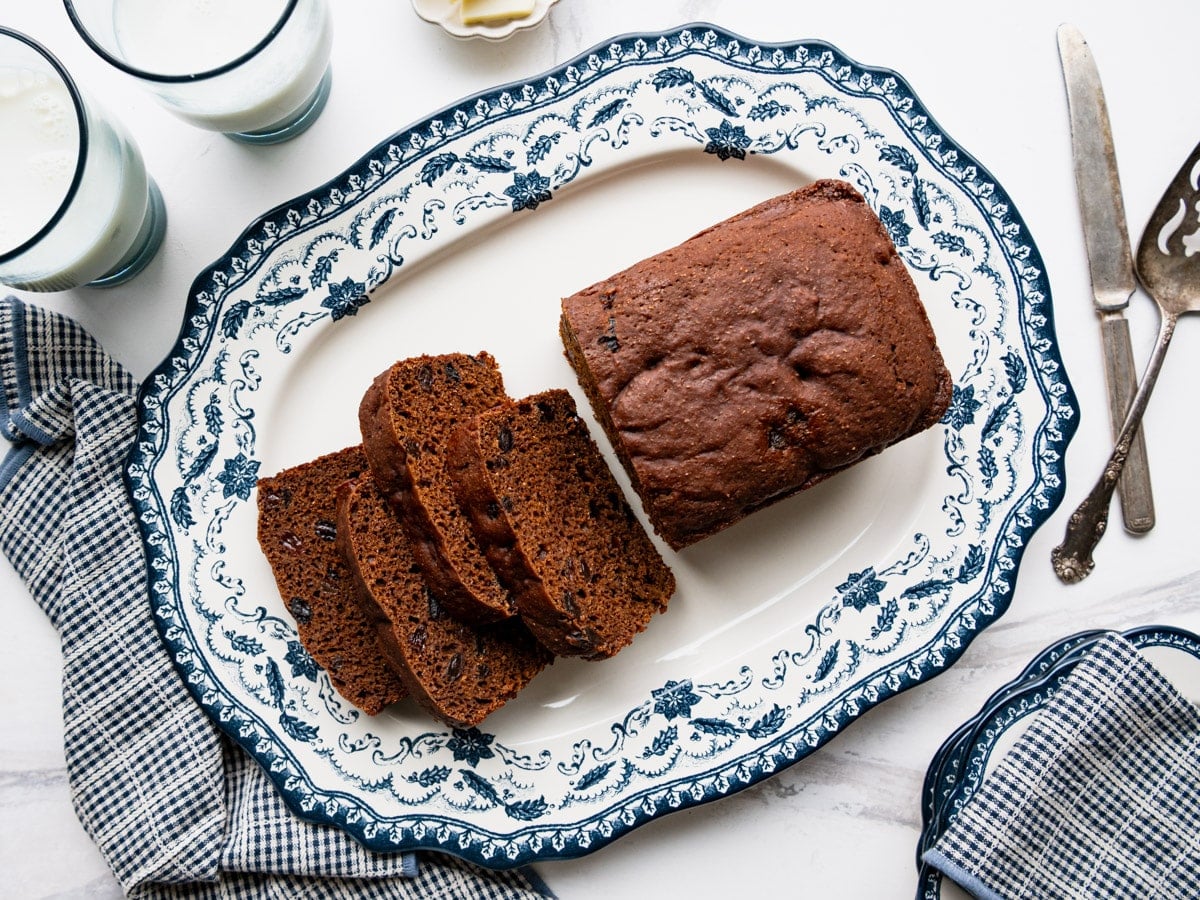
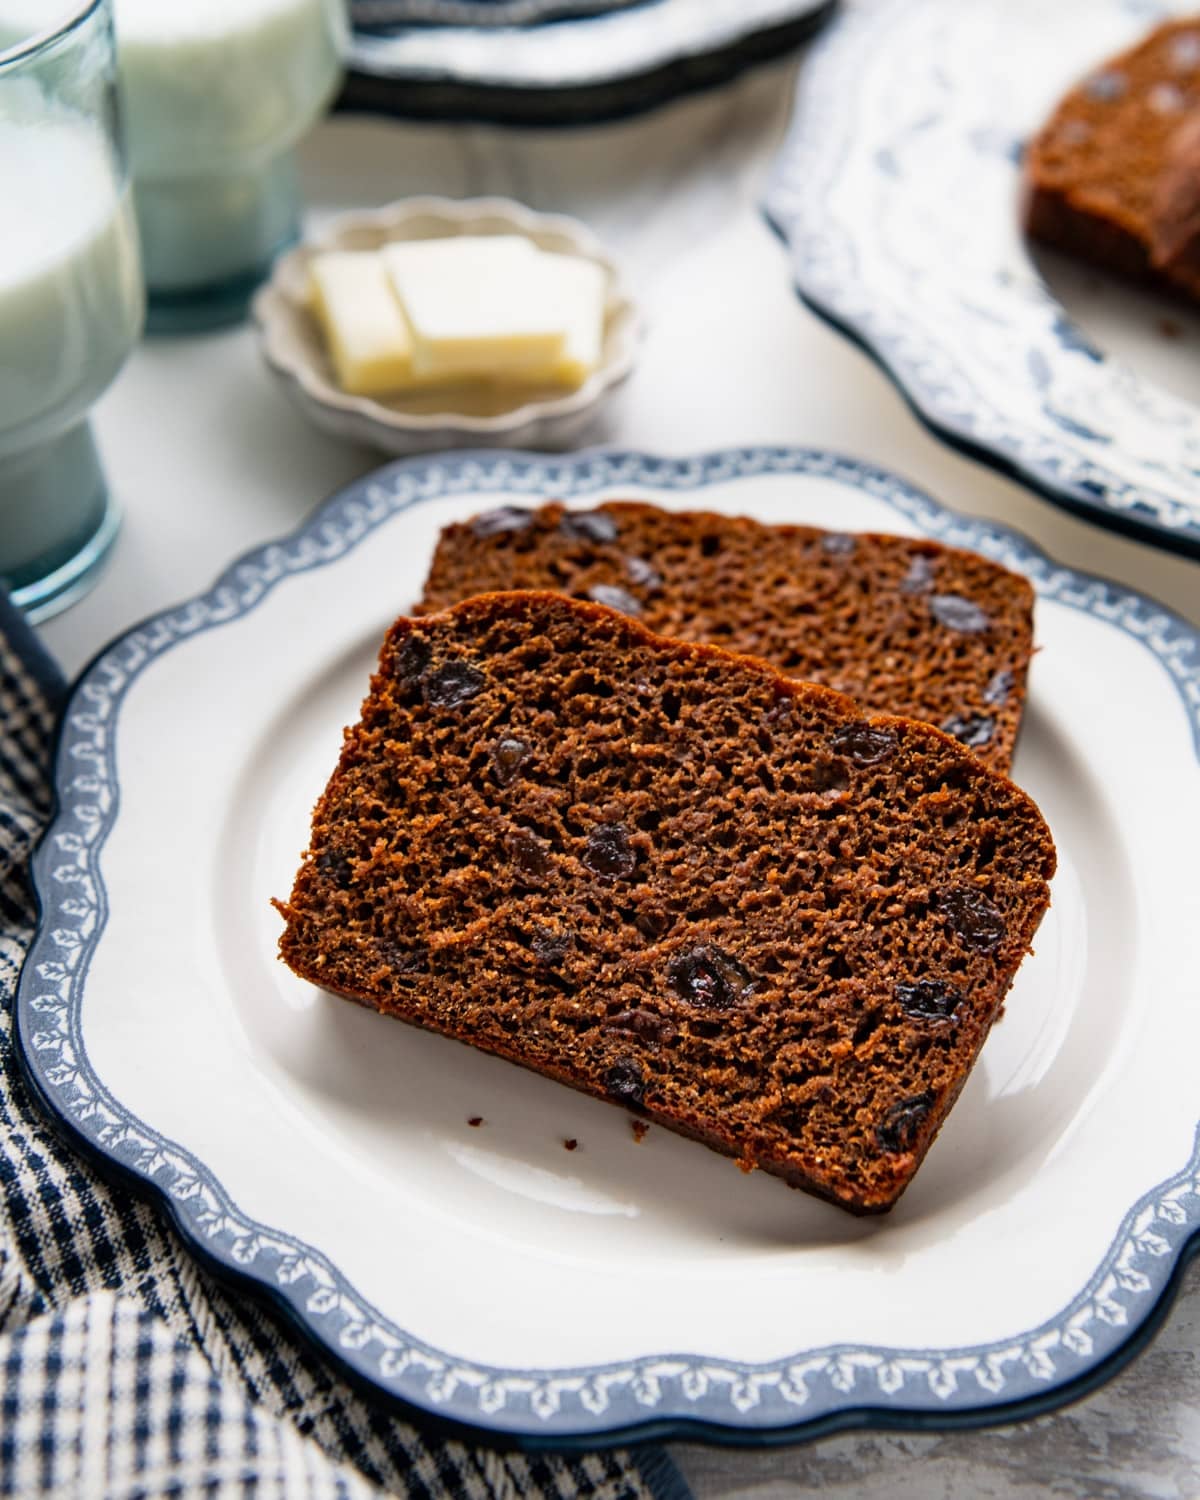
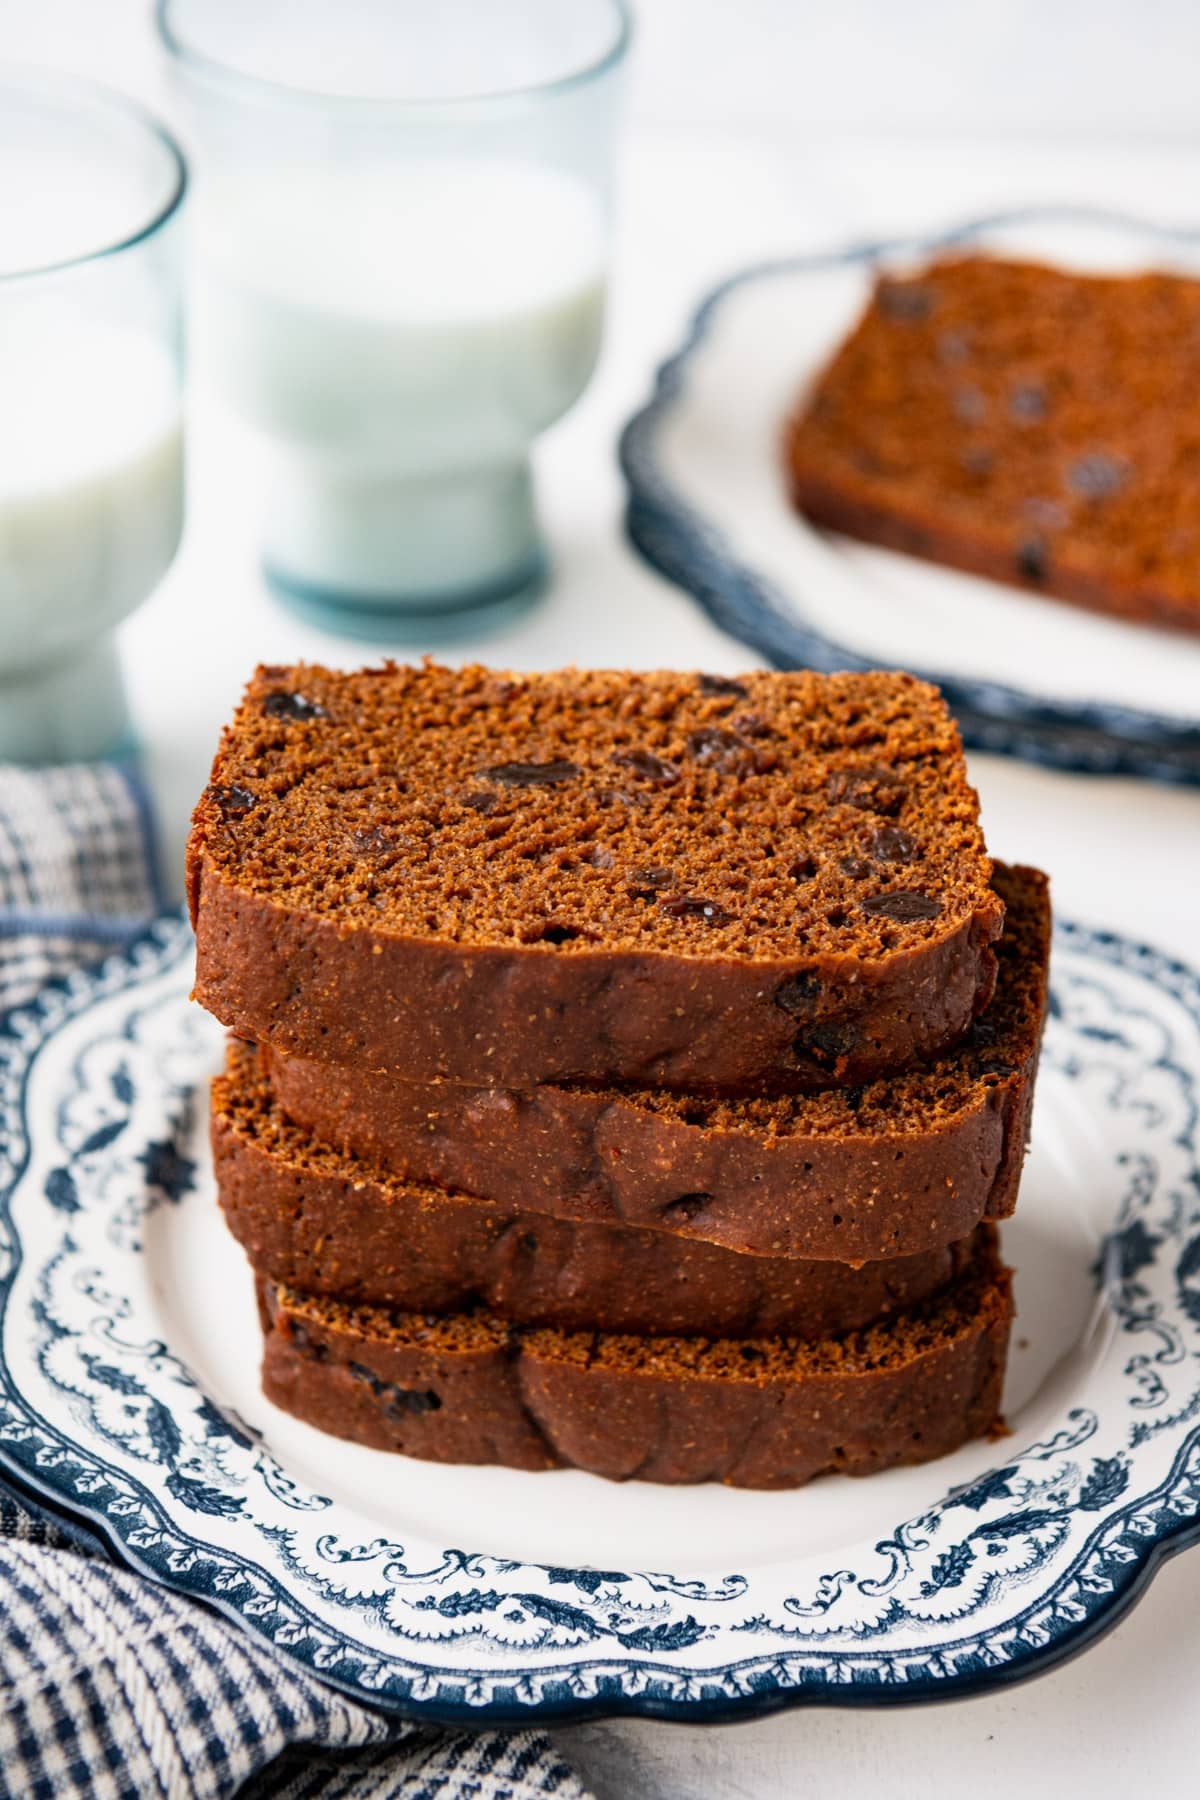
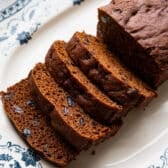
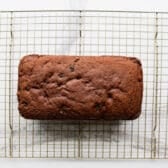
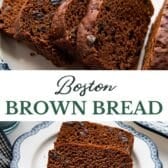
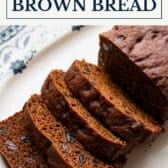
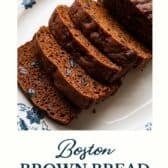
This old-fashioned Boston brown bread is dense, moist, and full of rich molasses flavor. Studded with plump raisins and made with whole wheat flour, the easy quick bread comes together in one bowl with about 10 minutes of prep. No coffee cans required!
If you enjoy simple homemade breads, you’ll also love this Irish soda bread (another buttermilk quick bread with raisins) and this easy 3-ingredient beer bread.
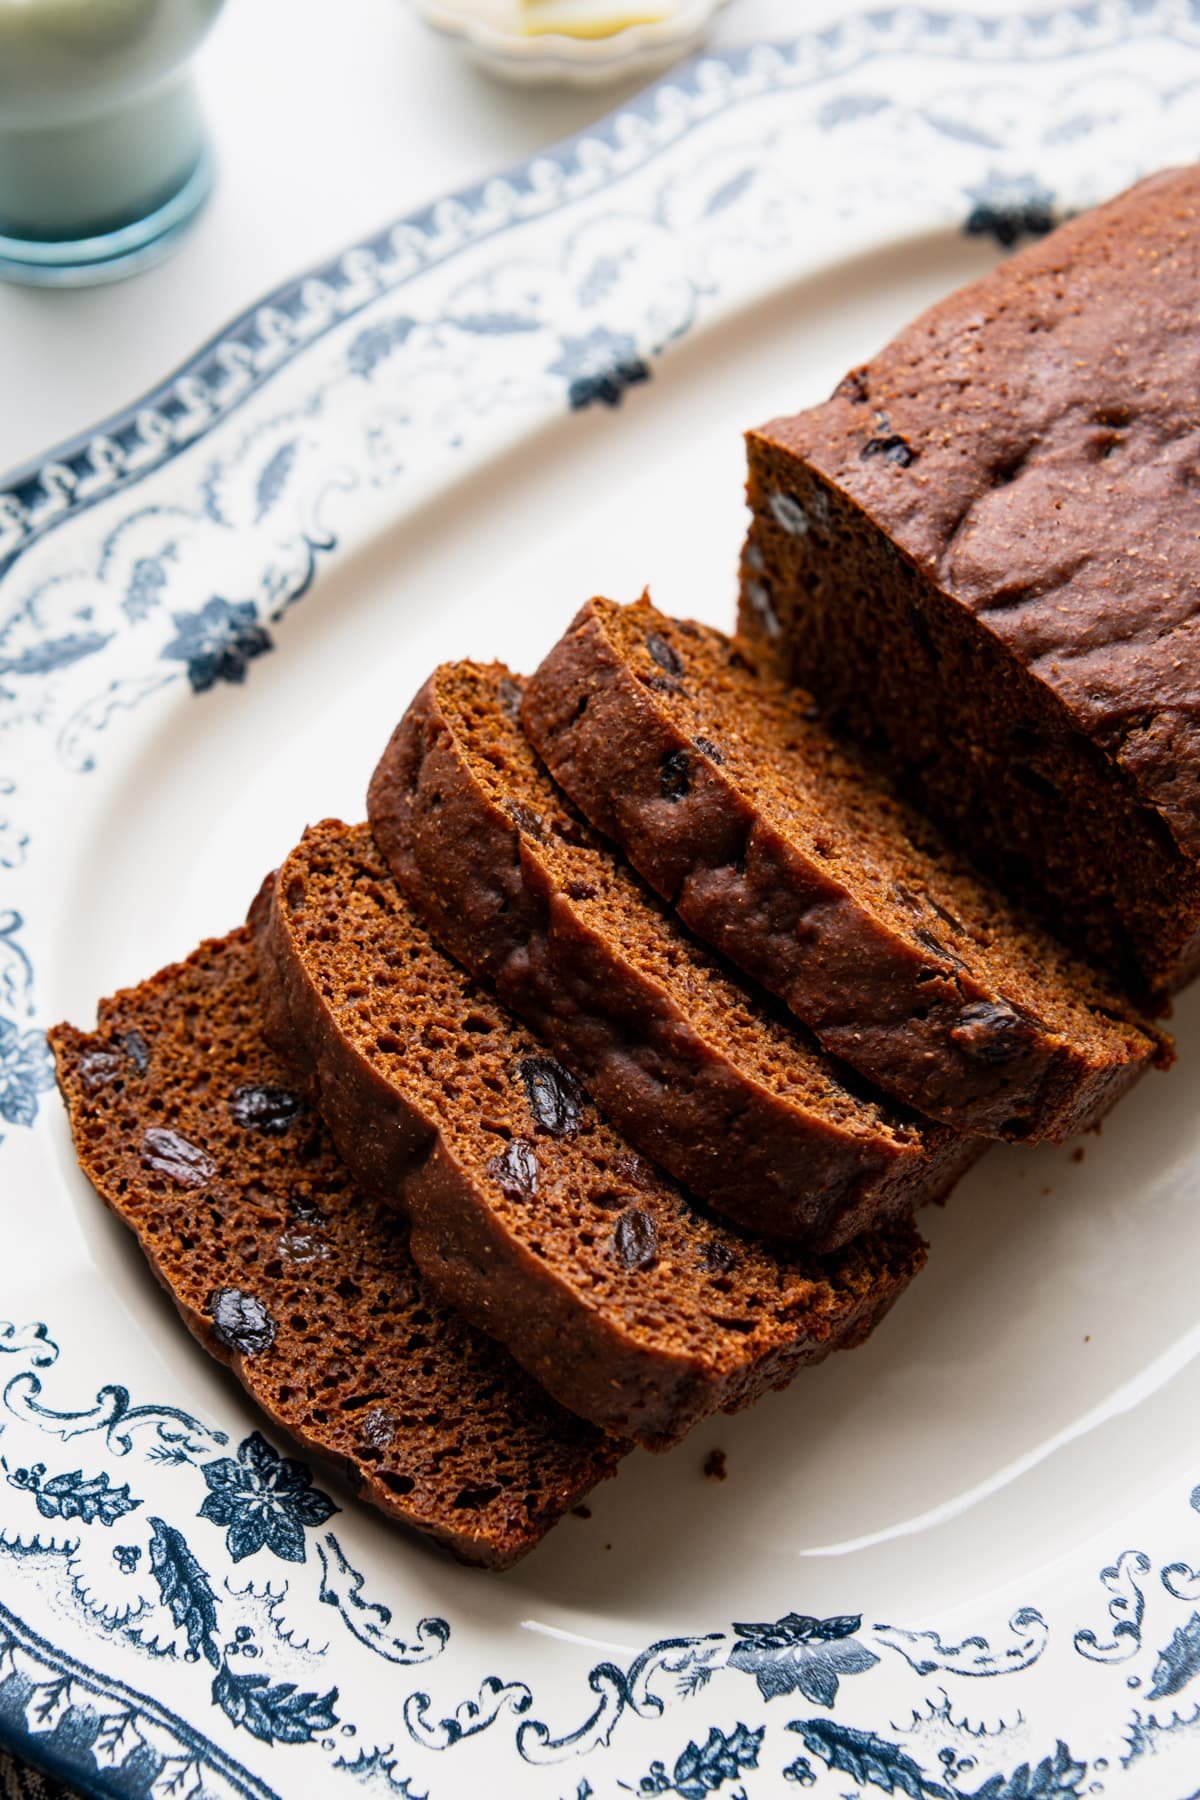
Table of Contents
What Is Boston Brown Bread?
Boston brown bread (also called New England brown bread) is a slightly sweet, molasses-flavored quick bread with a mildly nutty, hearty taste. It’s reminiscent of gingerbread, but not quite as sweet or cake-like. The bread often includes raisins or nuts for extra flavor and texture.
Traditionally, this bread was steamed in coffee cans using a variety of flours like cornmeal, rye, and graham flour. Since most of us don’t keep those specialty flours (or empty coffee cans) on hand anymore, this updated recipe uses a combination of whole wheat and all-purpose flours and bakes in a regular loaf pan, just like banana bread or pumpkin bread. The foil-covered baking method gives you that same dense, steamed texture without the fuss.
⇢ If you want the traditional steamed experience, you can still use greased cans (large juice cans work well). Fill them about two-thirds full, cover tightly with greased foil, and steam in a large pot with a few inches of simmering water for about 2 to 2 ½ hours.
Before You Get Started
Here are a few tips that make all the difference with this bread:
- Don’t over-mix the batter. Stir the wet ingredients into the dry just until everything comes together. Too much mixing activates the gluten and will give you a tough, dry loaf instead of a moist, tender one. A few small lumps are perfectly fine.
- Use regular molasses, not blackstrap. Regular (or “original”) molasses gives the bread its signature rich, mildly sweet flavor. Blackstrap molasses is much more bitter and intense, and will overpower the bread.
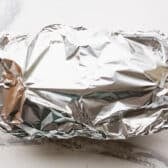
- Tent with greased foil before baking. This is what creates the steamed texture that makes Boston brown bread special. Press the foil tight around the edges of the pan, but balloon it up in the center so the bread has room to rise without sticking to the foil.
A note about buttermilk: Real buttermilk works best here. The acid in the buttermilk reacts with the baking soda to help the bread rise and gives it a tender crumb. If you don’t have buttermilk on hand, you can make a quick substitute by stirring 1 tablespoon of white vinegar or lemon juice into 1 ¼ cups of milk and letting it sit for 5 minutes. The texture may be slightly different, but it will still work.
How to Make Boston Brown Bread
Since this is a quick bread, there’s no yeast necessary, no rising time, no kneading, and no mixer to haul out. The entire loaf comes together in about 10 minutes with just one bowl to wash at the end. That’s my kind of baking!
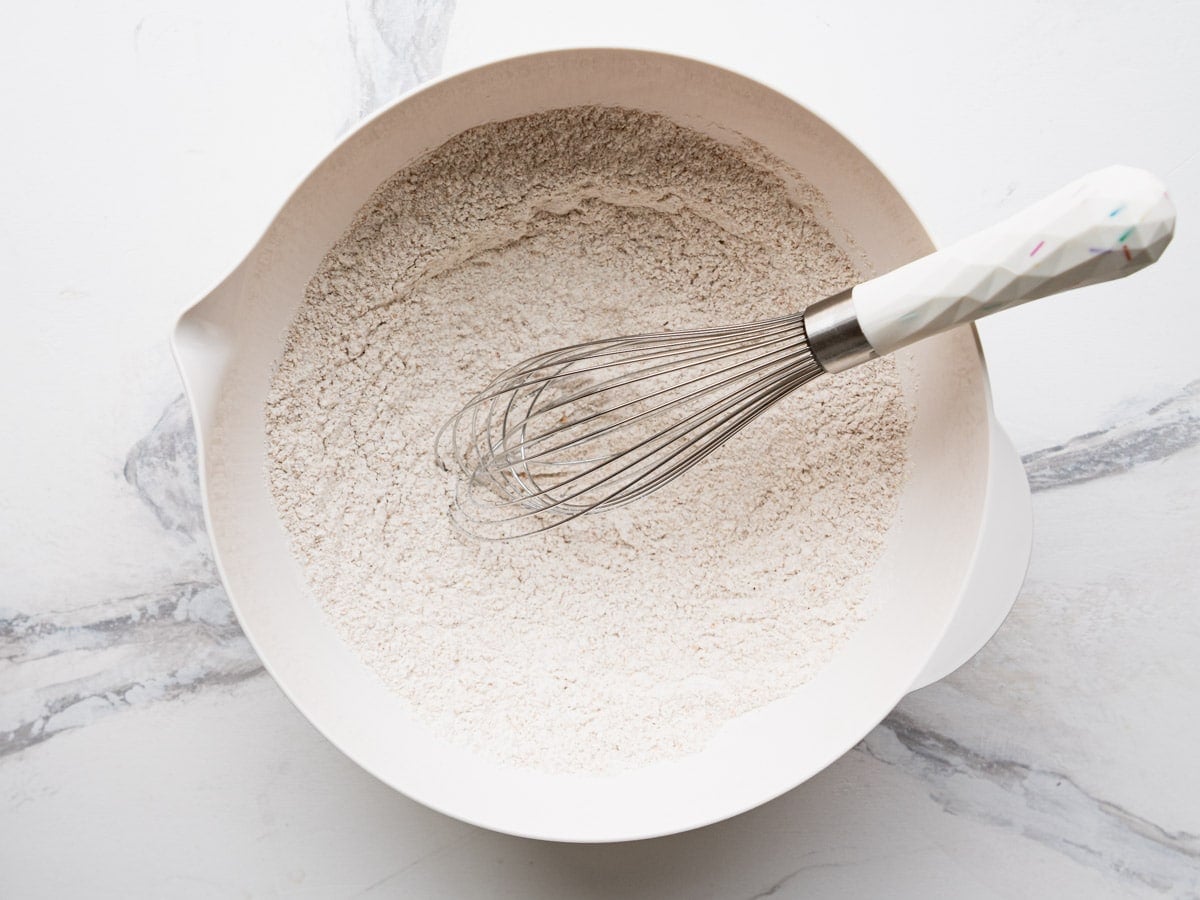
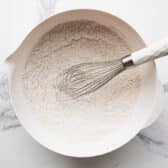
Step 1: Mix the Dry Ingredients
Preheat your oven to 325°F and grease an 8 ½ x 4 ½-inch loaf pan well.
In a large bowl, sift or whisk together the whole wheat flour, all-purpose flour, baking soda, and salt.
Sifting helps break up any clumps in the whole wheat flour and ensures even distribution of the baking soda, which is important for a consistent rise.
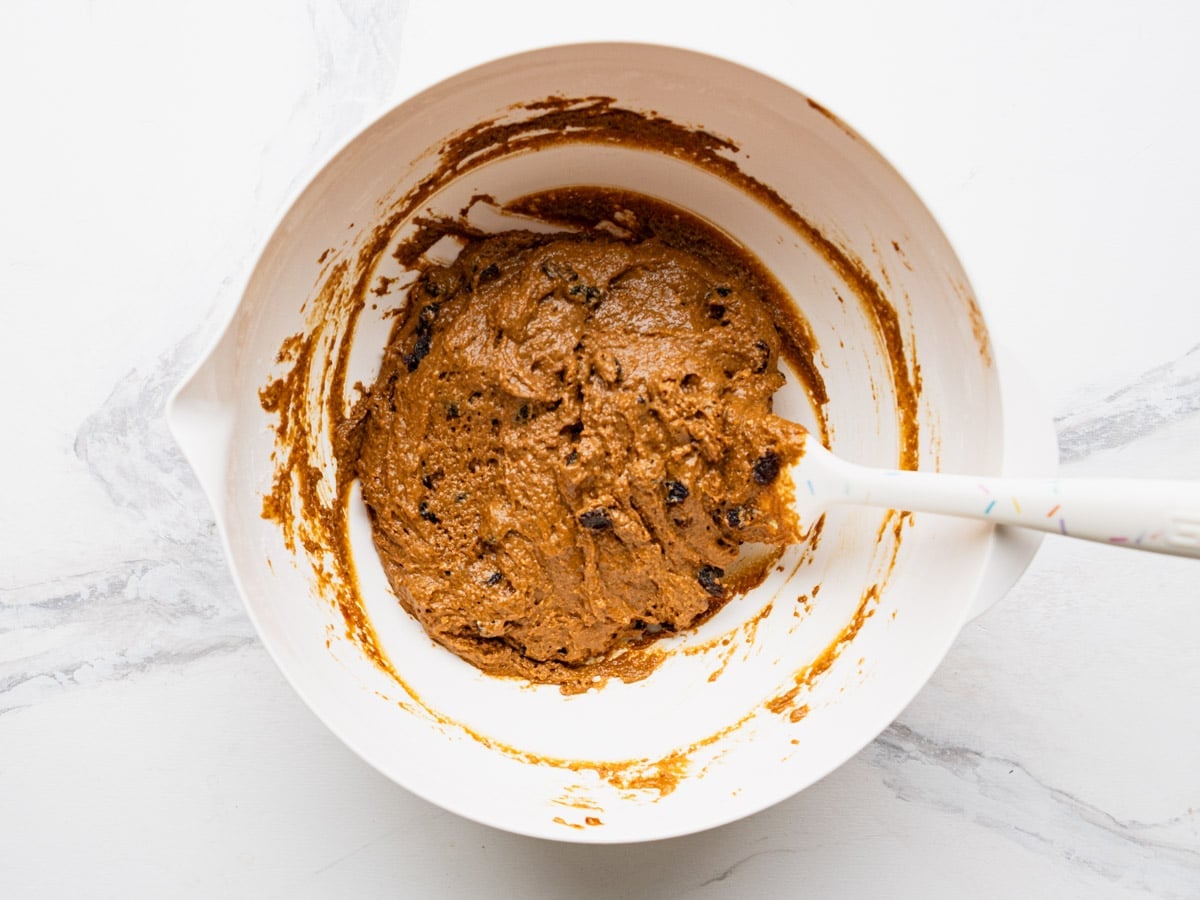
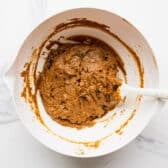
Step 2: Add the Wet Ingredients and Raisins
Gradually stir in the buttermilk and molasses, mixing just until combined. The batter will be thick and a bit sticky. Remember, less stirring means a softer, more moist loaf.
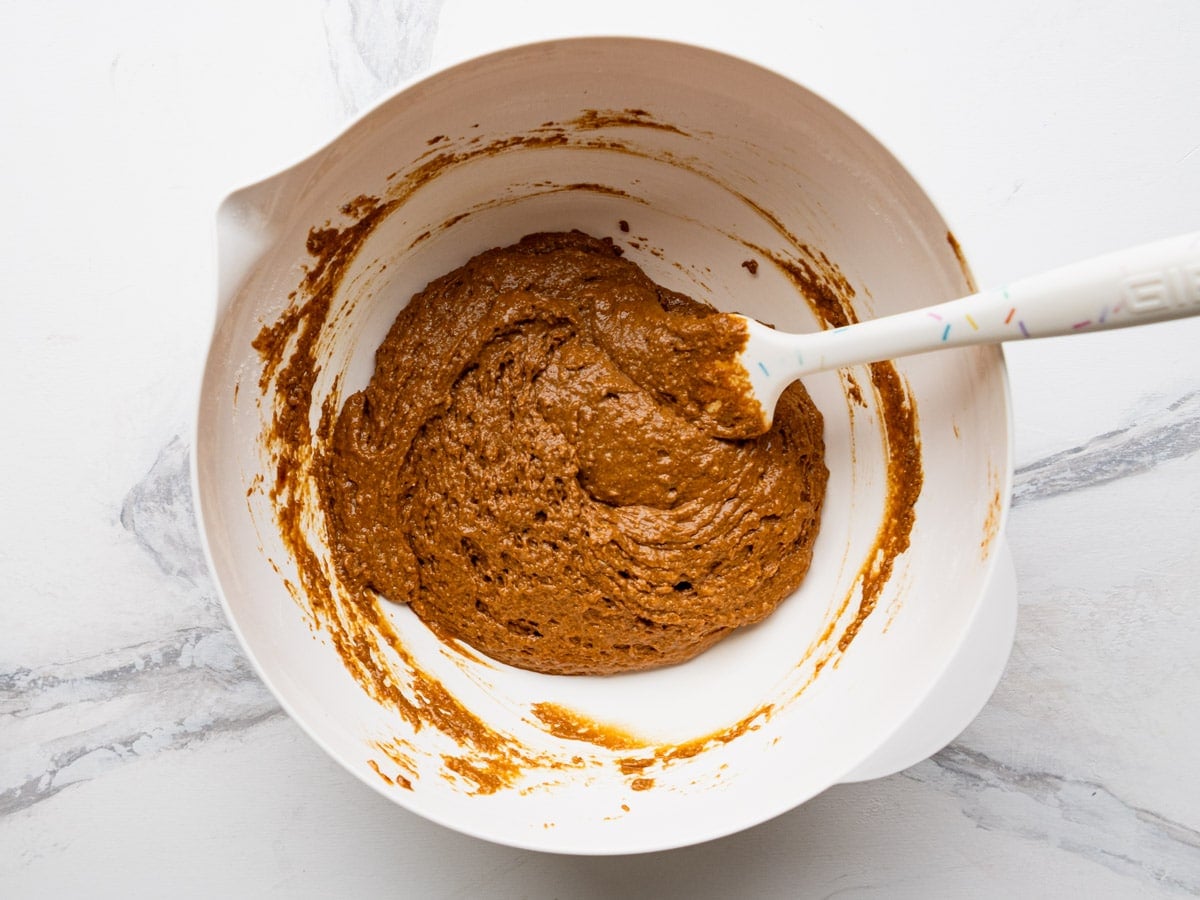
Fold in the raisins with a few gentle strokes.
⇢ Want to switch it up? Use dried cranberries, chopped dates, or currants instead of raisins, or leave them out altogether. You can also add ½ cup of chopped walnuts or pecans for a bit of crunch.
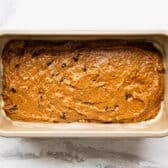
Step 3: Bake and Cool
Transfer the batter to your greased loaf pan.
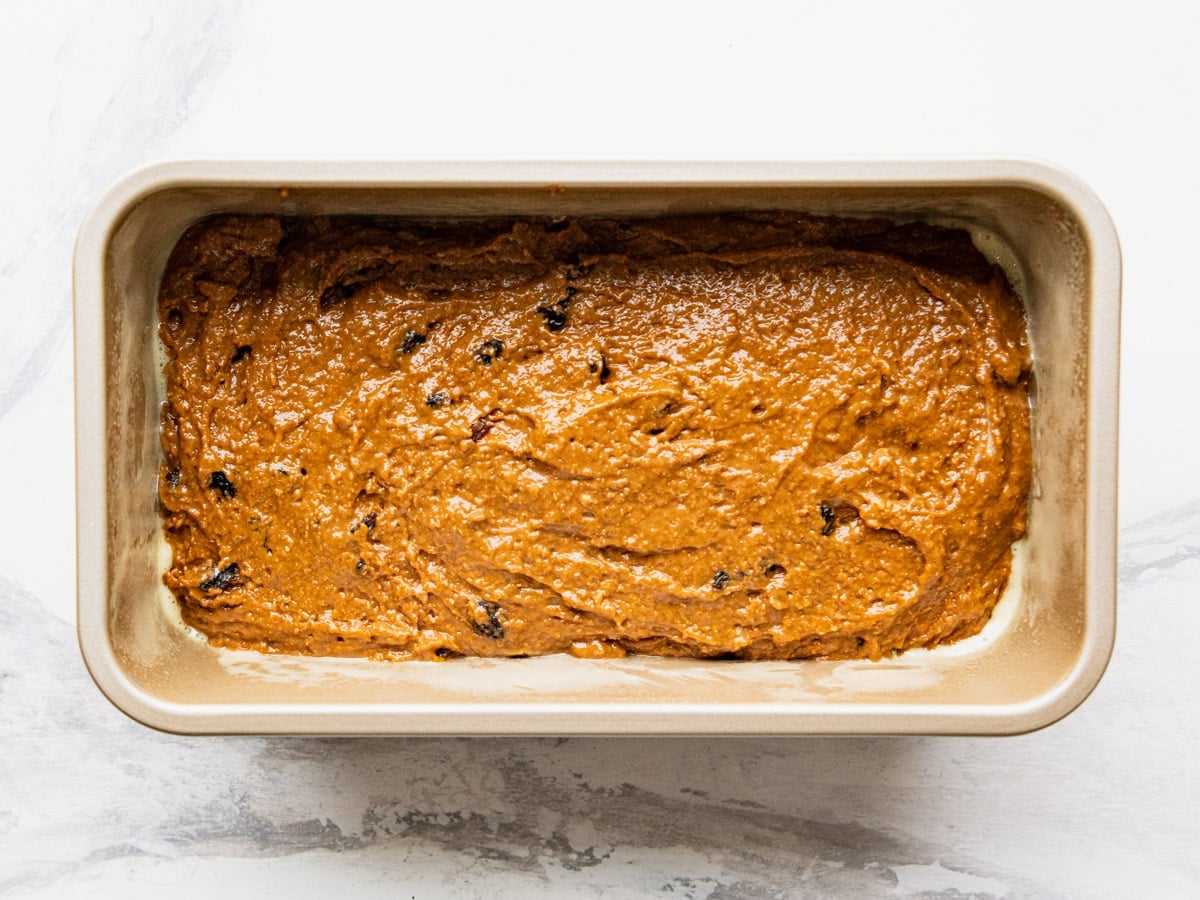
Cover the pan with buttered or sprayed aluminum foil, pressing it tight around the edges but ballooning it up in the center so the bread has room to rise.
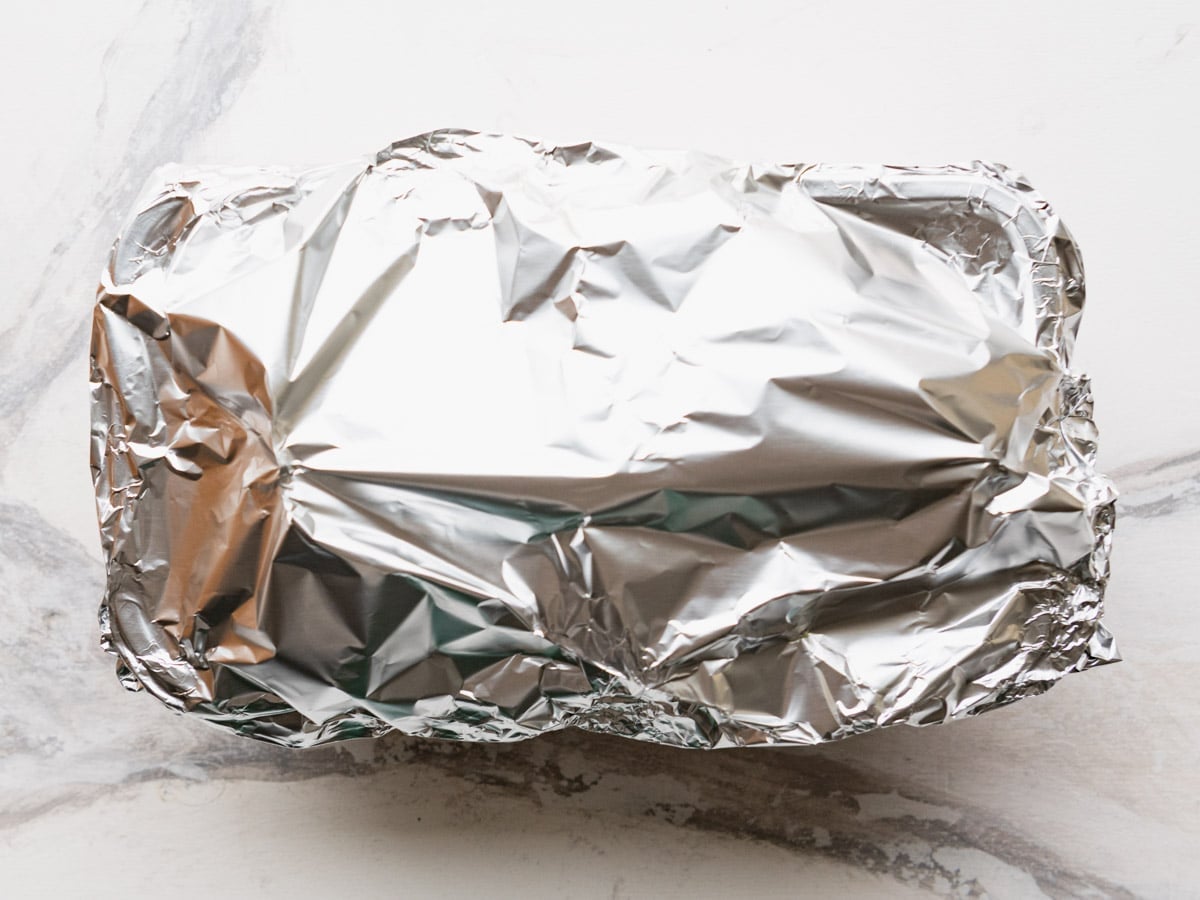
Bake at 325°F for 50 minutes with the foil on. Then remove the foil and bake for an additional 10 minutes, or until a toothpick inserted deep into the center comes out clean.
⇢ Don’t panic if the middle looks slightly sunken after you remove the foil. That’s normal and it will continue to set as it cools.
⇢ Check early with a toothpick. All ovens are different, and baking time can vary depending on your pan material. Glass and ceramic pans tend to take longer than metal pans. If the toothpick comes out with wet batter, give it another 5 to 10 minutes and check again.
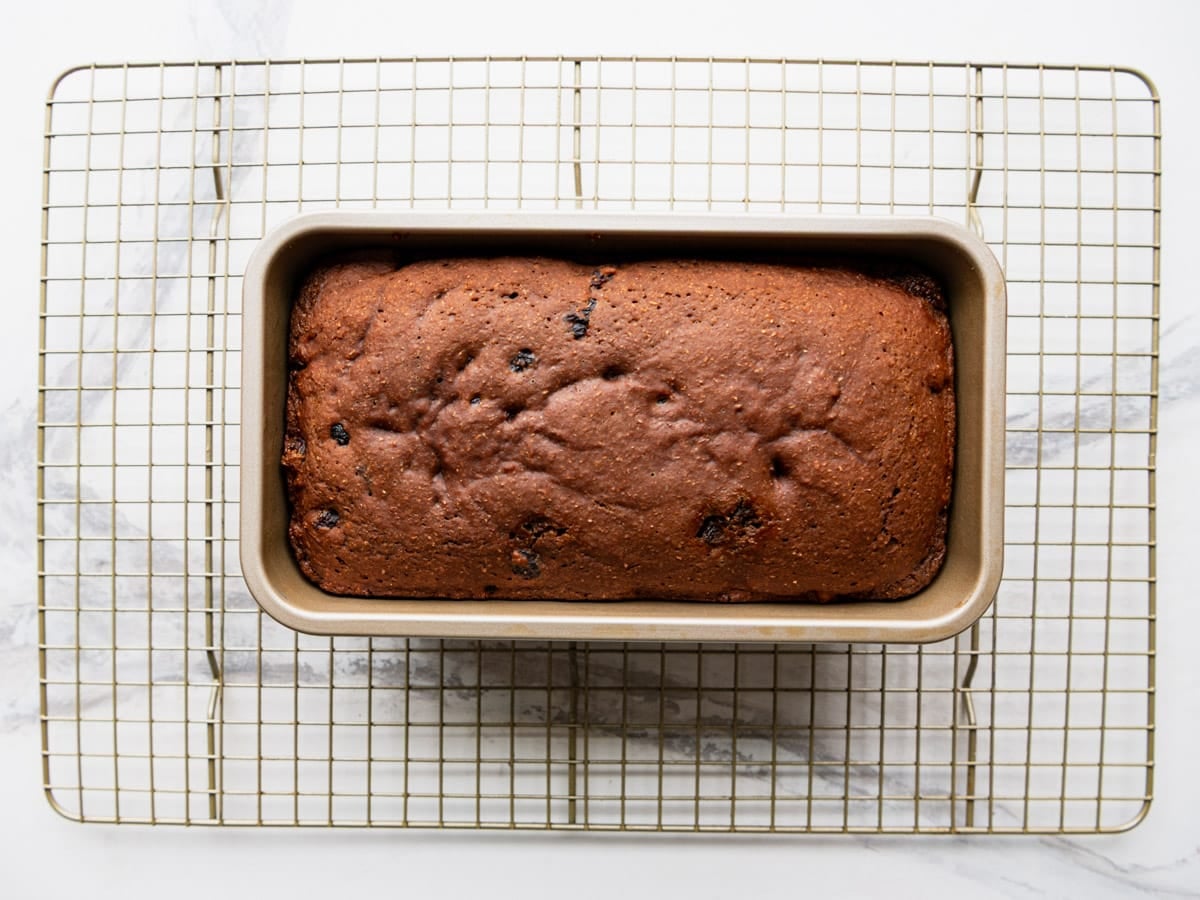
Let the bread cool in the pan for about 10 minutes, then turn it out onto a wire rack to cool completely before slicing. A serrated knife works best for clean slices.
How to Serve Boston Brown Bread
In New England, Boston brown bread is traditionally served alongside baked beans and franks, and that’s still one of the best ways to enjoy it. Try it with homemade baked beans or a pot of franks and beans for a classic, cozy meal.
The bread is also delicious on its own at room temperature. Smear a slice with butter or cream cheese, top with a dollop of orange marmalade, drizzle with honey, or pair it with eggs or yogurt for breakfast. Leftover slices are wonderful toasted the next day with a pat of butter.
At dinner, the hearty bread goes well with soups, stews, and roasts:
- Crock Pot Beef Stew
- Chili con Carne
- Dutch Oven Pot Roast
- Roast Chicken and Vegetables
- Dutch Oven Roast Chicken
- Sausage and Cabbage
- Corned Beef Hash
Tea Sandwiches: You can also slice the bread thin and use it for little tea sandwiches. Spread with cream cheese and fresh dill and top with smoked salmon, fill with egg salad, or try apricot preserves mixed with cream cheese and topped with ham. Classic peanut butter and jelly works beautifully on this bread, too.
Storage
Wrap the loaf in plastic wrap or foil to prevent it from drying out. The bread will stay fresh at room temperature for 2 to 3 days and in the refrigerator for up to 5 days.
To freeze: Cool the loaf completely, wrap tightly in plastic wrap, then place in a freezer bag. The bread will keep in the freezer for up to 3 months. Thaw at room temperature before serving.
To reheat: Warm individual slices in the microwave for 15 to 20 seconds, or toast them lightly for a crisp exterior.
Taste just like Mom used to make and so easy forget the coffee can~ this is great.
– Jill
Frequently Asked Questions
What makes Boston brown bread different from regular bread?
Boston brown bread is a quick bread leavened with baking soda instead of yeast, so there’s no rising or kneading involved. It has a dense, moist texture and a rich molasses flavor that sets it apart from typical sandwich breads. Traditionally it was steamed in a can, but this version bakes in a loaf pan for the same great taste with less effort.
How do you eat Boston brown bread?
The classic New England way is to serve it warm alongside baked beans and franks. It’s also delicious at room temperature with a smear of butter, cream cheese, or honey. Try it toasted for breakfast, or slice it thin for tea sandwiches with cream cheese and smoked salmon.
Can I use a different type of molasses?
Use regular (also labeled “original” or “mild”) molasses for the best flavor. Dark molasses will work and gives a slightly deeper, more robust taste. Avoid blackstrap molasses, which is very bitter and will overpower the bread.
Why did my brown bread come out raw in the center?
The most common reasons are too much liquid in the batter or not enough baking time. Make sure you’re measuring your buttermilk accurately (shake the carton well before measuring), and always check doneness with a toothpick inserted deep into the center.
Glass and ceramic pans can require extra baking time compared to metal pans. If the toothpick comes out with wet batter, cover the bread loosely with foil and bake for another 5 to 10 minutes.
Can I make this without raisins?
Absolutely. The bread is delicious on its own, or you can swap in dried cranberries, chopped dates, or currants for a different twist. Add ½ cup of chopped walnuts or pecans for some crunch if you like.
More Quick Bread Recipes

Did you make this recipe?
If you enjoyed this recipe, please leave a comment with a 5-star review at the bottom of the post. Thank you!
Watch How to Make It
Old-Fashioned Boston Brown Bread
Equipment
- 8 ½ x 4 ½-inch loaf pan
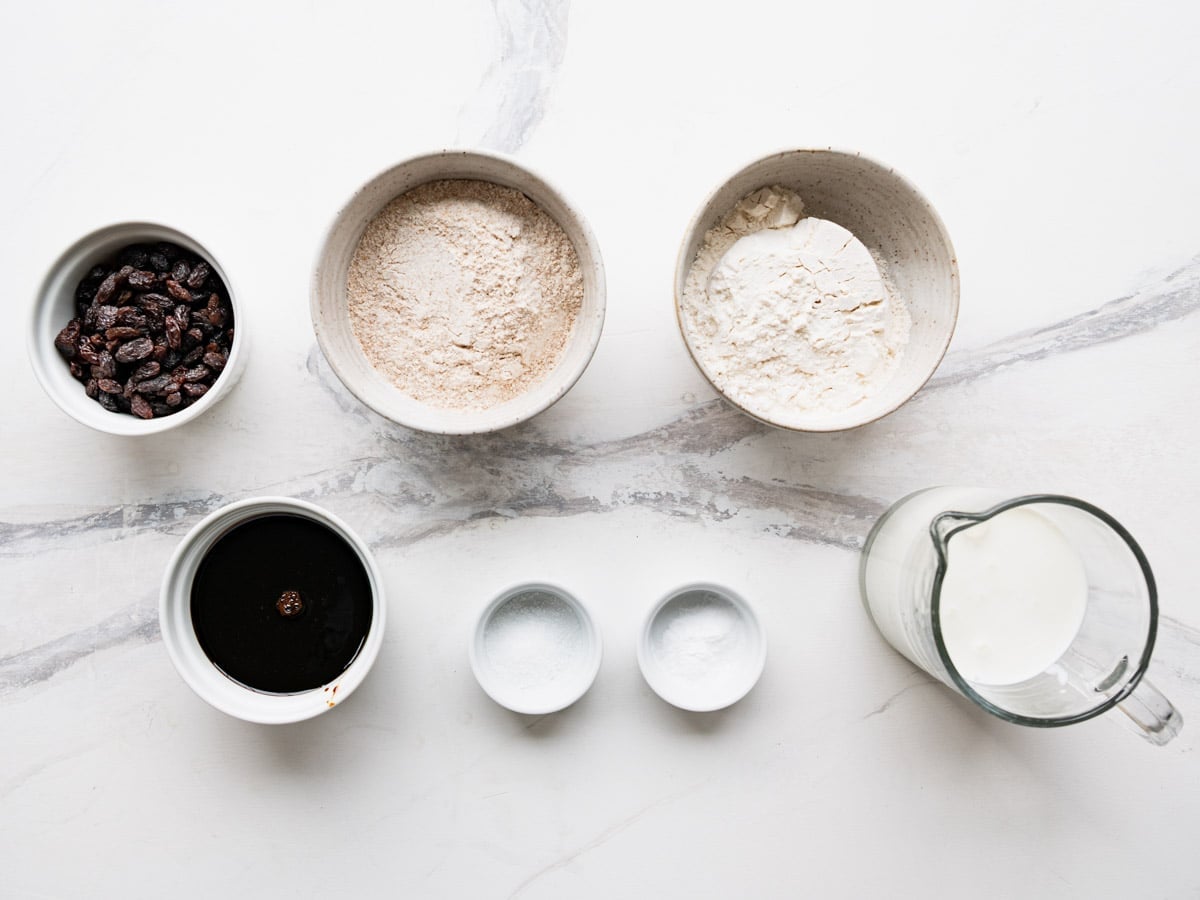
Ingredients
- 1 cup whole wheat flour
- 1 cup all-purpose flour
- ¾ teaspoon baking soda
- ¾ teaspoon salt
- 1 ¼ cups buttermilk, well shaken
- ½ cup molasses
- ¾ cup raisins
Instructions
- Preheat oven to 325°F. Grease an 8 ½ x 4 ½-inch loaf pan with nonstick cooking spray; set aside.
- In a large bowl, sift or whisk together the whole wheat flour, all-purpose flour, baking soda, and salt.

- Gradually stir in the buttermilk and molasses, mixing just until combined. Do not over-mix. Fold in the raisins.
- Transfer the batter to the prepared pan.
- Cover the pan with buttered (or sprayed) aluminum foil, pressing the foil tight around the edges of the pan but ballooning it in the center so the bread has room to expand.
- Bake for 50 minutes. Remove the foil and bake for an additional 10 minutes, or until a toothpick inserted deep into the center comes out clean.
- Let the bread cool in the pan for about 10 minutes, then turn it out onto a wire rack to cool completely before slicing.

Notes
- Don’t over-mix the batter. Stir just until the wet and dry ingredients are combined. Over-mixing develops gluten and makes the bread tough or dry.
- Use regular molasses, not blackstrap. Regular (or dark) molasses gives the best flavor. Blackstrap is too bitter for this recipe.
- The foil tent is important. It creates steam that gives the bread its signature dense, moist texture. Make sure the foil is tight around the edges but loose in the center.
- Shake your buttermilk well before measuring. Buttermilk separates in the carton, and the consistency matters for this recipe.
- Buttermilk substitute: If you don’t have buttermilk, stir 1 tablespoon of white vinegar or lemon juice into 1¼ cups of milk and let it sit for 5 minutes before using.
- Pan choice matters. Use an 8½ x 4½-inch metal loaf pan for best results. Glass and ceramic pans may need extra baking time.
- Always check with a toothpick. Insert it deep into the center. If it comes out with wet batter, cover loosely with foil and bake 5 to 10 more minutes.
- Raisin alternatives: Swap in dried cranberries, chopped dates, or currants. Or add ½ cup of chopped walnuts or pecans for crunch.
- Grease the pan generously so the bread pops right out.
- Storage: Wrap in plastic wrap or foil. Keeps at room temperature for 2 to 3 days, refrigerated for up to 5 days, or frozen for up to 3 months.
- Best the next day. The flavors develop and the bread becomes even more moist after resting overnight. Try it toasted with butter for breakfast!
- Recipe adapted from King Arthur Flour.
Nutrition
Originally published in October, 2020, this post was updated in March, 2026.


The recipe turned out so delicious. Thanks for sharing.
Thank you!
about identical to my old recipe, but I bake a loaf in a large (48oz) juice can, sides & bottom thoroughly greased & dusted with cornmeal, tightly covered with foil. Too tasty to make only one at a time, though, so I doubled for a family of 6. Keeps nicely in a plastic bread bag, in the fridge, doesn’t stay around long, though!
I have made the traditional steamed version from a recipe from my grandmother who got it from her mother. Not sure how far back it goes… Our recipe is a combination of whole wheat and rye flours and cornmeal. I’d have to check for the ratio, but the different flours add great texture and flavor! The rest of the recipe is very similar. I might try my next batch in a loaf pan…
Hey, Sarah! Yep, that flour mixture is definitely the more traditional combination. I mentioned in the post that I use just the wheat and all-purpose flours to keep it easier and more simple (since those two flours are much easier to find and store in the kitchen). I’d love to hear how you like this modified version if you give it a try!
Can I use sour milk instead of the buttermilk?
Hi, Annabelle! Yes. 🙂
I remember eating boston brown bread as a kid. Mom didn’t make it but as a treat for my dad and me she would buy the bread in a can. We usually ate it with butter or cream cheese. So it was going to be a trip down memory lane to have boston brown bread. But I had problems! Getting ingredients and mixing were fine. As I put the bread into the 8 X 4 pan it looked too full, and it was. It ran over and I had chard remains on the oven floor. I baked it the 45 minutes at 350, removed it from the pan and the middle fell in as it cooled. And the middle definitely was not done. I was sad, We ate what we could but much was too raw.
I suggest you retest this recipe for pan size and time. Most of your other recipes I have used we have enjoyed so I won’t give up on you.
Hi, Pat! Thanks so much for your feedback! I had tested the recipe a handful of times before posting, with great luck each time. I always use a very thick real buttermilk that I buy at a local country market, so this afternoon I picked up store-bought cultured buttermilk from the grocery store (which has a thinner texture) to test with that version. The batter was definitely thinner, but it still worked fine in the loaf pan without running over and was done in about 40 minutes. I wonder if you accidentally measured too much liquid for your batter? If the batter was too wet from too much liquid, that would explain why it didn’t cook through.
But! You’ve now inspired me to go down the brown bread rabbit hole again. 🙂 I’m testing a couple of more loaves with smaller measurements for all of the ingredients — to make a smaller loaf. I also want to test baking it covered so that it gets that “steamed” consistency of the traditional loaves made in coffee cans. Stay tuned, because I’ll adjust the recipe if I think the oven-“steamed” smaller loaves taste even better. Again, I always appreciate feedback and I’m happy to tweak things if it might make the recipe even better. Have a great week!
Mine come out awesome
Great! Thanks, Jeremy!
Hi, Bonnie! I’m sorry that you found the instructions difficult or confusing, but I hope that you were able to enjoy a delicious loaf of bread in the end. My tip was to add the ingredients together gradually and not to over-mix in order to avoid a dry loaf of bread. Adding the wet to the dry or the dry to the wet shouldn’t impact the consistency of the loaf. It’s stirring too much and activating too much gluten that can cause baked goods to be tough or dry. Hope that makes sense! 🙂
Taste just like Mom used to make and so easy forget the coffee can~ this is great.
Thank you, Jill! I’m so glad that you enjoyed it! 🙂
Excellent. Recipe is spot on.
Thank you, Jim! I’m so happy to hear that. 🙂
I made 3 small cans & steamed them , it came out way too wet, I can’t wait to try the loaf recipe, as my son has said he misses the brown bread is a can , he is almost 44 years old, so I want to make it again for him & my husband & myself, thanks so much !!!
I made 3 small cans & steamed them , it came out way too wet, I can’t wait to try the loaf recipe, as my son has said he misses the brown bread is a can , he is almost 44 years old, so I want to make it again for him & my husband & myself, thanks so much !!!
I made the bread and I did it exactly as called but the centre was raw. I tested it and it was
pulling away at the sides. I only got two slices on each end that were good.
Sounds like it just needed more time in the oven, Joan. All ovens are different, and the total baking time can also vary depending on the type of pan that you use (glass, metal, dark, light, ceramic, etc.). As a result, it’s best to check with a toothpick to make sure that the center is cooked through before removing from the oven.
Oh, great! I hope that your son loves it! 🙂
Almost always on recipes there will be “jump to recipe” (sometimes real small)so you dont have to scroll thru many readers enjoy the actual blog parts as well as recipes. I used left over rum and vanilla soaked raisins,so good Nextel days toasted with cold cream cheese
Thanks, Lynn! Yes, there’s always a “Jump to Recipe” button on my blog posts at the top. Hopefully that makes skipping ahead more convenient. 🙂
I am trying the brown bread tomorrow.
Never tried it before so here it goes.
Please let us know how it goes, Shela! If you have any issues we’re happy to help troubleshoot.
about identical to my old recipe, but I bake a loaf in a large (48oz) juice can, sides & bottom thoroughly greased & dusted with cornmeal, tightly covered with foil. Too tasty to make only one at a time, though, so I doubled for a family of 6. Keeps nicely in a plastic bread bag, in the fridge, doesn’t stay around long, though!
We’re glad you were able to make it work for you and enjoyed it! Thank you for the feedback, Marina.
Good recipe, but webpage won’t load/display the double & triple batch recipe.
Sorry about that! It’s working on our end. Did you by chance try refreshing your browser and clearing any cookies?
On my computer, the amount of each ingredient for the brown bread is not shown. Where can I get the amounts?
Hi, Chris! There’s a full recipe card at the bottom of the post, which includes all of the specific measurements and instructions. If you’re having trouble viewing that, I’ve copied and pasted the ingredients below:
1 cup whole wheat flour
1 cup all-purpose flour
¾ teaspoon baking soda
¾ teaspoon salt
1¼ cups buttermilk
½ cup molasses
¾ cup raisins
Hope you enjoy the recipe!
Delicious!!! I made one batch in the pan and one batch in jars to take to one of my daughters!
How nice of you, Jani! We’re so glad you enjoyed it. Thank you for trying it out and taking the time to leave a review!
How much of each ingredient? I did not see measurements.
Hi, Linda! You can find all of the specific measurements for each ingredients and the complete instructions in the printable recipe card at the bottom of the post. Hope you enjoy!
I LOVE this recipe… and so does my husband!!! I went to make it again and half way through I realized I had the wrong recipie So… now that I have the right recipe again, I will get up early tomorrow morning and make THIS ONE again!
Thank you, Sydney! We’re so glad you enjoy it.
As a yeast bread baker for over 40 years, I ran across this recipe which would be easy and quick, so I made it. Delicious! I couldn’t keep from eating 5 slices!! It was easy, so moist, and wonderful the next morning toasted with peanut butter. I will definitely make this again, especially when I am short on time and nearly out of bread.
Thank you, Ann! We’re so glad you enjoyed it and appreciate you taking the time to leave a review.