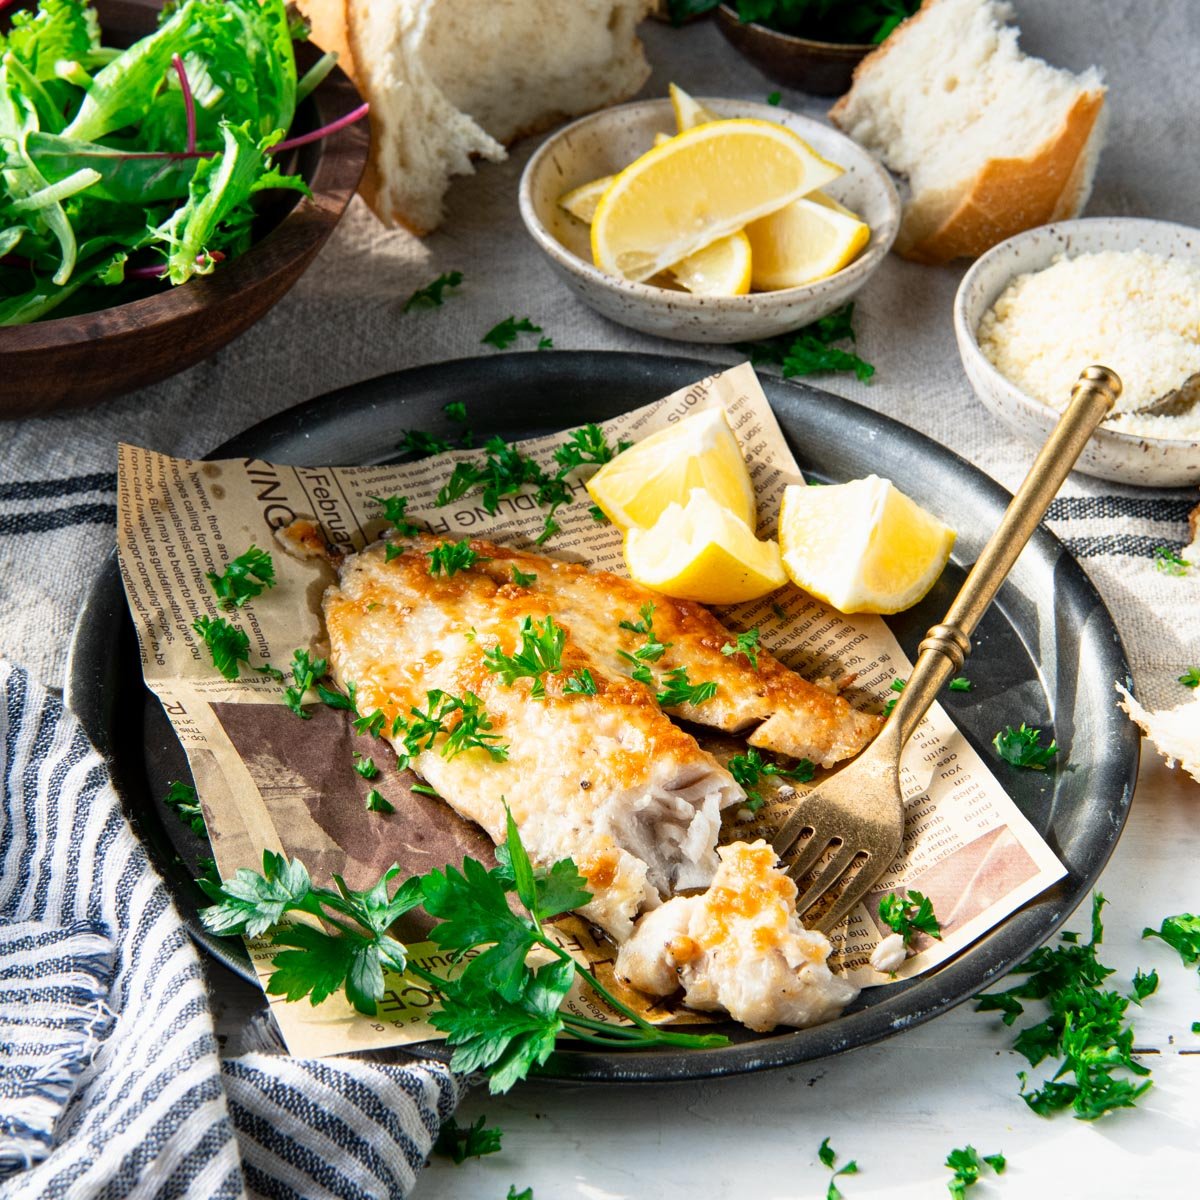
Learn how to cook tilapia in just 15 minutes! This 5-ingredient garlic parmesan crusted tilapia recipe is a delicious and easy dinner that the whole family will love. Serve the fish with rice, a loaf of crusty bread, or a simple green salad.
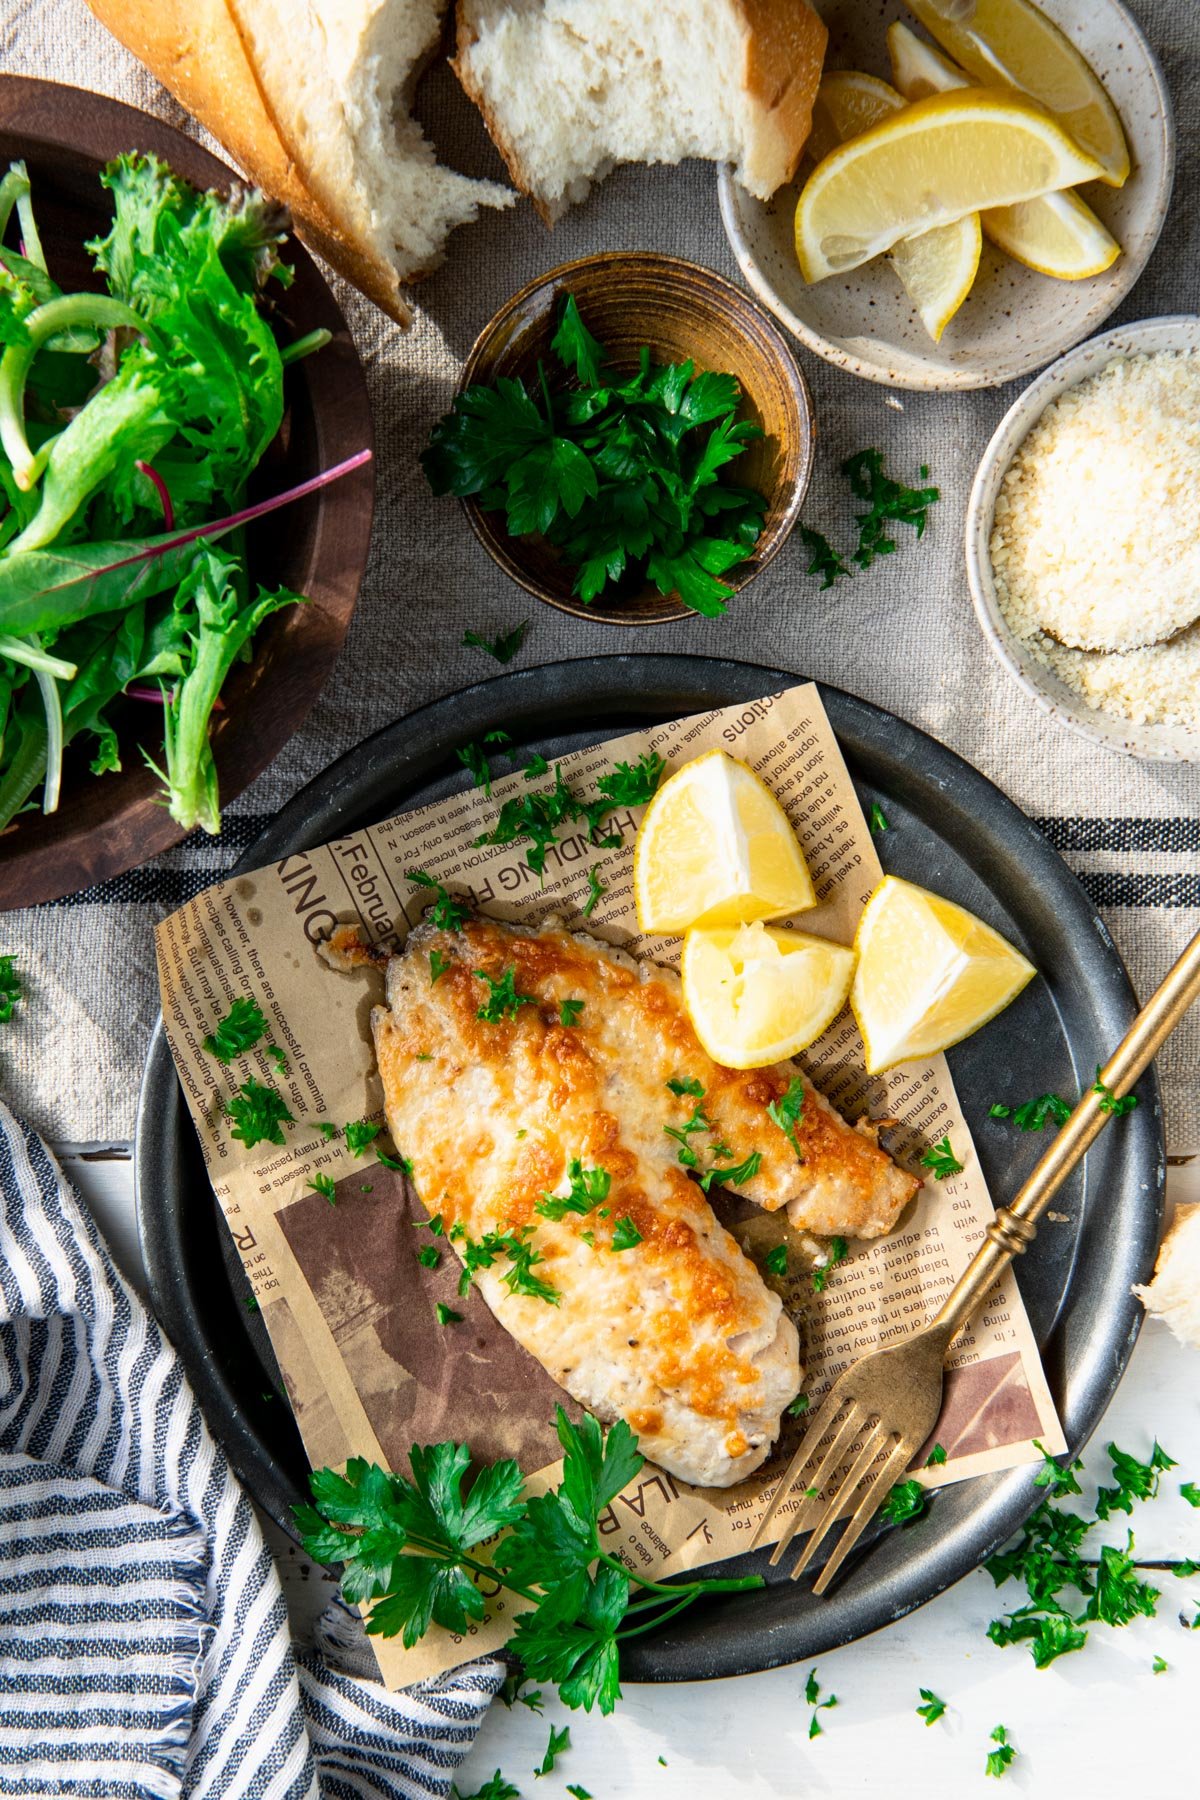
Table of Contents
If you love baked tilapia recipes, be sure to try this baked tilapia with lemon and garlic and this 5-ingredient almond-crusted baked tilapia, too!
How to Make this Easy Tilapia Recipe | 1-Minute Video
Best fish recipe I’ve used in a long time. Also the easiest. Can’t wait to use again. Actually tasted the flavor and it was the perfect crispness. Thank you!!
– Billy
Why You’ll Love this Recipe
Put an end to the crazy rush of mealtime with an easy tilapia recipe that the whole family can agree on! Here are three reasons that you’ll love this meal:
- You only need 5 ingredients — most of which are pantry staples. You can also keep the fish in the freezer until you’re ready to use it, so this is one option that will save you a last-minute trip to the grocery store.
- The dinner is a lighter, healthier, protein-packed option, yet it’s still made with delicious, familiar ingredients that your children will love. We’re talking butter, garlic, Parmesan cheese, and a very mild, tender white fish. Who wouldn’t devour that?!
- And finally (but perhaps most important), this baked tilapia recipe only requires about 5 minutes of prep. We all have time for that!
How to Cook Tilapia
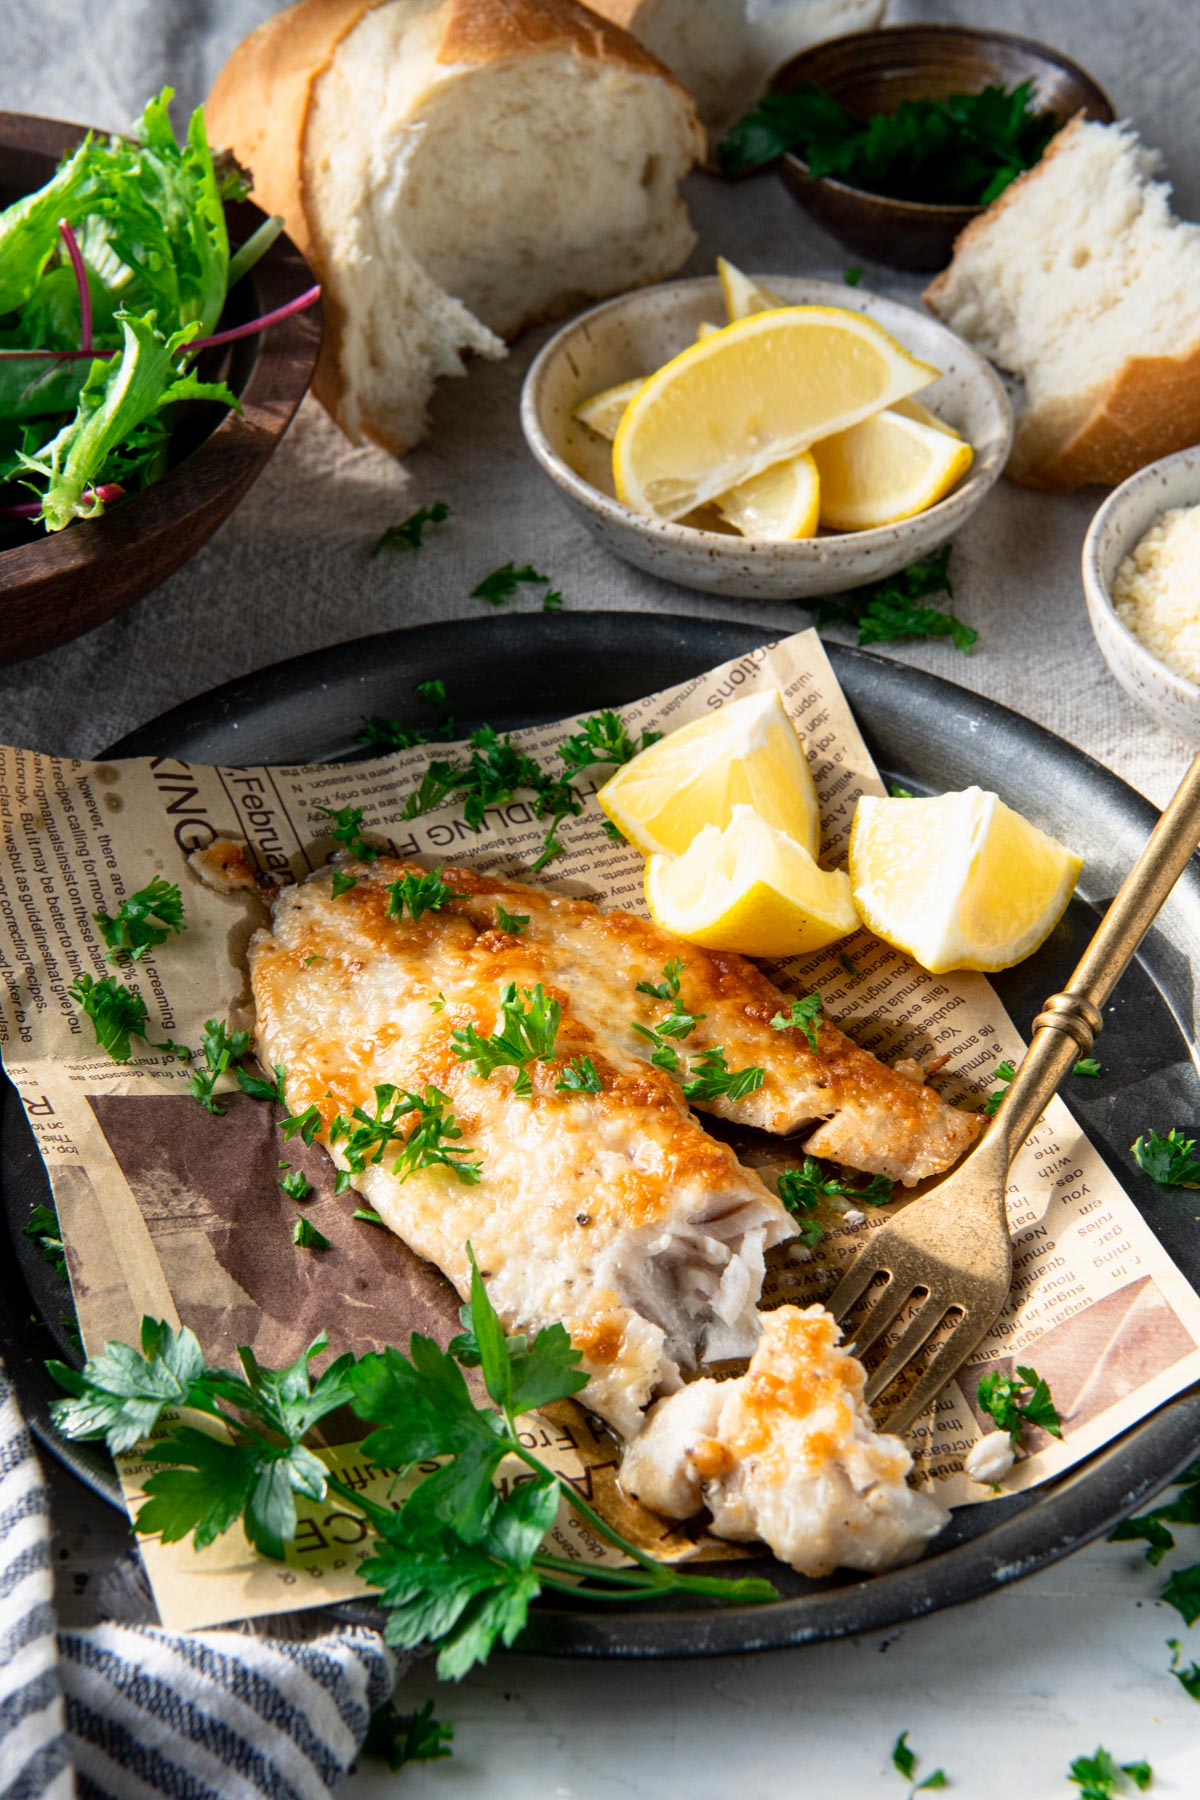
Learn how to cook tilapia fillets with an easy, gluten free, 5-ingredient recipe that’s ready from start to finish in about 15 minutes! For this dish, you’ll cook the fish under the broiler. The high heat of the broiler gives the tilapia a nice golden brown, crusty exterior, while the inside of the fish stays moist and tender.
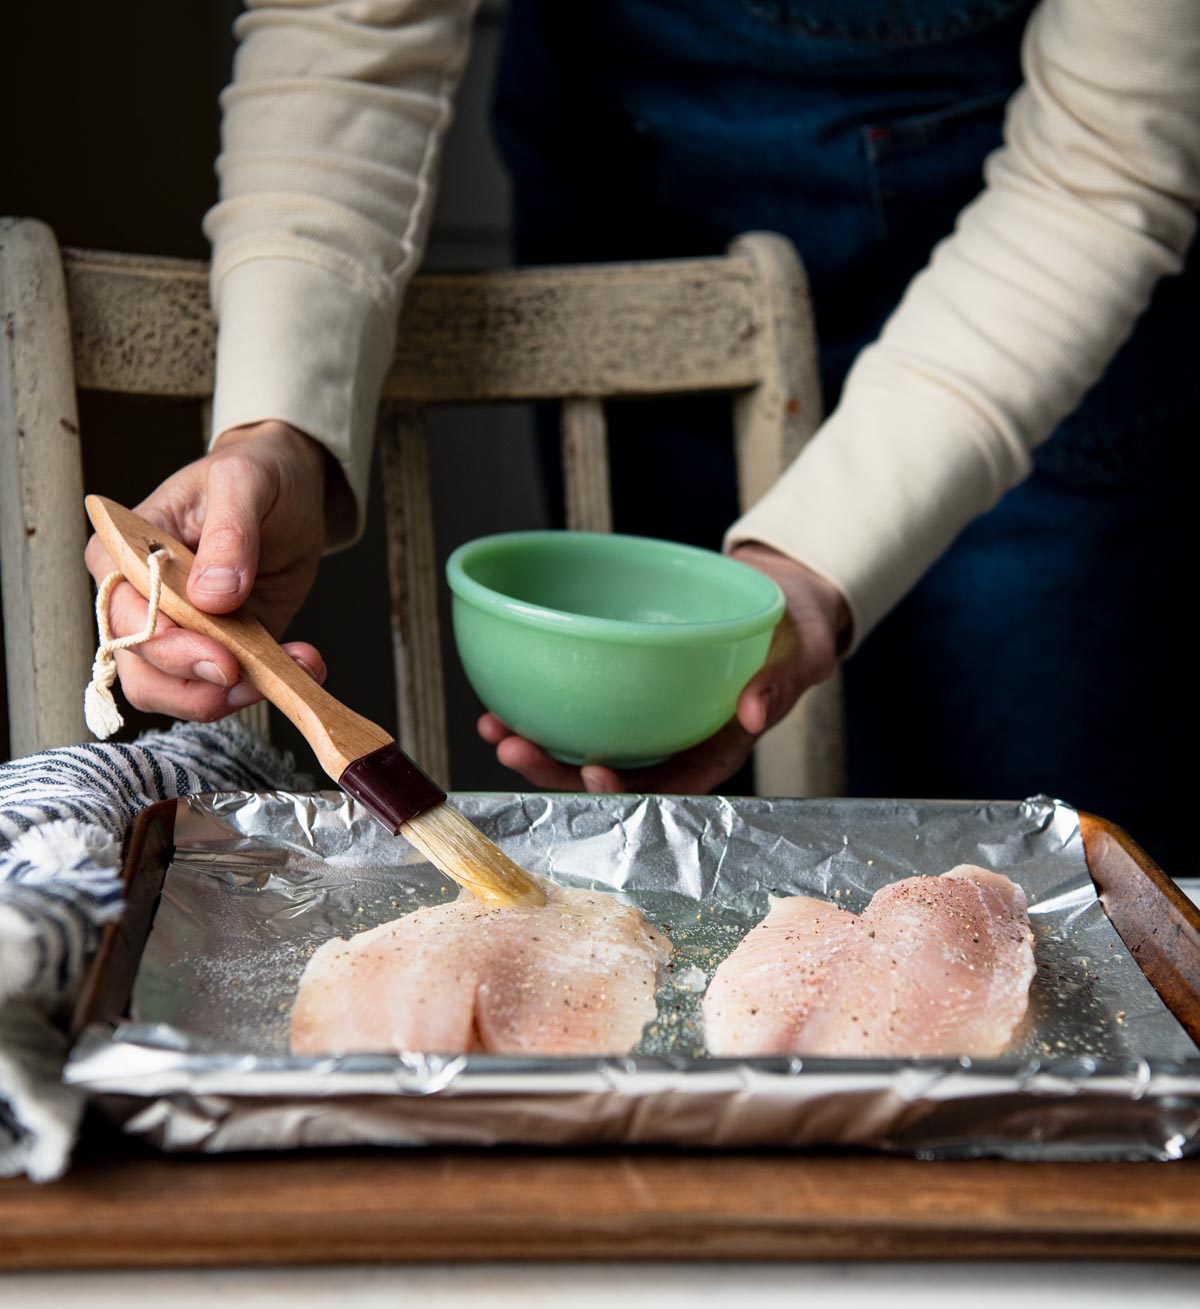
- Combine melted butter, lemon juice, and garlic powder in a small bowl.
- Brush the tilapia filets with the butter sauce and place on a broiling pan, rimmed baking tray lined with aluminum foil, or even a large baking dish (if they fit).
- Broil the tilapia for 5 minutes.
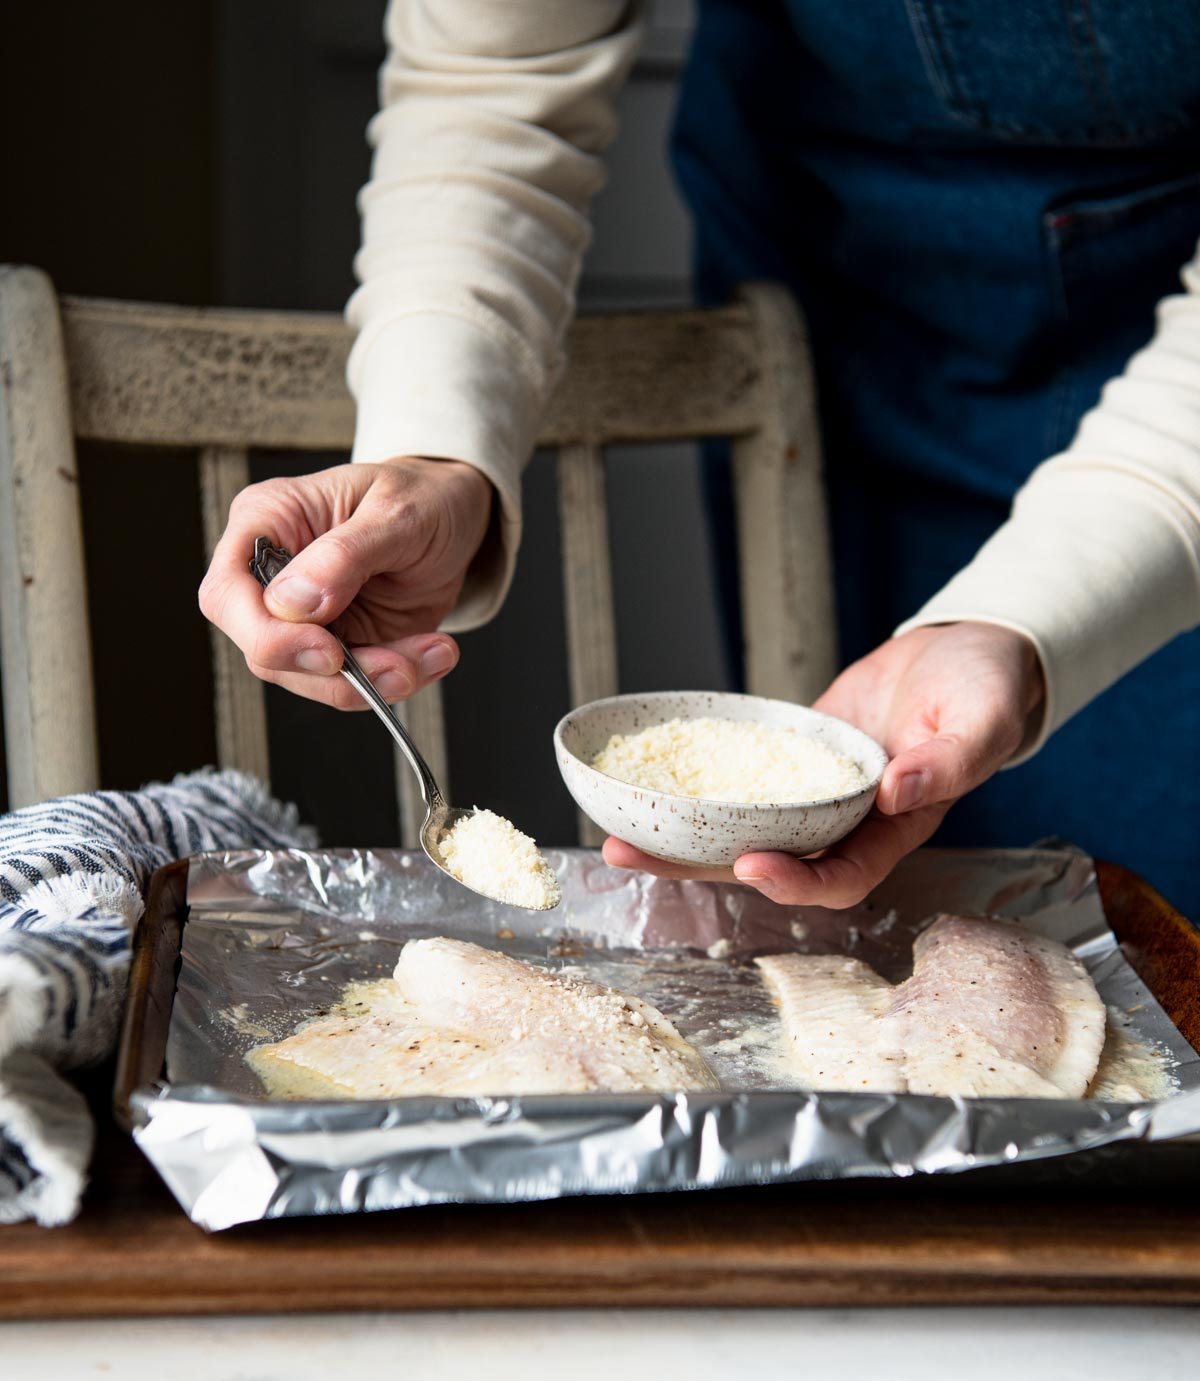
- Flip the fillets, sprinkle with Parmesan cheese, and broil for 5-6 more minutes. Cooking times will vary depending on the size and thickness of your fish, the temperature of the fish when it goes under the broiler, and the proximity to the broiler itself. Keep a close eye on the fish while it’s cooking — don’t walk away — as food can burn very quickly under a broiler.
- Taste and season tilapia with additional salt and pepper, if necessary.
- Garnish each serving with fresh herbs, such as parsley, basil, thyme, oregano, or chives, a lemon wedge, lemon slices, or a squeeze of fresh lemon juice. You can also sprinkle with red pepper flakes for some heat!
Serving Suggestions
Garnish the fish with a lemon wedge and some chopped fresh parsley. Pair the really simple tilapia recipe with almost any side dish, such as no-knead cast iron focaccia, pesto pasta, tomato, cucumber and onion salad, cherry tomatoes with basil and balsamic, sauteed spinach, roasted yellow squash, green beans and mushrooms, or sauteed zucchini.
Storage
- How to cook frozen tilapia: If you’re starting with frozen tilapia, thaw the fish in the refrigerator overnight. Pat dry with paper towels and use in the recipe as instructed.
- How to store: The cooked fish will keep in an airtight container in the refrigerator for about 2 days. If you need to store the tilapia longer, you can freeze the leftovers for up to 1 month. It’s important to note, though — this tilapia is best when served warm from the oven.
- How to reheat: While it’s not ideal, you can carefully reheat the tilapia. You just need to be sure that you don’t overcook the fish in the reheating process. Either warm in the microwave for just a few seconds, or warm in a 275°F oven (loosely covered with foil) for about 7-10 minutes (or until the fish reaches an internal temperature of 130-135°F).
Went looking for a recipe on the fly, and found this one. I cannot say enough about it! The garlic and parmesan were perfectly proportioned, and not overwhelming, just perfectly flavored! I HIGHLY recommend this. Just wonderfully refreshing anytime of the year!
– Wendy L.
More Popular Fish Recipes


Did you make this recipe?
If you enjoyed this recipe, please leave a comment with a 5-star review at the bottom of the post. Thank you!
Watch How to Make It

5-Ingredient Garlic Parmesan Tilapia Recipe
Ingredients
- 4 tilapia fillets (about 8 ounces each)
- 2 tablespoons salted butter, melted
- Juice from 1 lemon
- 1 teaspoon garlic powder
- ¼ cup grated Parmesan
- Kosher salt and ground black pepper, to taste
- Optional, for serving: lemon wedges; chopped fresh parsley
Instructions
- Preheat oven to BROIL on HIGH and place a rack about 5-6 inches from the broiler unit. Line a rimmed baking sheet with foil and spray with non-stick cooking spray. Set aside.
- Pat tilapia dry and season with salt and pepper, to taste.
- Combine melted butter, lemon juice, and garlic powder in a small bowl. Brush the butter mixture on both sides of the fish.
- Place the fish on the prepared baking sheet, bottom side UP, and broil for 5 minutes. Flip the fish over, sprinkle with Parmesan cheese, and return to the broiler for 5-6 more minutes. The fish will flake easily with a fork when it’s done.
- Garnish with lemon wedges and parsley.
Notes
- Always keep a close eye on food when it’s under the broiler, as it can burn very quickly.
- To know when the fish is done, gently insert the tines of a fork into the thickest part of a fillet. Twist the fork at a 45 degree angle. If the flesh of the fish is fork-tender and flakes easily, it’s done! If you prefer to use an instant read thermometer, the fish is done when it reaches an internal temperature of 145°F.
- If you like the flavor of Old Bay seasoning, you can add a dash of Old Bay to the melted butter mixture and then brush it on the fish. Paprika, garlic salt, onion powder, or lemon pepper would also be great additions to the butter mixture.
Nutrition
Recipe Variations
- If you like the flavor of Old Bay seasoning, you can add a dash of Old Bay to the melted butter mixture and then brush it on the fish. Paprika, garlic salt, onion powder, or lemon pepper seasoning would also be great additions to the butter mixture.
- We love the flavor of the butter, but you can swap it out and use olive oil instead if you prefer.
- For even stronger lemon flavor, add some grated lemon zest to the butter mixture.
- Swap out the lemons and use lime juice instead. The cooked tilapia would be great in fish tacos!
- Make it spicy by garnishing with crushed red pepper flakes or by adding cayenne pepper to the butter mixture.
- Serving sizes: This recipe yields four very large servings. If you’re cooking for two, or if you have smaller appetites to feed, I would suggest using only two or three tilapia fillets.

This recipe was originally published in January, 2017. It was updated in July, 2024.


This tilapia looks so good, Blair! My husband and I eat fish quite often, and I’m always looking for new ways to prepare it. Garlic and parm is a favorite of mine, so this tilapia looks perfect!
I know — fish can get boring quickly. This is such a simple and delicious twist! Hope you try it!
Hi,
I love your easy recipe. My husband is not big on parmesan, so I substituted it with a tsp of ground ginger. I also use parchment paper instead of foiling the pan. Guaranteed non stick. I have also tried paprika as an addition. (1tsp) it was quite yummy.
Great suggestions, Mariah! Thank you!
Watch the salt here. Fresh parmesan is salty, using salted butter and then adding more salt?
You can definitely adjust to taste! We hope you enjoy the recipe, Nonie.
Is it a LOW broil or Hi? My oven has both
Hi, Genevieve: either will work. I do high, but you have to keep a really close eye on it so that it doesn’t burn. 🙂
This looks incredible! I haven’t seen those Libby’s veggies. I want to try with your fish!
Thanks, Megan!
This looks absolutely delicious. Blair. It’s perfect healthy and easy meal for the whole family. And it’s so light.. quite good for after holiday overeating, right hehe 😉
Thanks, Natalie! Yep — this is one of those great seafood dishes that appeals to the little ones as well!
Oh my goodness, this tiliapia looks solo good! I usually am not a huge fan of tilipia because the way I cook it is too bland, but if were like this, I’d enjoy so much more!
Thanks, Bethany! No bland or boring tilapia allowed! 🙂
Mila, thank you for catching that typo! I updated the recipe so it should be more clear now! Thank you again for noticing the mistake, and I hope that you get to try it!
Thank you! I made this tonight. It was delicious and easy to make.
That’s great, April. Thank you!
Hiya Blair,
This is such a great recipe ! Can’t go wrong with with white fish, parsley and lemon and it’s ready in no time. I love these kind of recipes because it gets the message across that you don’t have to be afraid to cook fish, lol. Not sure why that’s such a problem but it seems to be a common fear. I”m much more concerned about messing up an expensive steak!
Gorgeous photos 🙂
Exactly, Robyn — keep it simple! And I agree — folks are confused or intimidated by fish, but it’s so easy and fast to cook. Hope this changes some minds! 🙂
Hi, this recipie looks super delicious and super easy! But do you broil on hi or low? And how far away from the broiler are you cooking the fish? Thanks!
Hi, Paige! I broil on HIGH, and I keep my fish about 4-6 inches below the broiler. However, broilers tend to be different, so just keep your eye on your fish and make sure that it’s not burning too quickly (or too slowly).
Hi… do you keep broiler door open when you broil or keep it closed as you do when baking?
Hi, Nanci! Personally, I keep the door shut. That just seems to work best with my particular oven/broiler. I know that a lot of ovens supposedly do best with the door cracked open while the broiler is on so that the food doesn’t burn too quickly or catch on fire from the high heat. Again, I’ve never had a problem with either of those issues with the door shut, so that’s how I do it. I’d try it with the door shut, but watch the oven very carefully and crack it open if it seems to be cooking the fish way too fast. 🙂
I just made this for dinner today and I must say OMG was it delicious
I made it with brown rice
That’s great, Jennifer! I’m so glad that you enjoyed it! 🙂
Does it have to be fresh fish or can it be frozen? And do you cook it the same way frozen?
Hi, Amanda! Nope, it doesn’t need to be fresh fish. I often use frozen fish! You will just want to thaw the fish in the refrigerator before cooking.
I have not tried baking it from frozen. You would definitely need to increase the cooking time, and I would guess that it will work fine (although I can’t make any promises!). 🙂
Hello Blair,
What degrees to I preheat the oven ?
Hi, Kelly! You’re going to want to use the “BROIL” setting on your oven, which isn’t actually a temperature setting. Some ovens give you the option of broiling on “HIGH” or on “LOW,” and I typically go with HIGH. That said, every oven is different, so be sure to keep a close eye on the fish as it cooks. Broiling uses very high temperature so the food will cook very quickly! Enjoy! 🙂
Hi Blair, i have been following your blog for a few months now and i must compliment you on how varied and delicious looking your meals are. I have tried a couple of chicken based recipes which were a winner! All of the snacks would be gobbled up in no time ( by adults as well :-)) but a lot of the meals appeal to me but i doubt my kids would eat them. Like one the other day with shrimps. I was just wondering if your kids eat all of these meals or you sometimes also end up making multiple dinners! Ax
Hey, Angela! Thanks so much for your kind words! I definitely do NOT make multiple meals each night — I don’t have time (or energy) for that! For the most part, my kids eat what I serve. My oldest and my youngest are definitely pickier eaters, but they have learned to at least try most of what I serve. More often than not, if they just take one bite, they realize that they actually like it! Sometimes it takes a few tries before they come around, but I’m persistent and I just keep serving what I want to serve, and they usually get on board eventually!
That said, I do try to make sure that I have at least one portion of the meal that I know everyone will enjoy. For instance, if I’m trying a new seafood dish and I’m not sure how much the kids will eat, I try to pair it with either one of their favorite veggie side dishes (like broccoli) or with some bread, pasta, or rice that I know they love. That way, even if they just take a few bites of the new food, I know that they can fill up on the other options. Some nights they might go to bed with mostly broccoli in their stomach, or with mostly bread in their stomachs, but I figure it balances out over time. As long as they make an effort to try the dish, I certainly don’t force them to eat anything! 🙂
I hope that helps, and thanks so much for following along!
Made this tonight with steamed carrots, broccoli, and spinach. Turned out fantastic! Thank you 🙂
Awesome! I’m so glad that you enjoyed it, Samantha! Thanks for letting me know! 🙂
I don’t eat tilapia, but I like other kinds of white fish. I will fix this SOON with some fish I have on hand and am SURE I will love it!! I can tell just because I love the ingredients. Thanks, Blair, for sharing this part of your life. Oh, also, I like your philosophy on feeding your children. Present them with everything, expect them to taste, NO forced eating. They’ll come around. (My son is now a Chef)
Thanks so much for your thoughtful note! I hope that you enjoy the fish! I agree — the flavors would be perfect with just about any type of white fish!
Have a wonderful evening!
Best fish recipe I’ve used in a long time. Also the easiest. Can’t wait to use again. Actually tasted the flavor and it was the perfect crispness. Thank you!!
Wonderful! I’m so glad that you enjoyed it, Billy! Thanks for letting me know. 🙂
Hi Blair, I plan on making this for dinner for my family and checked my oven for the broiler setting and it’s set to 500 F. Should I decrease the temperature or leave it at 500?
Hi, Yvonne! If your broiler is set at 500 that’s perfect! Just leave it there. 🙂
Hi! 🙂 What do you mean by “bottom side UP” ?
Hi! There’s a flat side of the fish fillet that I consider the “bottom” of the fillet (i.e., not the fleshy top part that you see in the photos). When you begin cooking the fish on the tray, you’ll want to start with the bottom of the fish facing up towards you. Then you’ll flip it over so that the “top” fleshy side of the fish is facing up during the second half of cooking. Basically you just want to make sure that you cook the fish on both sides! 🙂
Blair,
Thanks for this quick and easy recipe that I made tonight. I added fresh steamed green beans and I used a small crock egg poacher which only takes 2 minutes for the beans. Living alone and only having to feed 1 mouth has made the small steamer a must have. When I did have family members living with me, I would definitely have tried the Libby vegetable pouches. Looked great.
Wow! What a smart idea to broil tilapia with those 5 ingredients. The parmesan cheese added such a great touch and the broiling tip made it delicious. To complement my meal, I boiled fettuccine noddles and added the leftover 5 ingredients as a sauce.
I’m a new fan. Can’t wait to try a new recipe recommendation from you.
Hi, Jennifer! I’m so glad that you found the blog and that you enjoyed the fish. That small steamer sounds ideal for a single-person household, and the addition of pasta must have been delicious.
Thanks for your note, and enjoy the recipes on the blog! 🙂
Hi. I was wondering if you used fresh grated or the green jar/canister of grated Parmesan? Thanks!
Hi, Bryn! You can definitely use either one, but I typically go with the canister because that’s what I have on hand (and it’s easy)! 🙂
There’s a reason that Chef say that cheese and fish doesn’t go together and another reason why I always, always never cook fish with any kind of fish….well tonight I decided to give it a try but what a disappointment it was from everyone at the kitchen table!!
Good solid recipe! I will reuse with tilapia and other fish. Who doesn’t love lemon butter with garlic? But as for me, I have in the past made a delicious sauce but couldn’t taste it, so today, I doubled the sauce and figured, so what if I had too much! And… I did. but good for me, what was left over I mixed with my cheese to make a paste, which I pressed on each fillet with a spoon. Wow! You get a huge flavor boost when you coat your parmigiana with lemon butter! Try it! (Double the sauce first though–don’t be scared of too much lemon butter!)
Thanks for the tip, Donna! No such thing as too much lemon butter, right?! 🙂
PS I used a combination of fresh grated from a big Costco block and the shaker stuff! Both are great!