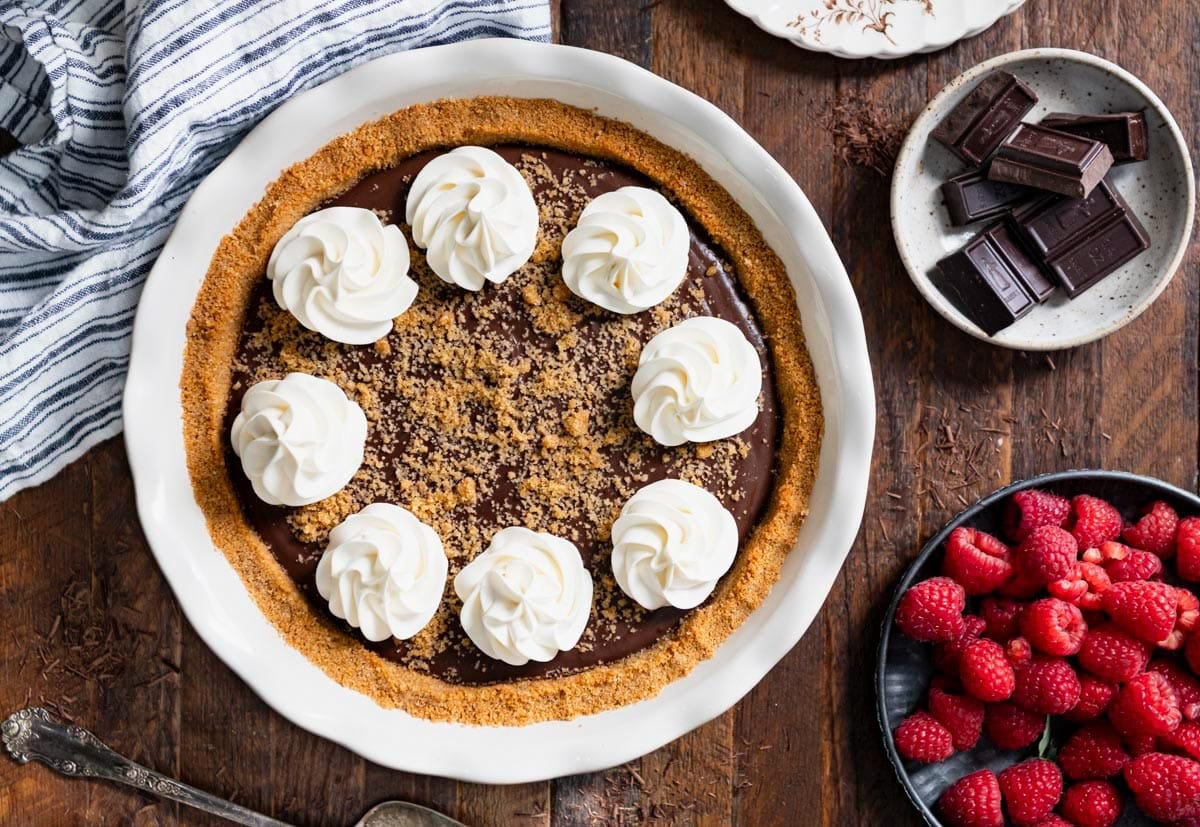
This rich and creamy chocolate pudding pie is a tried-and-true family favorite! Made with Cook-and-Serve pudding and a buttery graham cracker crust, it’s the perfect easy dessert for holidays, gatherings, or any time you’re craving a cool chocolate treat.
If you love chocolate desserts, try my chocolate bundt cake (with cake mix) or one-bowl buttermilk chocolate cake, and don’t miss all my favorite dessert recipes for more old-fashioned inspiration.
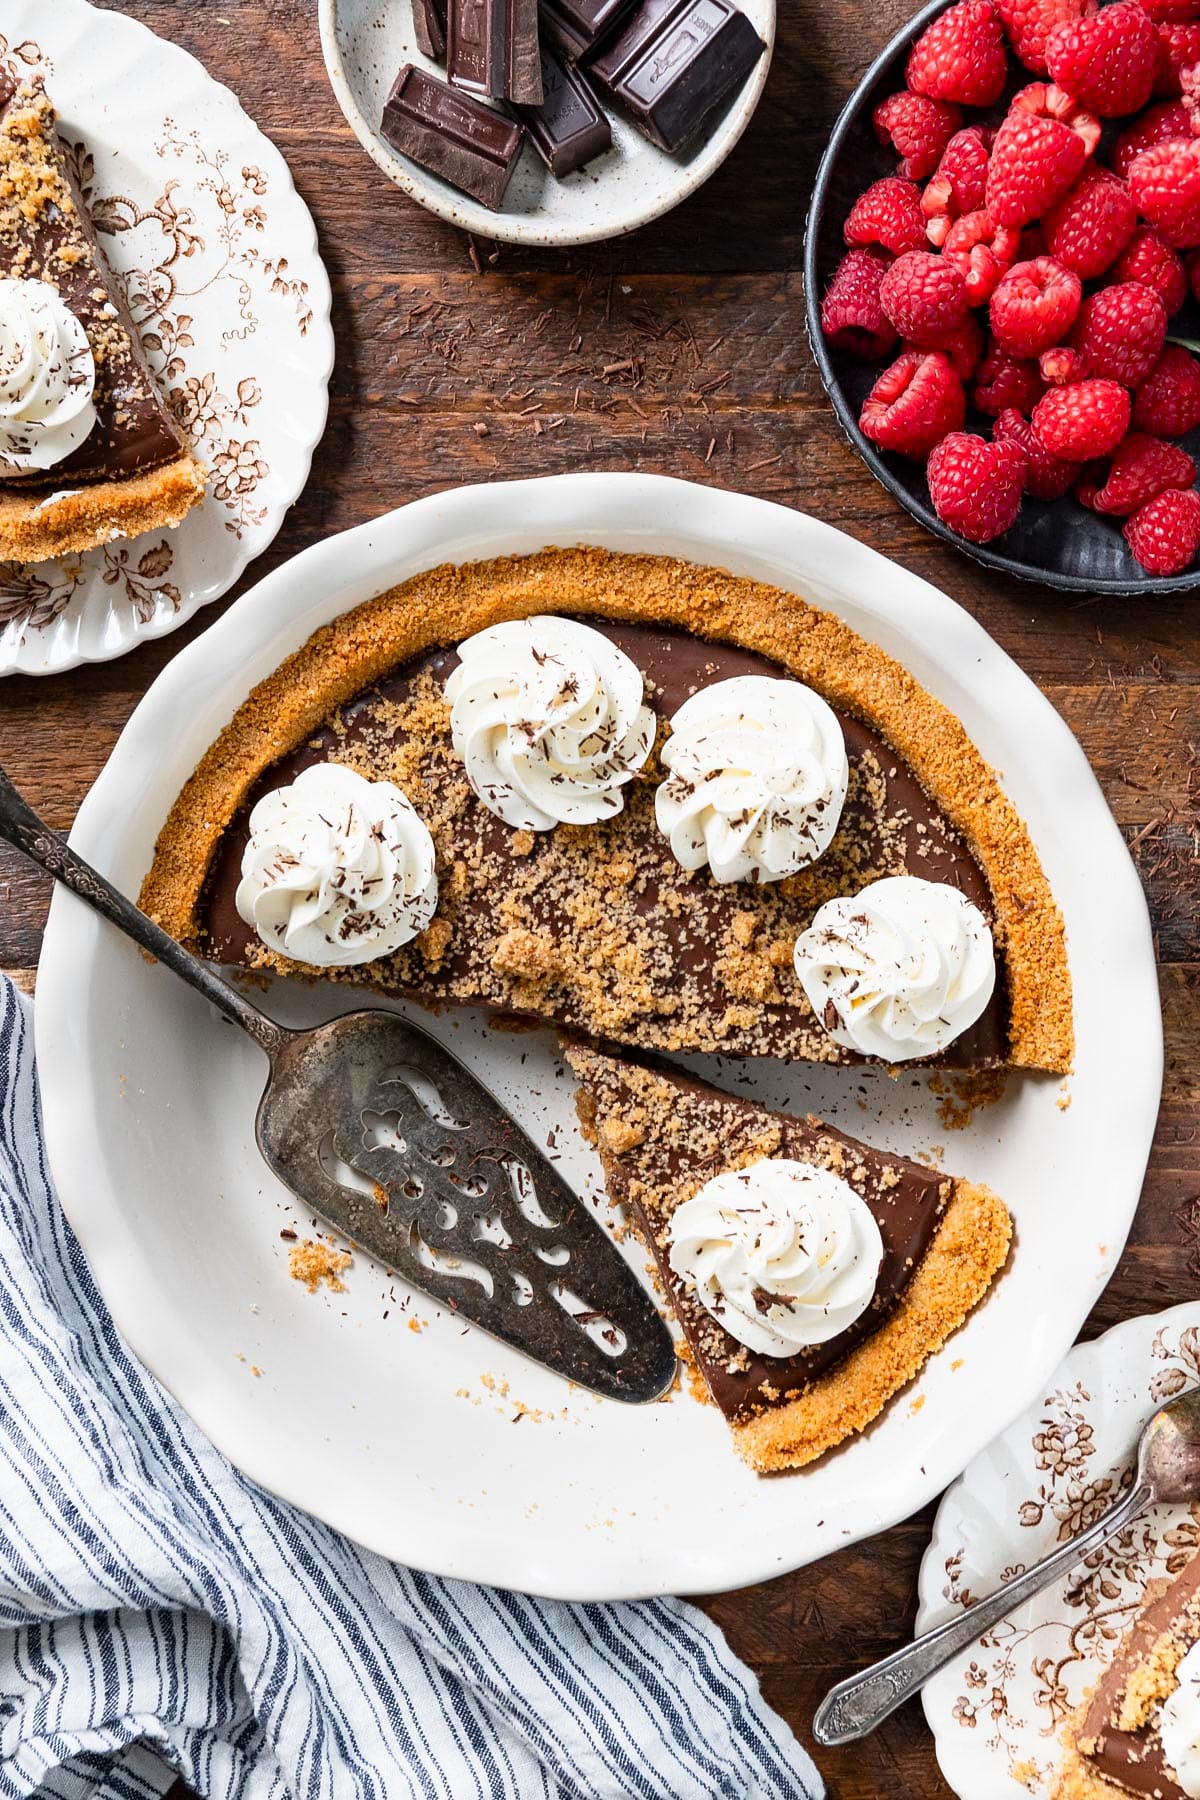
Table of Contents
Before You Get Started
Here are a few tips to ensure that your pie comes out perfectly every time:
- Always buy the Cook & Serve pudding mix in the large 5-ounce box. Instant pudding won’t set up the same way with this recipe.
- Good-quality unsweetened chocolate deepens the flavor. This is a baking bar of unsweetened cacao, which is not the same as a regular chocolate candy bar. Find the unsweetened chocolate in the baking aisle at just about any grocery store.
- Don’t rush the chill time. Give the pie at least 3 hours in the fridge, but overnight is even better.
- If you’re making your own crust, bake it first so it stays firm under the pudding, and let it cool completely before filling.
- A deep-dish pie plate gives you plenty of room for a generous layer of filling.
A Family-Favorite Dessert

As you know by now, I love a recipe with a story or personal connection. This particular dessert comes from my mom’s best friend, “Miss Joyce,” as my boys call her. My mom insisted that Joyce send me her tried-and-true family recipe for chocolate pudding pie, knowing that it would be a big hit in our house.
I love an easy dessert recipe, and as Miss Joyce says, “it’s literally easy as pie!” — thanks to help from a box of Jello pudding mix.
This is the same recipe that Joyce’s grandmother made for her, and which she has been making for her friends and family for as long as she can remember. It is now on its 4th generation of loyal devotees!
How to Make Chocolate Pudding Pie
Let’s walk through the process together. Think of it like we’re standing at the stove, chatting while the pudding thickens. I’ve got a few extra tips for you!
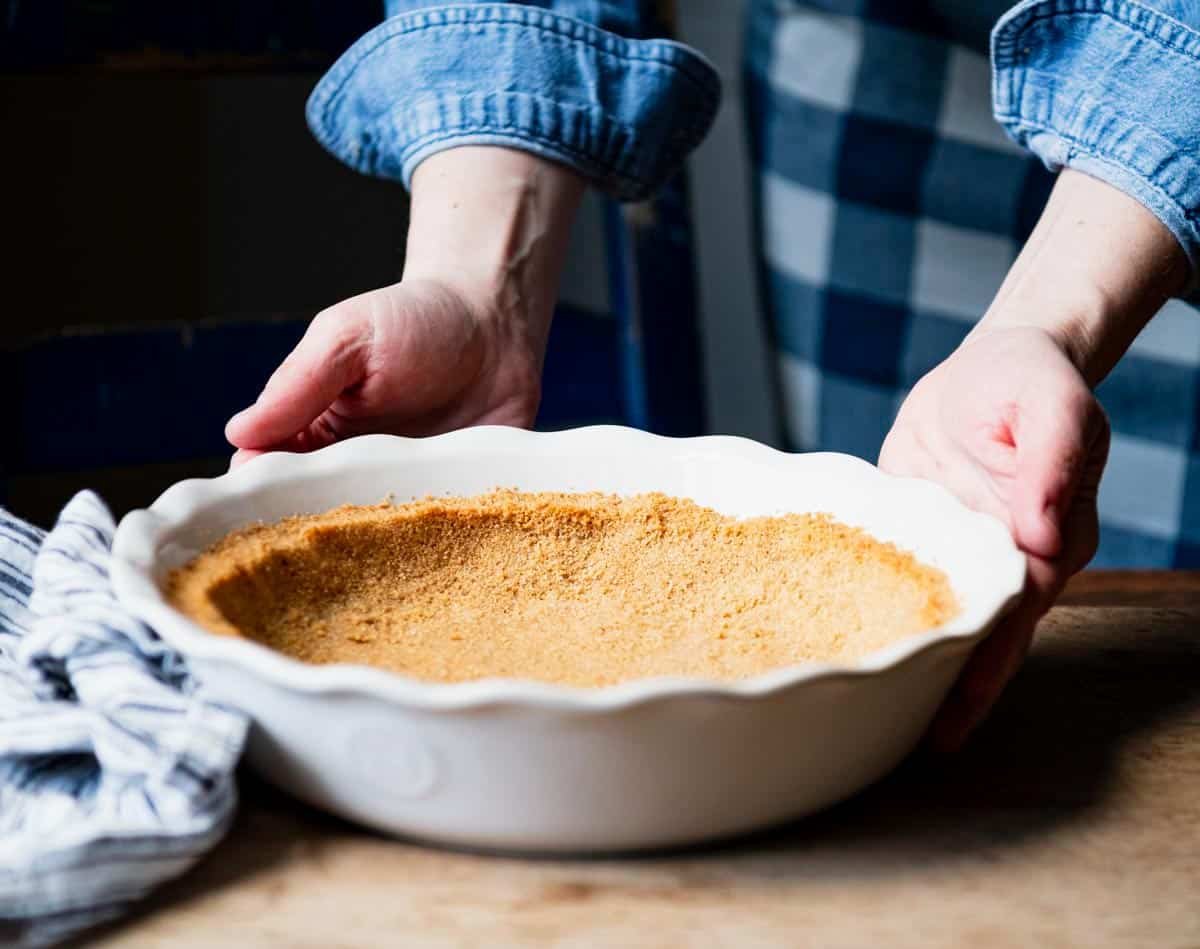
Step 1: Bake the Graham Cracker Crust
Combine crushed graham crackers, sugar, and melted butter until the crumbs are evenly coated. Press them into the bottom and sides of a deep 9-inch pie dish, then bake at 375°F for 8 to 10 minutes. Set aside and let it cool completely before you add the filling.
** Tip: Save a spoonful of crumbs to sprinkle over the finished pie for a pretty garnish.
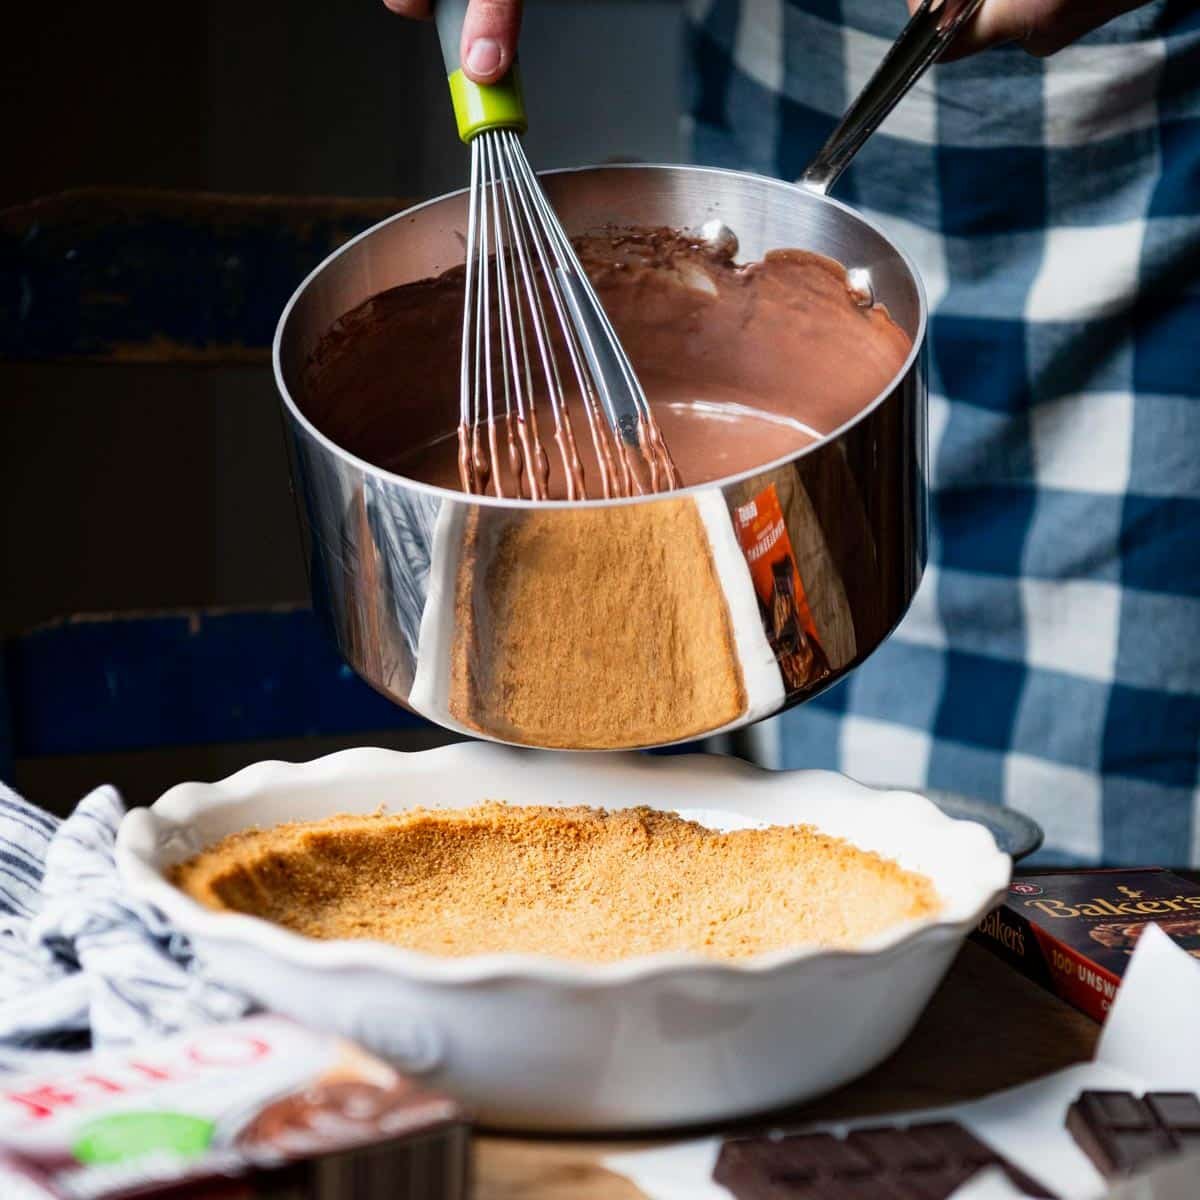
Step 2: Cook the Pudding Filling
In a medium saucepan, whisk together the pudding mix, milk, and chopped Baker’s chocolate. Bring everything to a full boil over medium heat, whisking constantly so the pudding doesn’t scorch. You’ll know it’s ready when the mixture is completely smooth and starting to thicken. Remove it from the heat and let it sit for about 5 minutes, whisking occasionally.
** Pro Tip: Stirring gently while it cools helps prevent a skin from forming on top of the pudding.
** Quick Note: Prefer a no-bake shortcut? Substitute a 3.9-oz box of instant chocolate pudding and 1 ¾ cups cold milk. Whisk until thickened, then spoon into a prepared crust and chill 3+ hours.
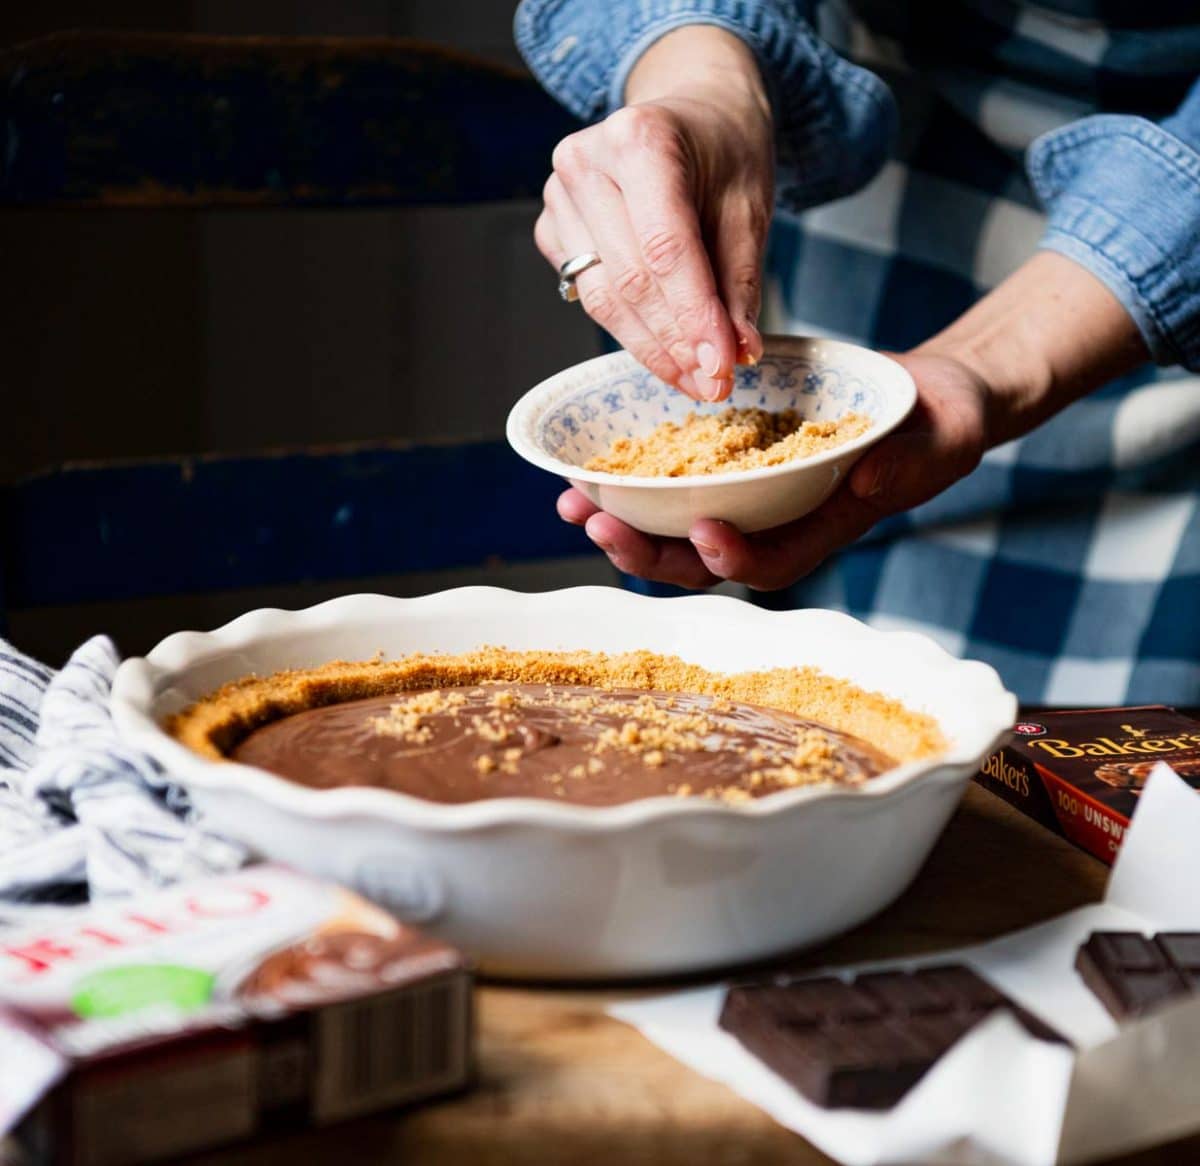
Step 3: Pour and Garnish
When the pudding is slightly thickened but still pourable, spread it evenly in the cooled crust. If you saved those crumbs, sprinkle them over the top now.
Step 4: Chill Until Set
Cover the pie loosely and refrigerate for at least 3 hours. Overnight is even better for the cleanest slices.
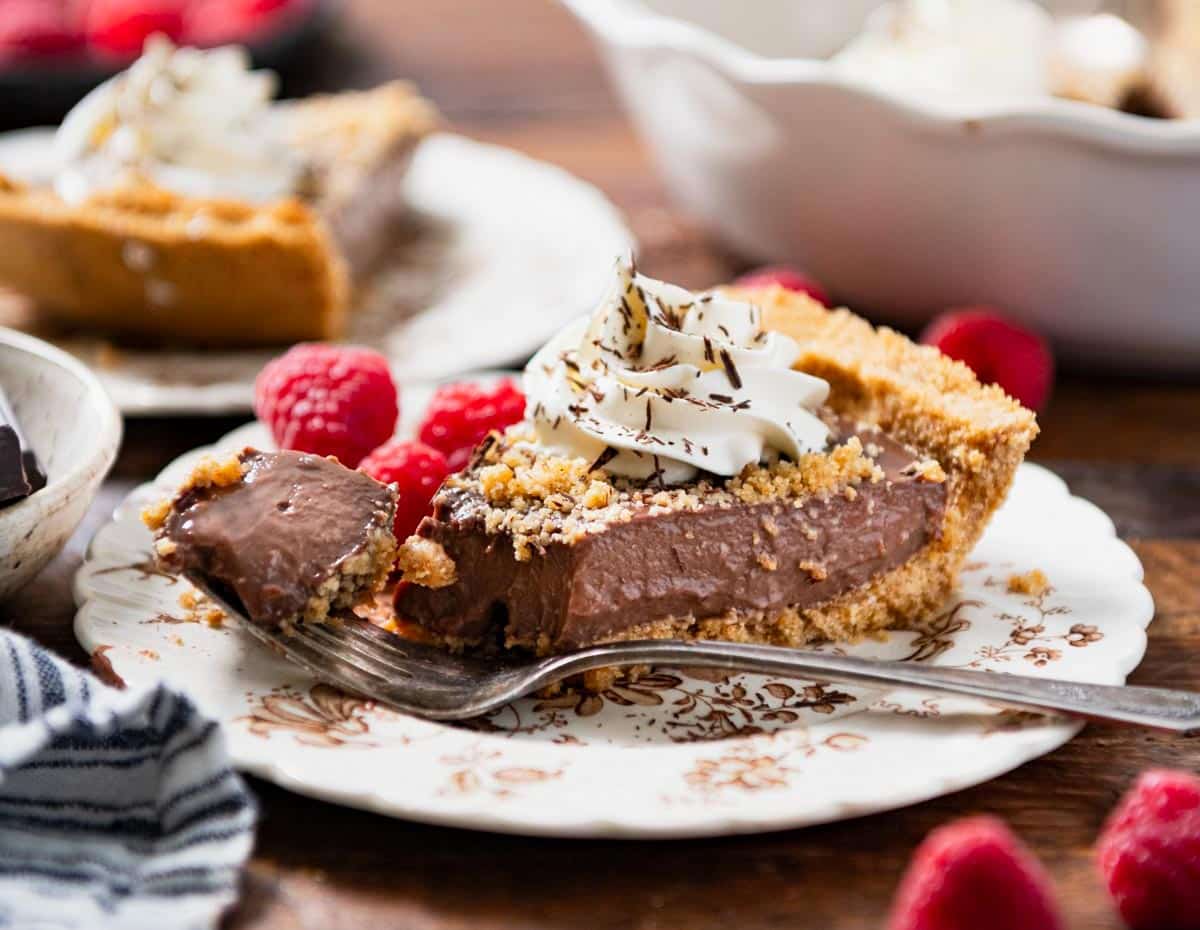
Step 5: Garnish and Slice
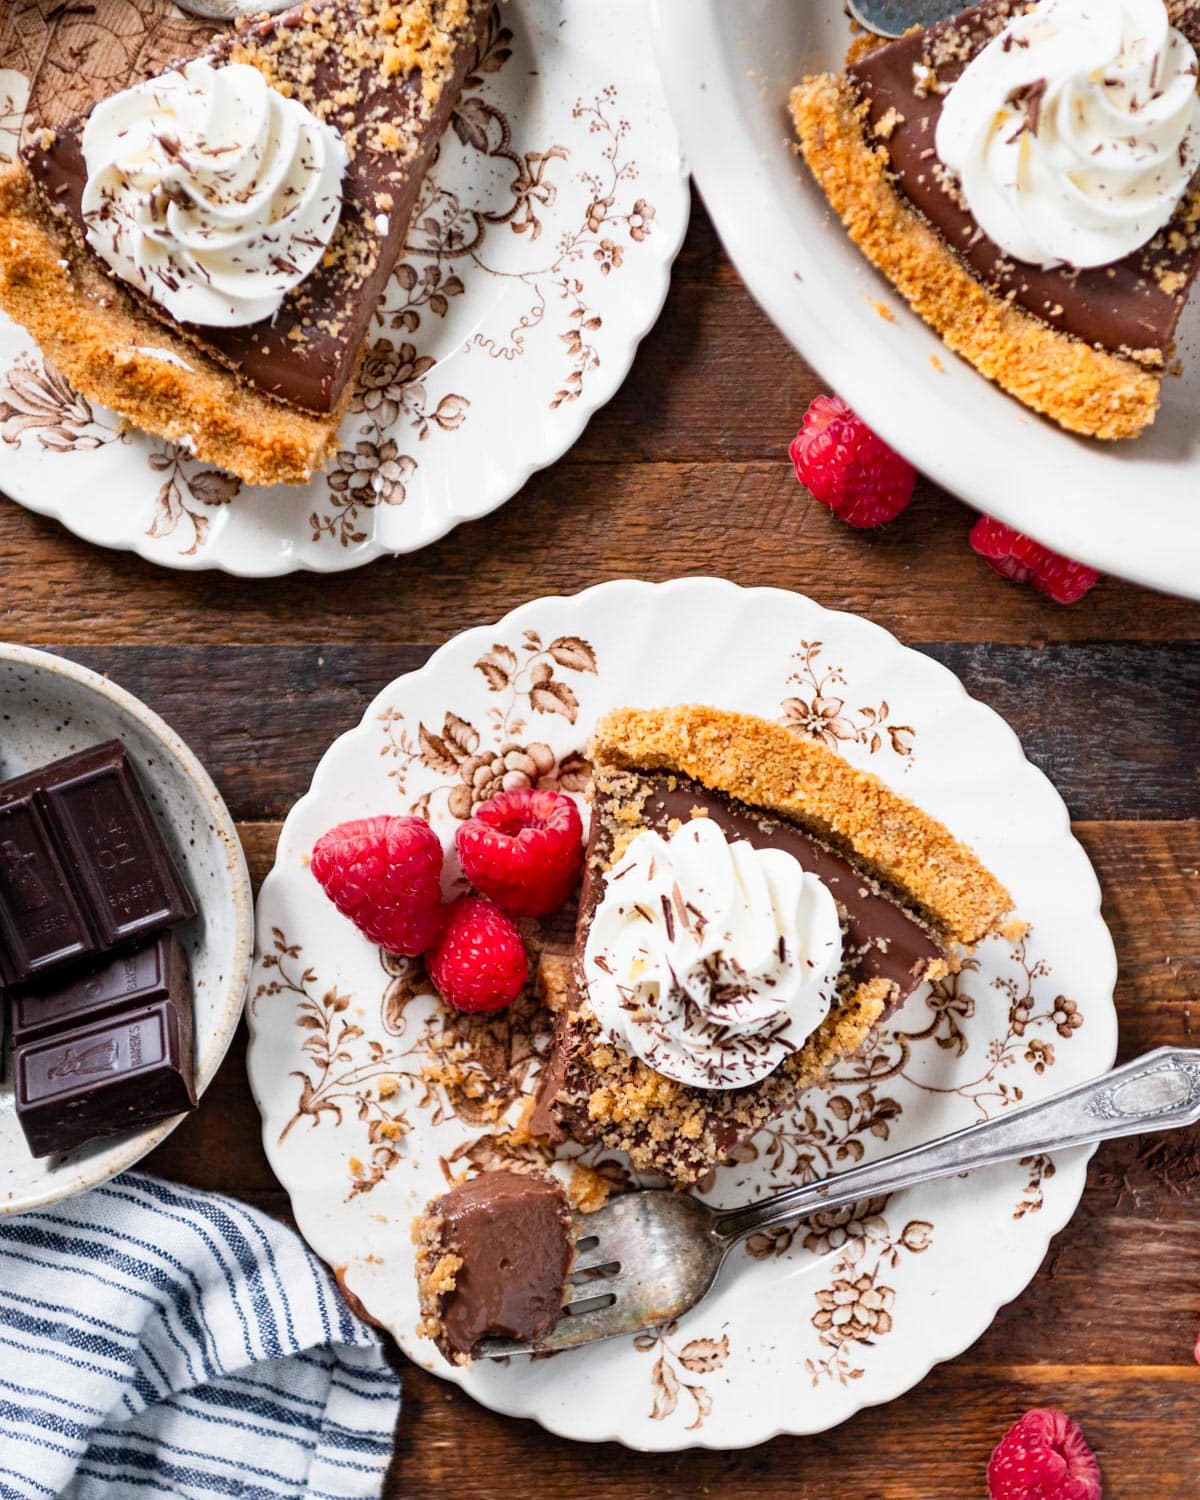
This pie is wonderful as-is, but a little garnish takes it over the top. Add a dollop of whipped cream or Cool Whip to each slice. Chocolate curls, a dusting of cocoa, or a few fresh berries are all easy ways to elevate the pie. For coffee lovers, a light sprinkle of espresso powder pairs beautifully with the chocolate.
Variations and Customizations
- Crust options: Swap graham cracker for Oreo for extra chocolate flavor.
- Toppings: Use Cool Whip for convenience or homemade whipped cream for a lighter texture.
- Flavor twists: Add a pinch of espresso powder or sea salt to enhance chocolate flavor.
- Holiday touch: Top with shaved chocolate and red berries for a festive dessert platter. A drop of peppermint extract will give it that classic holiday chocolate-mint flavor.
Hello, thanks for the recipe, it was delicious.
– Adri
I didn’t get a chance to take pictures, because the pie didn’t last long and I wasn’t fast enough…
Storage, Freezing & Make Ahead
Store the pie covered in the refrigerator for 3-4 days, or wrap it tightly and freeze for up to 1 month. Thaw in the fridge before serving. This pie is also great to make ahead. I like to prepare it a day in advance so it has time to cool and set, making dessert easy and stress-free on busy holidays.
Frequently Asked Questions
Can I use instant pudding instead of Cook-and-Serve?
You can, but it won’t be as silky or stable. You also won’t want to use the cooking instructions here. Use a 3.9-ounce box with 1 ¾ cups cold milk, whisk until thick, and chill 3+ hours.
Why didn’t my pudding set?
The pudding needs to reach a full boil to activate the thickeners. Make sure you cook it long enough, then chill it fully for 3+ hours.
What type of crust works best?
A firm, fully cooled graham cracker or Oreo crust prevents sogginess.
How far ahead can I make it?
Up to 24 hours is ideal; longer than that, and the crust may soften.
Can I freeze chocolate pudding pie?
Yes, but know that the texture might change slightly. Freeze well wrapped for up to 1 month, then thaw in the fridge before serving.
Related Recipes

Did you make this recipe?
If you enjoyed this recipe, please leave a comment with a 5-star review at the bottom of the post. Thank you!
Watch How to Make It

Chocolate Pudding Pie
Equipment
Ingredients
- 1 (5 ounce) package Jell-O Cook & Serve Chocolate Pudding & Pie Filling (do not use instant pudding mix)
- 1 ounce unsweetened Baker’s Chocolate
- 3 cups milk (I use 2%, but whole milk also works well)
- 1 prepared graham cracker crust (a store-bought crust is perfectly fine, but a homemade crust is easy and extra special!)
- Optional garnish: whipped cream or Cool Whip
Homemade Graham Cracker Crust
- 12 full-size graham crackers, crushed or processed into fine crumbs
- ¼ cup sugar
- 6 tablespoons salted butter, melted
Instructions
For the Graham Cracker Crust
- If you’re making your crust from scratch, combine graham cracker crumbs, sugar, and melted butter in a large bowl. Toss until all of the crumbs are evenly coated in butter (you can also mix the ingredients in a food processor). Set aside about 1-2 tablespoons of crumbs to garnish the top of your pie, if desired. Press crumbs into the bottom and up the sides of a deep-dish 9-inch pie dish and bake at 375°F for 8-10 minutes, or until golden brown. Allow pie crust to cool completely before filling.

For the Pie Filling
- Whisk together dry chocolate pudding mix, milk, and Baker’s Chocolate in a medium saucepan. Bring to a full boil over medium heat, whisking constantly. Make sure that all of the chocolate is completely melted and incorporated into the pudding. The mixture should be completely smooth. Remove the saucepan from the heat. The filling will thicken as it cools, so wait about 5 minutes, whisking regularly so that the filling stays nice and smooth.

- After about 5 minutes, the filling should start to thicken. Pour the filling into the prepared crust. Sprinkle with reserved graham cracker crumbs, if desired.

- Refrigerate the pie for at least 3 hours (or overnight), until the filling is set. Slice and serve with whipped cream or Cool Whip on top.

Notes
- Use a 5-ounce Cook and Serve pudding mix (not instant).
- Cool crust completely before filling.
- Whisk constantly while cooking.
- Let pudding cool ~5 minutes before pouring into crust.
- Chill at least 3 hours (overnight preferred).
- Store covered in fridge up to 3-4 days.
- To freeze: wrap well, thaw overnight in fridge.
- Instant pudding variation: 3.9-ounce box + 1 ¾ cups milk.
- Add espresso powder or salt for deeper flavor (optional).
- Top with Cool Whip or fresh whipped cream before serving.
Nutrition
Originally published in July, 2014, this post was updated in November, 2025.


If it rich and has chocolate I’m in love! Looks amazing!
Hi, Mallory! I couldn’t agree more. 🙂
Great looking pie! Thanks for sharing it on the Linky 🙂
Thanks for stopping by, Lisa!
That looks totally indulgent. I want some 🙂
Kaz — Yes! Indulgent and amazingly delicious!
This is my kind of recipe, especially when the first two ingredients are CHOCOLATE! Love it!! Found it over at Freedom Fridays with all my bloggy friends linky party:)
Thanks for visiting, Adrian! You’re right…if the first two ingredients are chocolate, it can’t be bad! Have a great weekend. 🙂
I’ve tried this with regular pie crust and I think graham cracker crust would be much tastier! This looks amazing, thanks for sharing!
~Meaghan from DIYfaerie
Yes, Meaghan! The graham cracker crust is just so buttery and good! Try it. 🙂
Love love love rich chocolate pie, this sounds like the perfect way to end a day. Great recipe Blair. Pinned!
Thanks, Krista! I hope that you get to try it. It’s so simple and delicious!
This looks so good! Thank you for linking up at Tickle My Tastebuds last week. I am featuring you tomorrow on my blog and would love if you would stop by with some more delicious recipes to share!
Julia @ Mini Van Dreams
Hi, Julia! Thank you so much for the feature! Of course I will be back tomorrow. 🙂
Thanks for sharing this decadent pie with us at Best of the Weekend – I’ll be featuring it on my blog Friday!
This looks so much better than your average chocolate pudding pie! Thank you so much for linking up at Tasty Tuesday! Your recipe has been pinned to the Tasty Tuesday Pinterest board! Please join us again this week!
Thanks for stopping by, Stephanie!
Ooh, I love generational recipes 🙂 Especially chocolate ones! Thanks for sharing, and your post was the “most viewed” and is featured in tonight’s What’d You Do This Weekend! Pinned!
Thanks SO MUCH, Ashley!!
going to make this for a church function, looks so good!
Awesome! Thanks, Mikki! I hope that you love it!
if i wanted meringue on top, would i bake the pie first then bake it again the the meringue? or could i do it all in one go?
Hi, Ashley! I’ve never made it with meringue, but I would think that you could bake the pie first, add the meringue, and then pop it back in the oven for a few minutes to let the meringue brown. Meringue only needs about 10-12 minutes in the oven, so it would probably work best added at the end. 🙂
Hi Blair:
Thank you so much for sharing your beautiful family with us, the wonderful recipes and photos. All of your time, energy and hard work in presenting your weeekly Our Week in Meals is greatly appreciated. I think all of your followers have fallen in love with your town and state just by your narratives.
Wishing you and your family the very best in the New Year and happy holidays.
Jo Ann
Jo Ann! Thank you!!! I appreciate your kind words SO much. You totally made my day. Thanks for reading along with us! xoxo
Hi Blair, This pie brings me back to my childhood. My mother used to make a butterscotch pudding and layer bananas on the crust before adding the pudding.She did this with the chocolate as well. You should give it a try, Delicious!
Oooooh! That sounds delicious, Lisa!!
I layer lightly press pecans in prepared pie shell bake then add semi cooled pudding gently so pecans are not dislodged
That sounds like a delicious addition, Lynn!
Is 3 c milk accurate. That is one cup more than the jello pudding package calls for. I’m worried that it might be too runny.
Hi, Sonny! It sounds like you’re looking at a small box of the Jell-O pudding. As I mentioned in the instructions above, you want to make sure that you have the larger size box (the 5 ounce package). This larger size box calls for 3 cups of milk, so that is the correct amount. 🙂
Hello, thanks for the recipe, it was delicious.
I didn’t get a chance to take pictures, be cause the pie didn’t last long and I wasn’t fast enough.
I will make it again, this time adding Tapioca pudding to the chocolate.
Will make sure this time I take pictures before, it gets to the dining room table, ????.
Regards,
Adri
That’s awesome!!! Definitely snap some photos next time! 🙂
Question instead of the chocolate pudding mixture could I use a peanut butter and chocolate pudding made from a different recipe and then put that into the pie crust and then add the cool whip on top?
Sure! That sounds like a delicious twist on the original. 🙂
Awesome thanks can’t wait to see how my dad likes this seeing as my mom dislikes peanut butter and chocolate unless it’s whit chocolate.
Also I can share the chocolate peanut butter pudding recipe with ya if you want.
Yes, that would be great if you could post it in a comment for other readers to try, too. Thanks again! 🙂
I might have forgotten to say it so I’ll say it now, but It’s no problem I love learning new recipes, sharing recipes, and also combining recipes. I just love cooking in general but more so making snacks, sweets, treats, and desserts.
That French Toast sounds amazing, Randall! Thanks so much for sharing both recipes.
Since it’s just a recipe for chocolate peanut butter pudding, I’m wondering if the pie will slice cleanly into slices (or will the pudding be too soft)? You want the filling to firm up enough so that you can slice it into individual servings. I don’t know for sure, since I haven’t tried that recipe, but it’s something to consider. 🙂
If I want it thick enough for that I just need to let the pudding chill uncovered for I think 3 hours maybe 3 1/2. I had on accident the first time making it (and not knowing the correct way to chill it) I had left it in the fridge uncovered for about 3 1/2 or 4 hours and it came out quite thickened to the point I had to use a spoon to scoop it out.
Okay, great. Sounds like it will probably work fine!
Okay so while I was looking for the recipe book with the chocolate and peanut butter pudding recipe I also found the recipe for Peanut butter french toast (its better than it might sound).
Here is the ingredients needed for the Pudding followed by the recipe.
1/4 C. Smooth Peanut Butter (I suggest using a bit more than this if you want it to have enough of the peanut butter taste)
2 C. Milk
1 pkg. Instant chocolate pudding
Step 1. Beat peanut butter and 1/4 cup milk until smooth.
Step 2. Slowly add remaining milk and blend well. (You don’t need to use an actual blender.)
Step 3. Add pudding mix and blend well.
Step 4. Pour into serving dish and chill. (I have found that waiting at least 2 hours is best.)
The ingredients and recipe for the Peanut Butter French Toast
1/2 C. Creamy Peanut Butter (You can use more if you wish.)
8 Slices Sandwich bread
2 Bananas Sliced evenly
4 lg. eggs lightly beaten
1/2 C. milk
2 T. butter or Margarine
Step 1. Spread peanut butter evenly over 4 bread slices.
Step 2. Arrange Banana Slices Evenly over peanut butter.
Step 3. Top with remaining bread slices; Set aside.
Step 4. In a small dish or bowl combine eggs and milk; mix well.
Step 5. Melt butter in a large non-stick skillet over medium heat
Step 6. Dip each sandwich into egg mixture; turning to coat both sides.
Step 7. Place in Hot Skillet. Cook 3 to 4 minutes on each side or until browned.
Serve Immediately. Makes 4 Servings.
Also I recommend starting with just 1 serving because if your having things like bacon, sausage, or eggs with it then one serving is enough.
I have other peanut butter themed recipes, as well as some others in my favorite cookbook if anyone wants more.
~Randall
What size baking dish should o be using ??? 9inch?
Hi, Randi! Yep! A standard pie dish is 9 inches in diameter. Enjoy!
I don’t have the extra chocolate to add will this setup ok? Any hints with cooking it? I tried this once and it set for a while but then flooded. Not sure what I did wrong.
Hi, Kim! I’ve only ever made the recipe as written, so I have no idea what will happen if you omit the chocolate. I wouldn’t recommend it. 🙂