These one bowl brownies are rich, fudgy, and loaded with chocolate chips — and they’re ready for the oven in just 10 minutes! A quick and easy homemade treat.

Table of Contents
If you love chocolate as much as we do, try our favorite salted chocolate chip cookies, this chocolate pudding pie, and this one-bowl buttermilk chocolate cake, too!
The Best Homemade Brownies
The kids say that these homemade brownies taste just like boxed mix brownies — and in their eyes, that’s the highest praise! I appreciate that the recipe is quick and easy to stir together, and uses simple ingredients that I always have stashed in my kitchen.
This one bowl brownie recipe comes from my friend Jackie. When she originally shared it with us, my 13-year-old son was the first to bake them. That’s how easy the brownies truly are! Even a kid that spends almost ZERO time cooking or baking was able to whip up a delicious pan of homemade brownies from scratch in a matter of minutes. Needless to say, the whole family has been hooked ever since! The recipe yields nice and thick treats with firm, chewy edges, lightly-crinkled or cracked tops, and moist, fudgy centers. They’re truly the best!

Ingredient Notes and Tips for Success
- We recommend a 9-inch square baking pan for this recipe; however, an 8-inch square pan will also work. If using the smaller 8-inch pan, your brownies will be very thick, and you will therefore need to bake them a little bit longer.
- A glass, ceramic, or light metal baking pan works best. If you’re using a non-stick or dark metal pan, you may need to decrease the baking time by a few minutes.
- If you prefer to cut the brownies on a cutting board outside of the pan, I recommend lining the pan with parchment paper overhanging the edges of the pan like handles. This makes it easy to lift the brownies out of the pan once they are cool.
- Not too sweet and not too bitter, semi-sweet chocolate chips are perfect for this recipe. We prefer Ghirardelli brand.
- If you’d like to use unsalted butter (rather than salted butter), you’ll need to add an extra ¼ teaspoon salt to the batter.
- Chopped walnuts are optional. If you’re like my boys, you’ll prefer even more chocolate chips instead!

How to Make One Bowl Brownies
One-bowl brownies are an easy, crowd-pleasing dessert that comes together in minutes. You’ll find detailed directions in the recipe card below, but here’s the overview:
- Melt the chocolate chips and butter. Be careful not to scorch the chocolate. Use a heavy saucepan or Dutch oven over very low heat. This only takes a minute or two, so don’t walk away — and stir constantly!

- Stir in the remaining ingredients. To get a shiny, flaky, light-colored crackly crust on the top of your brownies, beat the batter really well with your whisk after adding the eggs (but before adding the flour). This incorporates extra air bubbles in the batter, and when the brownies cool the air bubbles shrink — giving the tops that cracked texture that so many of us love.

- Pour the mixture into a greased baking dish.

- Bake the brownies for about 27-33 minutes. The total baking time will vary depending on a number of factors, including the size and type of pan that you’re using, as well as your individual oven. It’s important not to over-bake the brownies in order to maintain that moist, fudgy texture. Press gently in the center of the pan — the brownie should feel like it has just set. Then insert a toothpick. The brownies are done when a toothpick comes out with a few moist crumbs still clinging. It’s okay for the toothpick to look moist, but if you see wet batter, bake the brownies a little bit longer. Let the brownies cool, and then dust them powdered sugar just before slicing and serving.

- Brownies will break apart if you cut them while they’re still hot. It’s best to let them cool in the pan on a wire rack for at least 1-2 hours (or until they come to room temperature). Once the brownies are cool, spray a long, sharp knife with cooking spray before slicing them into squares. Don’t saw back and forth to cut through the brownies, but instead press down firmly once. This will prevent the brownies from falling apart.

Watch How to Make It

One Bowl Brownies
Equipment
Ingredients
- 2 cups (12 ounces) semi-sweet chocolate chips, divided (we like Ghirardelli brand)
- ½ cup (1 stick) salted butter, cubed
- 3 large eggs
- 1 ¼ cups all-purpose flour
- 1 cup granulated sugar
- 1 teaspoon vanilla extract
- ¼ teaspoon baking soda
- ¼ teaspoon kosher salt
- ½ cup chopped walnuts or extra chocolate chips (optional)
- Powdered sugar, for dusting
Instructions
- Preheat oven to 350°F. Grease a 9-inch square baking pan with cooking spray. Line with a parchment paper overhang for easy removal, if desired. Set aside. In a large saucepan, melt 1 cup of the chocolate chips and all of the butter over very low heat until smooth, stirring constantly. Remove the pan from the heat.

- Add the eggs; whisk to combine. Add the flour, sugar, vanilla extract, baking soda, and kosher salt. Stir to combine. Fold in the remaining 1 cup of chocolate chips and the optional nuts.
- Pour into the prepared pan.
- Bake for approximately 27-33 minutes, or until the brownies are set but still soft in the middle. A toothpick inserted in the center should come out with just a few moist crumbs. If it looks like it’s too wet or just has batter on it, the brownies need to bake for a little bit longer. Cool completely before dusting with powdered sugar and slicing into squares.


Notes
-
- Be careful not to scorch the chocolate. Melt the chocolate chips and butter in a heavy saucepan or Dutch oven over very low heat. This only takes a minute or two, so don’t walk away — and stir constantly!
-
- To get a shiny, flaky, light-colored crackly crust on the top of your brownies, beat the batter really well with your whisk after adding the eggs (but before adding the flour). This incorporates extra air bubbles in the batter, and when the brownies cool the air bubbles shrink — giving the tops that cracked texture that so many of us love.
-
- Do Not Over-Bake. Be careful not to over-bake the bars or they will not have that soft, fudgy texture. When you remove them from the oven, the center will still be soft and may even look slightly underbaked. That’s fine! The brownies will firm up as they cool, and will be perfectly moist.
Nutrition
Serving Suggestions
Serve the homemade brownies warm, at room temperature, or even cold — straight from the fridge! They’re perfect for an afternoon snack with a cup of coffee, tea, or cold milk, and they’re also great as a dessert on a holiday buffet or cookie tray.
Once they’re cool, dust the brownies with powdered sugar. For a real treat, make a hot fudge brownie sundae by topping a warm brownie with vanilla ice cream and hot fudge sauce!

Storage Tips
Store brownies in an airtight container at room temperature for up to 3 days, or in the refrigerator for up to 1 week.
To freeze the brownies, wrap them tightly with plastic wrap and aluminum foil and store in the freezer for up to 3 months. Thaw on the counter at room temperature when ready to enjoy, and dust with powdered sugar just before serving.
Recipe Variations
- Chocolate Chip Brownies: Add an extra ½ cup of chocolate chips to the brownie batter before baking (instead of the walnuts). You can also sprinkle extra chocolate chips on top of the batter. My boys love the extra chocolate and the added crunch! Milk chocolate, semi-sweet chocolate, dark chocolate, or even white chocolate chips will all work.
- Brownies with Nuts: Stir ½ cup of chopped walnuts into the brownie batter before baking. Chopped pecans are also delicious!
- For that sweet-and-salty flavor combo, sprinkle the tops of the warm brownies with flaky sea salt as soon as they come out of the oven.
- Thinner Brownies: Bake the brownies in a 9 x 13-inch pan for about 25 minutes.

More Easy Dessert Recipes with Chocolate Chips

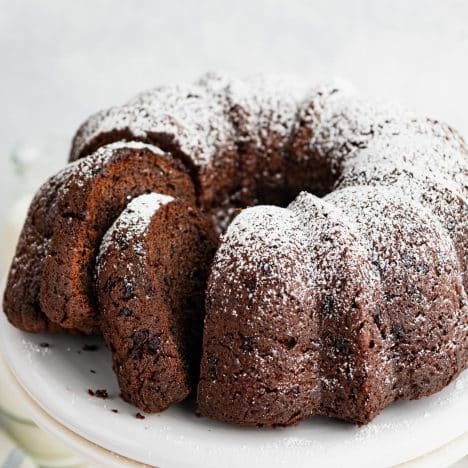
Chocolate Chip Bundt Cake
3 hours hrs 5 minutes mins

Easy Chocolate Chip Cookies
40 minutes mins
Chocolate Bundt Cake {Using Cake Mix!}
3 hours hrs 5 minutes mins
Originally published in August, 2023, this post was updated in July, 2025.


Did you make this recipe?
If you enjoyed this recipe, please leave a comment with a 5-star review at the bottom of the post. Thank you!