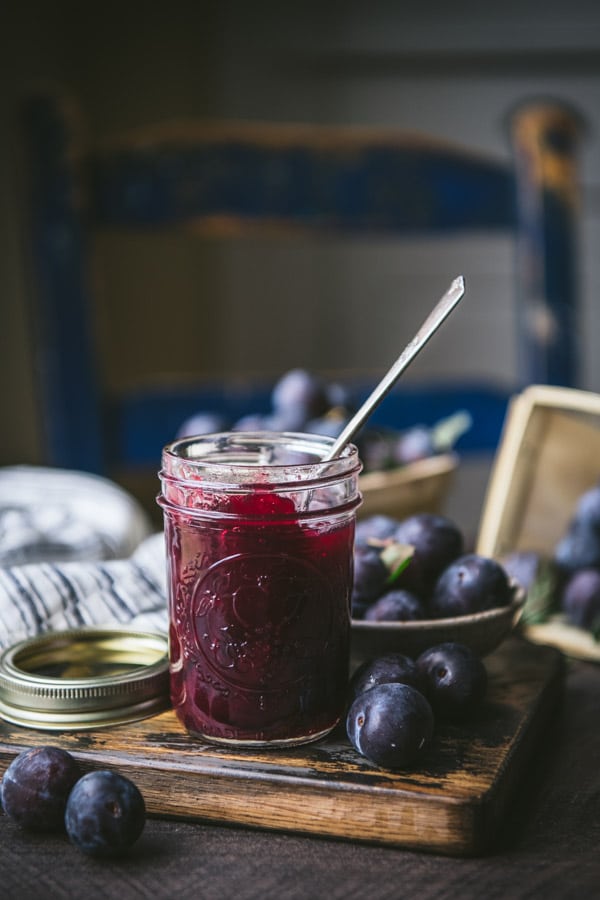
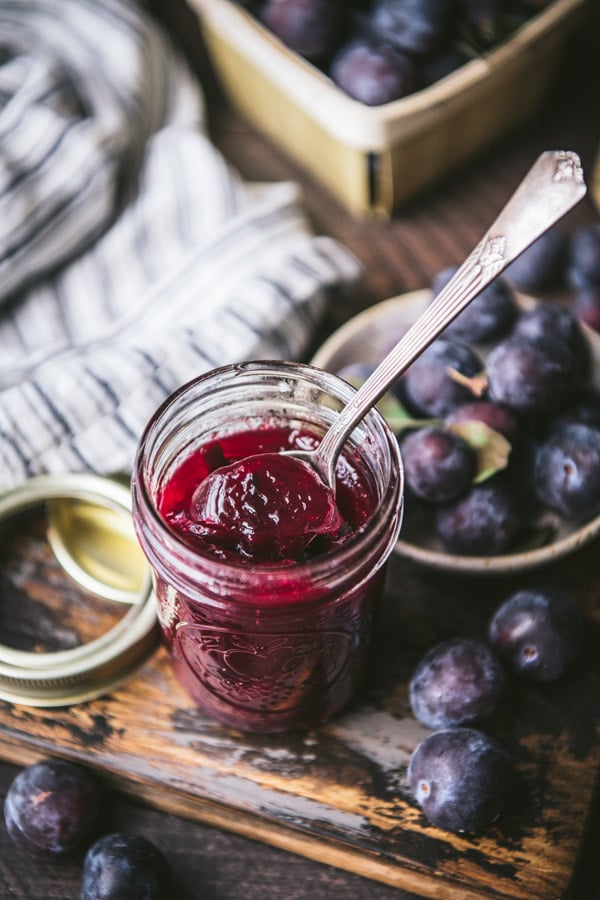
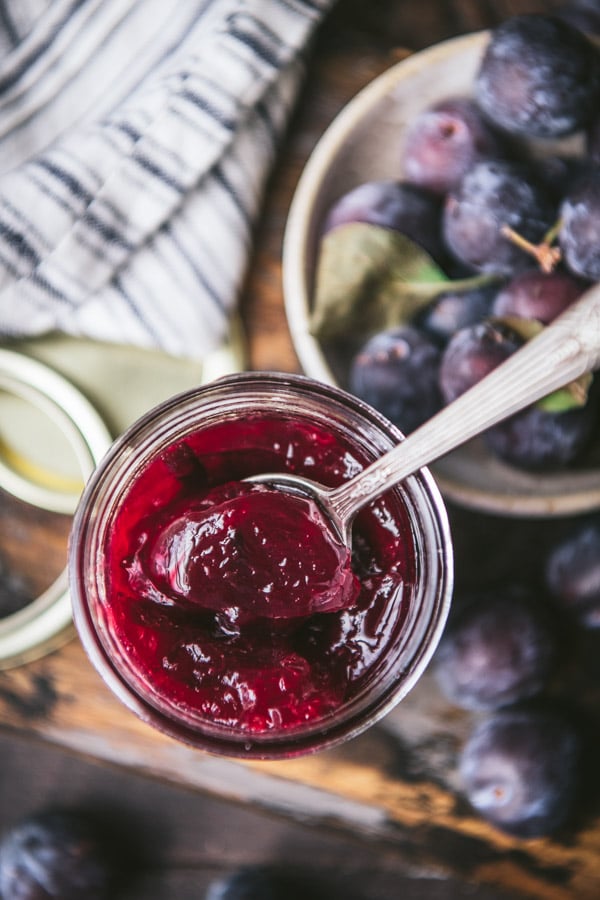
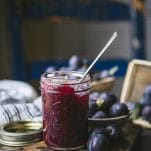
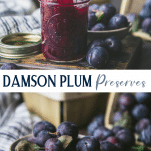
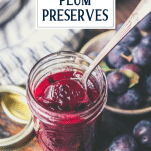
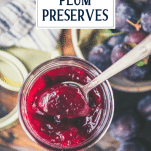
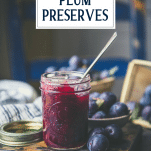
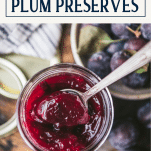
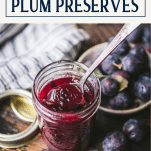
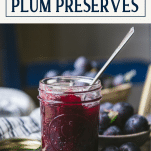
Sweet and a little bit tart, these old-fashioned Damson Plum Preserves require just 3 ingredients — and no pectin! Remove the pits, simmer a pot on the stove, and you’ll have a couple jars of beautiful, preserved fresh plums to enjoy with cheese on your next charcuterie board, to spread on biscuits, cornbread or toast, to elevate sandwiches, or to use in baked goods like a classic Damson Plum Pie.
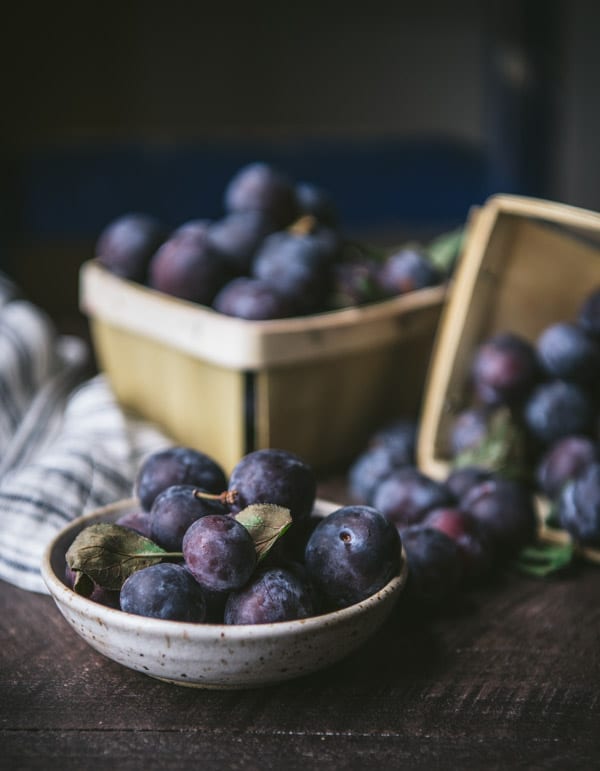
Damson plums are small stone fruits that typically ripen here in Virginia from August to early September. They look like the black plums that are readily available in grocery stores, but they’re much smaller — about the size of a very large seeded grape! The fruit has existed unaltered for thousands of years, and gets its name from Damascus (likely where it originated). The fruit was eventually taken to Italy, then spread to the rest of Europe and parts of North America, where it now grows wild and in home orchards. If you’re lucky enough to get your hands on a quart or two of these beautiful purple gems, a pot of Damson plum preserves is a must!
Taste
Damson plums have a strong, tart flavor, making them ideal for preserves, jam, cooking and baking.
Can you eat damson plums straight from the tree?
Yes, you can eat the fruit raw, straight from the tree — but you might not want to. Damson plums have a more pungent, sour flavor than other plums. Most folks prefer to bake with Damsons or to make jam, jelly or preserves.
The Difference between a Damson and a Plum
There are a few differences between damsons and other types of plums. First, the taste — as mentioned above, damsons have a stronger, more tart flavor than other plums. Damsons are also significantly smaller than a standard red or black plum, and have an oblong-oval shape, rather than the rounder shape of a regular plum. Finally, larger plums have a pronounced, grooved longitudinal seam, whereas the same seam on damsons is much more difficult to see.
Ingredients
This is an overview of the ingredients that you’ll need for an old fashioned damson preserves recipe without pectin. As always, specific measurements and complete cooking instructions are included in the printable recipe box at the bottom of the post.
- Fresh damson plums: this recipe yields a small batch of preserves (about 2 jars), so you only need 1 quart of fresh fruit. A smaller batch means that it’s quicker and easier to pit the fruit, although you can certainly scale this recipe up to make a larger batch.
- Granulated sugar: you’ll need a good amount of sugar to offset the tart fruit.
- Water: to dissolve the sugar and help simmer the fruit.
Equipment Needed
- 2 sterilized half-pint mason jars and lids: this recipe yields enough for about 2 (8-ounce) jars of jam (plus a little bit more). I like the half-pint jars because it’s just the right amount of jam to keep in the fridge after it’s opened, but smaller 4-ounce jars are also a great option.
- A sterilized funnel: this makes it easier to get the jam inside the jar without spilling; however, it’s fine if you don’t have a funnel — you can carefully spoon the jam into the jars instead.
- Tongs: canning tongs are incredibly helpful when taking the jars in and out of the boiling water.
- Stock pot, saucepan, or Dutch oven: for cooking the preserves.
- Canner or large pot for boiling jars: this needs to be very deep so that you can cover the jars with at least 1-2 inches of water. I use my deepest stock pot for this step, since I don’t have an official canner to process the jars.
- Wooden spoon: to stir, stir, stir so that the jam doesn’t stick to the pot!
How to Sterilize Jars and Lids for Jam or Preserves
It’s a good practice to sterilize the jars and lids before canning in order to kill any bacteria, fungi or yeast. There are a variety of ways to sterilize the jars (here’s a helpful article with different options). I typically use the dishwasher, or just boil them for 10 minutes in the same big pot of water that I’ll use for processing.
How to Make Damson Plum Preserves
This old-fashioned recipe comes from my friend Mollie, whose great grandmother used damsons to make preserves each year. The damson preserves were then enjoyed in this vintage damson pie, which I also highly recommend!
- Remove the pits from the plums and cut into quarters.
- Place the plums, sugar and water in a Dutch oven or other heavy-bottomed pot.
- Bring the mixture to a boil, then reduce the heat to low.
- Gently boil the mixture until it reaches a jelling point of 220-225° F. This takes about 30 minutes, but the total time will vary. Stir regularly!
- Divide the preserves between two sterilized jars. Wipe rims clean, then secure lids and rings.
Canning Plum Preserves
Once the sterilized jars are full and sealed, set the hot jars on a rack in a canner or in a large pot of boiling water. Make sure that the pot is deep enough so that the jars are covered by at least 1-2 inches of boiling water. Boil for 10 minutes (or 15 minutes if your altitude is above 6,000 feet).
How long does it take for Damson preserves to set?
Once the jars are filled and processed in the hot water bath for 10 minutes, place the jars on a dish towel on the counter. The jam will not set immediately, so it’s important to allow the jars to rest without interruption at room temperature until cool (or overnight), about 12 hours. Don’t forget that the preserves will continue to thicken as they cool and set.
Storage
Once the jam has had a chance to cool, you can check the seals on your jars. The lids should be down in the center or stay down when pressed. Unsealed jars should be refrigerated and used within 3 weeks. Properly sealed and processed jars of damson preserves should be stored in a cool, dark, dry place (such as a pantry) for up to 8 months.
If you choose not to process your jars of preserves in a hot water bath, they need to be stored in the refrigerator. These jars will stay fresh for up to 3 weeks. To freeze unprocessed jars of preserves, be sure to leave about 1-inch of headspace at the top of each jar to allow for expansion.
How to Use Damson Plum Preserves
This versatile spread is delicious in a variety of dishes. Try serving the preserves:
- Spread on flaky biscuits, 7up biscuits, cornbread, sour cream muffins, or toast.
- On a cheese plate at your next cocktail hour.
- Over vanilla ice cream for dessert.
- On sandwiches for a sweet contrast to smoked turkey, country ham, roast beef or Swiss cheese.
- In baked goods such as cakes and pies.
Recipe Variations
- More or less sugar. Feel free to play around with the ratio to suit your taste preferences. Some fruit may be sweeter than others. If you have very tart plums, you may need a little bit more sugar.
- Scale the recipe to make a larger batch. If you have a bunch of plums available, just multiply all of the ingredients to create more preserves.
- If you don’t want to bother with canning the jars in a water bath, no problem! Just transfer the jam to jars, let them cool completely at room temperature, and then store in the refrigerator for up to 3 weeks.
Tips for the Best Damson Plum Preserves Recipe
- Do not overcook the preserves or the mixture will become too thick to spread. The preserves thicken significantly as they cool and set. The total cooking time may vary — in some instances you might need less than 30 minutes, in some instances more. This is why I find a candy thermometer to be so helpful — you’ll know exactly when it reaches the jelling point of 220-225°F.
- Use a wooden spoon to stir the pot frequently as it cooks. This will prevent the sugar from sticking and burning on the bottom.
- Leave ¼-inch of headspace in each jar. The proper amount of headspace is important to ensure a vacuum seal. If there’s too little headspace, the preserves may expand and bubble out when air is being forced out from under the lid during processing.
More Homemade Jam Recipes to Try
- Fig Preserves
- Blackberry Jam (with or without pectin)
- Spiced Apple Pear Jam
- Blueberry Jam
- Strawberry Freezer Jam
- Crockpot Apple Butter

Did you make this recipe?
If you enjoyed this recipe, please leave a comment with a 5-star review at the bottom of the post. Thank you!
Damson Plum Preserves
Ingredients
- 1 quart (about 1 ½ lbs.) damson plums
- ½ cup water
- 1 ½ cups granulated sugar
Instructions
- Wash the plums, remove the pits, and cut into quarters. Place the plums in a medium Dutch oven (or other heavy-bottomed pot). Add the water and sugar.
- Bring the mixture to a boil over medium-high heat, stirring constantly until the sugar dissolves (this only takes a few minutes). Reduce the heat to medium-low or low, and continue to cook at a gentle boil until it reaches a jelling point of 220-225°F. This generally takes my pot about 30 minutes, but the total time will vary. Stir frequently as the fruit simmers.
- Divide the preserves between 2 sterilized 8-ounce glass jars, leaving ¼-inch of headspace at the top of each jar. Wipe the rims clean with a damp cloth, then secure the lids and bands.
- Process in a boiling water bath for 10 minutes (or 15 minutes if your altitude is above 6,000 feet). Carefully remove the jars to a towel on the counter. Let stand, undisturbed, for 12 hours at room temperature. Check the seals after 12 hours by pressing the center of the lids. If the lid gives or the center button remains popped up, store in the refrigerator for up to 1 month. Properly sealed jars will keep in a cool, dark place for up to 8 months. Refrigerate after opening.
Notes
- Do not overcook the preserves or the mixture will become too thick to spread. The preserves thicken significantly as they cool and set. The total cooking time may vary — in some instances you might need less than 30 minutes, in some instances more. This is why I find a candy thermometer to be so helpful — you’ll know exactly when it reaches the jelling point of 220-225°F.
- Use a wooden spoon to stir the pot frequently as it cooks. This will prevent the sugar from sticking and burning on the bottom of the pot.
- Leave ¼-inch of headspace in each jar. The proper amount of headspace is important to ensure a vacuum seal. If there’s too little headspace, the preserves may expand and bubble out when air is being forced out from under the lid during processing.

I made this and it came out very runny
Hi, Carol! Sounds like it just needed to boil a bit longer to thicken more.
I have my 2nd batch cooking.. What do you do with the skins? do you strain it, or food mill, or just leave in. I diced this time instead of quartered and will cook longer because I am at high altitude and that’s probably why 1st batch came out runny.
I just leave the skins in the jam. They’re thin and almost unnoticeable by the end of the cooking. 🙂
Can you recook the jam if it is to runny?
Hi Marsha,
That should work! Just bring it back to a boil on the stove.
Wondering if you have a recipe for damson plum jelly? At least enough to fill 8 250 ml jars.
Hi Maxine,
Unfortunately, we do not have a damson plum jelly recipe at this time.