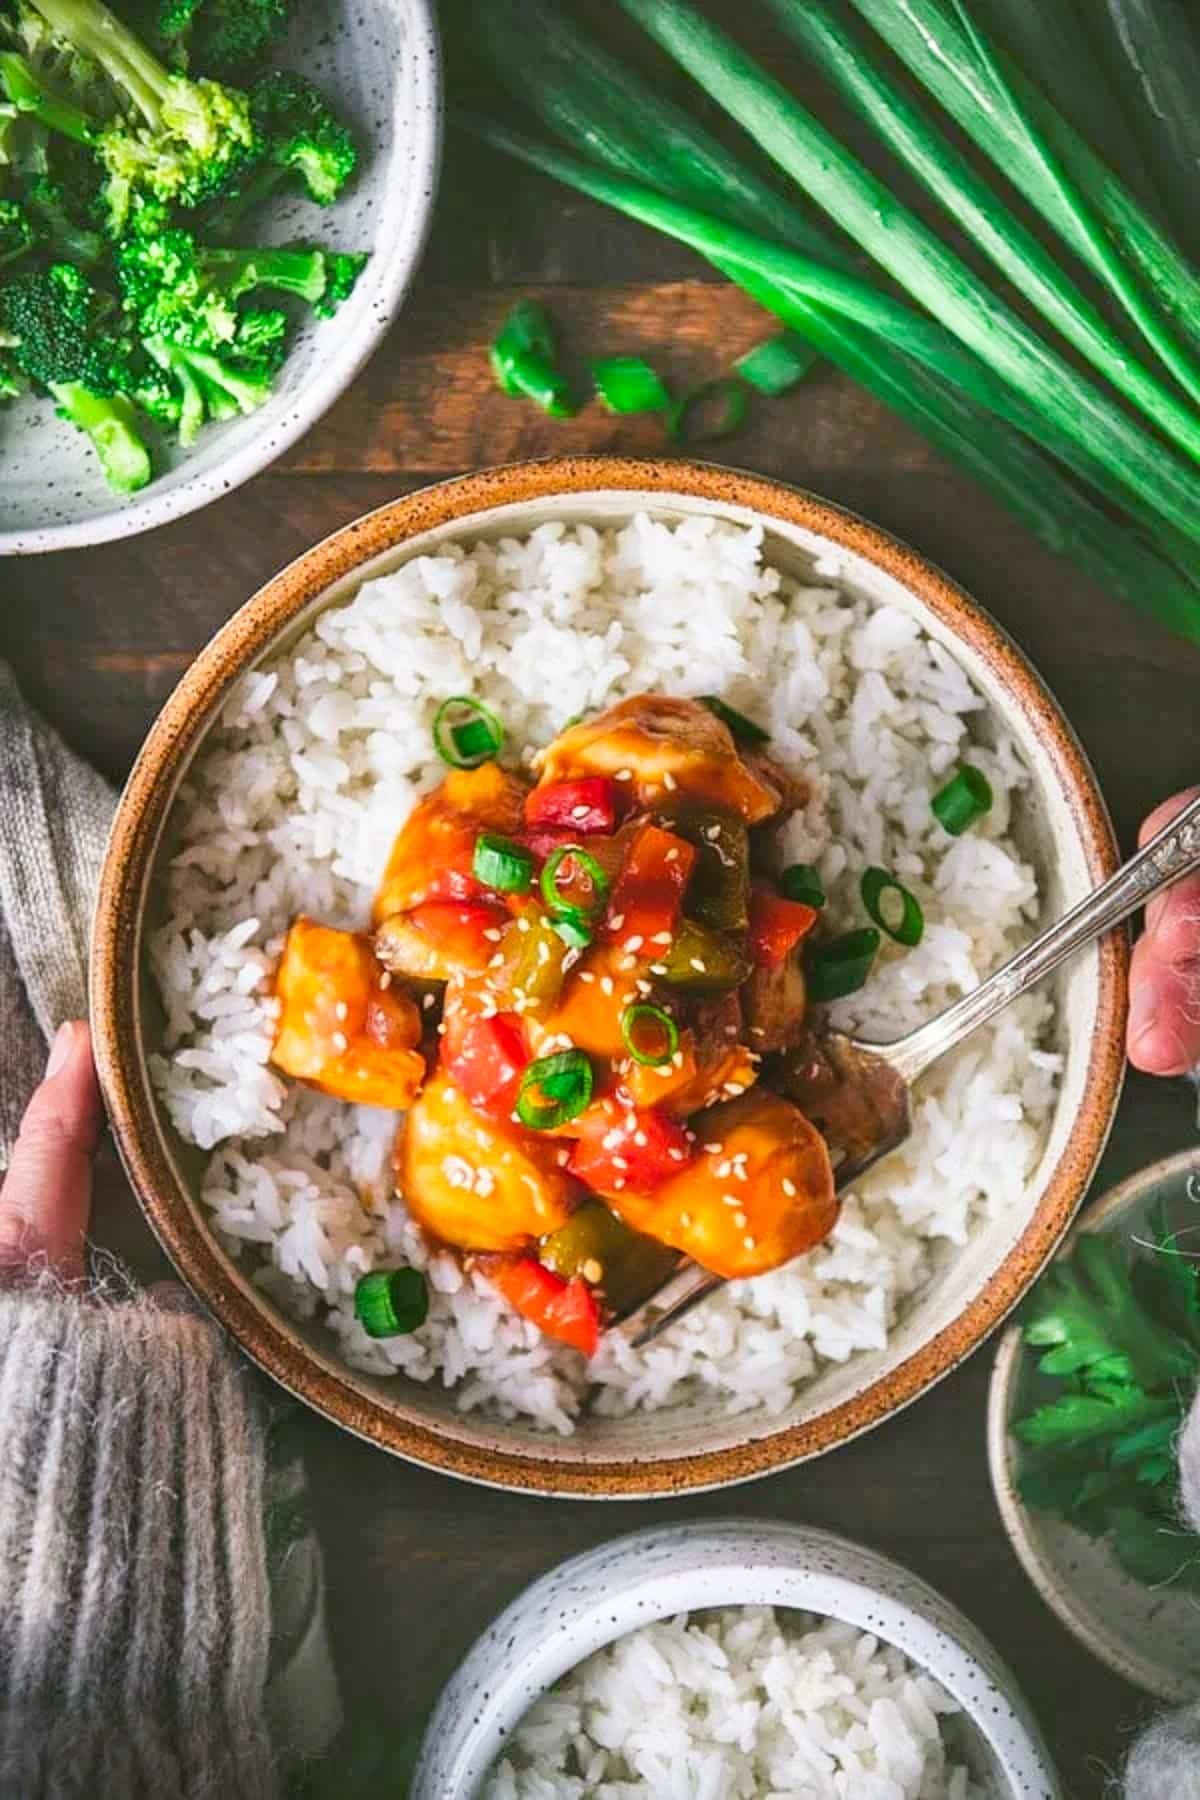
This baked sweet and sour chicken is a lighter, healthier version of the Chinese restaurant classic. With just one dish and about 10 minutes of prep, it’s even easier and tastes even better than takeout! Serve the sticky sweet and sour chicken with rice, a side of broccoli, or some crispy egg rolls for a quick, family-friendly dinner.
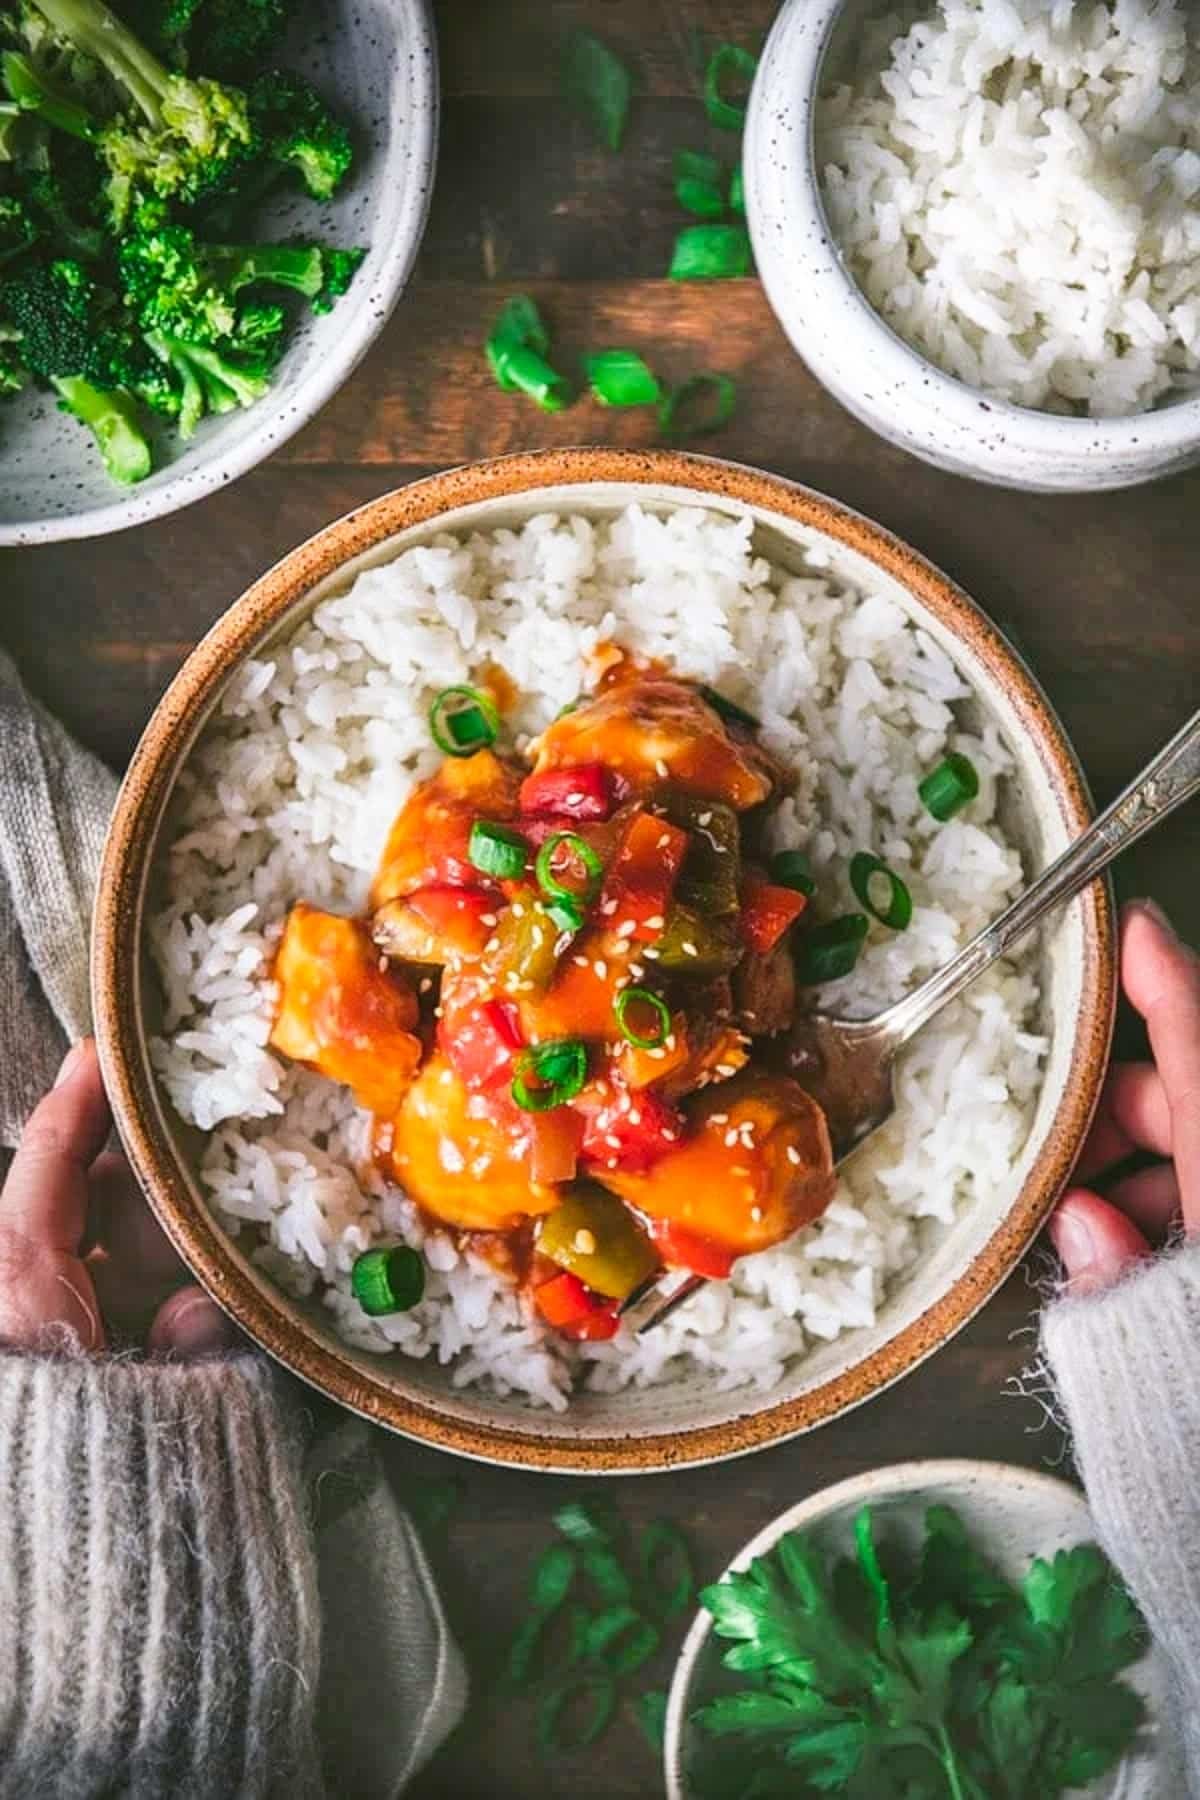
Table of Contents
If you love easy Asian-inspired recipes at home, be sure to try these sweet and sour meatballs, this baked General Tso chicken, a skillet of sticky chicken, dump-and-bake sesame chicken noodles, chicken and bell pepper stir fry, pepper steak with onion, mu shu pork, shortcut sesame chicken, and this wildly popular one-skillet egg roll in a bowl recipe!
Why You’ll Love this Recipe
- Healthy. This chicken is not battered, and it’s baked instead of deep-fried, so it’s lighter than its restaurant counterparts.
- Easy. You’ll use our favorite dump-and-bake method to prepare this dish. That means that you only need about 10 minutes of hands-on prep time, and then the oven does the work. No standing over a hot stove frying in batches!
- Simple Ingredients. Sometimes Asian-inspired recipes require unusual or harder to find ingredients. Not here! This dish comes together with basic pantry staples that are accessible in any grocery store.
Wow. This was a home run with my husband and three boys. This was so easy to make after a night of games. I made the recipe exactly as directed except I marinated the chicken. Thank you so much for sharing this easy recipe.
-Michelle
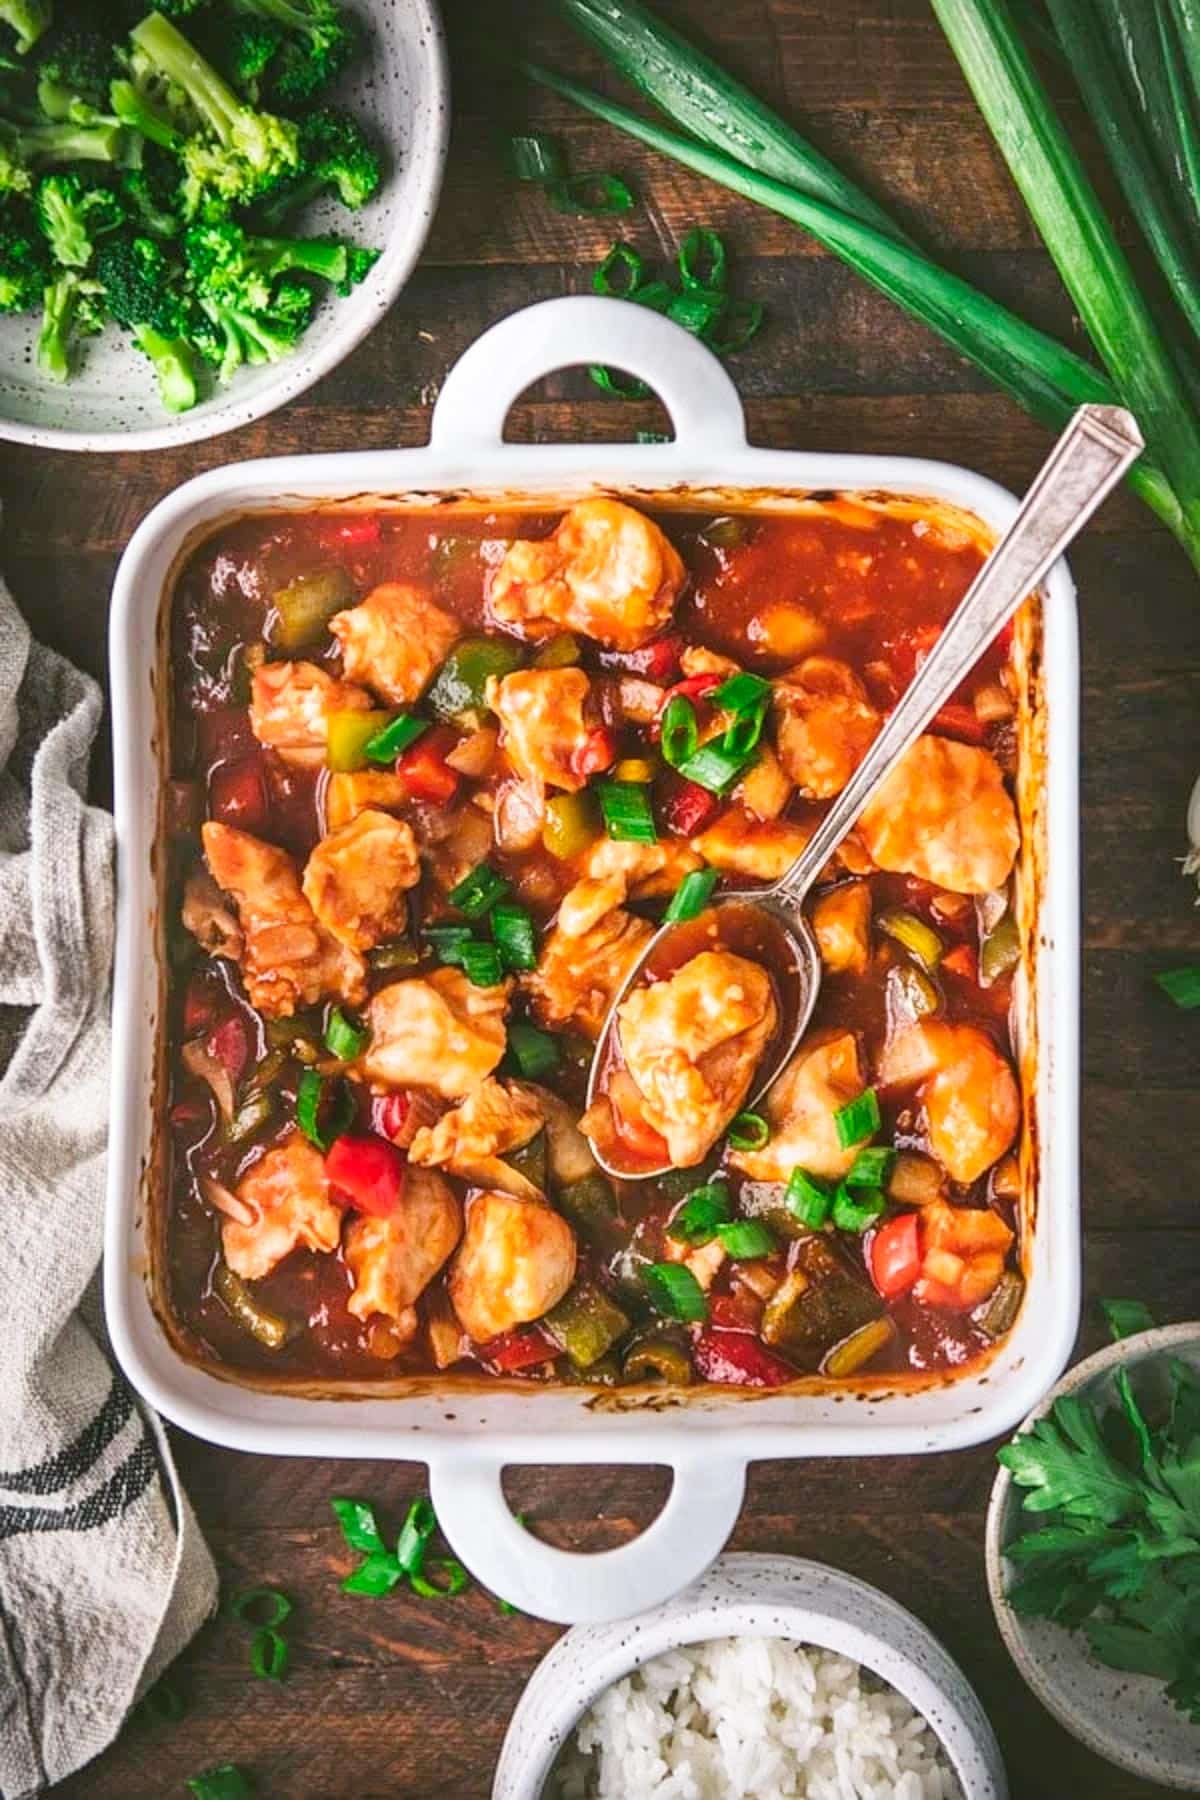
An Easy Baked Sweet and Sour Chicken without Frying
Classic sweet and sour chicken is a popular dish served at Chinese-American restaurants. It typically includes small bites of battered and deep-fried chicken (or pork) that are coated in a sweet and sour sauce. The dish also might feature chopped bell peppers, onions, or pineapple.
The sauce can be a combination of various ingredients, such as ketchup, chili sauce, plum sauce, vinegar, and soy sauce. Each restaurant has its own version, but we’re keeping the ingredient list for this particular homemade sweet and sour sauce very simple!
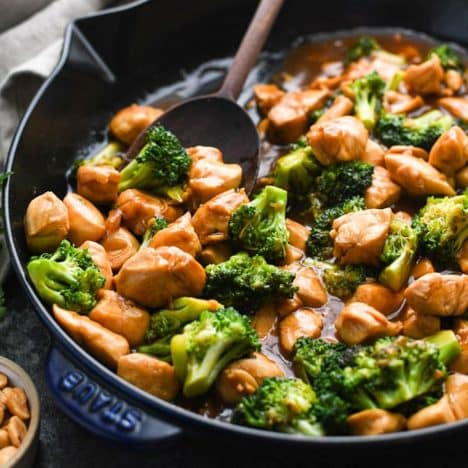
Best of all, this recipe is about as easy as it gets. There’s no deep-frying or sautéing necessary. Instead, we combine the raw chicken with the vegetables and sauce in a single pan. Bake it in the oven, stir it once, and your job is done!

The Homemade Sweet and Sour Sauce
The key to tasty homemade sweet and sour chicken is obviously the perfect sauce! It needs to be thick (not runny and watery like some Crock Pot recipes), and it needs to have the perfect balance of sweetness and tang.
You don’t want so much sweet that you feel like you’re eating candy, and you don’t want so much sour that it makes your mouth pucker. It’s got to be juuuuuust right, and that’s exactly what we have here! Best of all, the sauce ingredients are simple pantry staples, easy to find at any grocery store, and probably already in your kitchen.
Ingredients
This is just a quick overview of the ingredients that you’ll need for a pan of baked sweet and sour chicken. As always, specific measurements and complete cooking instructions are included in the printable recipe box at the bottom of the post.
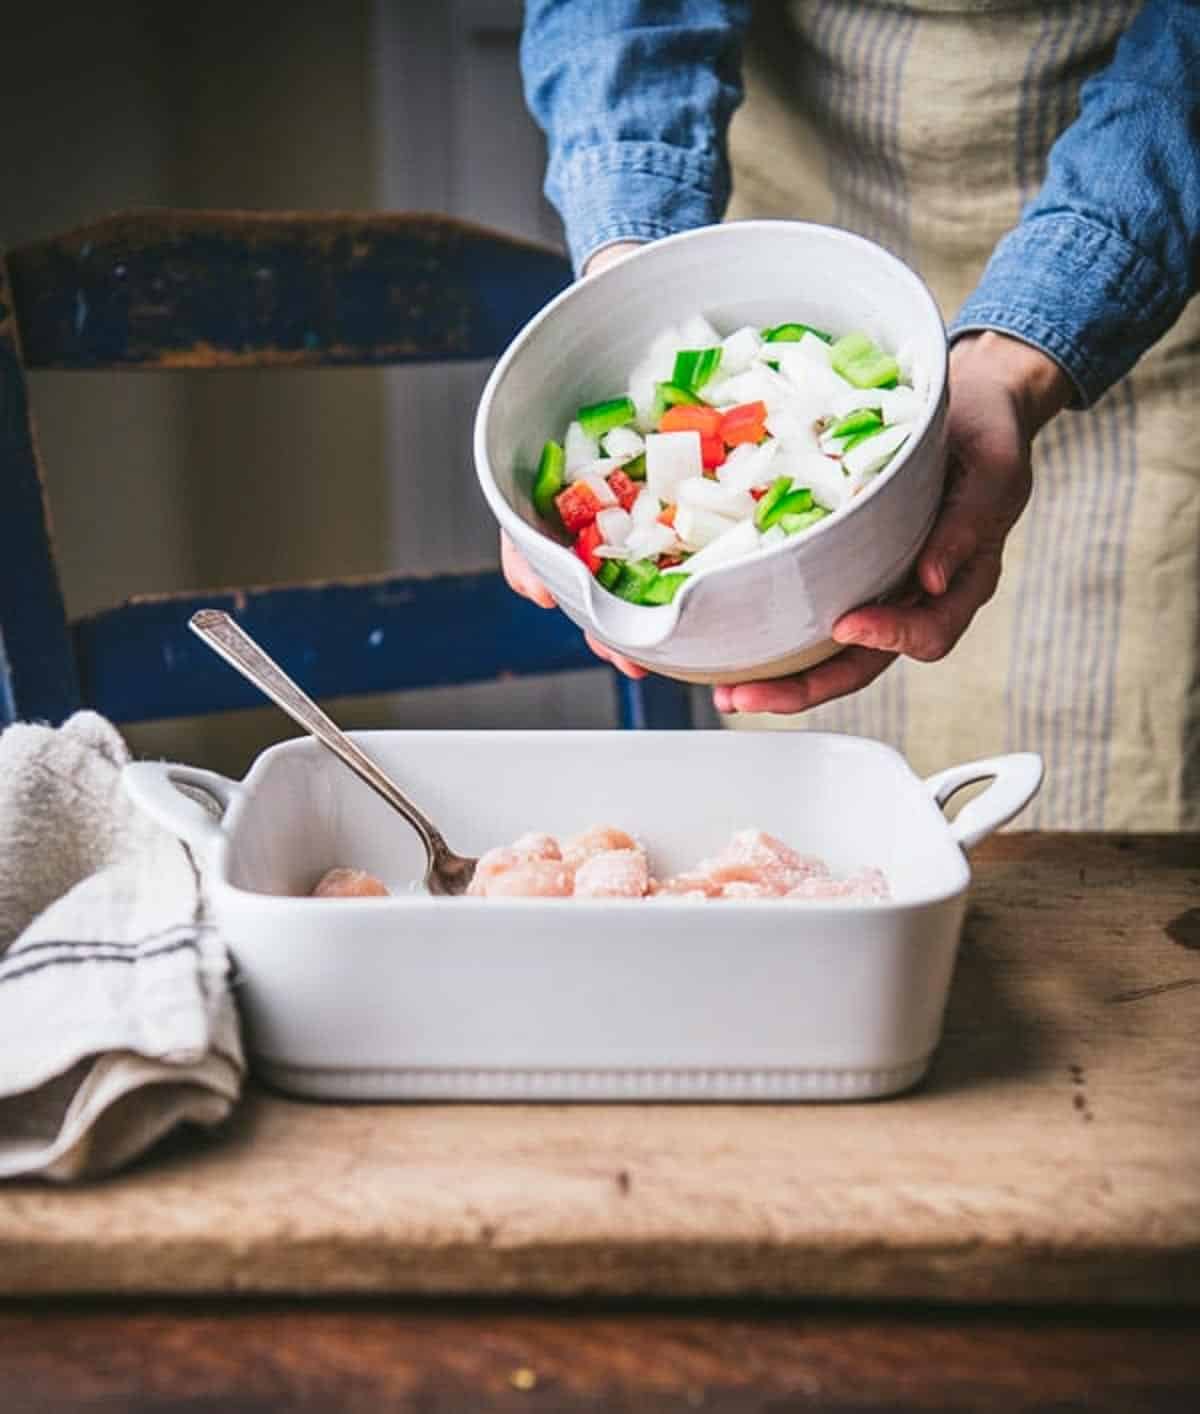
- Chicken: I use boneless, skinless chicken breast, but boneless, skinless chicken thighs also work well. Dice the chicken into bite sized pieces before adding to the dish. You can use kitchen shears for this step if you like.
- Cornstarch: thickens the sauce and helps to coat the chicken.
- Onion, green bell pepper, and red bell pepper: classic vegetables that add flavor and texture to the dish.
- Ketchup: for sweetness and that quintessential orange color in the sauce.
- Apple cider vinegar: the “sour” component that gives the sauce tang.
- Brown sugar: for even more sticky sweetness.
- Soy sauce: gives the sauce salty, umami flavor.
- Garlic and ginger: for even more delicious flavor. If you don’t have fresh garlic cloves on hand, you can sub with about 1/8 teaspoon of garlic powder.
Instructions
This baked sweet and sour chicken recipe is so simple because there’s no need to stand over a skillet or wok to stir-fry your meal, and there’s no need to spend money on Chinese carry-out. This is seriously one of the tastiest and easiest family dinners that you will find!
- Toss chicken with cornstarch.
- Stir in onion and bell peppers.
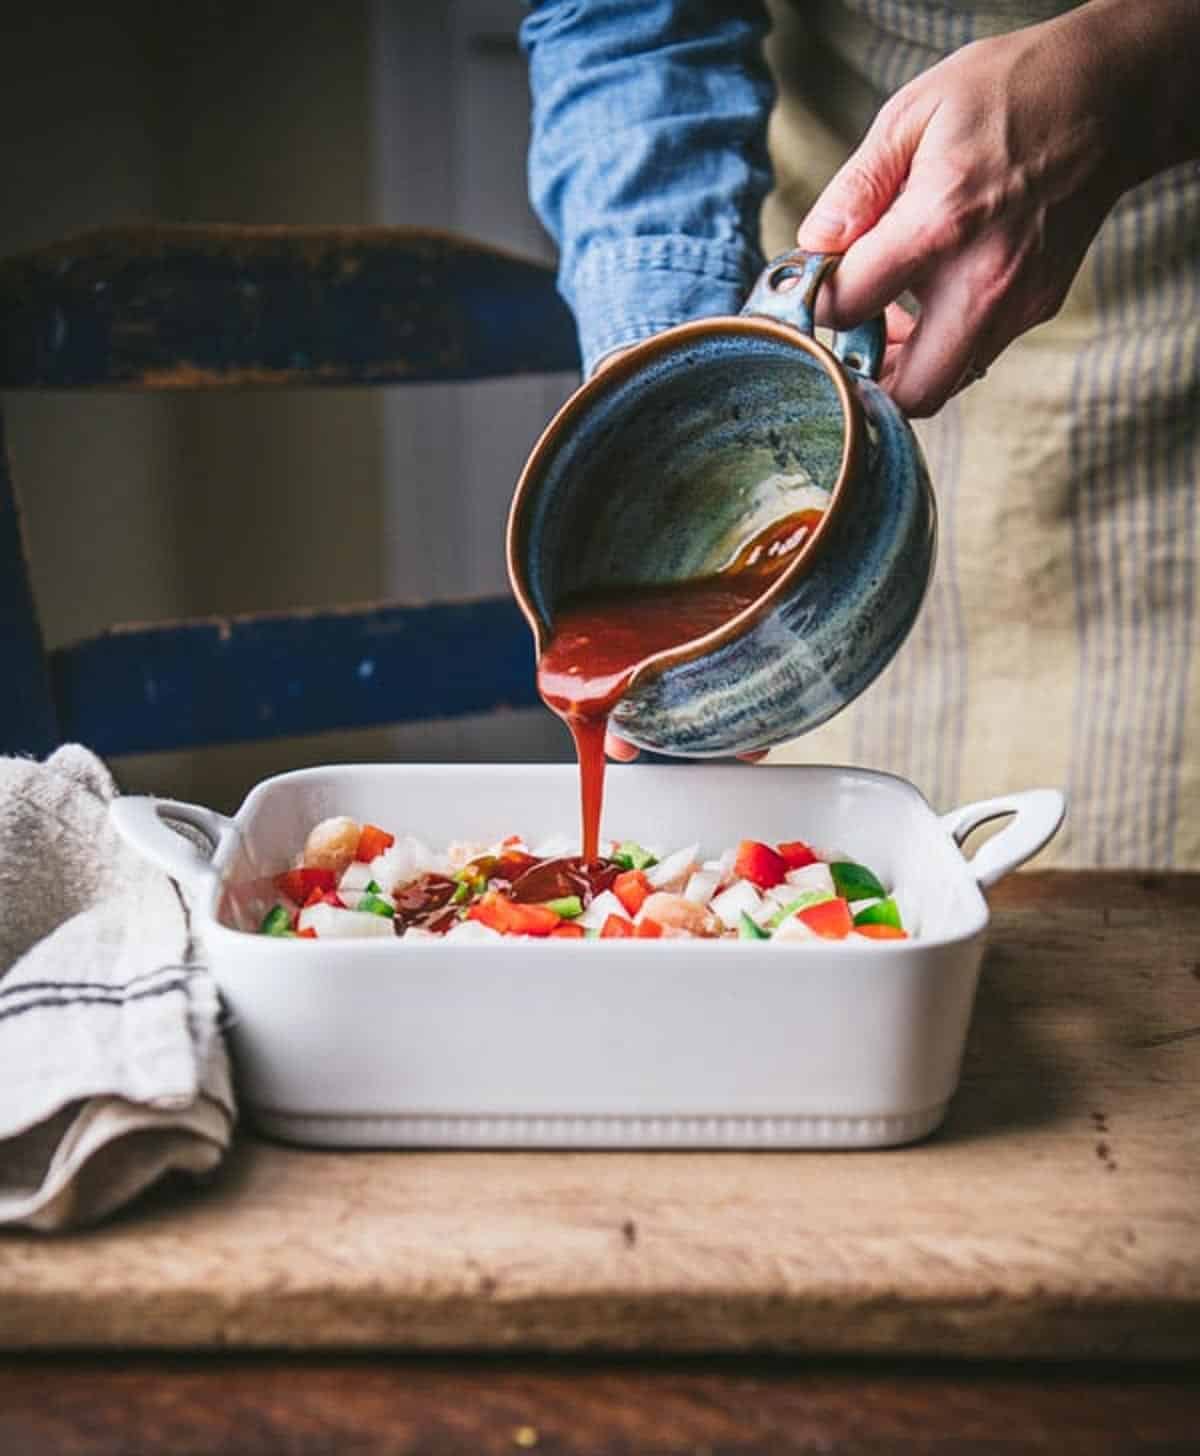
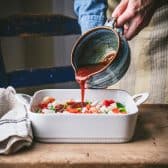
- Whisk together sauce in a small bowl, then stir the sauce into the chicken mixture.
- Bake chicken in a 425°F oven for about 30-35 minutes, stirring during the final 5-10 minutes. It’s done when the chicken is cooked through (and reaches an internal temperature of 165°F) and the sauce has thickened.
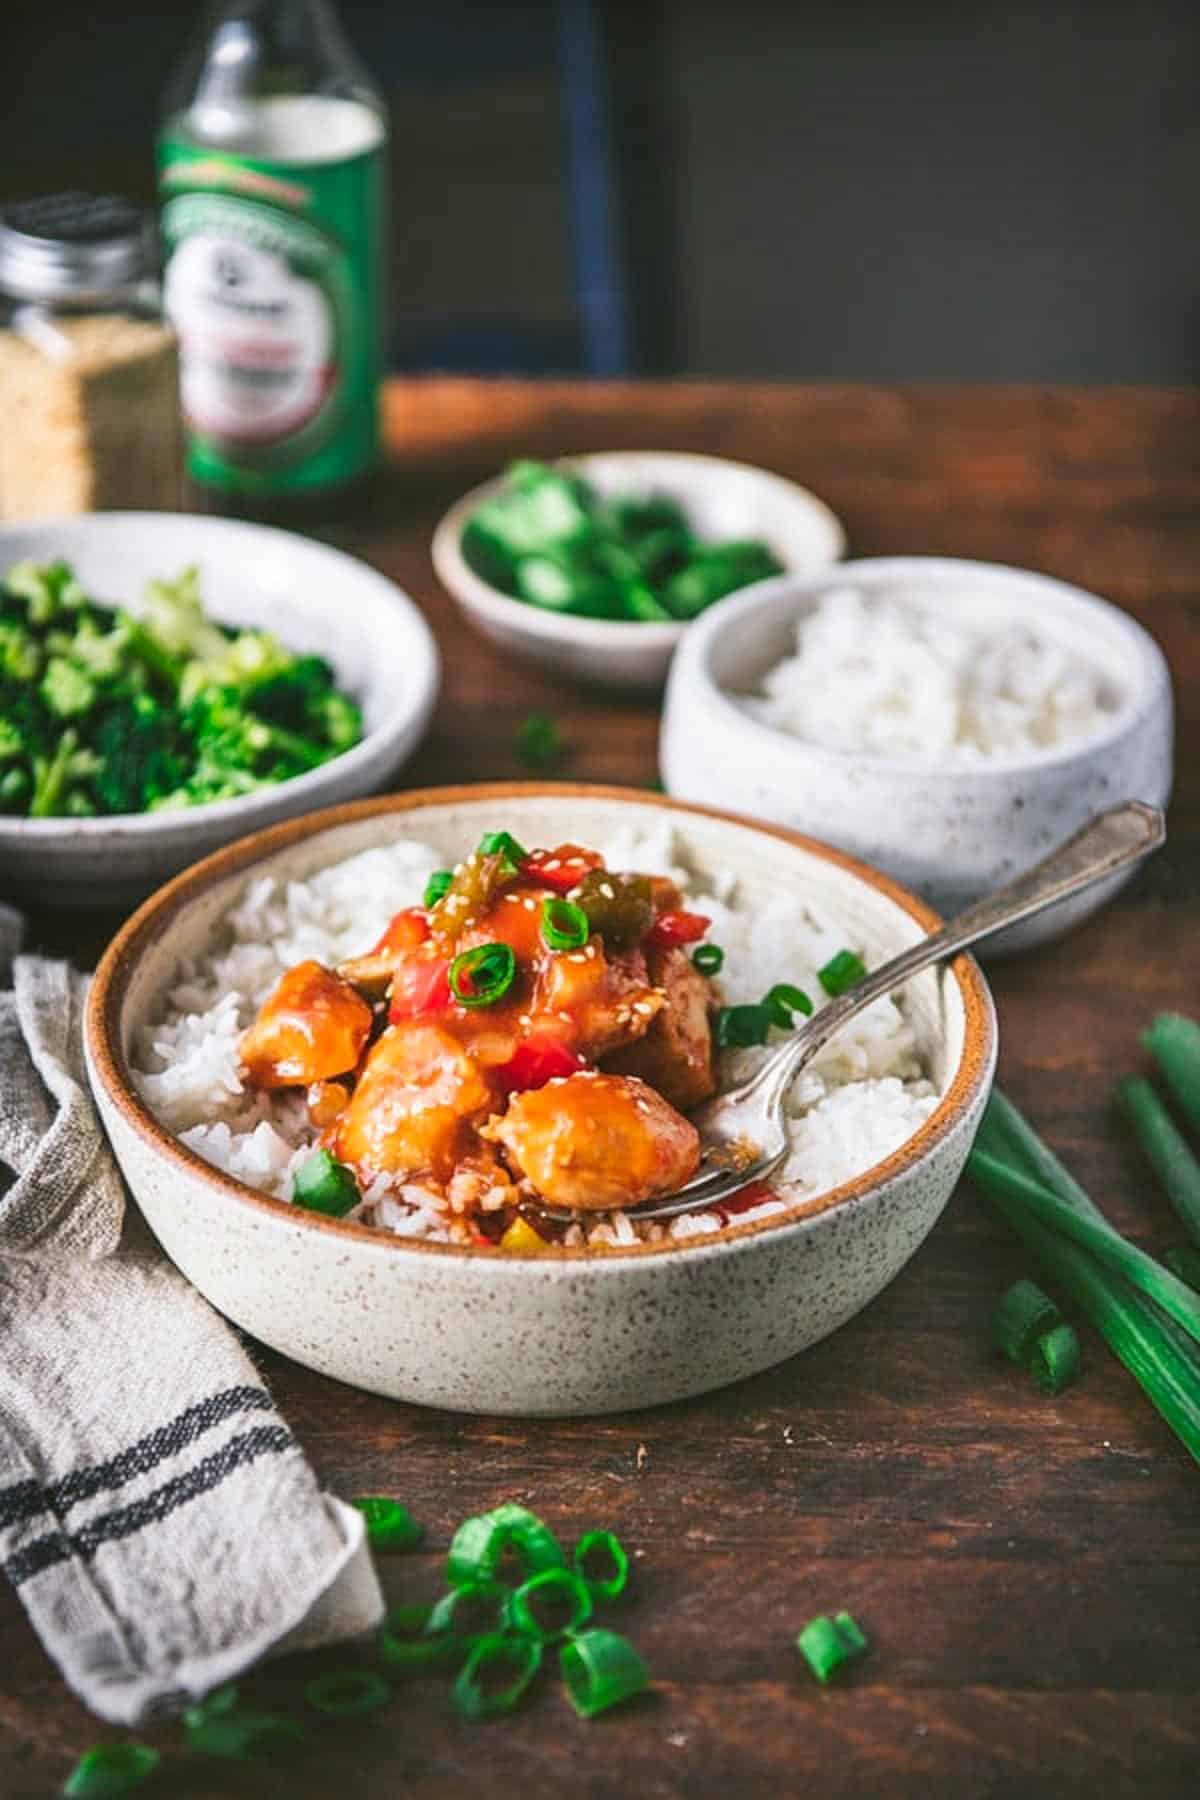
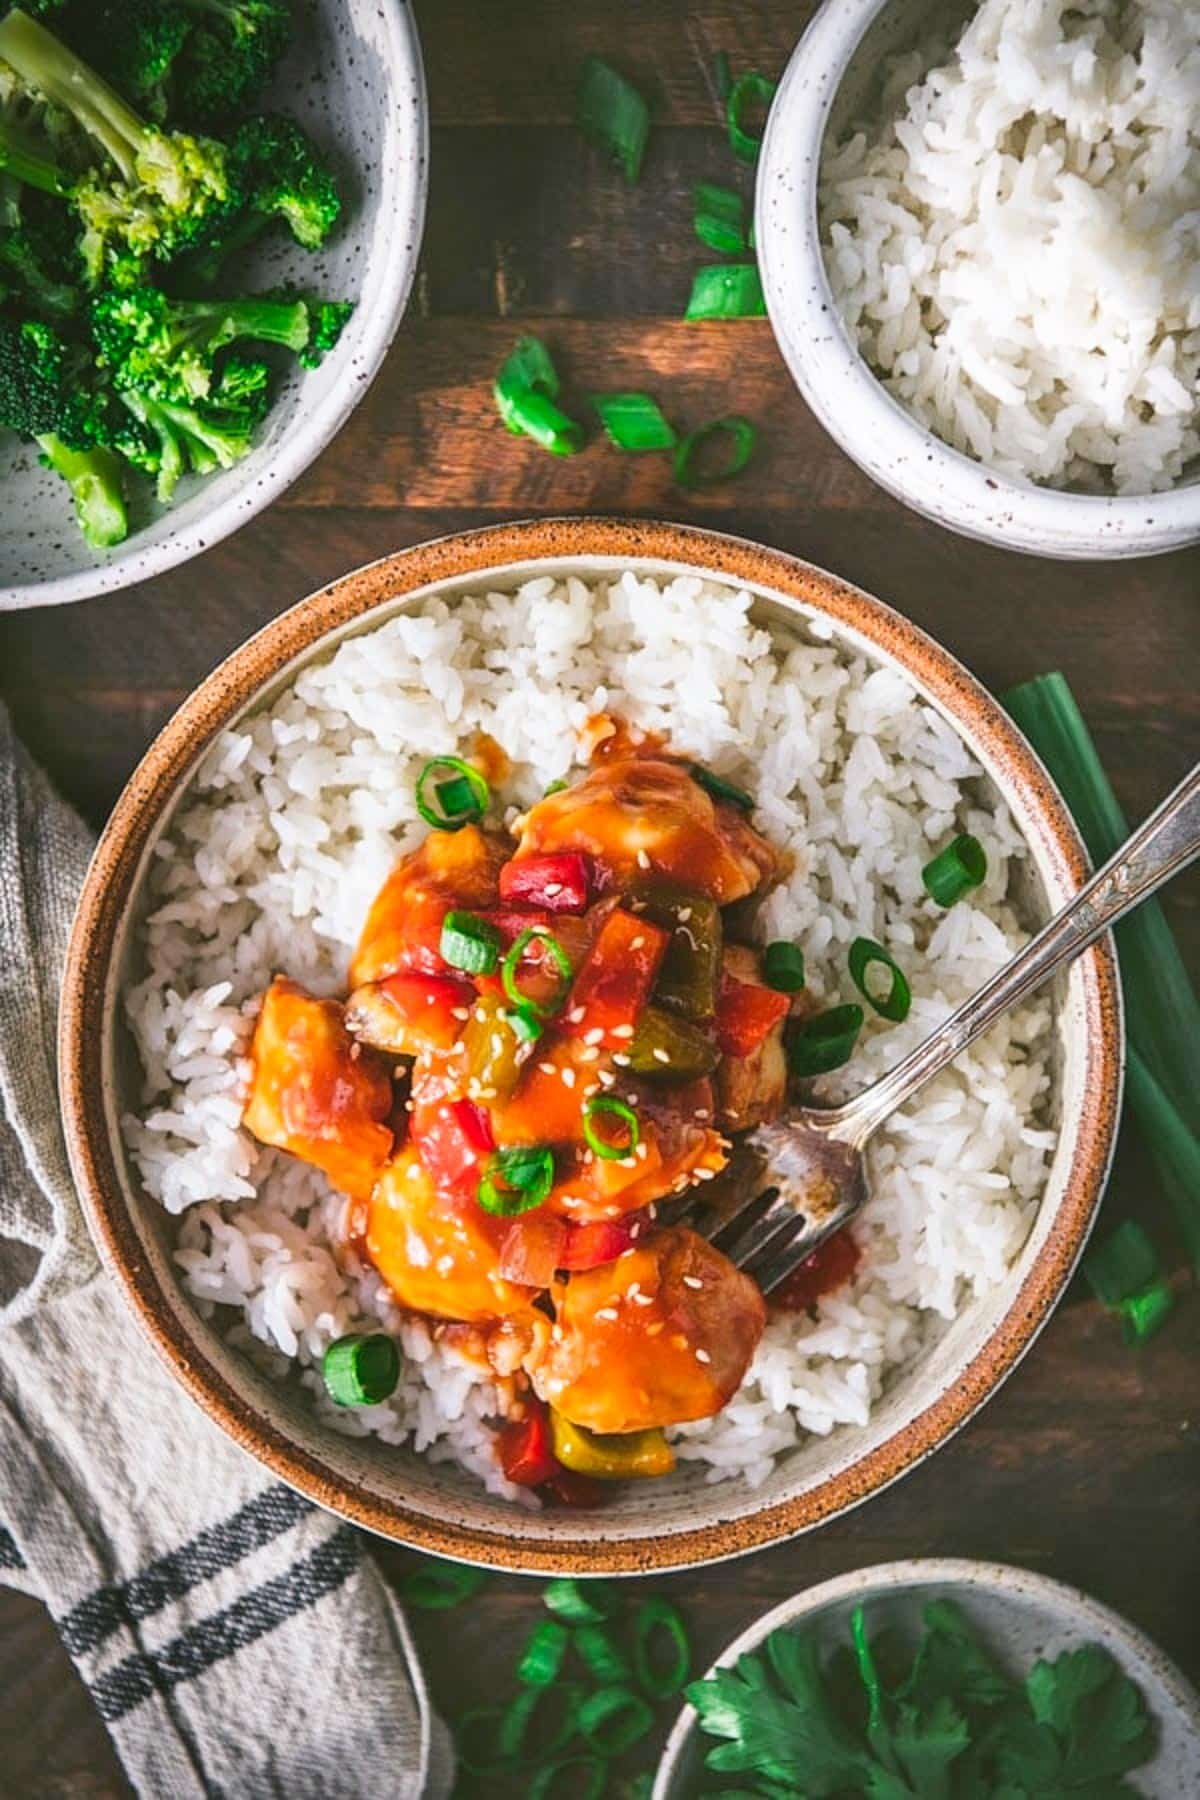
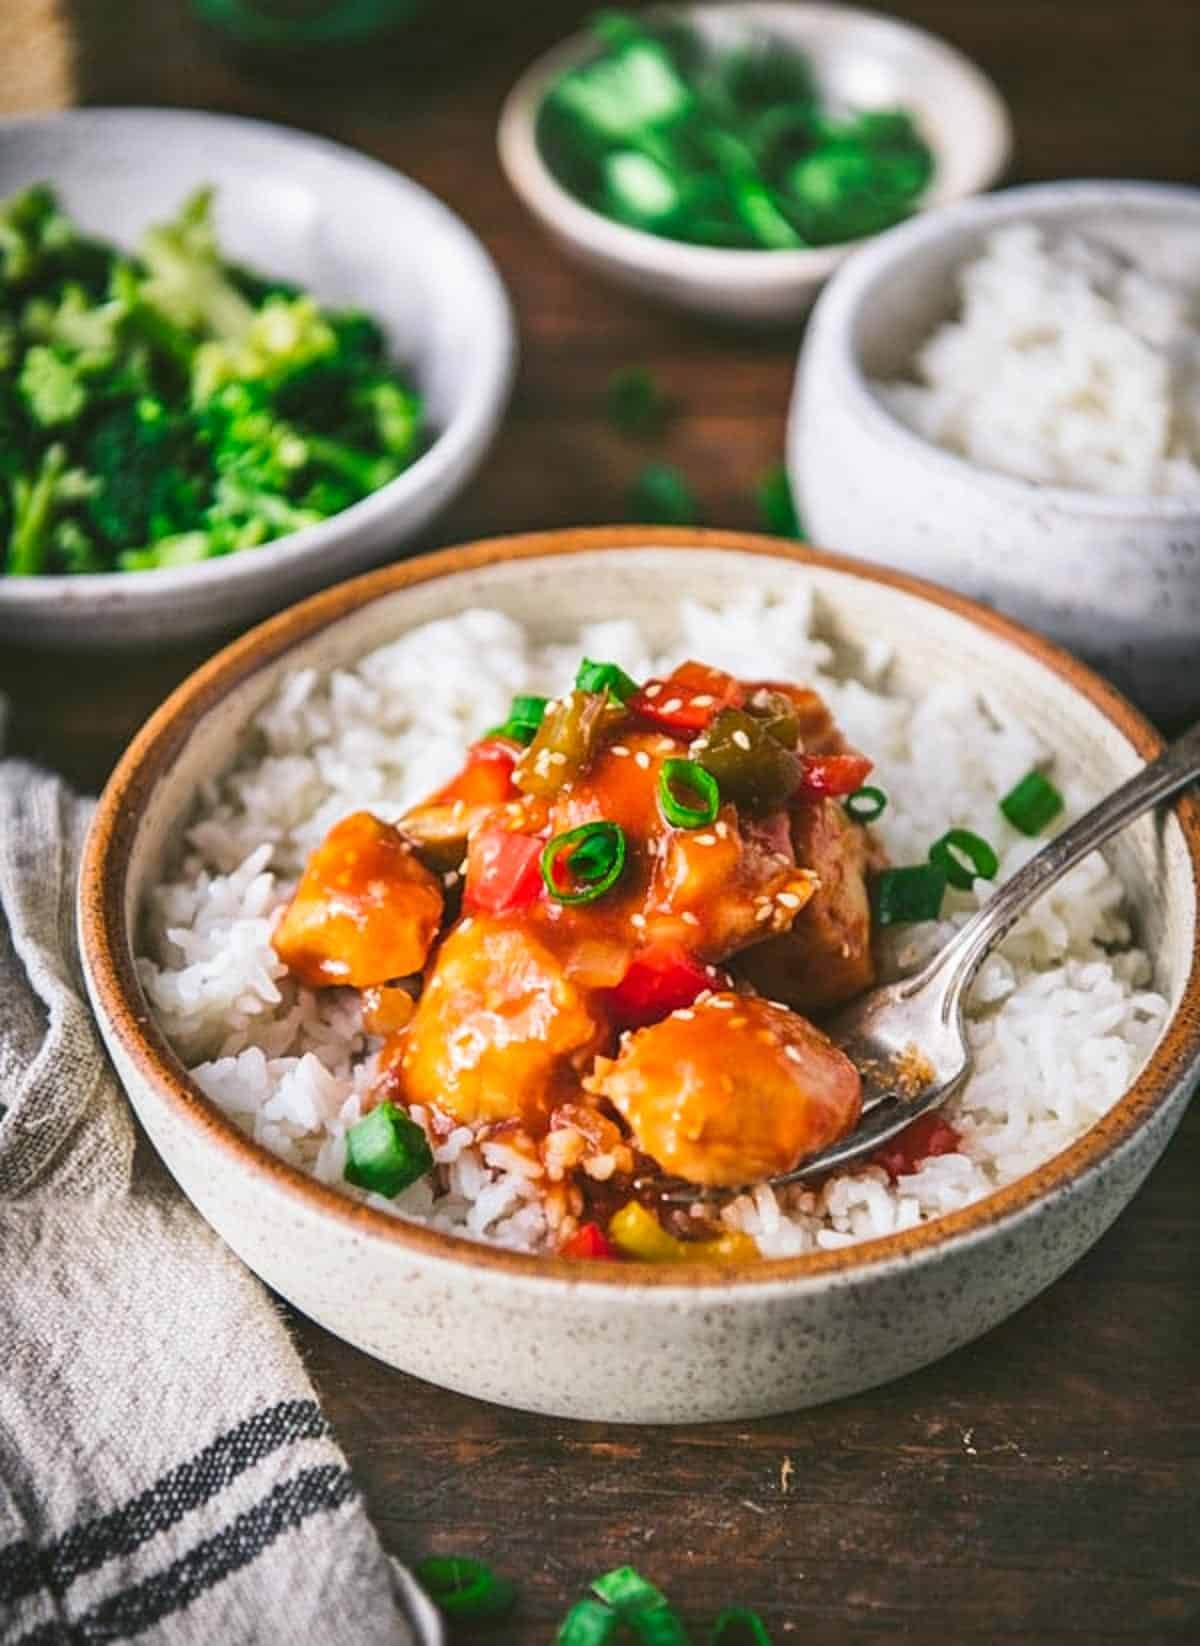
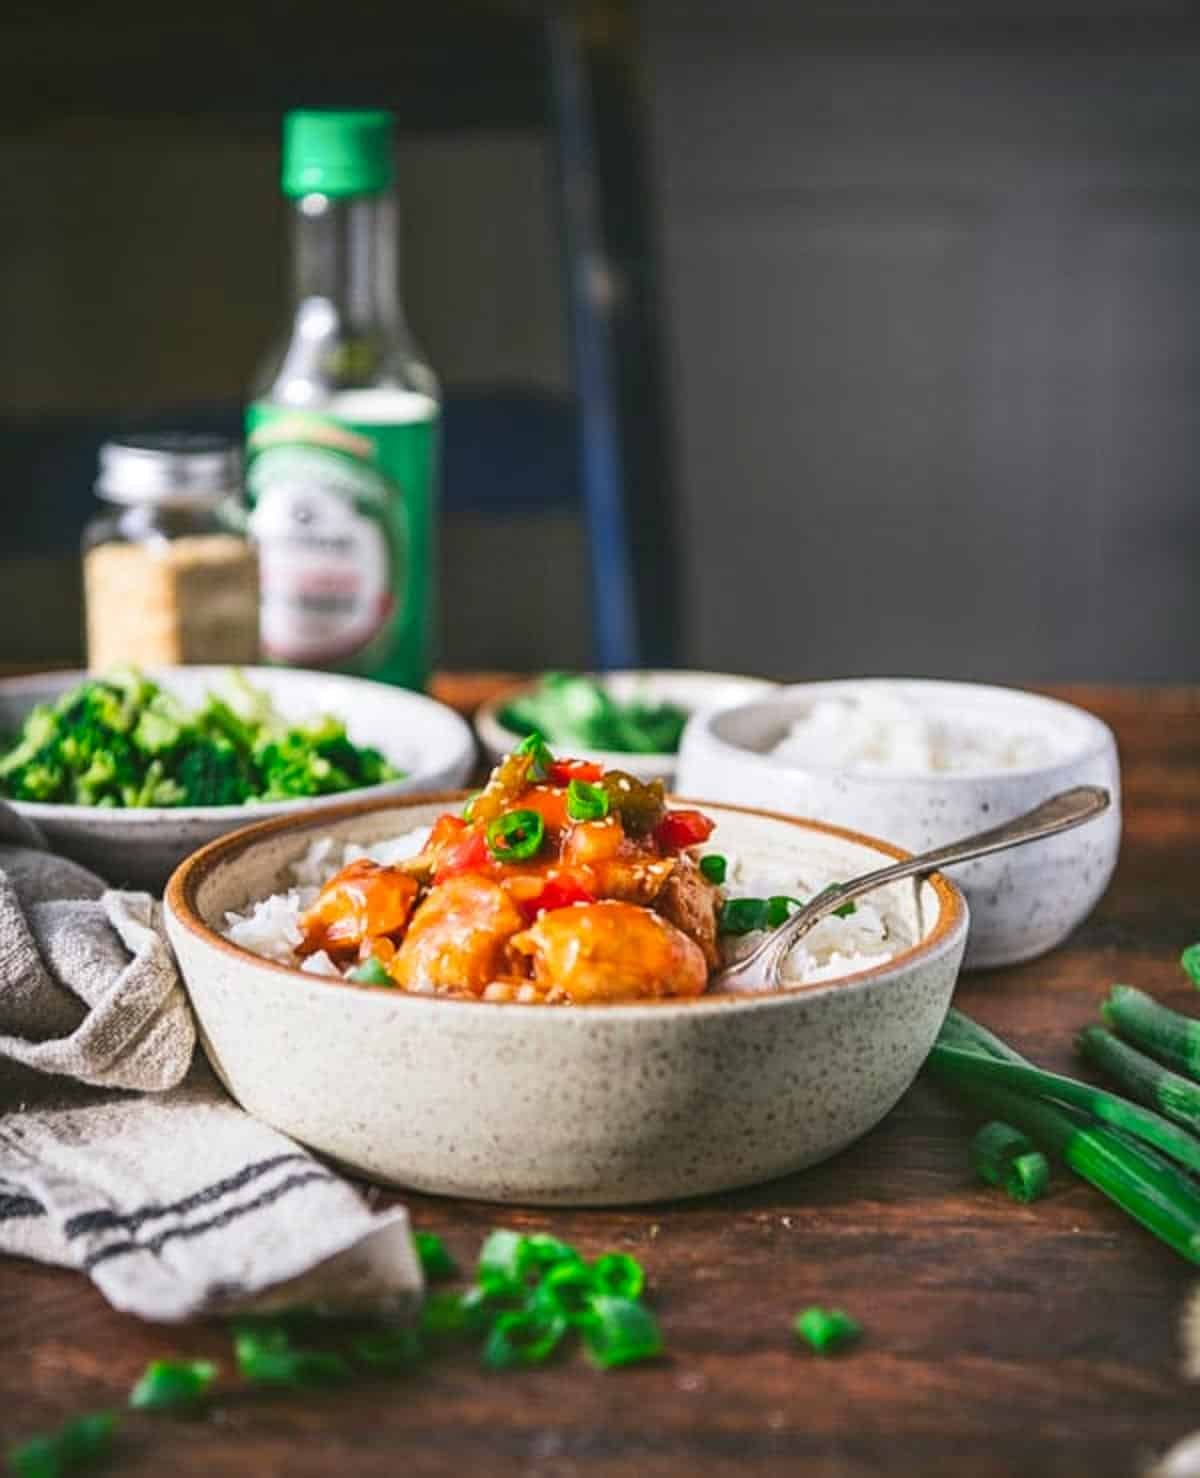
Serving Suggestions
Serve the sweet, sticky chicken over rice (or over cauliflower rice for an even lighter dish), with plenty of extra sauce spooned over top. We love it with steamed broccoli tossed into the mix as well. Additional good options include pasta, ramen noodles, sesame peanut noodles, ramen noodle coleslaw, sesame ginger snap pea salad, or baked store-bought egg rolls. Don’t forget fortune cookies for dessert, too!
Storage Tips
- How to Store: Leftovers will keep in an airtight container in the refrigerator for 3-4 days. Another bonus to the baked not fried chicken? It’s doesn’t get soggy in the fridge!
- Freezer Instructions: You can also freeze the leftovers in an airtight container for up to 3 months. Thaw the chicken in the fridge overnight before reheating.
- How to Reheat: Reheat the chicken in a skillet on the stovetop over low heat, just until warmed through. You can also microwave individual servings for 1-2 minutes.
Recipe Variations
- Make it spicy by adding crushed red pepper flakes, cayenne pepper, or hot sauce.
- Substitute rice vinegar for the apple cider vinegar.
- A little bit of toasted sesame oil in the sauce adds great Asian flavor, too.
- If you prefer dark meat, substitute boneless skinless chicken thighs for the chicken breast.
- Stir diced pineapple, canned pineapple tidbits or pineapple chunks, or even a splash of pineapple juice into the dish. If using canned pineapple, you can wait to stir it into the dish during the final 5-10 minutes since it’s already so soft.
- For some bright citrus flavor, add a splash of orange juice or a little bit of freshly-grated orange zest to the sauce.
- Cooking Just for Two? Cut the ingredients in half and bake the chicken in a smaller dish. The cooking instructions remain the same.

Expert Tips
- If available, use fresh ginger instead of dried, ground ginger. If using fresh ginger, you’ll need about 1 teaspoon of the grated root.
- The total baking time will vary depending on the type of dish that you use, your individual oven, and the temperature of your meat when it goes into the oven. You’ll know that your dish is done when the chicken is cooked through (and reaches an internal temperature of 165°F) and the sauce has thickened. If the sauce is too thick, just add a splash of warm water to thin until it reaches the desired consistency.
- Garnish each serving with scallions, toasted sesame seeds, or peanuts for even more flavor and texture.
- Taste the dish before serving and season with salt and ground black pepper, if necessary.
More Easy Chinese Takeout Recipes to Try

Kung Pao Chicken Recipe
40 minutes mins
Chicken and Broccoli Stir Fry
28 minutes mins

Chicken & Broccoli Lo Mein (“Chinese Noodles”)
30 minutes mins

Did you make this recipe?
If you enjoyed this recipe, please leave a comment with a 5-star review at the bottom of the post. Thank you!

Baked Sweet and Sour Chicken
Ingredients
- 1 ½ lbs. boneless, skinless, chicken breasts or boneless, skinless chicken thighs, cut into 1 ½-inch pieces
- 1 tablespoon cornstarch
- ½ cup diced onion
- 1 medium green bell pepper, diced
- 1 medium red bell pepper, diced
- ½ cup ketchup
- ¼ cup apple cider vinegar
- ¼ cup brown sugar
- 2 tablespoons soy sauce
- 1 teaspoon minced or pressed fresh garlic (about 1 large clove)
- ½ teaspoon ground ginger (or 1 teaspoon grated fresh gingerroot)
- For serving: cooked rice (or cauliflower rice for a grain-free option)
- Optional garnish: sliced green onions; sesame seeds; chopped peanuts
Instructions
- Preheat oven to 425°F. Grease a 2-quart baking dish.
- Place chicken in the prepared dish. Sprinkle with cornstarch and toss to coat.

- Stir in onion and bell peppers.
- In a separate bowl, whisk together ketchup, vinegar, brown sugar, soy sauce, garlic, and ginger. Pour sauce over chicken and vegetables; stir to combine.
- Bake, uncovered, for 25 minutes. Stir, return to the oven for 5-10 more minutes, or until chicken is cooked through and the sauce has slightly thickened. If you find that your sauce is too thick when the chicken is done baking, you can add a splash of warm water (as necessary), and stir to thin.
- Serve over hot cooked rice, if desired. Garnish with sliced green onions, sesame seeds, and chopped peanuts.


Notes
-
- Make it spicy by adding crushed red pepper flakes or hot sauce.
-
- Substitute rice vinegar for the apple cider vinegar.
-
- A little bit of toasted sesame oil in the sauce adds great Asian flavor, too.
-
- If you prefer dark meat, substitute boneless skinless chicken thighs for the chicken breast.
-
- Stir diced pineapple, canned pineapple tidbits or chunks, or even a splash of pineapple juice into the dish. If using canned pineapple, you can wait to stir it into the dish during the final 5-10 minutes since it’s already so soft.
-
- For some bright citrus flavor, add a splash of orange juice or a little bit of freshly-grated orange zest to the sauce.
-
- Cooking Just for Two? Cut the ingredients in half and bake the chicken in a smaller dish. The cooking instructions remain the same.
- If available, use fresh ginger instead of dried, ground ginger. If using fresh ginger, you’ll need about 1 teaspoon of the grated root.
-
- Garnish each serving with scallions, toasted sesame seeds, or peanuts for even more flavor and texture.
- The total baking time will vary depending on the type of dish that you use, your individual oven, and the temperature of your meat when it goes into the oven. You’ll know that your dish is done when the chicken is cooked through (and reaches an internal temperature of 165°F) and the sauce has thickened. If the sauce is too thick, just add a splash of warm water to thin until it reaches the desired consistency.
Nutrition
This recipe was originally published in May, 2018. It was updated in March, 2024.


This was great, thank you!!
Thank you, Susan!
Thank you, this was such a hit with the family tonight! Will definitely be making this one again!!!
We’re so happy to hear this, Annamarie! Thank you for trying it out and taking the time to leave your feedback.
I have what may be a silly question. When I make your Asian Dump recipes, such as this one or the General Tso, do I need to use only raw chicken or can it be cooked to start with?
You could try using pre-cooked chicken, but it won’t get the crisp exterior we’re looking for. For the best results, we recommend sticking with raw chicken.
Thanks!
I made this last night. My husband called it restaurant quality. I used more garlic and fresh ginger because we like added flavor. This is definitely a keeper recipe. Thank you.
Wow, thank you, Sue! We’re so happy you enjoyed it.
This recipe was so quick and easy! Not to mention how delicious it issss. I had a can of pineapple chunks sitting around so I drained it and mixed the pineapple in. This is a great way to stretch the amount of food a bit more 🙂 My husband rated this recipe a 9/10, saying it would be 10/10 if the chicken was marinated to absorb more flavor. I will absolutely be making this in the future and hope to share it with others! Thank you for another awesome recipe for a couple who both work full time and don’t have a lot of time to cook. I make the full recipe and meal prep the leftovers for yummy and nutritious lunches during the week since it’s just the two of us (freezing them to last longer if needed).
I’m so happy to hear that, Kerrisan! Thanks for your note. I’m glad that your husband approved, too!
Do you have a suggestion for different veggies that would work with this? My hubby hates bell pepper.
Broccoli should work well! Feel free to experiment with any veggies you like best, but avoid watery ones like zucchini. Hope this helps, Carolyn!
This was excellent! Picky toddler and husband approved! Ended up using cauliflower and carrot for the veg and excluded the onion. Definitely adding to our regular rotation. Thank you for the tasty and easy recipe!
Thanks, Carolyn. I’m so happy to hear that!
I just have to come back here again and say how yummy this dish is! I made it for the second time, left in the onion this time, and my almost-4-year-old who “doesn’t like onions” asked for more onions! He protested the dish at first, but I told him the sauce was a “ketchup sauce” 😉 and that got him interested enough to try it – then proceeded to have 4 helpings. Thank you so much for sharing this one!
I love to hear that, Carolyn Joyce! Thank you for taking the time to let me know. It’s always a huge compliment when the kids approve!
Really enjoyed this sweet and sour chicken – great recipe! I followed directions almost exactly, but only had regular white vinegar, which seemed to work great. I marinated the chicken in the sauce for the afternoon and added pineapple at the end as suggested. My family loved it!
I’m so glad to hear that. Thank you for letting us know!
Delicious! The chicken cooked perfectly and the sauce was splendid.
Thank you, Sofia! We’re so glad you enjoyed it.
My first experience of Dump and Bake – this was so simple to make that I can’t believe how good it was! I did half quantity for two very generous portions. I will be looking at trying more, especially if they are as easy to adapt for gluten free as the sweet and sour chicken.
Thoroughly recommend this recipe.
I’m so glad to hear that, Mary. Thank you!
When you say you marinated the chicken, please explain. Did you marinate it using the sauce ingredients (including cornstarch) and then when ready to bake just add the vegetables? Or did you use a separate marinade for the chicken and then follow your recipe beginning with tossing in cornstarch? Thank you!
Hi, Mary! That was a reader comment from someone named Michelle, so I can’t speak for her. I’m assuming that she means she marinated the chicken in the sauce before baking. You can certainly do that if you like. Just assemble the dish through Step 4, cover and chill in the fridge for a few hours, and then bake according to the recipe directions. If the dish is really cold when it goes into the oven, you may need to add a little bit more time. Hope you enjoy the meal!