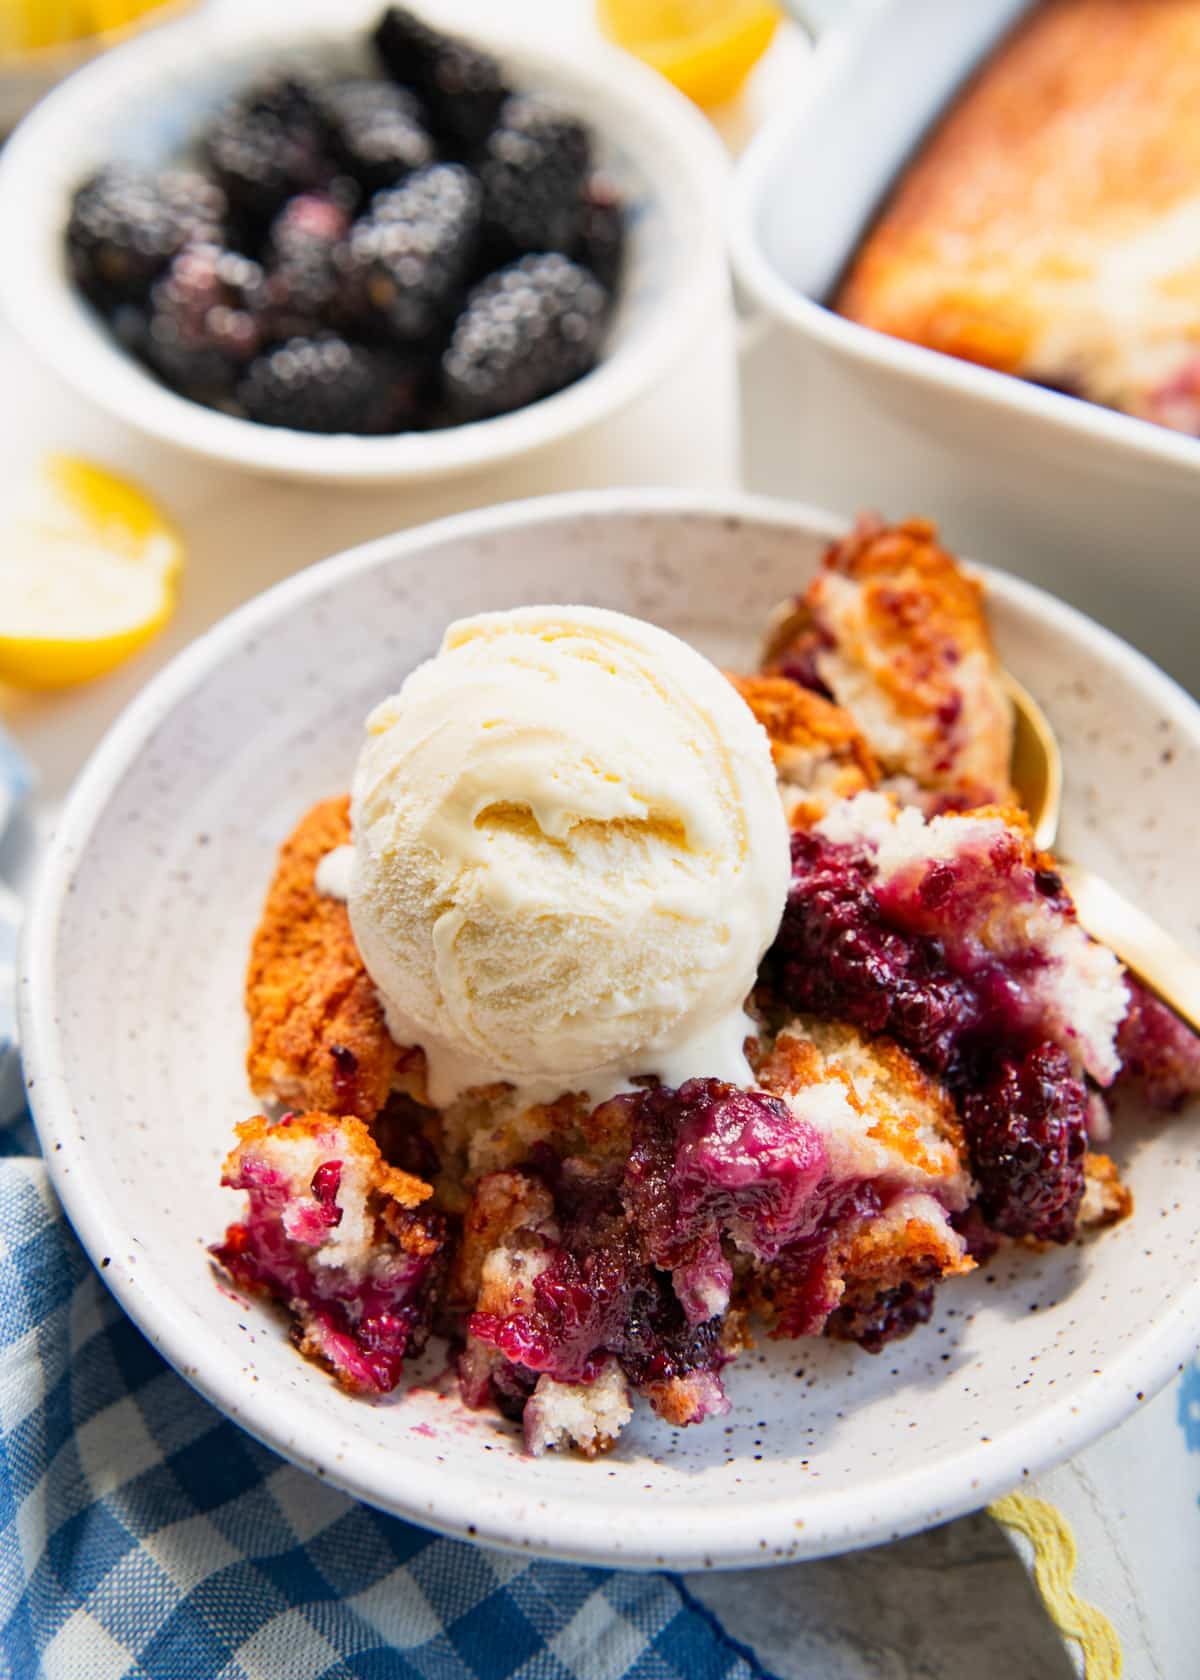
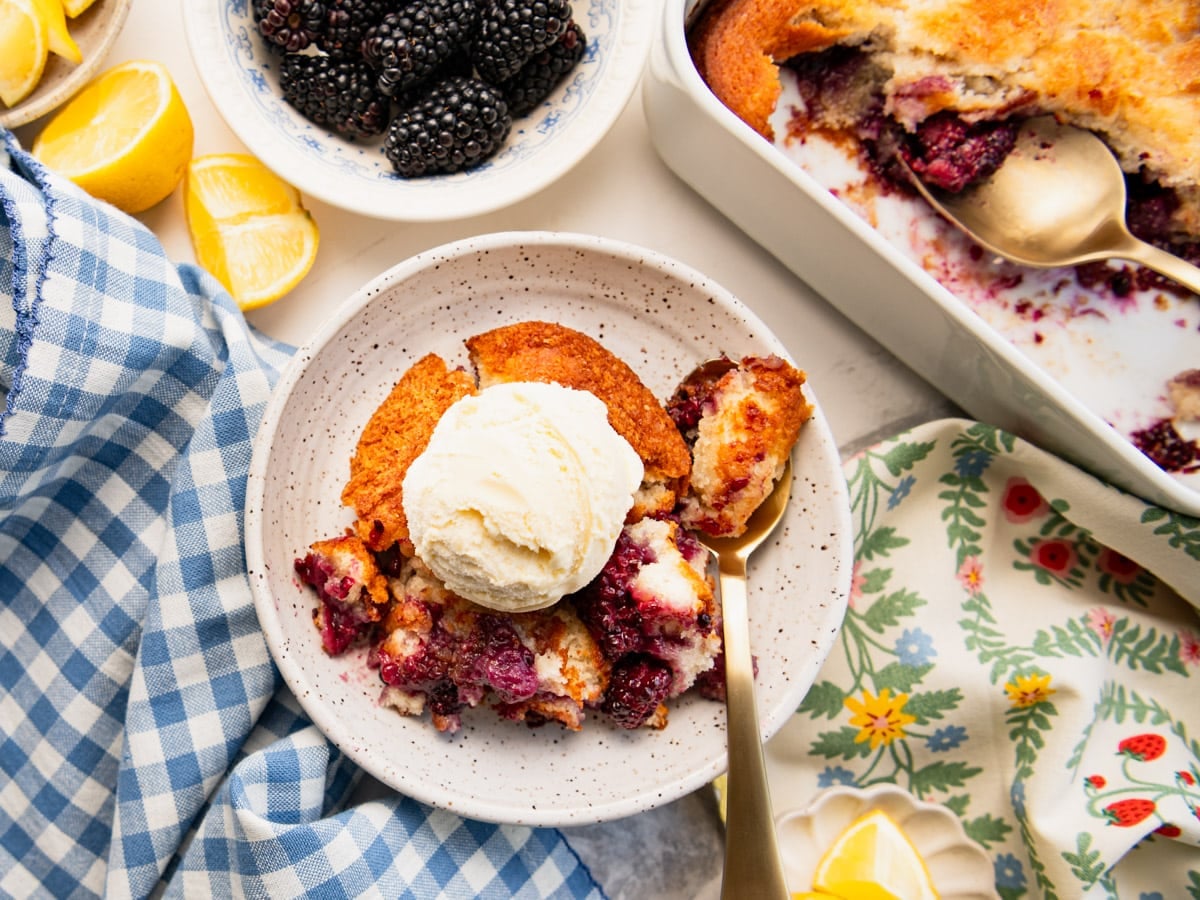
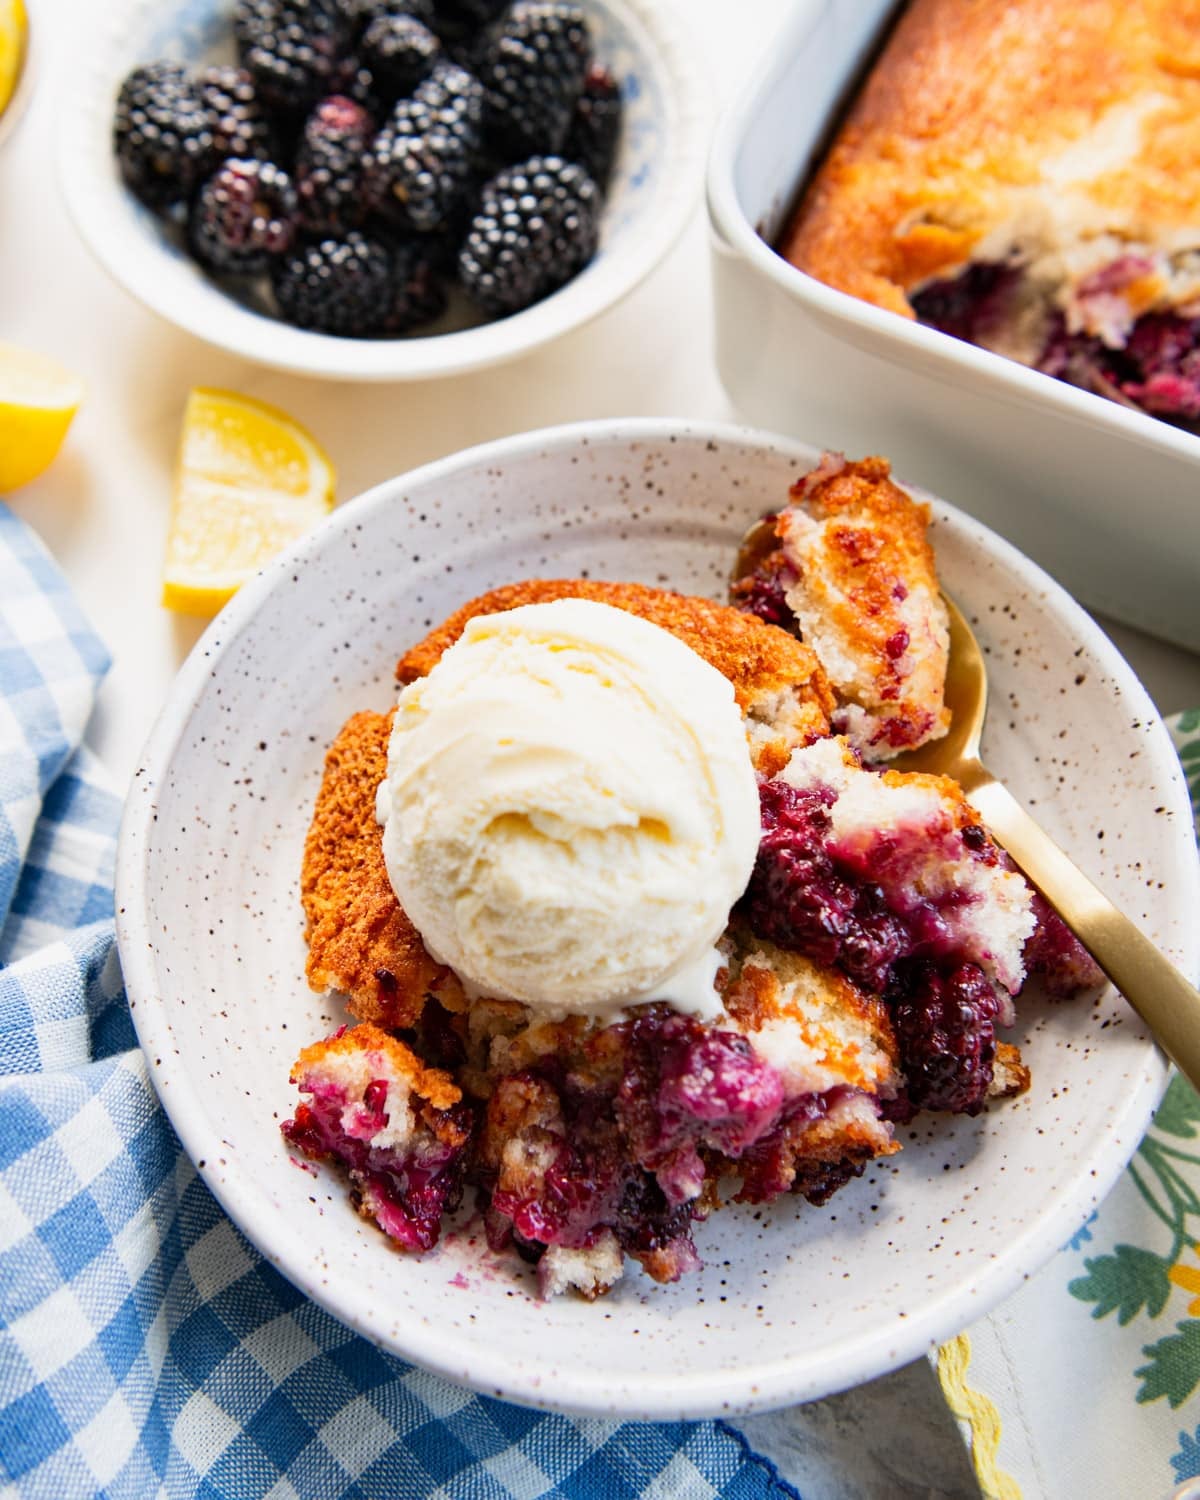
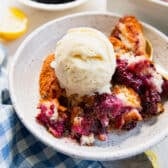
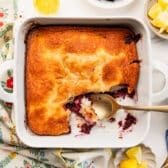
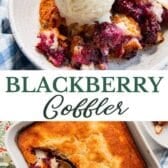
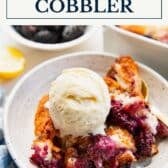
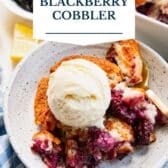
This old-fashioned blackberry cobbler is a classic Southern dessert with sweet, juicy berries baked under a tender, golden cake topping. It comes together in about an hour with fresh or frozen blackberries, so you can enjoy it any time of year. Serve it warm with a scoop of vanilla ice cream and you’ve got summer in a bowl!
More great cobbler recipes to try:
Cobbler vs. Crumble vs. Crisp
A cobbler is a fruit dessert with a biscuit or cake-like topping baked over the fruit. This blackberry version uses a thin batter that puffs up around the berries as it bakes, giving it that signature “cobbled” texture. Crisps and crumbles are different. Both have streusel toppings (oats vs. no oats, traditionally), while a cobbler always has a biscuit or cake top.
Before You Get Started
A few small details make the difference between a perfect cobbler and a soggy one. Keep these three in mind before you start:
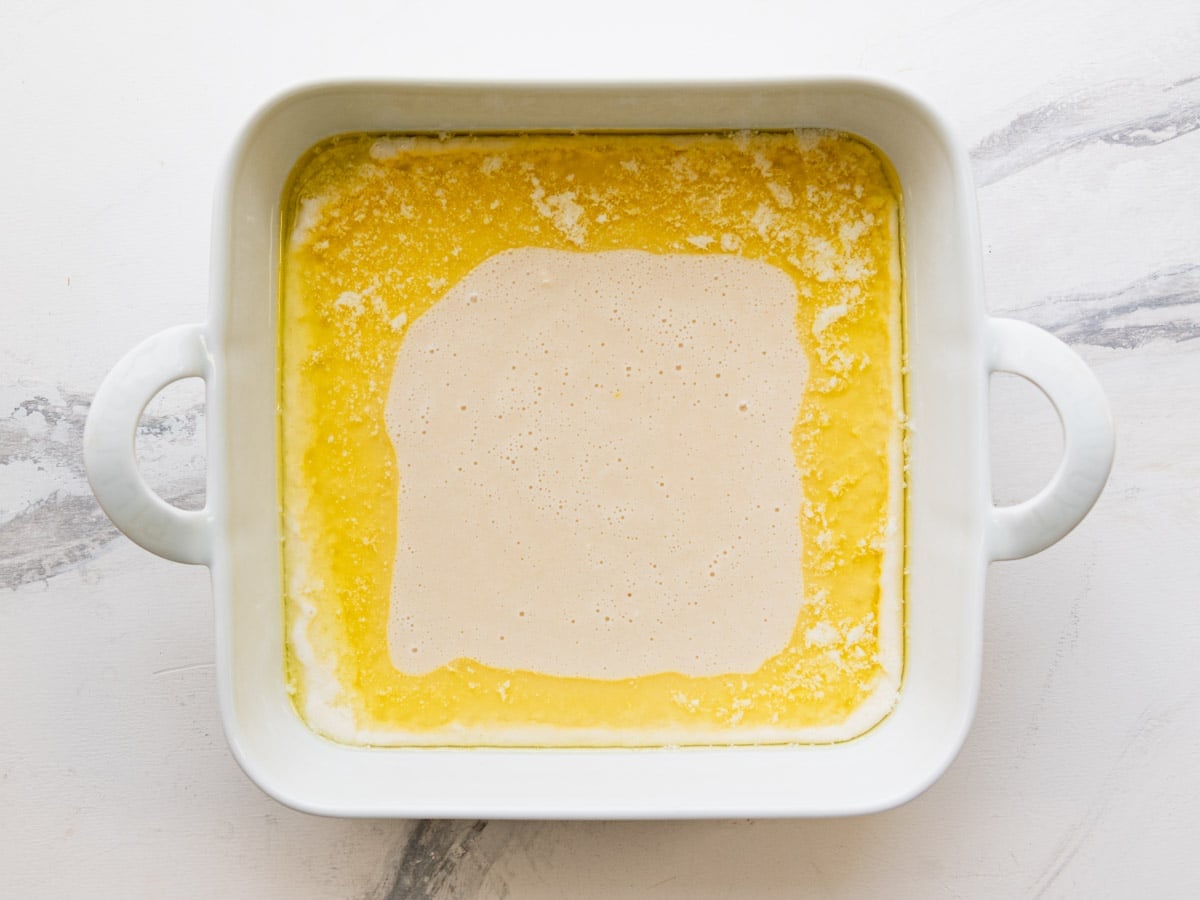
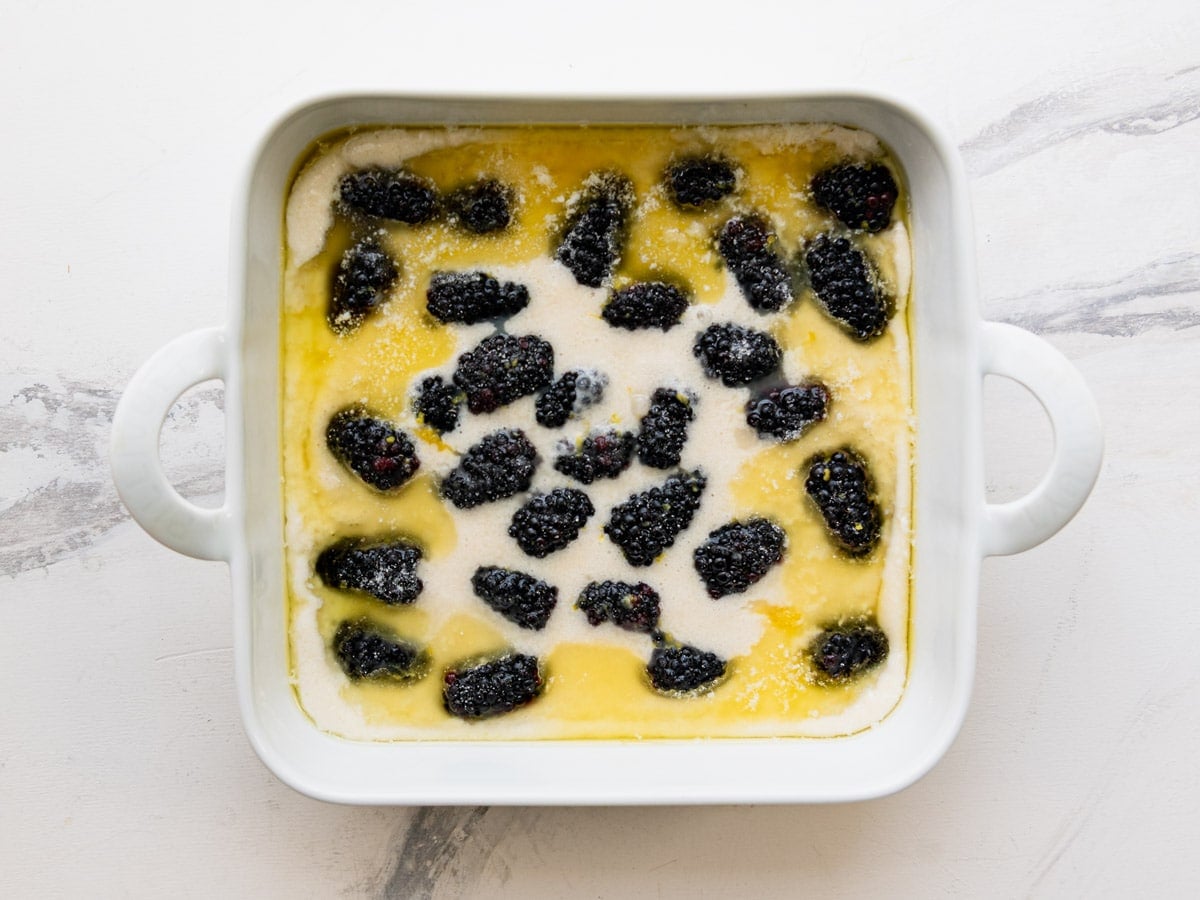
- Don’t stir the batter and berries. Pour the batter over the melted butter and scatter the blackberries on top. That layered start is what gives the cobbler its puffy, golden top and crisp edges.
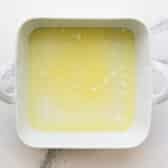
- Melt the butter in a hot pan first. Putting cold butter in the dish does not work the same way. The hot, buttery base is what creates those crisp golden edges and helps the batter rise.
- Bake until fully set, not just golden. A jiggly center means the cobbler isn’t done. Watch for bubbling juices around the edges and a top that springs back when gently touched.
How to Make Blackberry Cobbler
Here’s how the cobbler comes together, with a few notes to set you up for success:
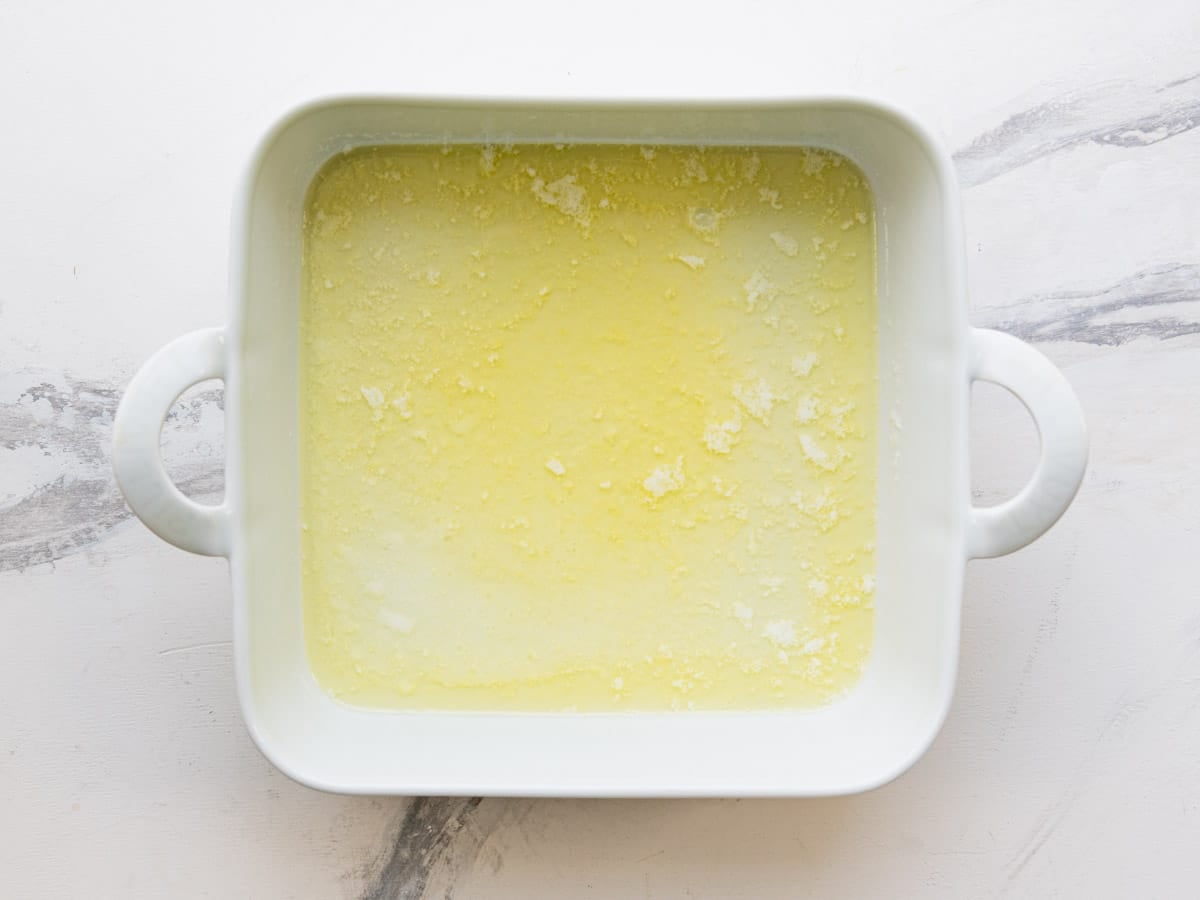
Step 1: Melt the Butter
Place the butter in your baking dish and pop it in the preheating oven for about 3-4 minutes, just until melted. Keep an eye on it so it doesn’t brown too far. A lightly nutty butter is fine, but you don’t want it burnt, since that flavor will carry through the whole dish.
⇢ Pan options. This recipe works in an 8×8-inch baking dish, a 9- or 10-inch cast iron skillet, or any 2-quart baking dish. Cast iron gives you those crisp, golden edges, while glass or ceramic bakes a little more gently and evenly.
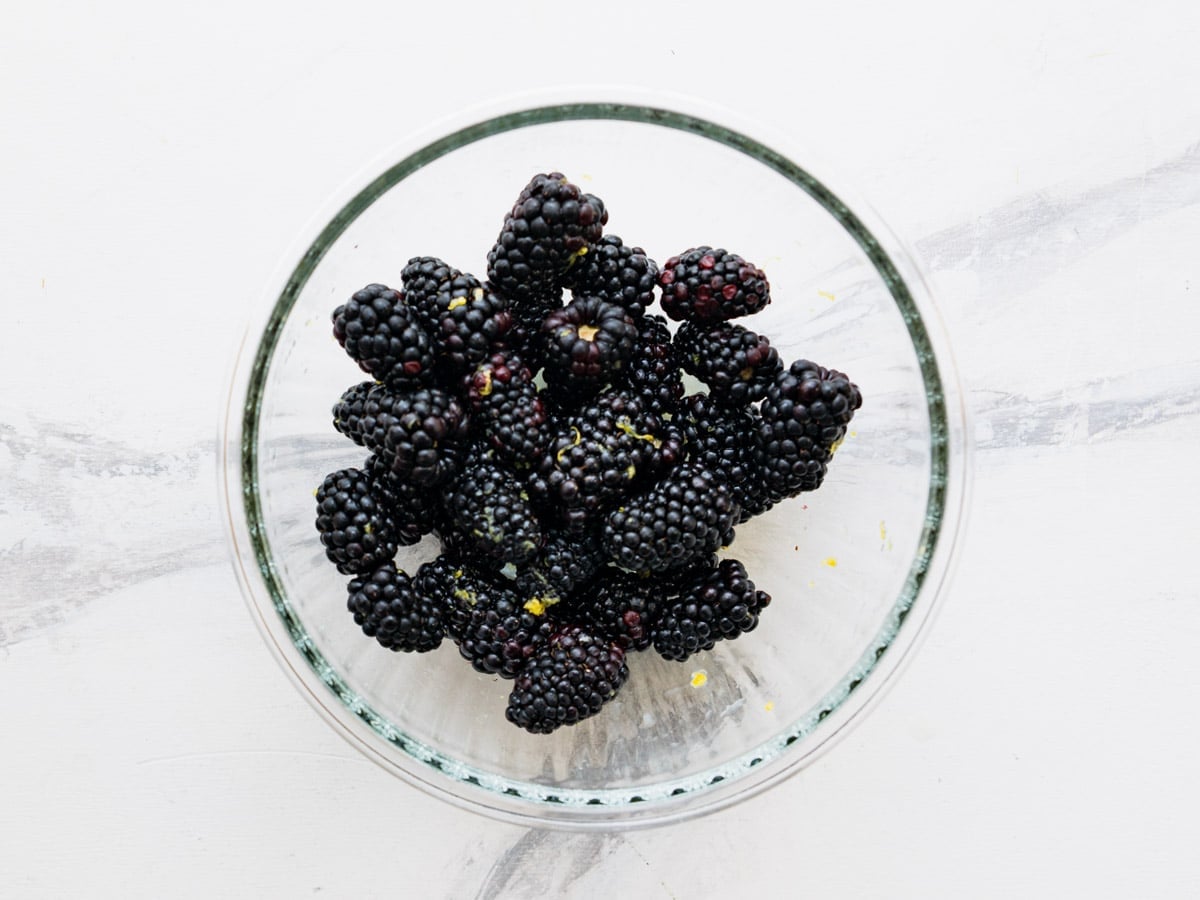
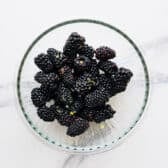
Step 2: Toss the Berries with Lemon
In a small bowl, gently toss the blackberries with the lemon juice and lemon zest. This quick step wakes up the berries and keeps the filling from tasting flat. You’re not trying to macerate them, just lightly coat so every bite has a little brightness.
⇢ Frozen berries work too. Use them straight from the freezer. Don’t thaw, since they’ll release too much liquid and make the cobbler soupy. Plan to add about 5-10 extra minutes to the bake time.
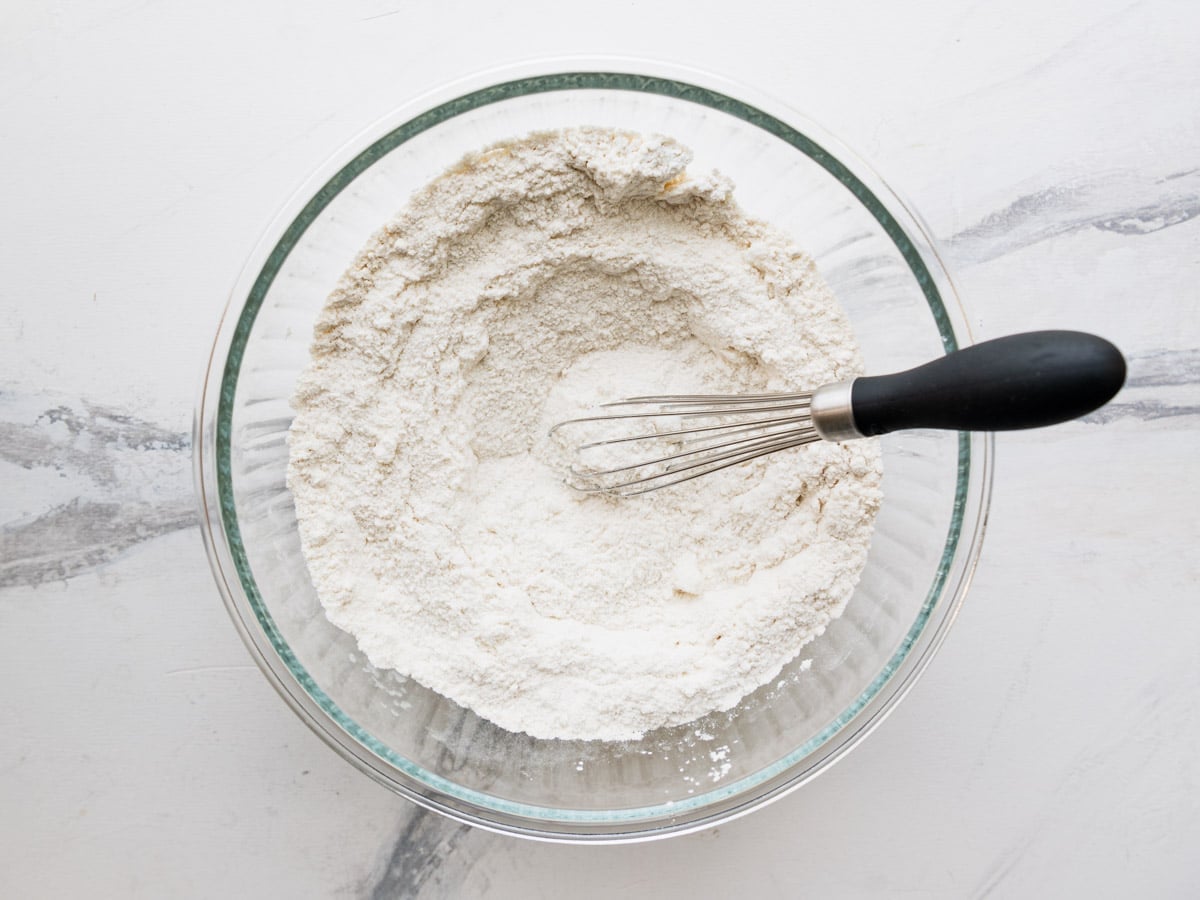
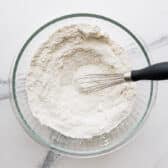
Step 3: Mix the Batter
In a large bowl, whisk together the sugar, flour, baking powder, and salt. Stir in the buttermilk and vanilla just until combined. The batter will be thin, almost like a thick pancake batter, and that’s exactly what you want. A looser batter spreads easily over the butter and rises up around the fruit as it bakes.
⇢ Don’t overmix. Stir just until the dry ingredients disappear. Overworking the batter can make the topping a little tough instead of tender.
⇢ No buttermilk on hand? You can use regular milk (the recipe will still work). For that tangy buttermilk flavor and a little extra lift, stir 1 tablespoon of lemon juice or white vinegar into a measuring cup, then fill with whole milk to reach 1 cup. Let it sit for 5 minutes, give it a stir, and use it in the recipe.
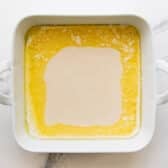
Step 4: Layer the Cobbler (Do Not Stir)
Carefully remove the hot pan from the oven. Pour the batter directly over the melted butter. Do not stir.
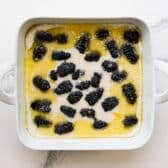
Spoon the blackberries evenly over the top, along with any juices from the bowl. Again, do not stir. Sprinkle 1-2 tablespoons of sugar over everything for a lightly crisp, sweet finish.
⇢ Why no stirring? This is what creates that classic cobbler texture. As it bakes, the batter rises up through the fruit and forms a soft, cake-like layer with golden, buttery edges. Stirring would blend everything together and you’d lose those distinct layers.
Step 5: Bake and Cool
Bake at 350°F for 40-50 minutes, until the top is golden brown and set, the edges are bubbling, and the center no longer jiggles when you gently shake the pan. You’ll smell that warm, buttery aroma when it’s close.
If the top starts to get too dark before the batter cooks through, tent the dish loosely with foil and continue baking.
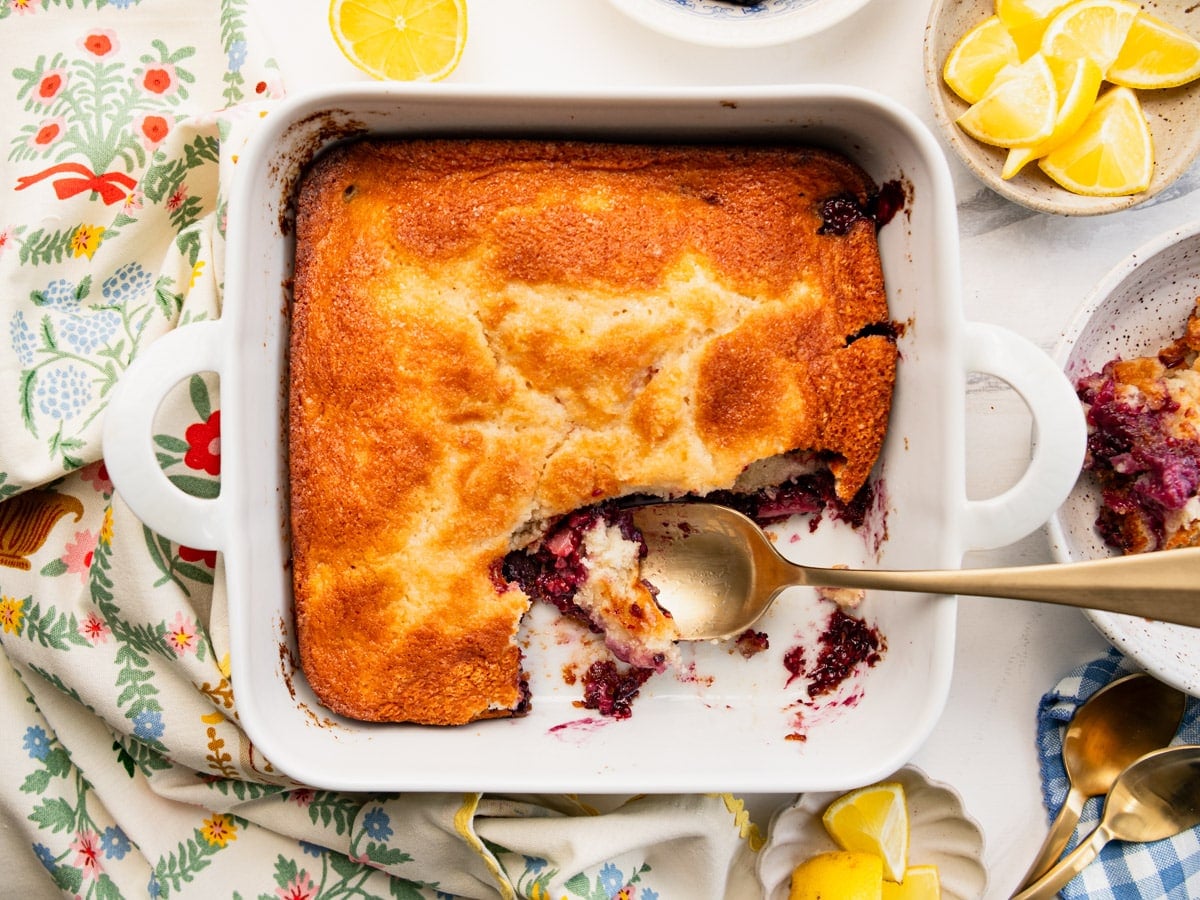
Let the cobbler rest for about 10 minutes before serving so the juices can settle and thicken slightly.
More fruit cobblers to try:
Storage, Freezing, and Make-Ahead
Cobbler is best the day it’s baked, but leftovers keep well.
- Same day: Cover loosely and leave at room temperature for up to 12 hours. No need to refrigerate right away.
- Refrigerator: Cover tightly and refrigerate for 3 to 4 days.
- Freezer: Wrap tightly and freeze for up to 2 months. Thaw in the refrigerator overnight before reheating.
- Reheating: Warm individual servings in the microwave for 20 to 30 seconds, or reheat the whole dish in a 350°F oven (loosely covered with foil) for 15 to 20 minutes. The oven brings back some of the crisp top.
Make-ahead note: This cobbler doesn’t make ahead well in raw form (the batter and butter need to go in hot). If you want a head start, you can bake it earlier in the day and reheat just before serving.
Frequently Asked Questions
Can I use frozen blackberries?
Yes. Use them straight from the freezer without thawing. Thawed berries release too much liquid and can make the cobbler soggy. You may need to add 5 to 10 minutes to the bake time when using frozen fruit.
Why is my cobbler runny or jiggly in the middle?
The most common cause is underbaking. Cobbler is done when the top is golden, the edges are bubbling, and the center springs back when gently touched. If you used frozen berries, expect a slightly juicier result and add a little extra bake time. An oven that runs cool can also leave the center wet, so an oven thermometer is helpful if this keeps happening.
Do I need to thicken the filling with cornstarch?
No. The cake-like batter absorbs the berry juices as it bakes, so no cornstarch is needed. If your blackberries are especially juicy or you’ve used frozen fruit, a slightly longer bake time will set things up nicely.
More Fruit Desserts You’ll Love
Watch How to Make It
Old-Fashioned Blackberry Cobbler
Equipment
- 8 x 8 inch baking dish
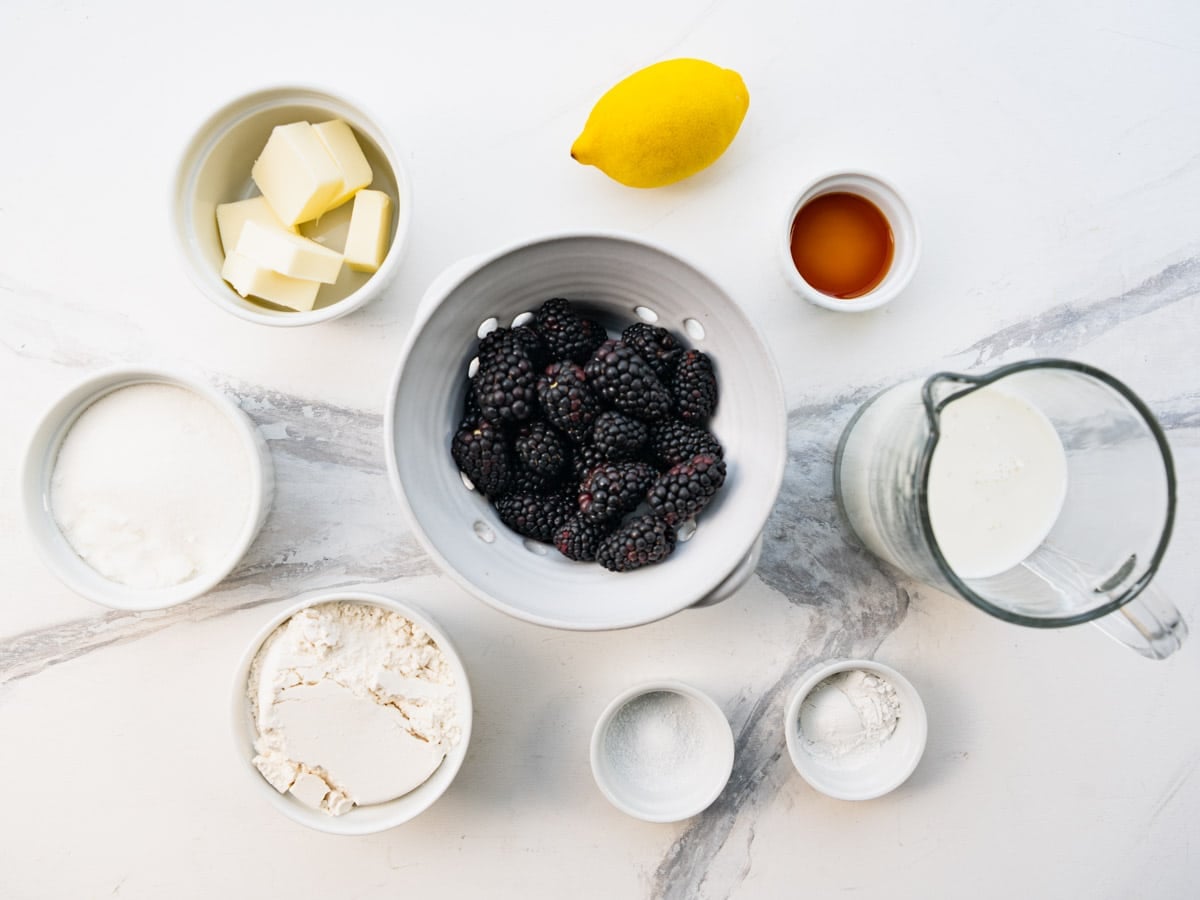
Ingredients
- 6 tablespoons salted butter
- 1 cup granulated sugar, plus 1 to 2 tablespoons for topping
- 1 cup all-purpose flour
- 2 teaspoons baking powder
- ¼ teaspoon kosher salt
- 1 cup whole buttermilk, well shaken (or substitute with whole milk)
- 1 teaspoon vanilla extract
- 2 cups fresh blackberries (or frozen, not thawed)
- 1 tablespoon lemon juice
- 1 teaspoon lemon zest (optional, but recommended)
- For serving: vanilla ice cream or whipped cream
Instructions
- Preheat the oven to 350°F. Place the butter in an 8×8-inch baking dish, a 9 or 10-inch cast iron skillet, or another 2-quart baking dish. Transfer it to the oven just until melted, about 3 to 4 minutes. Keep a close eye so the butter doesn’t brown too much.

- In a small bowl, gently toss the blackberries with the lemon juice and the lemon zest. The lemon brightens the flavor and balances the sweetness without needing extra sugar in the fruit layer.
- In a large bowl, whisk together the sugar, flour, baking powder, and salt. Stir in the buttermilk (or milk) and the vanilla just until combined. The batter will be thin.
- Carefully remove the hot pan from the oven. Pour the batter directly over the melted butter. Do not stir.
- Spoon the blackberries evenly over the top, along with any juices. Do not stir. Sprinkle 1 to 2 tablespoons of sugar over everything for a lightly crisp, sweet finish.
- Bake for 40 to 50 minutes, or until the top is golden brown and set, and the edges are bubbling. Tent the dish loosely with foil if the top starts to get too dark before the batter is cooked through. The batter will rise up around the fruit as it bakes, creating that classic cobbler texture.
- Let the cobbler rest for about 10 minutes before serving. Scoop it warm into bowls and top with vanilla ice cream.

Notes
- Don’t stir. Pour the batter over the melted butter, then scatter the berries on top. The layered start gives the cobbler its puffy, golden texture.
- Frozen berries work. Use them straight from the freezer without thawing. Add 5 to 10 minutes to the bake time.
- No buttermilk? Stir 1 tablespoon of lemon juice or white vinegar into a measuring cup, then fill with whole milk to reach 1 cup. Let it sit for 5 minutes before using. You can also just use regular milk (the recipe will still work).
- Pan options. An 8×8-inch baking dish, a 9 or 10-inch cast iron skillet, or any 2-quart baking dish all work. Cast iron yields the crispest edges.
- Other berries. Blueberries, raspberries, or a mix all work well. Stick with about 2 cups total of berries.
- Doneness cue. The cobbler is done when the top is golden, the edges are bubbling, and the center isn’t jiggly.
- Storage. Cover and refrigerate leftovers for 3 to 4 days, or freeze for up to 2 months.


Did you make this recipe?
If you enjoyed this recipe, please leave a comment with a 5-star review at the bottom of the post. Thank you!