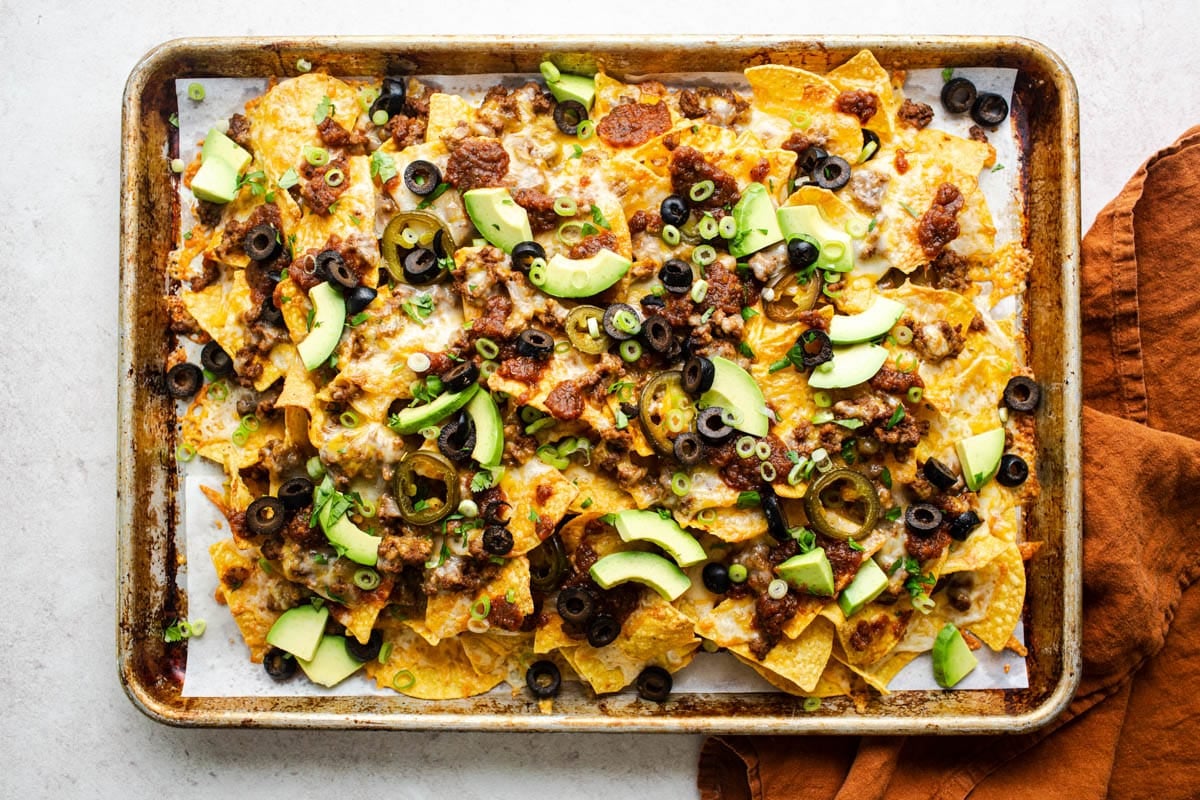
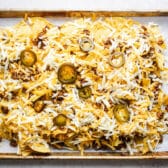
A tray of these loaded ground beef nachos makes a fun and easy weeknight dinner or game day snack. Layer crunchy tortilla chips with zesty taco-seasoned beef, melty cheese, and jalapeños, then pile high with all of your favorite toppings.
If you love nachos, you’ll also want to try Crock Pot chicken nachos and pulled pork nachos. And for more crowd-pleasing appetizers and snacks, check out my Game Day recipes collection.
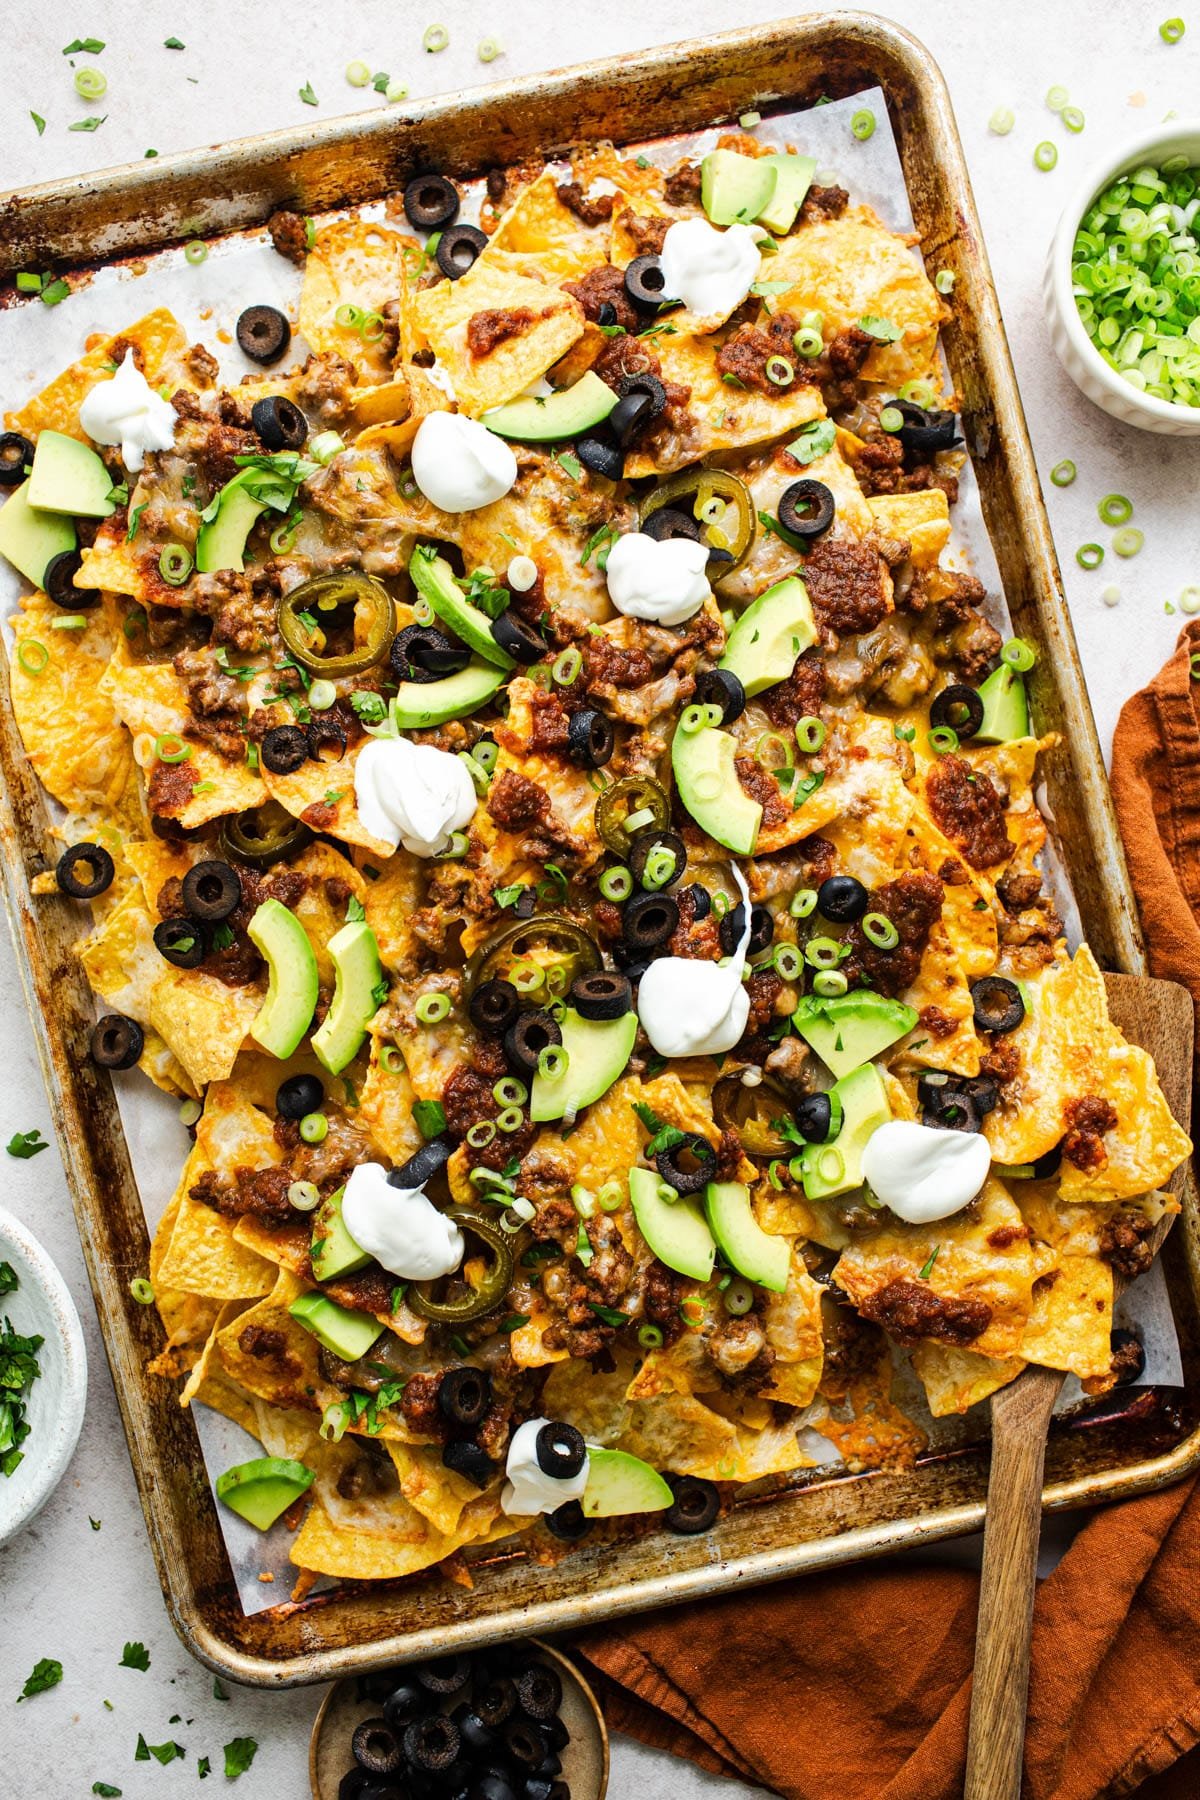
Table of Contents
Before You Get Started
- Layer your nachos in two rounds. This is the secret to nachos where every chip gets cheese and toppings. If you just pile everything on top, you’ll end up with loaded chips on the surface and plain, naked chips underneath.
- Drain the beef well. After browning the ground beef and onion, drain off all the fat before adding the taco seasoning. Excess grease will make your chips soggy and leave puddles on the pan.
- Serve immediately. Nachos are at their best straight from the oven when the cheese is melty and the chips are still crispy. The longer they sit, the soggier they get, so have your toppings ready to go before the nachos come out.
How to Make Ground Beef Nachos
Here’s how to make loaded nachos at home. You’ll find detailed instructions in the recipe card below, but this walkthrough will help you nail the details.
Step 1: Grate Your Cheese
Start by grating your cheese by hand. Pre-shredded cheese contains anti-caking agents that prevent it from melting smoothly.
For that ooey, gooey, stretchy cheese pull, freshly grated is the way to go.
I use half sharp cheddar (for flavor and tang) and half Monterey Jack (for its smooth, melty texture). Other good options include Pepper Jack, Colby, queso fresco, or cotija cheese.
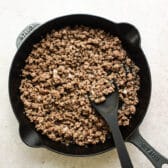
Step 2: Season the Beef
Cook and stir the ground beef and onion in a skillet over medium-high heat until the meat is no longer pink and the onion is tender.
Drain off all the fat, then return the beef to the skillet.
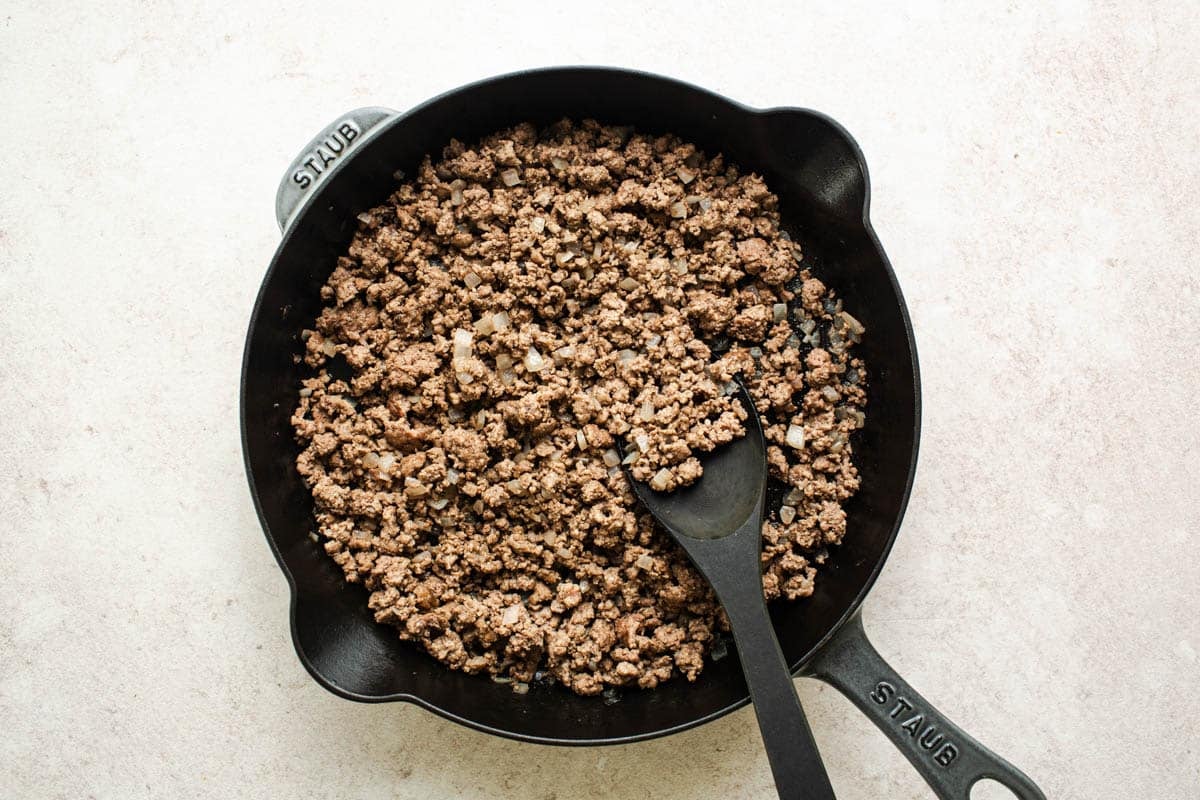
Add a packet of taco seasoning (and water if the packet calls for it), then cook according to the package instructions. You can also use homemade taco seasoning made with chili powder, cumin, paprika, and other zesty spices.
⇢ Prevent Soggy Nachos: Let the seasoned beef simmer until most of the liquid evaporates. This concentrates the flavor and prevents soggy nachos.
Step 3: Layer the Nachos
Grab a large rimmed baking sheet and line it with foil or parchment for easy cleanup. Now here’s the key: build your nachos in two layers.
Start with half of your tortilla chips, then top with half of the cheese, half of the beef, and half of the jalapeños (if using).
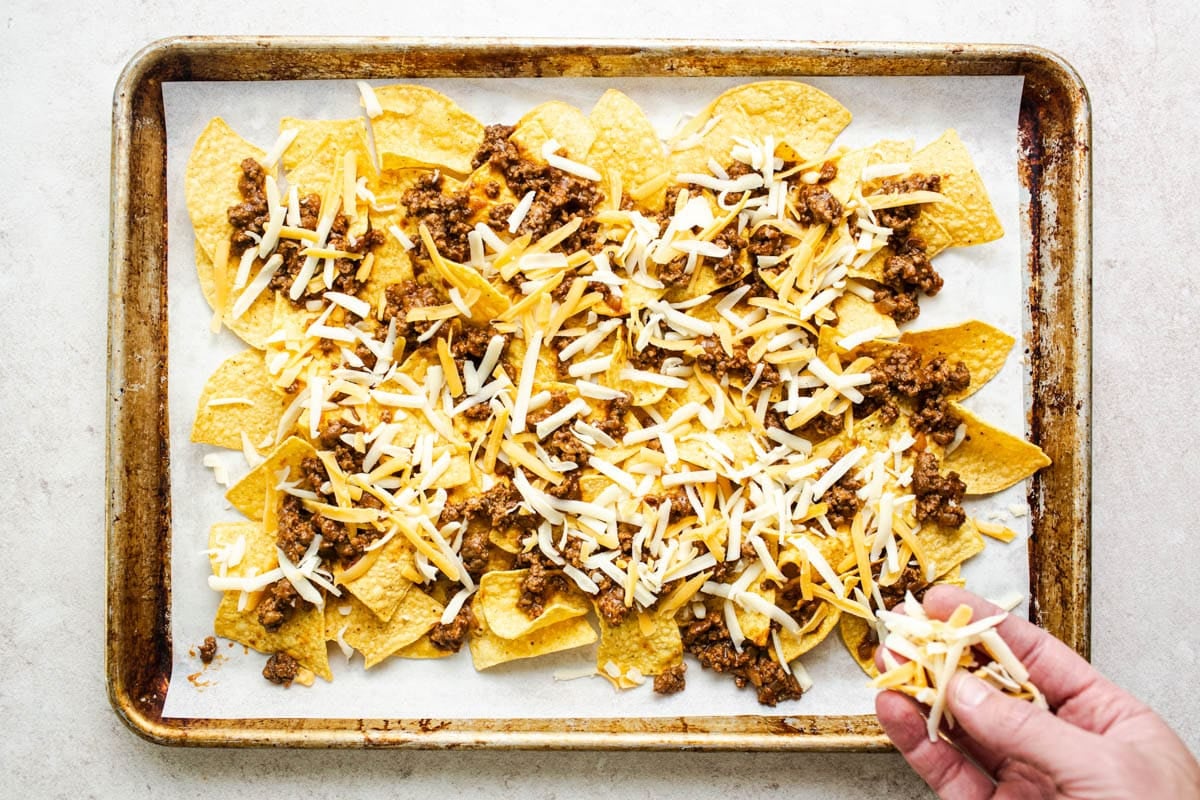
Repeat with the remaining ingredients. This layering method ensures toppings reach every chip, not just the ones on top.
⇢ Use thick, sturdy corn tortilla chips that can stand up to the toppings. I like the freshly made in-store chips from the deli section, or restaurant-style chips like Tostitos Cantina Traditional. Avoid thin, crispy varieties since they tend to get soggy or break under the weight of the toppings.
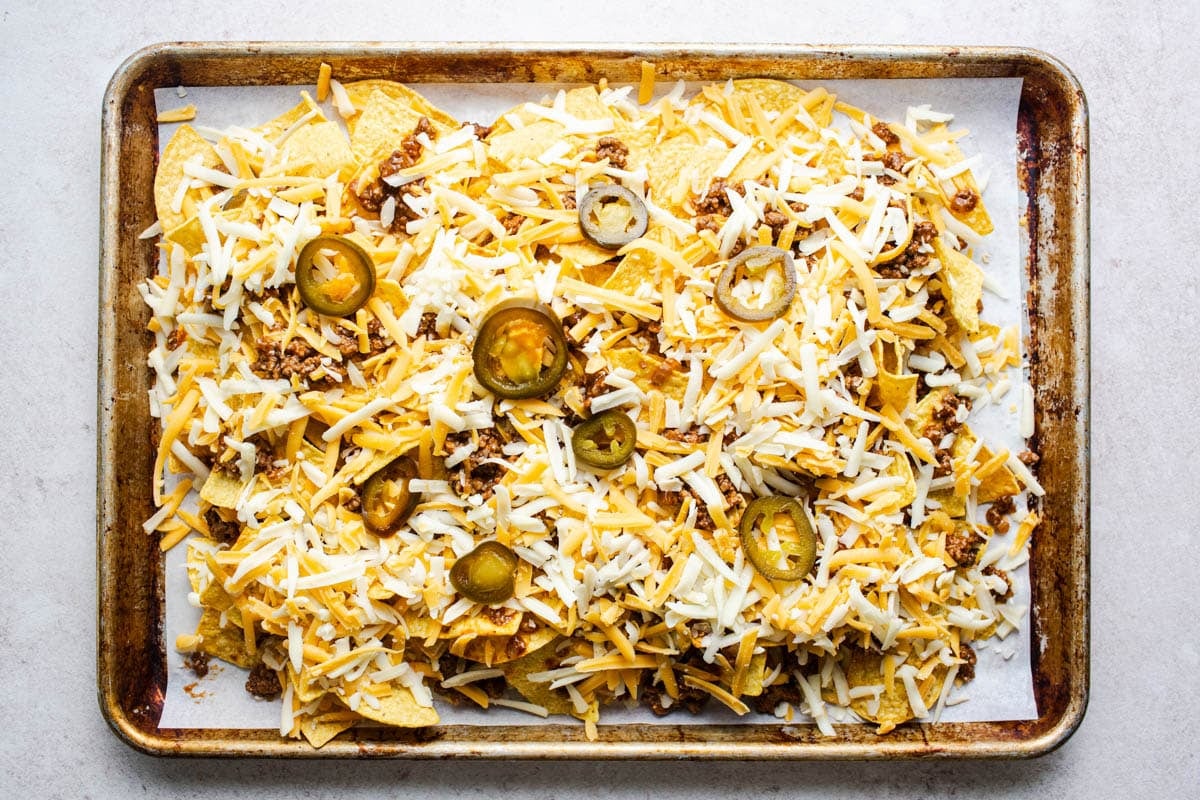
Step 4: Bake Until Melty
Pop the nachos in a 400°F oven and bake for 10 to 15 minutes, just until the cheese melts and the edges start to turn golden brown.
Keep a close eye on them toward the end. Nachos can go from perfectly melted to burnt quickly, so pull them out as soon as the cheese looks bubbly and the edges crisp up.
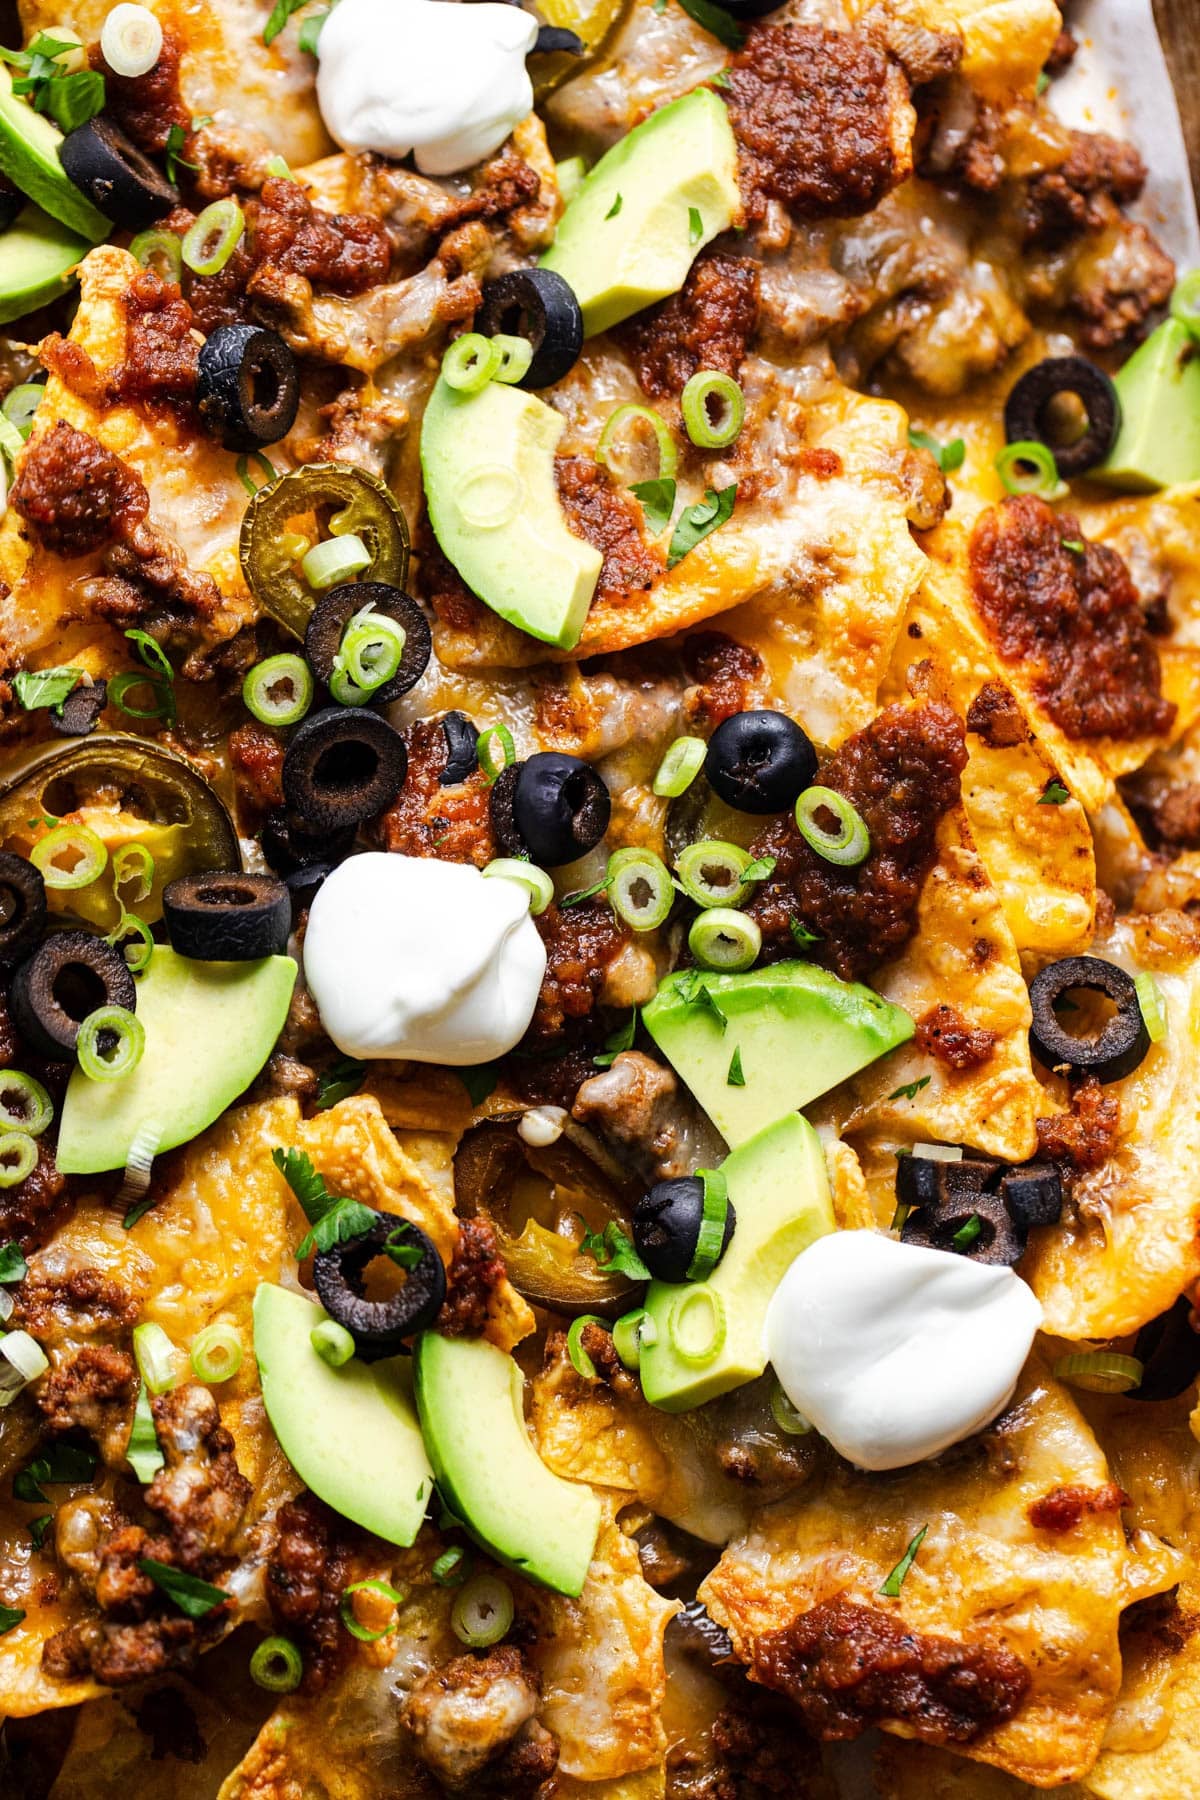
Step 5: Add Toppings and Serve
Remove the nachos from the oven and add your favorite toppings right away. Then serve immediately while the cheese is still warm and stretchy and the chips are crispy.
This was my first time making nachos and they were easy, came out perfect & were delicious. This recipe is a keeper.
– Kathryn
Customize Your Nachos
One of the best things about homemade nachos is how easy they are to customize. Whether you’re feeding picky eaters or setting up a nacho bar for a party, everyone can build their own perfect plate.
Topping Ideas
Set out a spread and let everyone add their favorites:
- Chopped tomatoes or salsa
- Guacamole or diced avocado
- Sour cream
- Sliced black olives
- Chopped green onions or fresh cilantro
- Sliced radishes
- Extra jalapeños
- Lime wedges or a squeeze of fresh lime juice
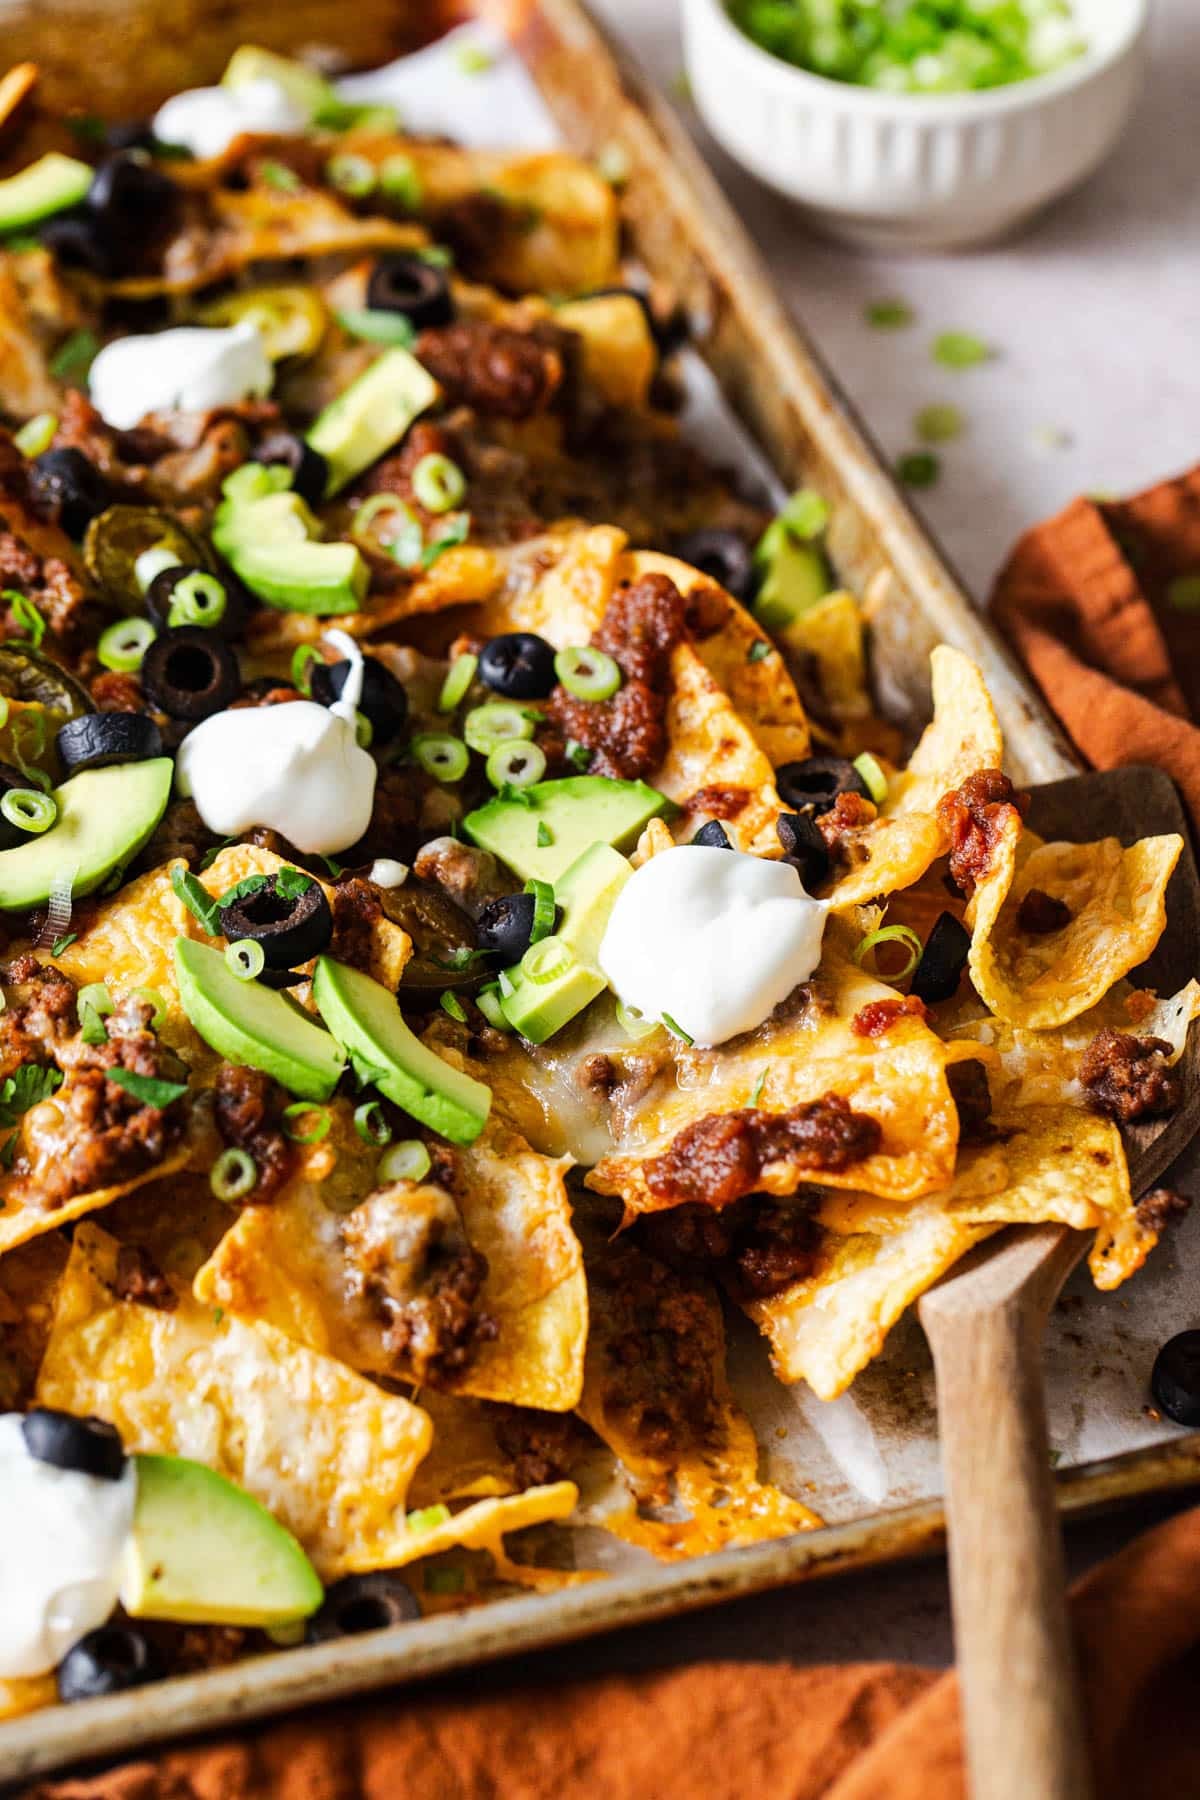
⇢ Tip: Drizzle sour cream or salsa over the top of the nachos for a restaurant-style finishing touch.
Easy Variations
- Add beans: Scatter drained and rinsed black beans or pinto beans over the chips before baking. Season them lightly for extra flavor.
- Go meatless: Skip the beef entirely for vegetarian nachos loaded with beans, cheese, and veggies.
- Swap the protein: Use ground turkey, ground chicken, or leftover pulled pork instead of beef.
- Use Doritos: Swap regular tortilla chips for Doritos to add extra crunch and flavor.
- Double it: Making nachos for a crowd? Double the recipe and bake on two separate sheet pans.
What to Serve With Nachos
Nachos work great as a main dish for a casual dinner, but they’re also perfect as part of a game day spread or party appetizer lineup.
For a simple side, try ranch-style beans or refried beans. A fresh corn salad adds a cool, crunchy contrast.
If you’re building an appetizer spread, pair the nachos with creamy spinach dip and cut-up veggies, Mexican cornbread, or a simple green salad.
Preparation and Storage Tips
Nachos are definitely best served fresh and warm, straight from the oven. Once they sit, the chips start to absorb moisture and lose their crunch. That said, here’s how to handle leftovers and make-ahead prep:
How to Store: Leftover nachos will keep in an airtight container in the refrigerator for 1 to 2 days, but expect the chips to soften.
How to Reheat: Spread the nachos on a baking sheet and warm them in a 300°F oven for 5 to 10 minutes, just until heated through. The oven helps crisp them up better than the microwave.
Make-Ahead Tip: You can brown and season the ground beef up to 3 days ahead and store it in the fridge. When you’re ready to eat, reheat the beef, layer the nachos, and bake. This makes game day or party prep much easier.
How to Freeze: Freeze the cooked, seasoned ground beef in an airtight container for up to 3 months. Thaw overnight in the fridge and use as directed. I don’t recommend freezing assembled nachos since the chips won’t hold up.
Frequently Asked Questions
Do you cook ground beef before putting it on nachos?
Yes! Always cook and season your ground beef before assembling the nachos. Raw beef won’t cook properly in the short time the nachos bake, and you’d end up with undercooked meat. Brown the beef, drain the fat, add taco seasoning, and let most of the liquid cook off before layering.
What’s the secret to nachos that aren’t soggy?
Three things make the biggest difference: use thick, sturdy tortilla chips that can hold up to toppings; drain your ground beef well so there’s no excess grease; and serve the nachos immediately while they’re still hot. Layering in two rounds also helps because the cheese acts as a barrier between wet toppings and chips.
What cheese is best for nachos?
For the best melt, use freshly grated cheese (not pre-shredded). A mix of sharp cheddar for flavor and Monterey Jack for smooth, stretchy texture works great. Pepper Jack, Colby, and Mexican cheese blends are also good options. Avoid pre-shredded bags if you want that classic ooey, gooey cheese pull.
What kind of ground beef is best for nachos?
Ground beef with about 80/20 lean-to-fat ratio works well. It has enough fat for flavor and moisture but not so much that the nachos get greasy. Just be sure to drain off the fat after browning before you add the taco seasoning.
More Nacho and Taco Night Ideas

Did you make this recipe?
If you enjoyed this recipe, please leave a comment with a 5-star review at the bottom of the post. Thank you!
Watch How to Make It

Ground Beef Nachos
Equipment
- large rimmed baking sheet
Ingredients
- 1 lb. ground beef
- ½ cup finely chopped onion
- 1 (1 ounce) packet taco seasoning mix (or use homemade taco seasoning blend)
- 1 large bag tortilla chips (about 11 ounces)
- 4 cups grated cheese (try cheddar, Monterey Jack, Pepper Jack, Colby, or a combination of these)
- ½ cup pickled jalapeños, patted dry (optional)
- Optional toppings: chopped tomato, salsa, sour cream, sliced black olives, chopped green onions, fresh cilantro, diced avocado or guacamole
Instructions
- Preheat oven to 400°F. Line a large rimmed baking sheet with foil or parchment paper and set aside.
- In a large skillet over medium-high heat, cook the ground beef and onion until the onion is tender and the meat is no longer pink. Drain off the fat and return the beef to the skillet.

- Add taco seasoning (and water if called for on the packet). Cook according to the package instructions, letting most of the liquid evaporate.
- Arrange half of the tortilla chips on the prepared baking sheet. Top with half of the cheese, half of the beef mixture, and half of the jalapeños (if using). Repeat layers with remaining ingredients.
- Bake until the cheese melts and edges just start to turn golden, about 10 to 15 minutes. Watch closely to prevent burning.
- Remove from oven, add desired toppings, and serve immediately.

Notes
- Grate cheese by hand. Pre-shredded cheese contains anti-caking agents that prevent smooth melting. Freshly grated cheese gives you that ooey, gooey texture.
- Use sturdy chips. Thick, restaurant-style corn tortilla chips hold up best under toppings. Avoid thin, crispy varieties that get soggy or break.
- Drain the beef well. Excess grease will make your chips soggy. Let the seasoned beef simmer until most liquid evaporates.
- Layer in two rounds. This ensures every chip gets cheese and toppings, not just the ones on top.
- Watch the oven closely. Nachos can burn quickly. Remove them as soon as the cheese is bubbly and edges are golden.
- Serve immediately. Nachos are best straight from the oven. The longer they sit, the soggier the chips become.
- Make-ahead option. Cook and season the beef up to 3 days ahead. Reheat before assembling and baking.
Nutrition
Originally published in August, 2021, this post was updated in February, 2026.


Looks delicious.
Thanks, Claudia!
I used my own taco seasoning instead of packaged.I added an undrained can of Rotel tomato & green chili instead of 1/4 cup of water..Also topped with chopped onion,lettuce,& tomatoes before serving. Along with the squeeze guacamole & sour cream.Delicious. Thank you for sharing.
Sounds perfect, Sallye! Thanks for your note!
what iron pan is this?
Hi, Charles! That’s the carbon steel oval roaster from Smithey. Here’s the link: https://smithey.com/collections/carbon-steel/products/carbon-steel-oval-roaster
This was my first time making nachos and they were easy, came out perfect & were delicious. This recipe is a keeper.
Thank you, Kathryn! We’re so glad you enjoyed them.
Hi Blair:
My name is Vincent and I’m a single guy who recently was kind of pushed into cooking. It turns out I like it and I’m getting bored with the normal stuff I make.
I want to expand my cooking skills and meals. But I LOVE your basic, home cooked, farm food.
I haven’t looked on your website a lot yet, but I plan to.
I stumbled upon your site looking for a “down to earth” recipe for nachos.
I found one that’s perfect for me, along with some other types of recipes that also look delicious.
I’m going to try your nachos and come back for more.
THANK YOU
Vincent
Hi Vincent,
WE’re so happy to have you here and appreciate your kind words! We hope you enjoy the nachos and any other recipes you try.