With just 5 ingredients and about 10 minutes of hands-on prep, you can bake a loaf of crusty no-knead Dutch oven bread! This quick recipe doesn’t need to rest overnight, so you can enjoy artisan-style bread the same day you stir it together.
My dad created this recipe for the perfect loaf of homemade bread. It has the taste and texture of classic French bread (a chewy crust and a light, tender crumb) but it doesn’t require a mixer, kneading, or an overnight rest.
If you love homemade bread recipes, be sure to try this baguette bread, this English muffin bread, this easy beer bread, and this jalapeño cheddar bread, too!

Table of Contents
Why a Dutch Oven Works So Well
A cast iron Dutch oven is the secret to bakery-quality bread at home. When you preheat the pot and add your wet dough, the heat reacts with the moisture to create steam. That steam keeps the crust soft longer so it can continue to expand during baking. It also gelatinizes the starches on the surface, creating a golden, glossy crust with beautiful blisters and crackle.
The tight-fitting lid traps all of that steam inside, giving you artisan results without a professional oven.
Before You Get Started
- Use warm (not hot) water. The water should feel like warm bath water, around 105°F to 110°F. Water that’s too hot will kill the yeast; too cold and the yeast won’t activate properly.
- Expect a wet, sticky dough. No-knead bread relies on a very wet dough. This allows the proteins to form gluten on their own without kneading. Don’t be tempted to add too much extra flour.
- Choose the right size Dutch oven. A 4 to 6-quart Dutch oven works best. Smaller pots (4-quart) yield a taller, rounder loaf, while larger pots produce a wider, flatter loaf. Both taste great, but the shape will differ.
How to Make No-Knead Dutch Oven Bread
This bread comes together in simple stages: mix, rise, shape, rise again, and bake. Here’s how to get perfect results every time.
Step 1: Mix the Dough
In a large measuring cup or medium bowl, stir together the warm water, yeast, and sugar. Set it aside for 5 to 10 minutes while the yeast softens and becomes foamy. You’ll know it’s ready when the surface looks bubbly and smells yeasty.
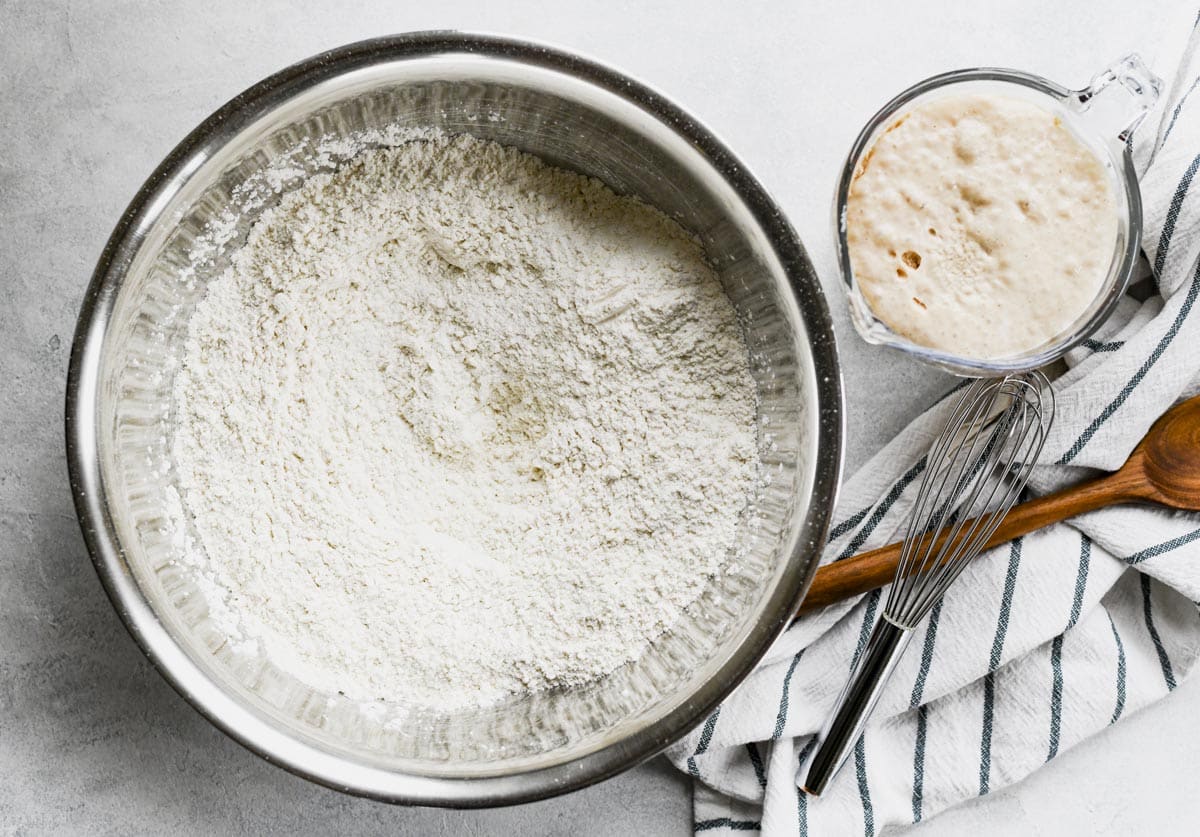
Meanwhile, whisk together the flour and salt in a large bowl. Make a well in the center of the flour mixture, pour in the yeast mixture, and use a wooden spoon to stir until a shaggy, rough dough comes together. The dough should pull away from the sides of the bowl.
** Tip: If the dough sticks to the bowl, add flour one tablespoon at a time. If it’s too dry with pockets of flour remaining, add water one tablespoon at a time.

Step 2: First Rise
Transfer the dough to a greased bowl and cover it with a kitchen towel or plastic wrap. Let it rise in a warm spot until doubled in size, about 1 ½ to 2 hours.
** Quick Note: If your dough isn’t rising, check the temperature of your kitchen. You want a warm spot that’s around 70°F to 75°F. A cold kitchen will slow the rise significantly.

Step 3: Shape the Dough
Dust a piece of parchment paper generously with flour. Nudge the dough from the bowl onto the floured parchment. Pat your hands with flour (the dough is very sticky!) and gently fold in the edges to form a loose ball.
Don’t stress about making it perfect. We’re making a rustic loaf of bread, not a beauty contest entry. A few cracks and uneven edges add character.

Step 4: Second Rise
Lift the parchment paper and dough ball into a smaller bowl. Cover with a kitchen towel or plastic wrap and let the dough rise again for about 30 to 60 minutes.

Step 5: Preheat the Dutch Oven
While the dough rises for the second time, place your 4 to 6-quart cast iron Dutch oven (with its lid) into the oven. Preheat the oven to 470°F. You want the Dutch oven incredibly hot when you add the dough because that heat creates the steam essential for a crusty loaf.
You do not need to grease or oil the Dutch oven. The parchment paper prevents sticking.
Step 6: Bake the Bread
When the oven reaches temperature and the dough has finished its second rise, carefully remove the hot Dutch oven (use oven mitts!). Use the edges of the parchment paper to lift and transfer the dough into the pot. Cover with the lid.
Bake for 30 minutes with the lid on. Then remove the lid and bake for an additional 10 to 15 minutes until the crust is deep golden brown. Keep a close eye on it during this stage to prevent over-browning.
Tip: If the top is browning too quickly, tent it loosely with foil for the last few minutes.

Step 7: Cool Before Slicing
Carefully remove the bread from the Dutch oven (it’s still very hot!) and place it on a wire cooling rack. Let it cool for at least one hour before slicing.
This step matters more than you might think. The bread is still cooking and steaming inside as it cools. Cutting into it too early can result in a gummy interior.
Once cooled, slice and serve with a warm bowl of chicken vegetable soup, ham bone soup, Italian sausage tortellini soup, slow cooker Italian wedding soup, Crock Pot potato soup, linguine with clam sauce, or sheet pan cabbage potatoes and sausage. It’s also perfect for grilled cheese sandwiches or the best piece of morning toast!

Storage
How to Store: This Dutch oven bread is a “lean bread,” meaning it doesn’t contain added fat to keep it soft and moist. As a result, it dries out quickly and is best enjoyed the same day it’s baked. You can store the whole loaf wrapped tightly in plastic at room temperature for 1 to 2 days, but the crust will soften. To keep the crust crispy, store the bread in an open paper bag at room temperature. Day-old bread is delicious when toasted for breakfast!
How to Freeze the Baked Loaf: Wrap the cooled loaf tightly in plastic wrap, then place in a freezer bag. Freeze for up to 2 months. Thaw at room temperature before serving.
How to Freeze the Dough: Prepare the dough as instructed and let it rise for 1 ½ to 2 hours until doubled in size. Form the dough into a loose ball, wrap it in greased plastic wrap, and place it in a freezer-safe container. Freeze for up to 2 months. When ready to bake, let the dough come to room temperature on the counter (covered) for 2 to 3 hours for its second rise, then bake as directed.
No-Knead Dutch Oven Bread Variations
Once you’ve mastered the basic recipe, try these easy variations:
- Herb Bread: Add 1 to 2 teaspoons of dried rosemary, thyme, or Italian herbs to the flour mixture.
- Garlic Bread: Mix in 1 teaspoon of garlic powder or 2 cloves of minced roasted garlic.
- Olive Oil Drizzle: Brush the top of the loaf with olive oil before the final bake for extra richness.
- Everything Bagel Topping: Sprinkle everything bagel seasoning on top of the dough before baking.
Absolutely amazing! I just made your recipe and it was fabulous! Your instructions were so easy to follow. I added rosemary and Italian herbs and olive oil to my bread and it came out just delicious. Thank you!
– Elizabeth
Frequently Asked Questions
What temperature should I bake Dutch oven bread?
For this recipe, bake at 470°F. The high heat creates steam inside the Dutch oven, which is essential for developing a crusty exterior and proper rise.
Should I bake with the lid on or off?
Start with the lid on for the first 30 minutes to trap steam and help the bread rise. Then remove the lid for the final 10 to 15 minutes to let the crust brown and crisp up.
Can I use bread flour instead of all-purpose flour?
Yes! Bread flour has more protein, which gives the loaf a slightly higher rise and chewier texture. All-purpose flour works great too, so use whichever you have on hand.
Why is my bread dense or gummy inside?
This usually happens for one of two reasons. The dough may not have risen long enough for the gluten to fully develop, or the bread wasn’t baked long enough. Also, be sure to let the bread cool completely (at least one hour) before slicing. It’s still cooking inside as it cools!
Do I need to preheat the Dutch oven?
Yes, preheating the Dutch oven is essential. The hot pot creates the burst of steam needed for a crispy crust and good rise. Always preheat with the lid on at 470°F.

This is the easiest most delicious bread I’ve ever made!
– Carrie Anne
5 stars for sure!!
I’ve made it twice and will be making again today. The crust is unreal….
More No-Knead Bread Recipes

Did you make this recipe?
If you enjoyed this recipe, please leave a comment with a 5-star review at the bottom of the post. Thank you!
Watch How to Make It

Dutch Oven Bread {No Knead!}
Equipment
Ingredients
- 2 cups warm water (about 105˚-110˚F)
- 1 (0.25 oz) envelope active dry yeast (about 2 ¼ teaspoons)
- 1 tablespoon sugar
- 4 cups all-purpose flour or bread flour
- 1 tablespoon kosher salt (reduce to 1½ – 2 teaspoons if you prefer a less-salty loaf)
Instructions
- In a large measuring cup or medium bowl, stir together the warm water, yeast and sugar. Set aside for 5-10 minutes while the yeast softens and becomes foamy. Meanwhile, in a large bowl, whisk together the flour and salt.

- Make a well in the center of the flour mixture. Pour the water and yeast mixture into the well and use a wooden spoon to combine until a shaggy, rough dough comes together and pulls away from the sides of the bowl. If the dough is too sticky, add more flour in small increments, about 1 tablespoon at a time. If the dough is too dry, add more water, 1 tablespoon at a time.

- Transfer the dough to a greased bowl, cover, and leave in a warm spot to rise until doubled in size, about 1 ½ – 2 hours.

- Dust a piece of parchment paper with flour. Nudge the dough from the bowl and dump it onto the floured parchment paper. Form the dough into a loose ball by gently folding in the edges. I pat my hands with flour since the dough is very sticky. Don’t stress — this doesn’t have to be perfect. We’re making a rustic loaf of bread!

- Lift the parchment paper and dough into another smaller bowl. Cover the bowl and let rise for about 30-60 minutes.

- While the dough is rising for the second time, place a 4-6 quart cast iron Dutch oven with its lid into the oven. Preheat the oven to 470°F. When the oven reaches temperature and the dough has risen for the second time, carefully remove the Dutch oven from the oven. Transfer the dough from the bowl to the Dutch oven using the edges of the parchment paper to lift the dough. Cover with the lid. Bake the bread for 30 minutes with the lid on the Dutch oven. Remove the lid and bake for an additional 10-15 minutes until crust is nicely browned (keep a close eye on it).
- Remove the bread from the Dutch oven carefully (it’s still very hot) and place on a cooling rack. Allow to cool for at least one hour before slicing.

Notes
- Bread flour vs. all-purpose: Bread flour yields a slightly higher rise and chewier texture, but all-purpose flour works great. Use whichever you have on hand.
- Water temperature matters: Aim for 105°F to 110°F (warm bath water). Too hot kills the yeast; too cold won’t activate it.
- Don’t skip the preheat: The Dutch oven must be very hot (preheated at 470°F) to create the steam needed for a crusty loaf.
- Lid timing: Keep the lid on for 30 minutes to trap steam, then remove for the final 10 to 15 minutes to brown the crust.
- Salt adjustment: Reduce to 1 ½ to 2 teaspoons if you prefer less salty bread.
- Cooling is essential: Wait at least one hour before slicing. The bread continues cooking inside as it cools. Cutting too early can result in a gummy interior.
- Dense or gummy bread? This usually means the dough didn’t rise long enough or the bread wasn’t fully baked. Make sure the dough doubles in size during the first rise.
- Storage tip: For the crispiest crust, store in an open paper bag at room temperature. Wrapped in plastic keeps it soft but the crust will lose its crunch.
- Freezer-friendly: Wrap the cooled loaf tightly and freeze for up to 2 months. You can also freeze the dough after the first rise.
Nutrition
Originally published in February, 2021, this post was updated in December, 2025.


Loved this recipe! Simple and easy to make. Its a favorite in our house now. Next time I make it might try to add some spices – rosemary, sesame, etc and see how it goes. Thank you.
Thank you, Paige! Yep, it’s very adaptable with the herbs, garlic, cheddar and jalapeno, cranberry walnut, etc. Glad it was a hit!
I found that the amount of water called for (2 cups) made the initial dough more like soup and I had to add at least another cup of flour to make it come together. Also, is it possible for you to put the number of grams of flour needed instead of just cups, as cup measuring can be very imprecise. The bread turned out fine after adding more flour, but didn’t have the nice big holes that I would have loved to see – it was definitely a tighter and spongier crumb.
Thank you for the feedback, Penny. We’re sorry the bread didn’t turn out as expected but are glad the bread still turned out well for you. We will see what we can do regarding the measurements. In the meantime, we hope you continue to enjoy other recipes on the site!
A hit every single time! So easy and adaptable. Everyone raves when I bring it to an event. Thank you so much for this perfect recipe!
We’re so happy to hear this, Janeen! Thank you for taking the time to leave a review.
Made this today and I’m already eating it. Has a nice crunchy outside with a nice soft inside perfect with a little bit of butter (or a lot) while warm. I’m just a little old lady and I have to use a very lightweight Dutch oven, but it’s working perfectly for my breads, which I will make into toast and sandwich sandwiches thank you
Thank you for the feedback, Marjorie. We’re so glad you enjoyed the recipe!