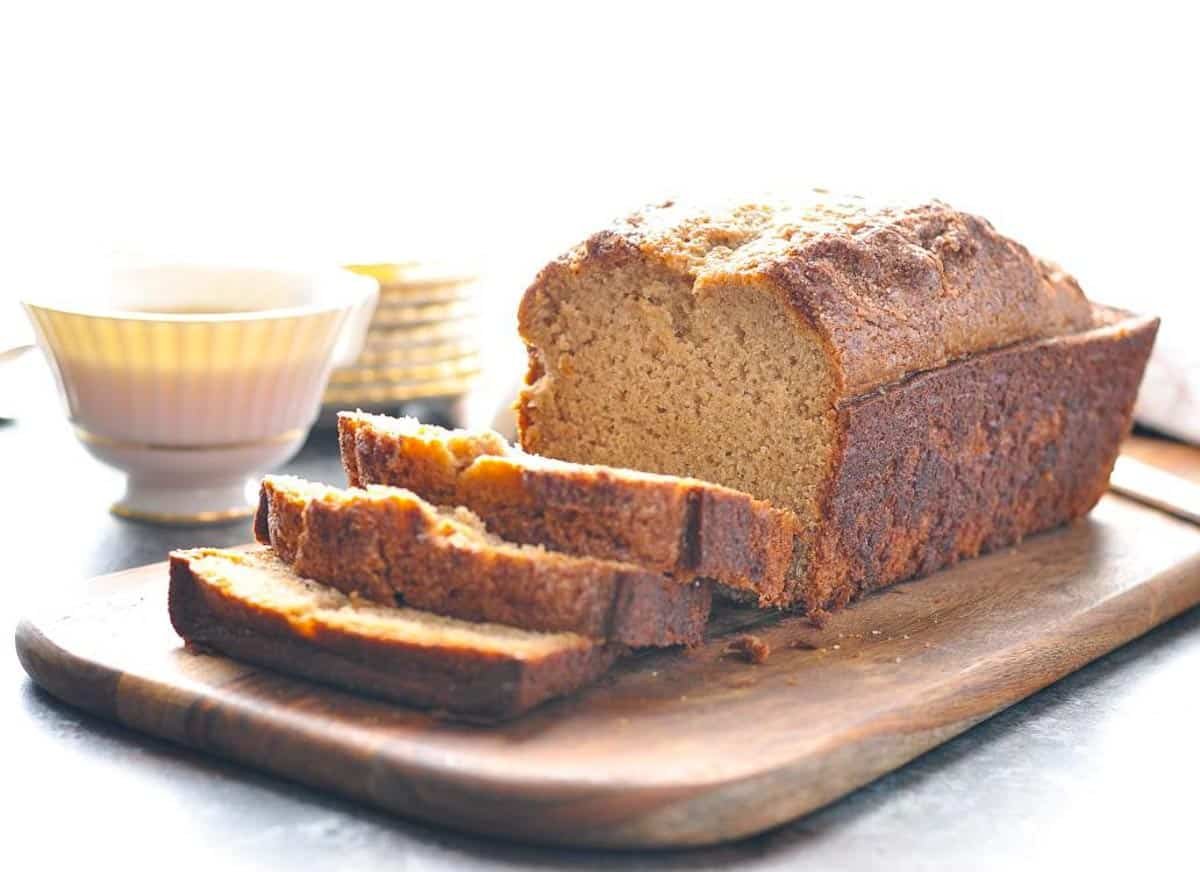
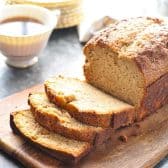
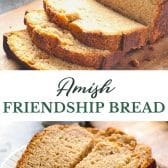
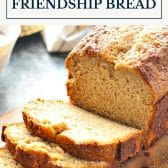
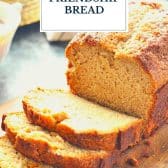
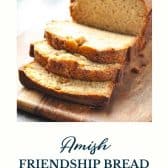
This easy Amish Friendship Bread is laced with notes of cinnamon, sugar, and vanilla for a sweet breakfast, snack, or dessert that pairs perfectly with a warm cup of coffee. There’s a printable starter recipe too, so you can pass it along to your friends!
For even more quick breads for your friends, try this banana nut bread and easy one-bowl pumpkin bread, or browse our full collection of muffins, scones and bread recipes.

Table of Contents
Thanks to my friend Jackie for sharing her recipe and a bag of her Amish Friendship Bread starter with me. Now I can’t wait to pass along the details to all of you as well!
Before You Get Started
• Use a non metal bowl and a wooden spoon for the traditional method.
• Keep the starter at room temperature so it can ferment properly.
• Expect bubbling, rising, and a mild yeasty smell. These are signs of healthy activity.
• Feed the starter on day 6 and again on day 10.
• Do not seal the bag tightly since gases need room to escape.
** Tip: A healthy starter should look slightly bubbly and creamy. If you see pink, green, or gray streaks or smell anything sharp or chemical, toss it and start fresh.
The Story Behind Amish Friendship Bread

Amish Friendship Bread starts with a simple starter made from flour, yeast, sugar, and milk. Traditionally, you divide the starter every ten days and share it with three friends, who then make their own bread and pass theirs along. It works just like a cozy baking chain that travels from kitchen to kitchen.
You do not have to wait for someone to gift you a bag of starter, though. You can easily make your own, bake a couple of loaves, and choose whether you want to keep the cycle going or share it with friends. It is completely up to you!
Printable Friendship Bread Starter Recipe
Download the Amish Friendship Bread Starter Recipe and printable directions here. I have also included the full set of ingredients and instructions in the printable recipe card at the bottom of this post, so use whichever version works best for you!

How to Make Amish Friendship Bread
Day 1: Make the Starter
Mix the warm water and yeast until foamy. Stir flour and sugar together in a large non metal bowl, then add the yeast mixture and milk. The batter will look thick and a little lumpy. Transfer it to a large zip top bag and leave it out at room temperature overnight.
** Pro Tip: If your yeast does not bubble after 10 minutes, start again with a fresh packet.
Day 2 to 5: Squish and Mix
Once a day, give the bag a gentle squish to keep everything mixed. This helps the starter ferment evenly.
Day 6: Feed the Starter
Add flour, sugar, and milk straight into the bag. Seal and squish until everything is well combined.
** Note: By the next morning, the bag should feel puffier and look more active.
Day 7 to 9: Keep Squishing
Give the bag one good daily squish. The starter may rise and fall during these days, which is completely normal.
Day 10: Divide and Feed Again
Pour the starter into a non metal bowl. Mix in more flour, sugar, and milk. Divide into one cup portions and spoon into four separate bags. Keep one bag for yourself to continue the cycle and share the other bags with friends.
** Pro Tip: Sometimes an extra half cup or so of starter appears if yours is especially active. Simply portion it out like the others.
Make the Bread with the Remaining Starter
The one cup of starter left in the bowl becomes your bread base. Add the eggs, flour, pudding mix, oil, sugar, milk, cinnamon, baking powder, baking soda, vanilla, and salt. Stir gently just until combined.
Fill the Pans and Add the Topping
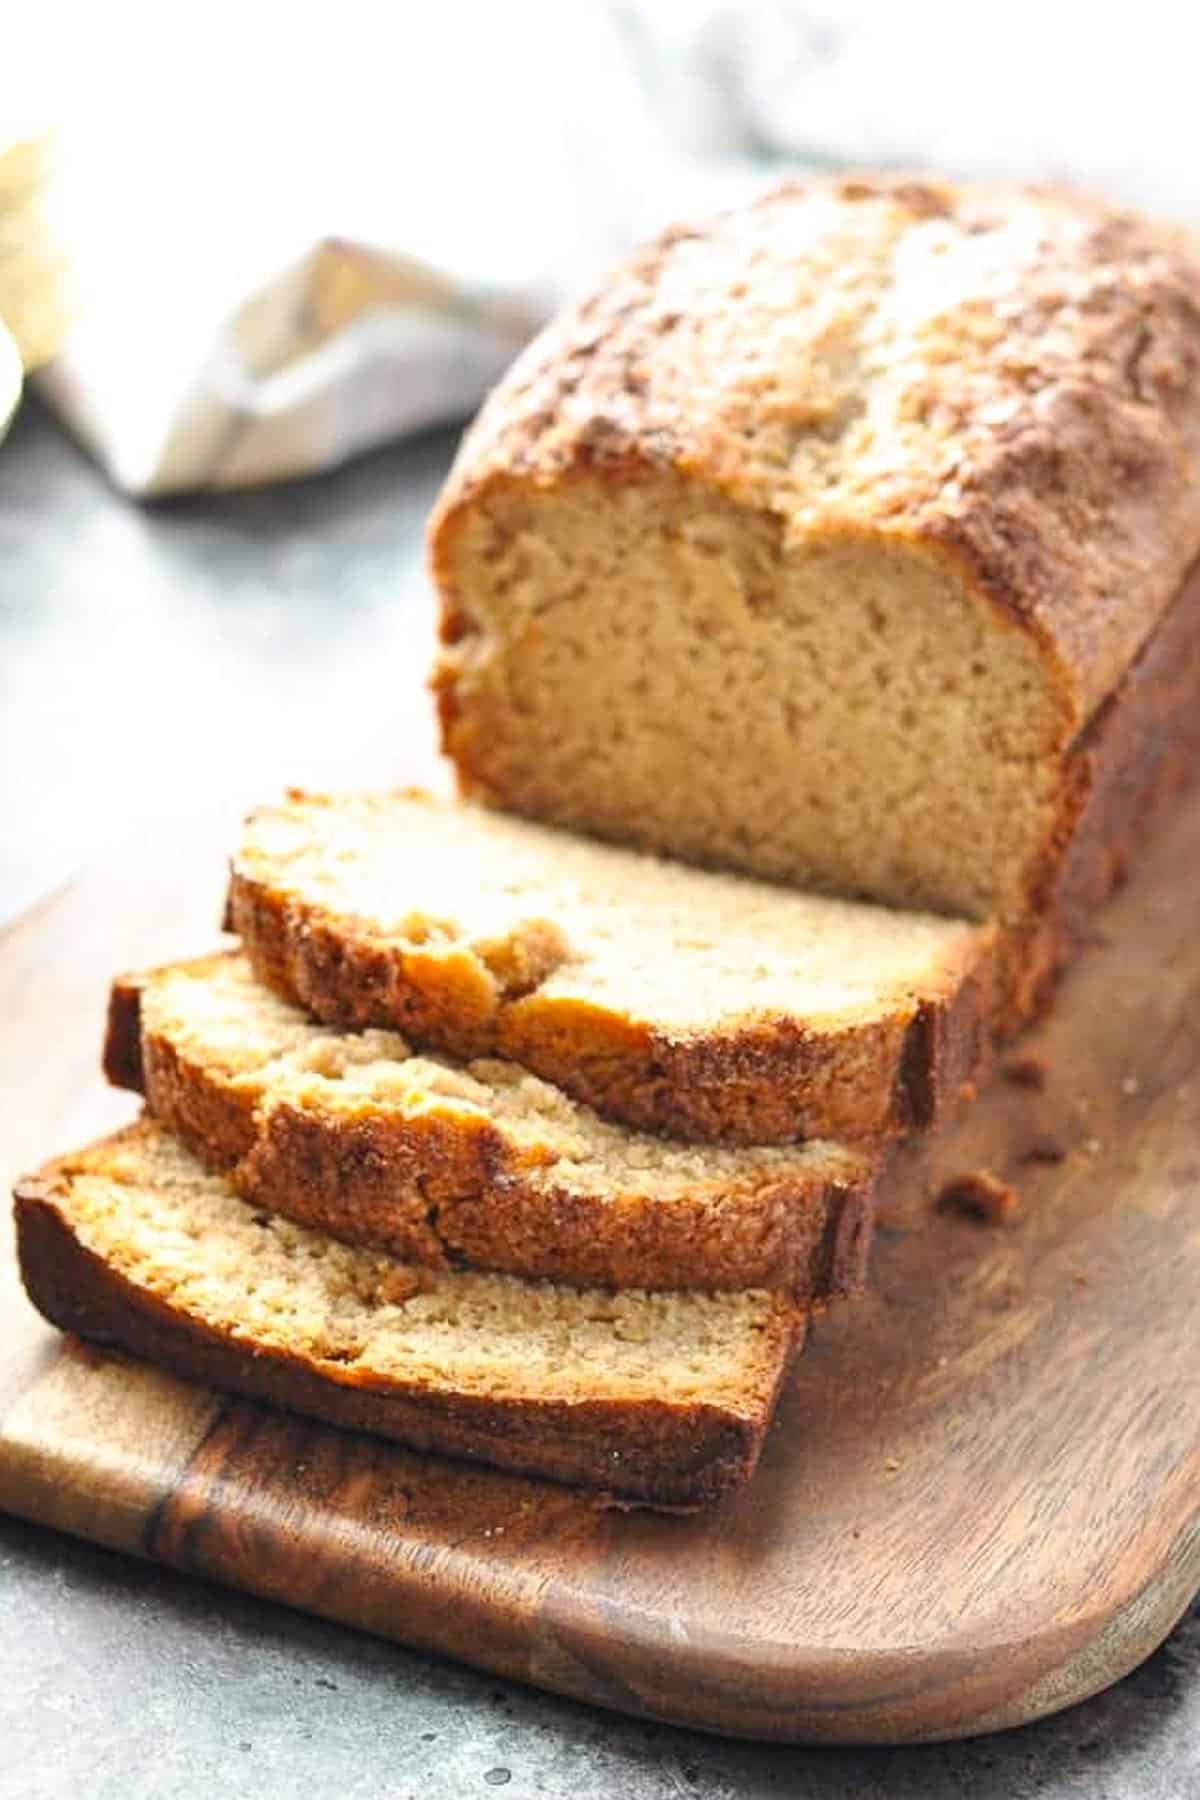
Divide the batter between two greased loaf pans. Mix cinnamon and sugar, then sprinkle it over each loaf so it bakes into a sweet crust.
Bake and Cool
Bake at 325°F until golden brown and the center tests clean. Cool completely before slicing so the loaves hold their shape.
Variations
• Use butterscotch, chocolate, pumpkin spice, or banana pudding mix.
• Add chocolate chips, chopped nuts, or dried fruit.
• Make banana friendship bread by stirring in mashed bananas.
• Add blueberries and lemon zest for a bright summer version.
• Make muffins instead of loaves and reduce the bake time.
** Tip: If adding wet mix ins like mashed banana or pumpkin, reduce the milk so the batter does not become too loose or dense.
Delicious! It takes like a cake.
– Tabitha
Storage, Freezing & Make Ahead
- Store baked bread at room temperature for 2 to 3 days.
- Freeze individual slices or whole loaves for up to 3 months.
- Freeze extra starter bags for up to 3 months.
- Thaw frozen starter bags completely at room temperature. Bake with them immediately, or start the 10-day cycle over on Day 1 to create even more bags of starter.
- Treat thawed starter as day 1 or bake with it right away.
Frequently Asked Questions
Can I make Amish Friendship Bread without a starter?
Yes! Here’s my recipe for Amish Friendship Bread without starter. It’s great if you’re short on time, or if you don’t want to mess with bags of starter.
What does Amish Friendship Bread taste like?
This cinnamon-flavored bread has the consistency of a pound cake or coffee cake, and is dusted with a cinnamon-sugar topping. The gelatin component in the vanilla instant pudding mix, along with plenty of oil, yield an incredibly moist and tender texture. Plus, thanks to the pudding mix, you get the added bonus of rich vanilla flavor.
How do I know if my starter has gone bad?
Spoiled starter may show mold or a pink or green tint. It may also smell sharp or like acetone. Discard and start fresh if you see any of these signs.
Can I skip squishing for a day?
Missing one day is usually fine. If several days pass without mixing, feed the starter and restart the cycle.
Why should I avoid metal bowls?
Traditional recipes warn against metal because of potential reactions during fermentation. Stainless steel is usually fine, but wooden spoons and plastic bowls guarantee no issues.
Can I make this without pudding mix?
Yes. The pudding makes the bread soft and moist, but you can use a homemade mix of cornstarch, sugar, and vanilla instead.
What can I do with extra starter?
Freeze it, bake extra loaves, or surprise more friends with a starter bag. You can also check out these 7 ways to use your Amish friendship bread starter. Pancakes, breads, and cupcakes galore!
Is Amish Friendship Bread the same as sourdough?
No, Amish friendship bread is a sweet sourdough starter since it includes milk and sugar. As a result, it has a much sweeter taste (and less tang) than a traditional sourdough starter.
Related Recipes

Did you make this recipe?
If you enjoyed this recipe, please leave a comment with a 5-star review at the bottom of the post. Thank you!
Amish Friendship Bread and Starter
Ingredients
TO MAKE THE STARTER ON DAY 1:
- ¼ cup warm water (about 110-115°F)
- 1 package active dry yeast (2 ¼ teaspoons)
- 1 cup all-purpose flour
- 1 cup granulated sugar
- 1 cup milk (use at least 2% milk or higher fat)
TO ADD TO THE STARTER ON DAY 6:
- 1 cup all-purpose flour
- 1 cup granulated sugar
- 1 cup milk (use at least 2% milk or higher fat)
TO DIVIDE THE STARTER ON DAY 10:
- 1 ½ cups all-purpose flour
- 1 ½ cups granulated sugar
- 1 ½ cups milk (use at least 2% milk or higher fat)
TO BAKE THE BREAD:
- 1 cup of Amish Friendship Bread Starter (what’s left in your large bowl after dividing on Day 10)
- 3 large eggs
- 2 cups all-purpose flour
- 1 large (5 ounce) box vanilla instant pudding mix (just the dry mix)
- 1 cup canola oil
- 1 cup granulated sugar
- 1 cup milk (use at least 2% milk or higher fat)
- 2 teaspoons ground cinnamon
- 1 ½ teaspoons baking powder
- ½ teaspoon baking soda
- ½ teaspoon vanilla extract
- ½ teaspoon salt
- For the Topping: ¼ cup of granulated sugar + 1 teaspoon ground cinnamon
Instructions
MAKE THE STARTER:
- In a small bowl, combine the warm water with the dry active yeast. Set aside until bubbly, 5-10 minutes.
- In a large non-metal bowl mix together the all-purpose flour and the granulated sugar. Stir in the milk and the yeast mixture.
- Cover loosely and leave on the countertop at room temperature until bubbly.
- Place starter in a large (gallon size) Ziploc bag. Seal bag and squish, squash, and mush until well combined. Let stand at room temperature overnight. The day that you prepare the starter is DAY 1.
- Day 2: Squish and mush the bag.
- Day 3: Squish and mush the bag.
- Day 4: Squish and mush the bag.
- Day 5: Squish and mush the bag.
- Day 6: Add to the bag – 1 cup of flour, 1 cup of sugar, and 1 cup of milk. Squish and mush the bag.
- Day 7: Squish and mush the bag.
- Day 8: Squish and mush the bag.
- Day 9: Squish and mush the bag.
- Day 10: BAKING AND DIVIDING DAY. Pour the entire contents of the starter bag into a non-metal bowl and add 1 ½ cups of flour, 1 ½ cups of sugar, and 1 ½ cups of milk. Measure out 4 separate batches of the starter batter (1 cup each) and place into large gallon-size Ziploc bags. Keep one bag of starter for yourself to continue the process (Day 10 is equal to Day 1) and give the other 3 to friends along with a copy of these instructions. After dividing the starter into separate bags, you should have about 1 cup of the starter batter still left in your large bowl. The starter that remains in the large bowl will be used for baking your Amish Friendship Bread.
BAKE THE FRIENDSHIP BREAD:
- Preheat oven to 325°F/160°C. Spray two loaf pans with nonstick cooking spray; set aside.
- To the bowl with the remaining 1 cup of starter, add the eggs, flour, instant pudding mix, canola oil, sugar, milk, cinnamon, baking powder, baking soda, vanilla, and salt. Stir just until combined.
- Divide the batter evenly between the two greased pans.
- In a small bowl, combine ¼ cup sugar and 1 teaspoon of cinnamon. Sprinkle the top of each loaf with the cinnamon-sugar mixture.
- Bake for 1 hour, or until a toothpick inserted in the center comes out clean. Cool on a wire rack and then remove bread from pans.
REPEAT THE 10-DAY PROCESS OR FREEZE THE STARTER:
- If you keep a starter bag for yourself, then DAY 10 is equal to DAY 1 again, and you can repeat the baking process every 10 days. If you do not want to continue the cycle right away, place the 1-cup bags of starter in the freezer for up to 3 months. When you take the starter out of the freezer, you can treat this as DAY 1, or you can use that starter right away to bake the loaves of Friendship Bread.
Notes
• Keep the starter at room temperature and squish the bag once a day.
• Feed the starter on day 6 and again on day 10 so it stays active.
• Expect bubbling and rising during fermentation. This is normal.
• Do not seal the bag tightly. Let excess air escape.
• Discard starter if it develops mold, odd colors, or an acetone smell.
• Stir the bread batter gently so the loaves stay tender.
• Do not prepare the pudding mix. Add it dry to the batter.
• Loaves freeze beautifully for up to 3 months.
• Extra starter can be shared, frozen, or used to bake more bread. Remember that you can also download a printable PDF of the Amish Friendship Bread Starter Recipe.
Nutrition
Originally published in November, 2017, this post was updated in November, 2025.

I picked your website because a google search showed a picture of your bread, and it looked exactly how I wanted mine to look, with a nice brown color and a tall rise in the middle. Most other breads look so flat. I followed your recipe and made this bread last night, it turned out perfectly. Thank you so much for sharing your recipe!
That’s great, Robyn! Thanks for your kind note. I’m so glad that you enjoyed it!
Hi Blair…. Had this starter years ago. Kept it going for 7yrs before I killed it. Didn’t know how to start one. Now I do thank you. Also wanted to say that I sprinkle the cinnamon and sugar in the pan first shaking it all around the pan, then adding mixture. Sprinkle a little on top. Also I change out different puddings for different flavors. Thanks again for the starter, I plan to start up again.
Wonderful, Laura! I hope that you enjoy the bread again! Love the idea of sprinkling the dish with cinnamon and sugar. YUM!
It’s now day 10 and I have to work late tonight. Have you ever let it go an extra day? I would just freeze it, but I think it’s silly to do that for just one day. Thanks!
Hi, Heather! I haven’t tried letting it go longer, but I think it should be fine! 🙂
I’m confused on day 10 do you add to it before deciding it in 4 bags
Hi, Trina! On Day 10, you’ll put all of the starter from the bag in a large bowl, and then add the extra ingredients listed. Then measure out 1 cup of the mixture into 4 separate bags. What remains left in the bowl will be used to bake your loaf of bread as instructed in the recipe. Hope that helps to clarify! 🙂
How long can it be stored in the baggies? Do you (or whoever you give it to) have to start as soon as it is received or can you wait until you’re ready to start?
Hi, Lauren! The bread needs to be baked on Day 10, so if you give it to your friend on Day 5, just make sure that she knows which day she should make the bread. Hope that makes sense! 🙂
RE: Out of friends, overwhelmed by starter
This starter was given to me, and we made delicious bread! I decided to keep all the new starters to make neighbor treats, but now I have four batches ready to go, and no way to get rid of 16 new starters. Is there a way to make the bread on Day 10 without creating the host of starters from each one? I only have so many friends and freezer space, and if the start becomes sentient, my kitchen is doomed.
Hi, May! I think that I understand your question. 🙂 I honestly don’t know what to suggest, since I’ve never tried making the bread without the full recipe. You might do what one reader suggested in a comment — just make the bread from scratch without a starter (see her recipe). That way you’re not creating a bunch of extra starters that you don’t have any use for. Hope that helps!
May, I have done this before (on a smaller scale). On day 10, I add the milk/flour/sugar. Then I put 1c of the mixture into two bags. I double the recipe for what you add to the bowl, then bake 4 loaves. I then either freeze or give away the two starter bags. I think we have 6 starter bags in our freezer right now, and are no longer slaves to ta starter 🙂
Theoretically, if you wanted to use up all of the starter mix, you could add the milk/flour/sugar, leave it all in the bowl, and multiply the other ingredients you add by 4. Then bake 8 loaves, and you’re good to go!
Hope this helps.
Has anyone used banana pudding and bananas in their recipe? How did it turn out?
Hi, thank you for the recipe. I made mine and it was absolutely delicious. I have a question though, what if it’s day 10 and I don’t want to share the starter, can I divide the whole batch of starter to make 4 loaves instead of 2 loaves only?
Yes! 🙂
On day 10, after i have added the milk sugar and flour and divided into 4 batches … do i add more milk flour and sugar to the bowl with the remainder ingredients? Im trying to decipher what it means to “add remaining ingredients”
Hey, Alisha! On Day 10, after you’ve divided the 4 batches, you can set aside 3 bags of starter to give to your friends and keep 1 cup of the starter for yourself. Put your 1 cup of starter in a non-metal bowl. To your 1 cup of starter in the bowl, add the 3 eggs, 1 cup of canola oil, 1 cup sugar, 1 cup milk, 2 teaspoons cinnamon, 1/2 teaspoon vanilla, 1.5 teaspoons baking powder, 1/2 teaspoon baking soda, 1/2 teaspoon salt, 2 cups flour, 1 large box dry instant pudding mix). Stir together. This is your batter. Divide the batter between two loaf pans and bake as instructed.
Enjoy!
Yes. Replace the pudding with banana pudding and add a mashed banana everything c else the same. Makes 2 nice loaves. Everyone loved it!
Great tip, Pam!
My recipe calls to feed on the 5th and 10th day. It is 1 cup sugar, 1 cup flour, and 1 cup milk added both times.
I accidentally added 1.5 cups each of sugar , flour and milk in day 6. What should I do? I am in day 10 today.
Hi, Shannon! I honestly don’t know. 🙁
Can you make this without the instant pudding? Very hard to find here, especially now with grocery shopping time extremely limited. Also, do you know if there is a substitution for yeast that can be used? Love this recipe and would love to be able to make it with my limited resources.
Hi, Teresa! I know, it’s definitely tough to find groceries at the moment! I’ve never tried the bread without the pudding mix, so I have no idea if it would work or how the consistency/flavor would change. I also haven’t tried making it without the yeast, and I worry that the texture would be really off without it. Not sure though!
It sounds like what you’re looking for it a cinnamon-sugar quick bread recipe. I would suggest using this recipe for my Brown Sugar Cinnamon Muffins, but bake the batter in a loaf pan instead of in a muffin tin. It doesn’t require pudding mix or yeast, but will give you a similar flavor. https://www.theseasonedmom.com/cinnamon-muffins/ If baking in a loaf pan, I would use a 350 degree F oven for about 45 – 55 minutes, or until cooked through. Hope that helps!
Thank you Blair. Just now saw your reply, so apologize for the late response. I have tried without the pudding and it didn’t change the consistency all that much. Of course living at 8000 ft above sea level makes baking a challenge to itself. Thank you for all your delicious recipes. Take care and God bless.
Great to know! Thanks, Teresa! 🙂
Just viewed recipe. The printable directions, 2 pages, with your logo, is missing milk in the bread baking part of recipe. I have a recipe for 1/2 cup of milk. Yours on web page says 1 cup. But not on the printable one! Which is correct??? Thanks.
Also, on day 10 my recipe calls for only 1 cup each of flour, sugar & milk. Will that be ok? Yours says
1 1/2 cup.
Hi, Barbara! I just double-checked both sets of directions and they both include 1 cup of milk when you go to bake your portion of the starter on baking day. Hope that helps. 🙂
Hello! I received a starter from a family member but got confused o. The day. So I didn’t add the Day 6 ingredients until Day 7. Should I bake on Day 10 even though the ingredients in the middle were added a day late or wait and bake on Day 11? Thanks in advance!
I would wait until day 11. I have waited to bake on day 11, and it was delicious! Plus that gives your day 6 (7) ingredients the full 4 days to ferment.
Yes — I agree with Heather! It won’t hurt to wait until day 11 to bake. 🙂
Is it okay to make it on day 10? That would be more convenient for me but I don’t want to mess it up lol
Yes, I would think so. 🙂
Hi, I was just wondering if you could use Instant Yeast for this bread. I have never tried it before and that’s what I have on hand. So I was just wonder if it would work just as good as the dry active yeast.
Hi, Jo! I think it can be done with no problem, but I haven’t tried it myself. Here’s a helpful link that explains how to swap out the regular dry active yeast for instant yeast in recipes: https://www.cooksillustrated.com/how_tos/6620-yeast-types
Hope that helps, and enjoy!
I am so grateful to find this recipe! I had it years ago when a friend of mine gave it to me with some starter. I continued making the recipe, in mini loaves so I could give one as a sample with the recipe and starter, for over a year. I also put walnuts in mine. People who were unable to make their own requested it from me every ten days! It’s so delicious! In many moves the recipe was lost. I now live in an Assisted Living facility and would like to make this for my new friends and my church family. Thank you so much for posting it. I also put it in my Pinterest account. That way I shouldn’t lose it again.
That’s awesome, Cheryl! I’m so glad that you found the recipe so that you can share it with your new friends now. Enjoy!!!
I made this recipe today,absolutely delicious I have 4 bags of starter. I can freeze them no problem. I am not able to give any bags away.. My question is, after I defrost a bag and do the day process, can I bake 2 loaves without making additional bags?
Hi, Linda! I’m not really sure how that would work. To just bake 2 loaves from the thawed bag, you’d have to discard 3/4 of that bag and then just use the remaining 1/4 of the bag with 1/4 of the dry ingredients called for in the recipe. It would be a lot of math, but you could do it. 🙂
I am at day 10, and I’m not sharing any. Can I just take 1 cup out of my bag and do the bake, with out having to add the last bit of milk, sugar and flour? I don’t see why I have to add to just throw it away. Every 10 days I’ve been baking and just want to stop for a while. Already have some in the freezer.
Hi, Linda! I honestly don’t know. I haven’t tried baking some of the mix without adding the other ingredients. If you give it a shot, let me know if it turns out. That would be helpful for others to know, too. 🙂
I finally tried this yesterday. It worked well and the bread was great. The only difference was that the loaves were smaller than usual. So adding the extra flour, sugar and milk must increase the batter a little to make 2 loaves. Next time I will make one large loaf and some smaller loaves with what is left.
I’m not understanding why I would have to discard 3/4 of bag. Can’t I just use 1 cup, before I add on day 10, and then add baking ingredients to bake? Wouldn’t it be the same as day 10 instructions without adding? I just feel it is such a waste to add and throw it out.
Hi Linda! Removing a portion is a component in every starter to achieve the desired end result. You have to do the same for sourdough starter too. You don’t need to toss it though; you can use it in a recipe instead. Try subbing for sour cream in cake or tea bread. I bet it would be delicious!
Thanks for explaining that, Robyn! 🙂
Delicious.! It takes like a cake.
Thanks, Tabitha! I totally agree — such a treat! 🙂
I got a starter from a friend and just baked the bread two days ago. It was delicious! My husband loved it. I was wondering if I could add mashed bananas to make it like a banana bread? Would I leave something out and use the banana as a substitute maybe? Maybe the milk? Thanks! Was also glad to learn I can freeze the starters. I was only able to give one away so still have 3.
Hi, Christine! I’m so glad that it was a hit! Bananas are a great substitute for some of the fat that’s typically called for in quick bread recipes. I would try replacing half of the oil with an equal amount of mashed bananas and see how that works. Let us know if you give it a shot!
Hi! Just made this bread at it was delicious!
Question.. the recipe says to put a cup of starter into 4 bags, then make bread with what is left in the bowl. With the 4th bag you save for yourself, can I just make bread 10 days later? Or do I have to split that bag into 4 again?
Hi, Rosie! Great question…and I’m not sure that I have the correct answer since I’ve never tried to think this through before. Maybe someone else can weigh in, too! My thought is that since you have to “feed” the starter to keep it alive by adding the flour, sugar and milk on Day 6, you’ll need to divide it up again at the end to keep the ratios/proportions correct for each loaf.