This easy chili con carne recipe works well on the stovetop or in the slow cooker for a simple, cozy, and healthy dinner that suits your busy life. Rich with tomatoes, seasoned ground beef, and tender beans, it’s the kind of hearty bowl the whole family can agree on.
It’s my husband’s all-time favorite chili, and it makes a regular appearance on our weekly meal plan when the weather turns cool.
For more chili inspiration, try this bold beef chili, the easy cowboy chili, or even this taco chili. You can also browse our full collection of the 20 Best Chili Recipes.

Table of Contents
Before You Get Started
A few simple tips will help you get the best results:
- Brown the beef well. Don’t rush this step. Let the meat develop some color before breaking it up. This builds deeper flavor in the finished chili.
- Drain the fat after browning. This keeps the chili from becoming greasy and lets the tomato and spice flavors shine through.
- Give it time to simmer. The longer the chili simmers, the more the flavors meld together. At least an hour on the stovetop (or 4+ hours in the slow cooker) makes a noticeable difference.
What is Chili Con Carne?
“Chili con carne” translates to “chili with meat,” and is often simply called “chili” in America. This classic spicy stew typically includes meat, chilies or chili powder, tomatoes, and seasonings such as onion, garlic, and cumin.
Traditional Texas-style chili con carne is made without beans and has a thicker, chile-forward base. This version is more of a home-style American chili that includes kidney beans for extra heartiness and fiber. It’s a meal that many of us grew up on, and it has stood the test of time for a reason. The easy comfort food is delicious!
How to Make Chili Con Carne
This chili con carne recipe can be prepared on the stovetop or in a slow cooker. The stovetop method is shown here, but slow cooker instructions are included in the recipe card below.
Step 1: Sauté the Aromatics
Heat olive oil in a large pot over medium heat.
Add the diced onion and cook for about 5 minutes, until the edges start to caramelize and turn golden. This caramelization adds a subtle sweetness to the chili.
Stir in the garlic and cook for another minute until fragrant.

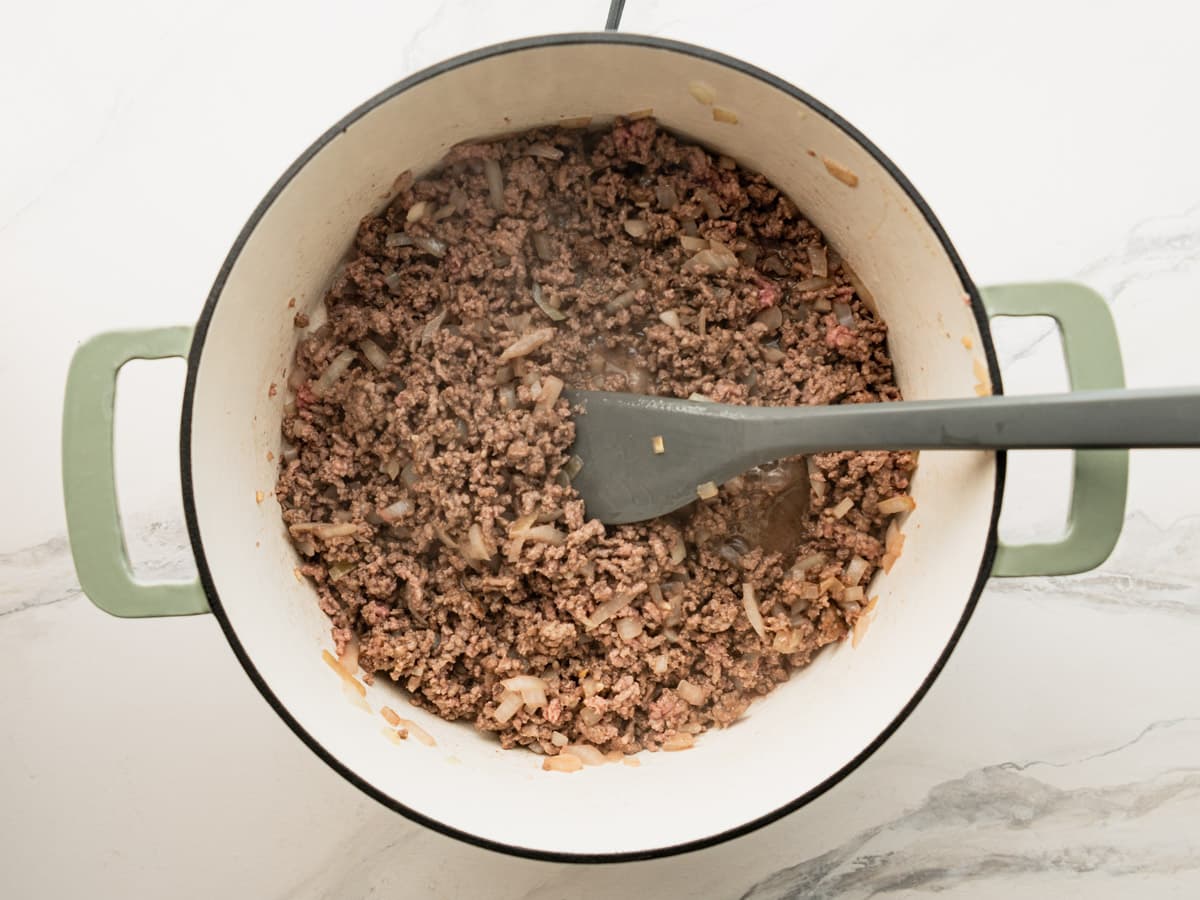
Step 2: Brown the Beef
Add the ground beef to the pot and cook until no longer pink, breaking up the meat as you go (about 5-7 minutes).
You want some browning on the meat, not just gray, steamed beef. Drain off the fat and return the beef mixture to the pot.
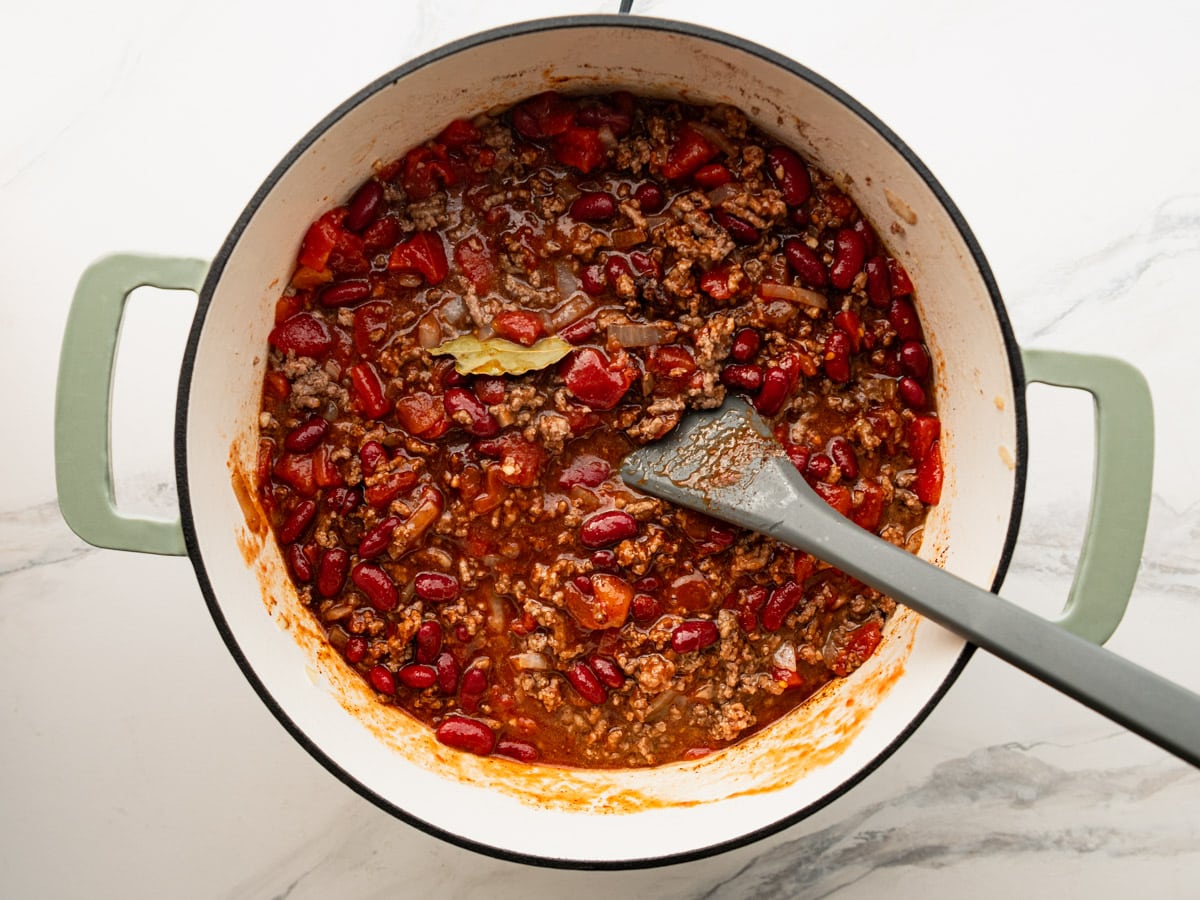
Step 3: Build the Tomato Base
Stir in the diced tomatoes (with their juices), tomato sauce, ketchup, kidney beans, chili powder, salt, and bay leaf. Give everything a good stir to combine.
** Quick Note: The ketchup might seem unusual, but it cuts the acidity in the tomatoes and adds subtle sweetness, similar to what brown sugar does in other chili recipes, with an extra layer of tomato flavor.
Adjusting the Heat — Use 1 tablespoon of chili powder for a milder chili that’s kid-friendly, or the full 2 tablespoons for more warmth (our preference). For extra kick, add a dash of cayenne. You can always add more heat later, but you can’t take it away.
Step 4: Simmer Low and Slow
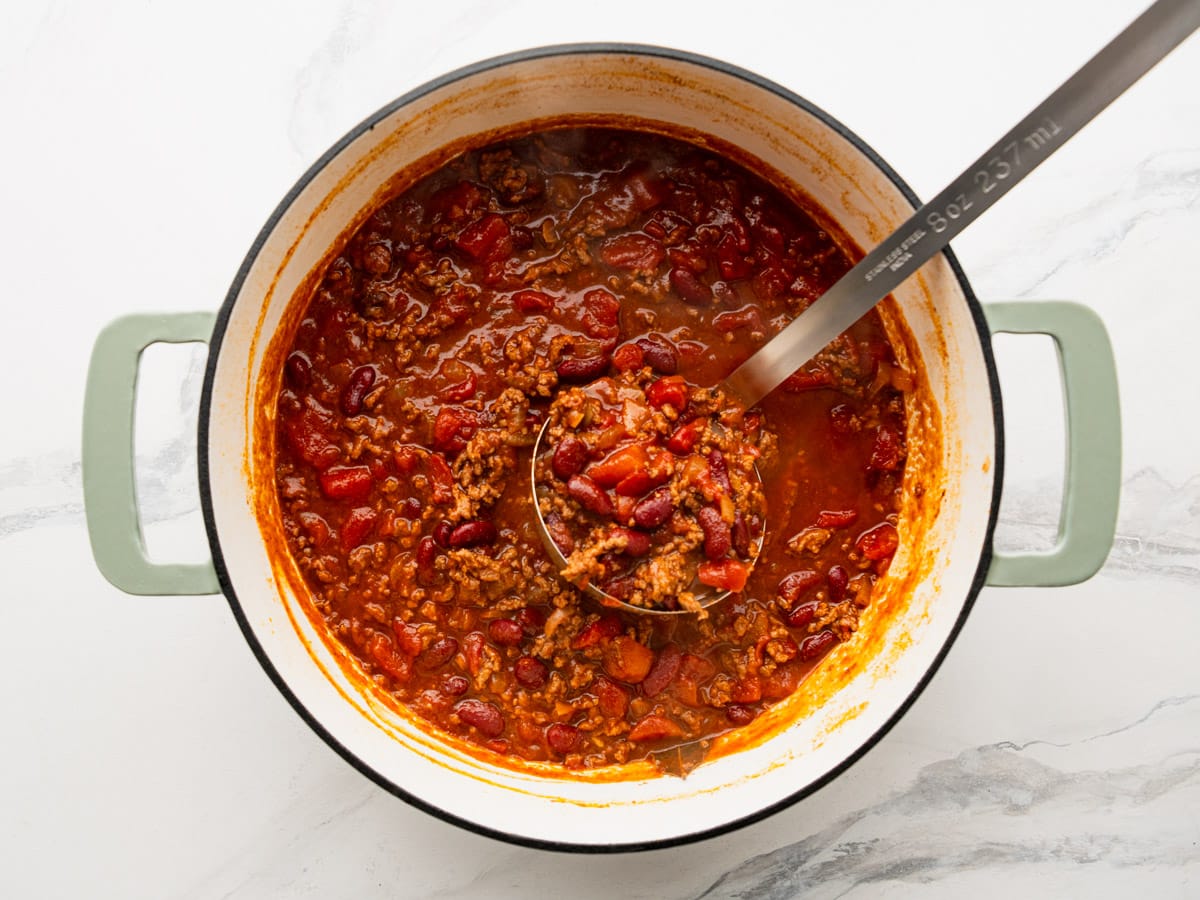
Place a lid on the pot and let the chili simmer on low heat for about 1 to 1 ½ hours. This slow simmer is what allows all the flavors to meld together and the spices to bloom. You’ll notice the chili thickens slightly and the aroma deepens as it cooks.
If Using The Slow Cooker: Cook on LOW for 4-6 hours or HIGH for 2-3 hours. The longer cook time in the slow cooker develops even richer flavor.
Remove the bay leaf before serving.
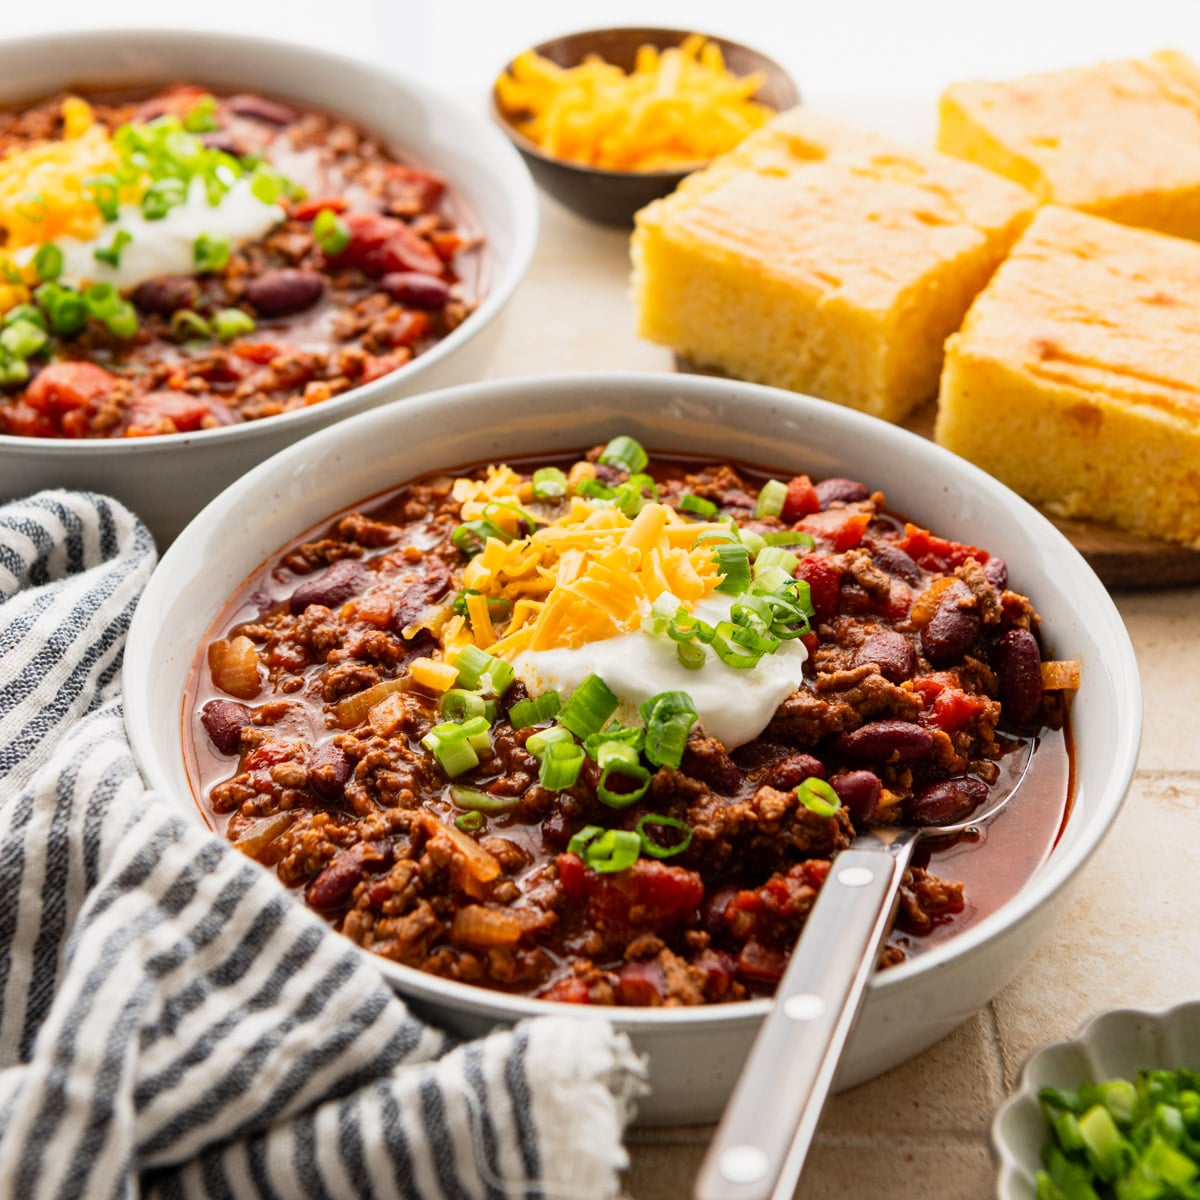
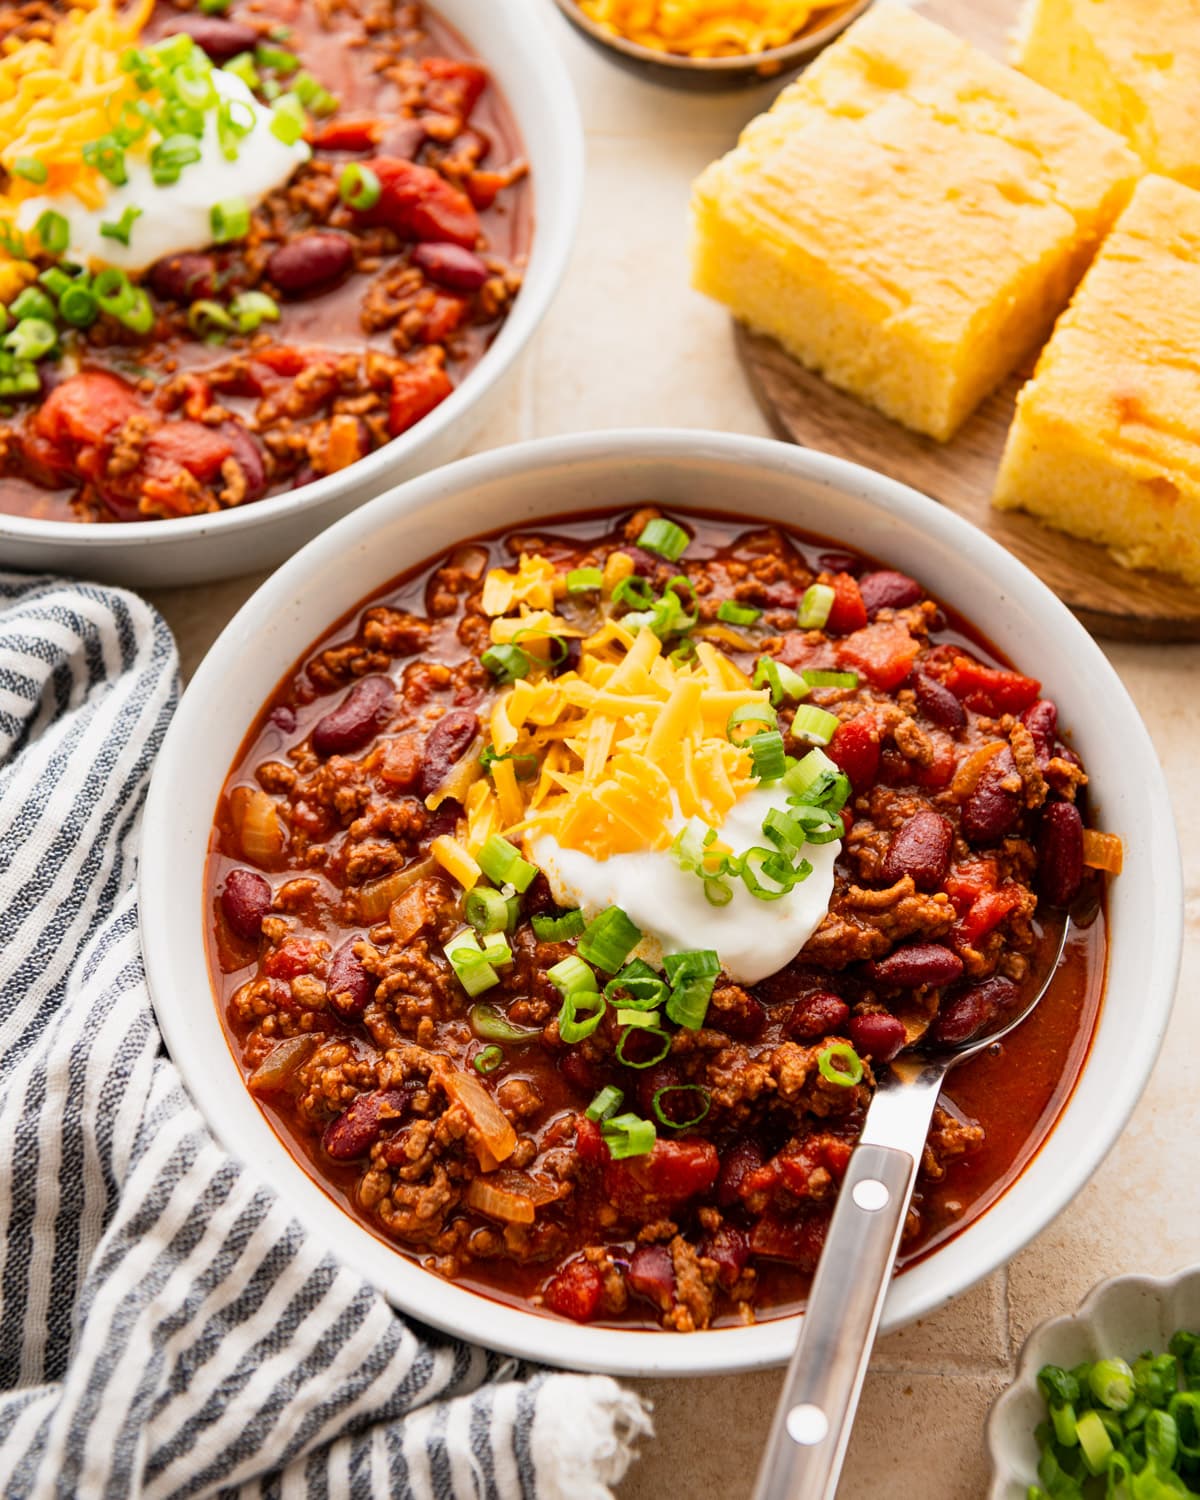
How to Serve Chili Con Carne
Topping Ideas
Don’t skip the toppings! They add texture, freshness, and flavor that take your bowl to the next level. Choose a few of your favorites:
- Shredded cheddar cheese or Mexican blend
- Sour cream
- Sliced green onions or chives
- Fresh cilantro
- Diced red onion
- Diced avocado or guacamole
- Crushed corn chips for crunch
What to Serve with Chili
Chili con carne pairs perfectly with a side of warm bread. Try it with
The dish is equally good with corn chips. Crush them on top for a crunchy addition, or use them to scoop up your chili instead of a spoon.
Hosting a Chili Bar
Feeding a crowd? Set up a simple chili bar and let guests serve themselves. Keep the chili warm in the pot, lay out the toppings, and let everyone build their own bowl. It’s an easy, casual way to entertain without stress.
Tips and Variations
- Swap the protein. This recipe uses ground beef, but you can substitute an equal amount of ground turkey or ground chicken if you prefer a leaner option.
- Make it without beans. Substitute a can of corn kernels or increase the ground beef to 2 pounds.
- Prep ahead. Brown the beef mixture over the weekend or the night before and store it in the refrigerator. On cooking day, just combine everything in your pot or slow cooker.
- Brighten the bowl. Fresh herbs or a squeeze of lime on top add a fresh contrast to the rich, hearty stew.
Storage and Freezing
Refrigerator: Store leftover chili in an airtight container for up to 3 days.
Freezer: This is a perfect freezer meal. Allow the chili to cool to room temperature, then package in airtight containers or freezer bags. It keeps well in the freezer for up to 3 months.
Reheating: Warm refrigerated chili in a pot over medium-low heat, stirring occasionally, until heated through. Add a splash of water or broth if it has thickened too much. Frozen chili can be thawed overnight in the refrigerator and reheated the same way, or warmed directly from frozen over low heat (this takes longer but works well).
Frequently Asked Questions
What’s the difference between chili and chili con carne?
“Chili con carne” literally means “chili with meat,” so technically any chili with meat qualifies. However, traditional chili con carne (especially Texas-style) is typically made without beans and focuses on meat and chiles. This recipe is a home-style American version that includes beans for extra heartiness.
Do you need to use beans in chili con carne?
Not necessarily. Authentic Texas chili con carne traditionally skips the beans. This recipe includes kidney beans because they add fiber, protein, and a satisfying texture that many families love. If you prefer no beans, substitute with corn or add an extra half pound of beef.
How long should chili con carne simmer?
At least 1 hour on the stovetop, though 1 ½ hours is even better. The longer simmer time allows the spices to bloom and the flavors to develop and meld together. In a slow cooker, aim for 4-6 hours on LOW for the best results.
Can you make chili con carne in the slow cooker?
Absolutely. Brown the beef and onions on the stovetop first (this step is worth it for flavor and to strain off the grease), then transfer everything to the slow cooker. Cook on LOW for 4-6 hours or HIGH for 2-3 hours.
How do you adjust the spice level?
Start with 1 tablespoon of chili powder for a milder chili, or use the full 2 tablespoons for more warmth. For extra heat, add a dash of cayenne pepper. You can always add more spice, but you can’t take it away, so start conservatively if you’re cooking for kids or spice-sensitive eaters.
More Chili Recipes to Try

Did you make this recipe?
If you enjoyed this recipe, please leave a comment with a 5-star review at the bottom of the post. Thank you!
Watch How to Make It

Chili Con Carne
Equipment
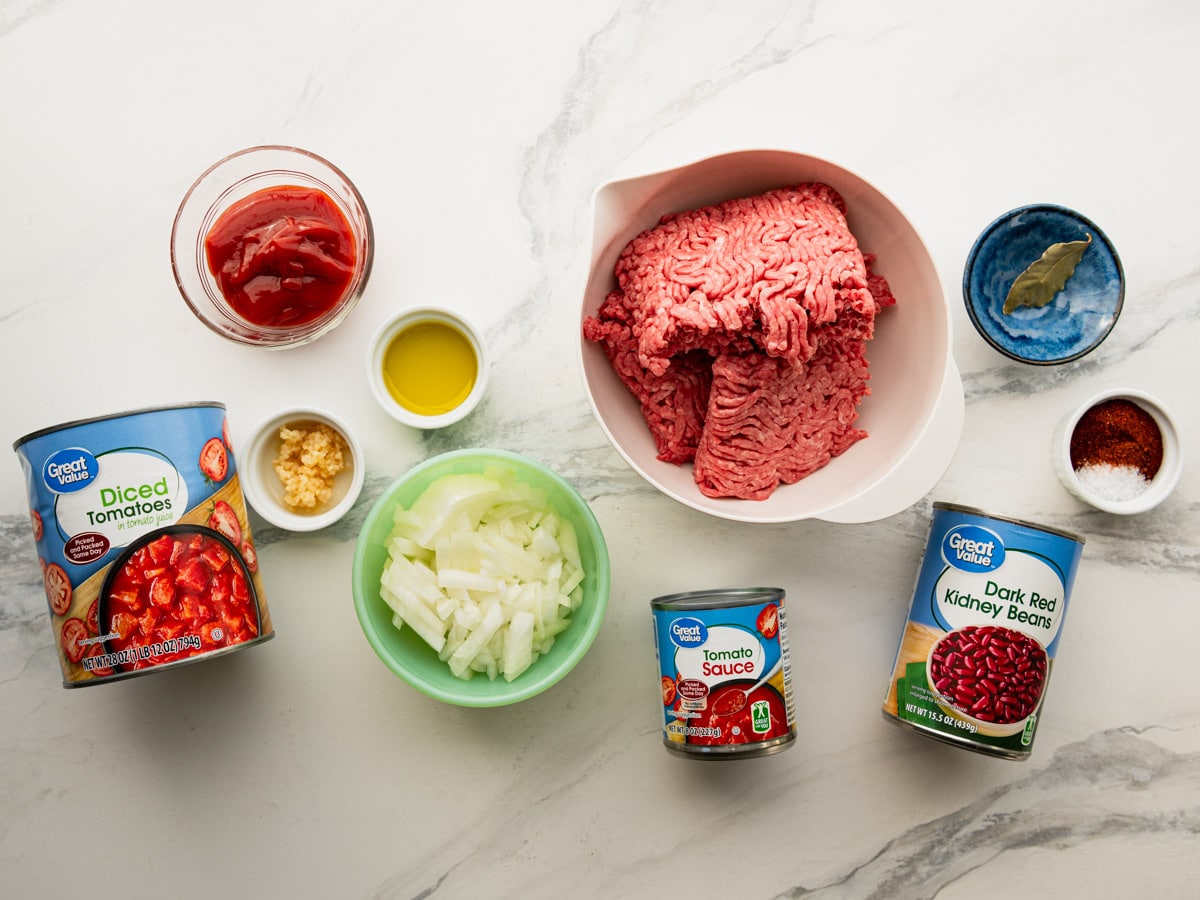
Ingredients
- 1 tablespoon olive oil
- 1 medium onion, diced
- 2 teaspoons finely minced or grated garlic (about 2 cloves)
- 1 ½ lbs. (24 ounces) lean ground beef
- 1 (28 ounce) can diced tomatoes, undrained
- ½ cup ketchup
- 1 (8 ounce) can tomato sauce
- 1 (15.5 ounce) can dark red kidney beans, drained and rinsed
- 2 tablespoons chili powder
- 1 ½ teaspoons kosher salt
- 1 bay leaf
- Optional: dash of cayenne pepper
- Optional, for serving: cornbread; corn chips; cheese; sour cream; sliced green onions/chives; cilantro; avocado; diced red onion
Instructions
For the Stovetop:
- Heat olive oil in a large pot over medium heat. When the oil shimmers, add the onion and cook until it starts to soften, about 5 minutes. Stir in the garlic and cook for 1 more minute.

- Add the beef and brown all over, breaking up the meat as you go, about 5-7 more minutes. Drain fat and return beef mixture to the pot.
- Stir in the diced tomatoes (with juices), tomato sauce, ketchup, kidney beans, chili powder, salt, and bay leaf.
- Simmer, covered, on low heat for about 1 to 1 ½ hours.
- Remove the bay leaf. Ladle the chili into bowls and garnish with desired toppings.


For the Slow Cooker:
- Heat olive oil in a large skillet over medium heat. When the oil shimmers, add the onion and cook until it starts to soften, about 5 minutes. Stir in the garlic and cook for 1 more minute.
- Add the beef and brown all over, breaking up the meat as you go, about 5-7 more minutes. Remove from heat and drain fat.
- Transfer the beef mixture to a slow cooker. Add remaining ingredients and stir to combine.
- Cover and cook on LOW for 4-6 hours or HIGH for 2-3 hours.
- Remove the bay leaf. Ladle the chili into bowls and garnish with desired toppings.
Notes
- Adjust the heat: Use 1 tablespoon chili powder for milder chili, 2 tablespoons for more warmth. Add cayenne for extra kick.
- No beans? Substitute with a can of corn kernels or increase the ground beef to 2 pounds.
- Protein swap: Ground turkey or ground chicken works in place of beef.
- Make ahead: Brown the beef mixture ahead of time and refrigerate. On cooking day, combine everything and simmer.
- Storage: Refrigerate leftovers for up to 3 days or freeze for up to 3 months.
- Reheating: Warm over medium-low heat, adding a splash of water or broth if the chili has thickened.
Nutrition
Originally published in November, 2018, this post was updated in January, 2026.


Just tried this in the crockpot tonight, and it was a big hit with the whole family! Thank you for having clear and easy to follow directions, not to mention, great taste!
Great! I’m so glad that you enjoyed it, Alisha! Thanks for letting me know!
Thank you so much for sharing this with us! I did not use a bayleaf, but did add some extra seasonings. Also, I substituted the 28 oz can of tomatos with diced tomatos with garlic and other spices like oregano. The chili was absolutely delicious!!! 🙂 Thanks for showing us recipes that are amazing, yet don’t require extensive time. 🙂
Awesome, Andrea! Thank you for taking the time to leave a note! 🙂 I’m so glad that you enjoyed it!