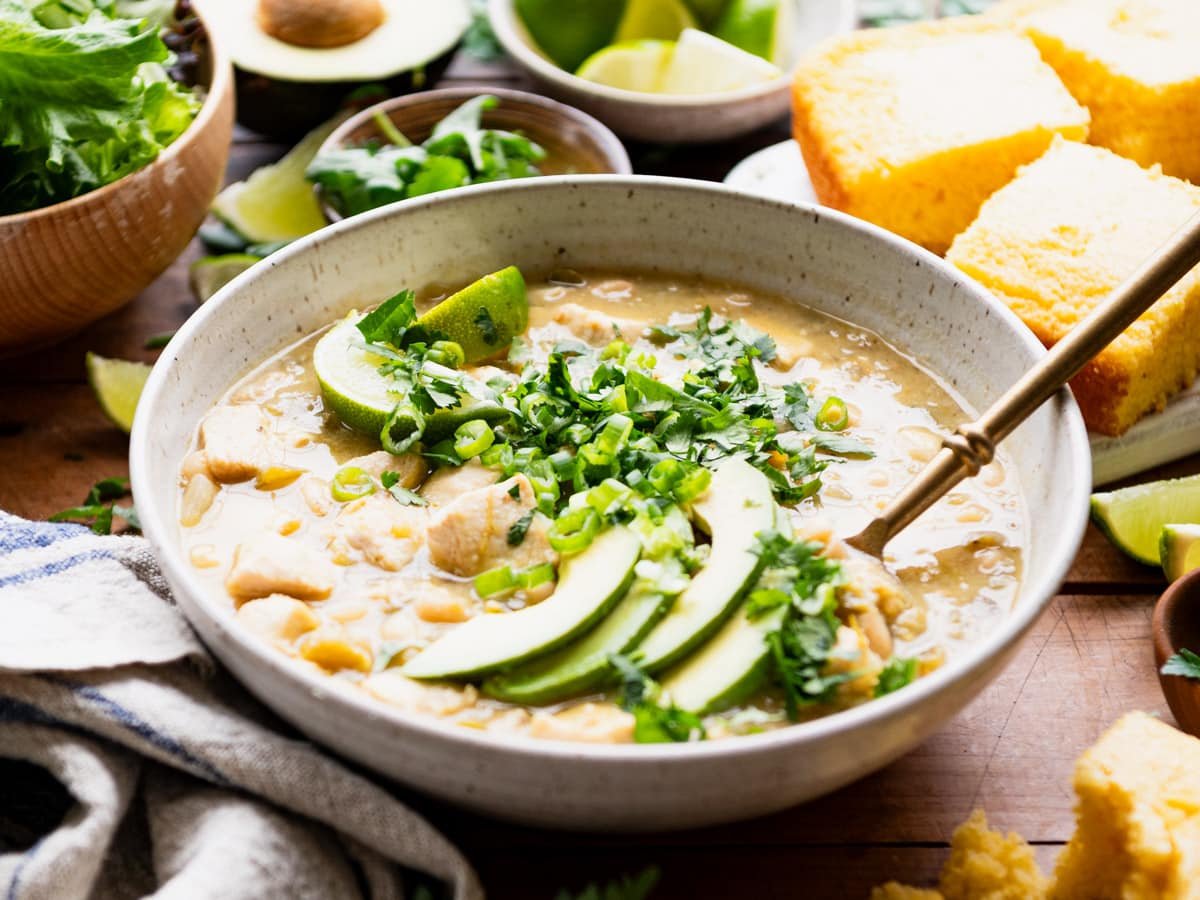
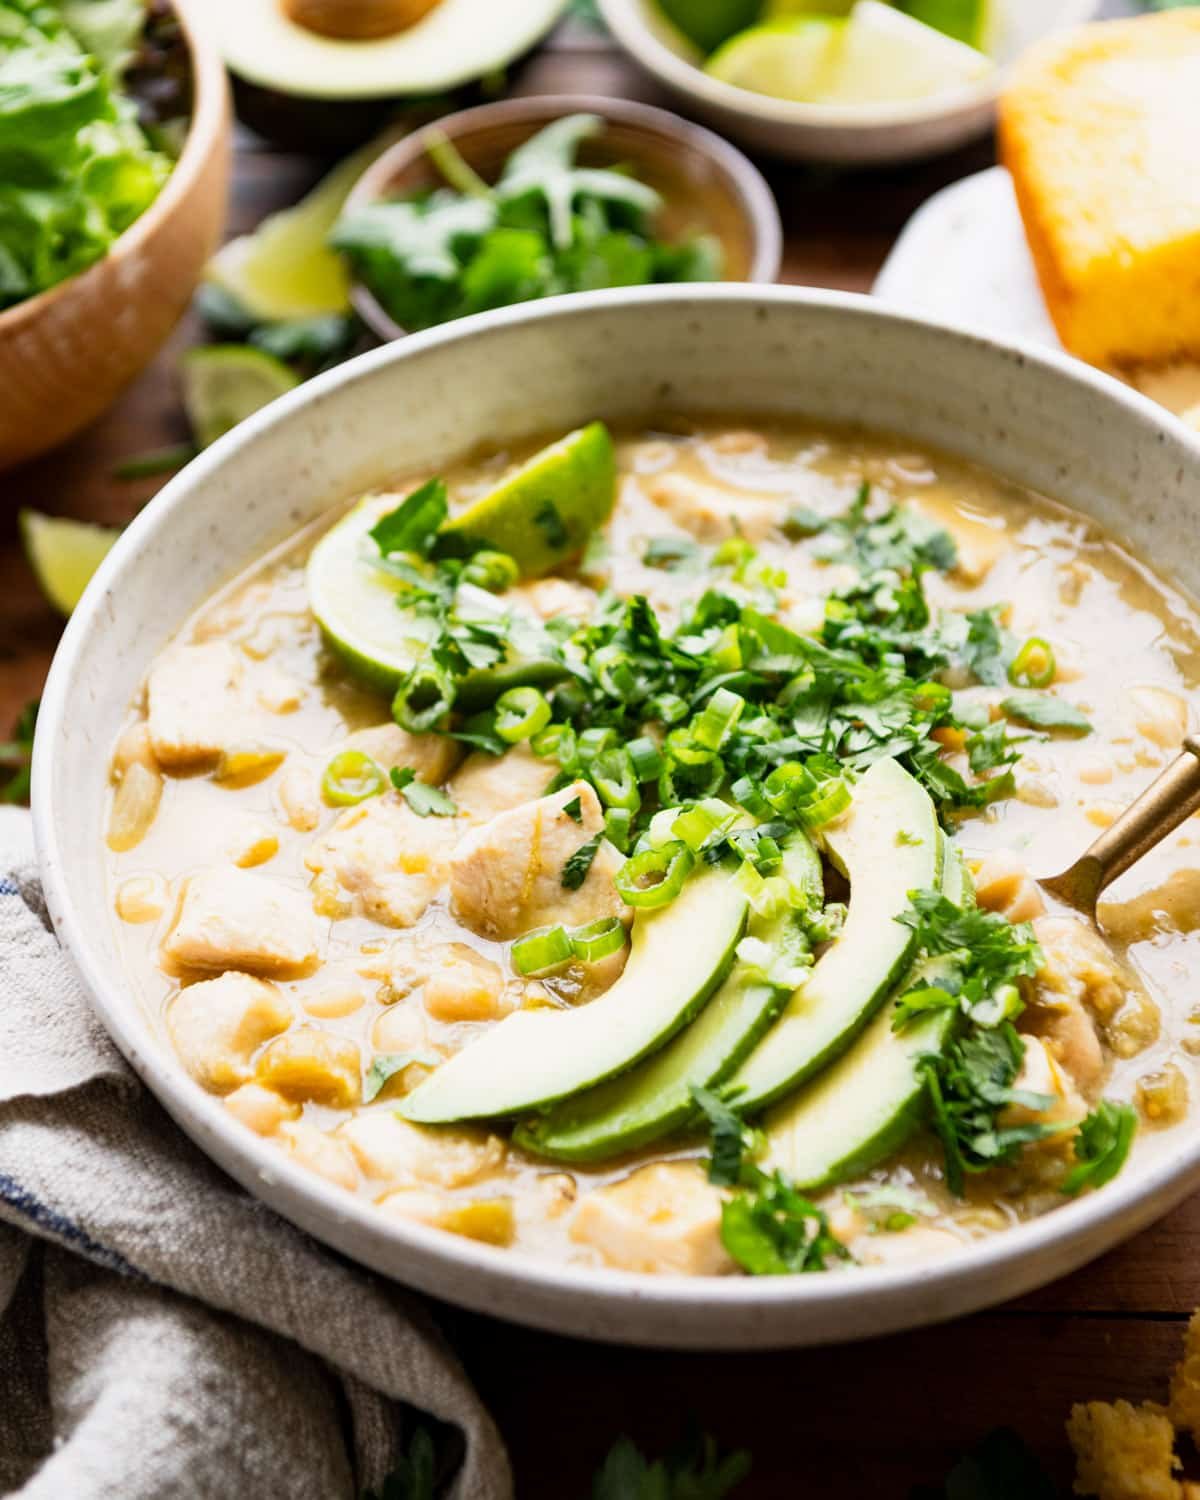
This easy green chicken chili comes together on the stovetop in about an hour, but it tastes like it has been simmering all afternoon. It is thick, cozy, and packed with flavor from salsa verde, tender chicken, and white beans, with a slow cooker option for busy days.
For even more cozy, family-friendly options, try our classic beef chili and this Wendy’s chili recipe, or check out our collection of the Best Chili Recipes.
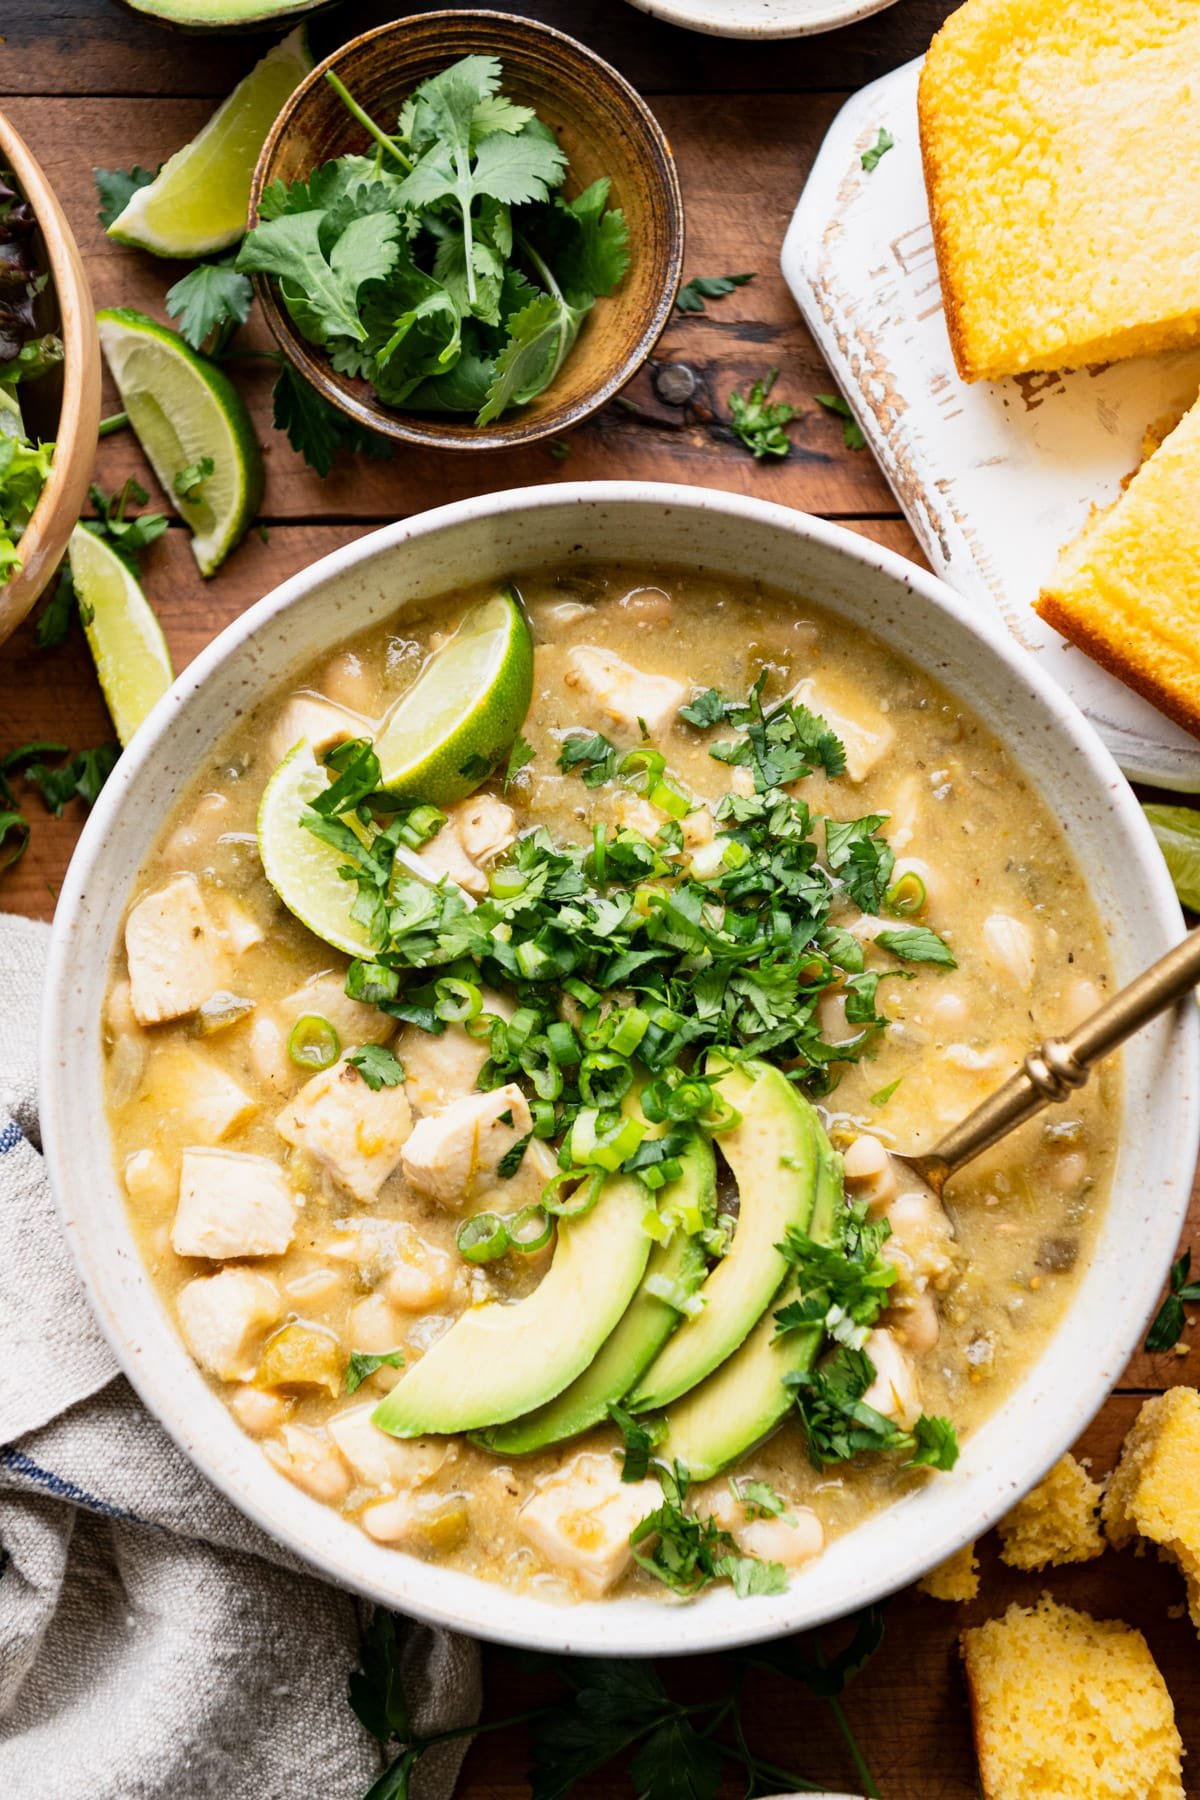
Table of Contents
Before You Get Started
Here are a few helpful things to know so your green chicken chili turns out just right:
- Pureed white beans provide a thick, creamy texture. It keeps things lighter (no cream or flour) while still feeling rich.
- Choose your salsa verde wisely. This ingredient adds a lot of the flavor, so pick one you like. Mild is family friendly, while medium or hot adds more kick.
- Chicken thighs and chicken breasts are both fine. Thighs stay extra juicy as they simmer, but chicken breasts work well if you keep an eye on the cooking time.
How This Green Chicken Chili Gets Thick and Creamy

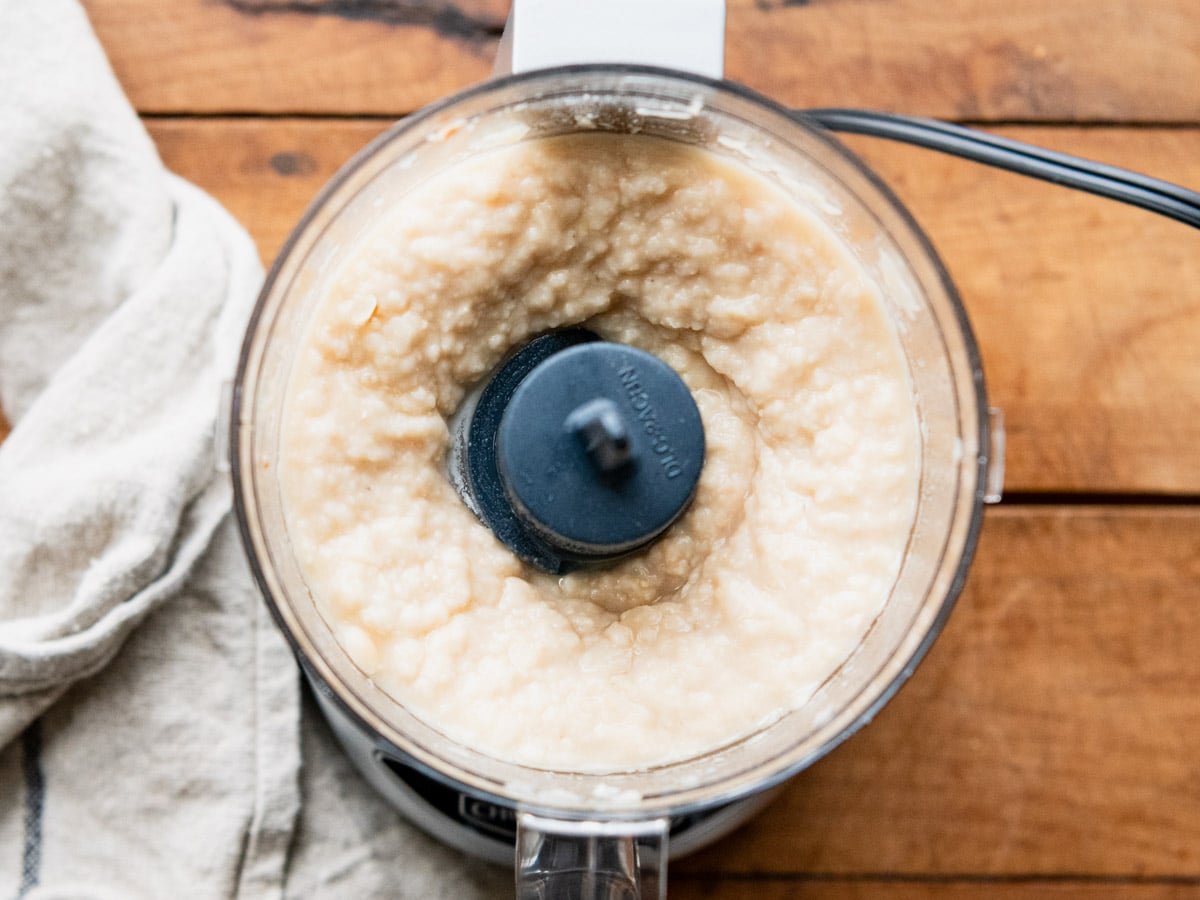
The secret to this green chicken chili is the beans. One can of white beans gets blended with a little broth and stirred into the pot. That simple step gives the chili body and creaminess without adding dairy.
Simmering the chili uncovered on the stovetop also helps. As it bubbles gently, some of the liquid cooks off and the flavors concentrate. This gives you a thick, scoopable chili that feels hearty and satisfying.
If your chili gets thicker than you like, do not worry. Just stir in a little extra broth until it reaches the consistency you want.
How to Make Green Chicken Chili
Step 1: Puree the Beans
Start by blending one can of drained white beans with a small splash of chicken broth until smooth. Set this aside. It will thicken the chili later.
** Tip: If you do not have a blender or food processor, you can mash the beans well with a fork or potato masher. The chili will be slightly thinner, but still delicious.
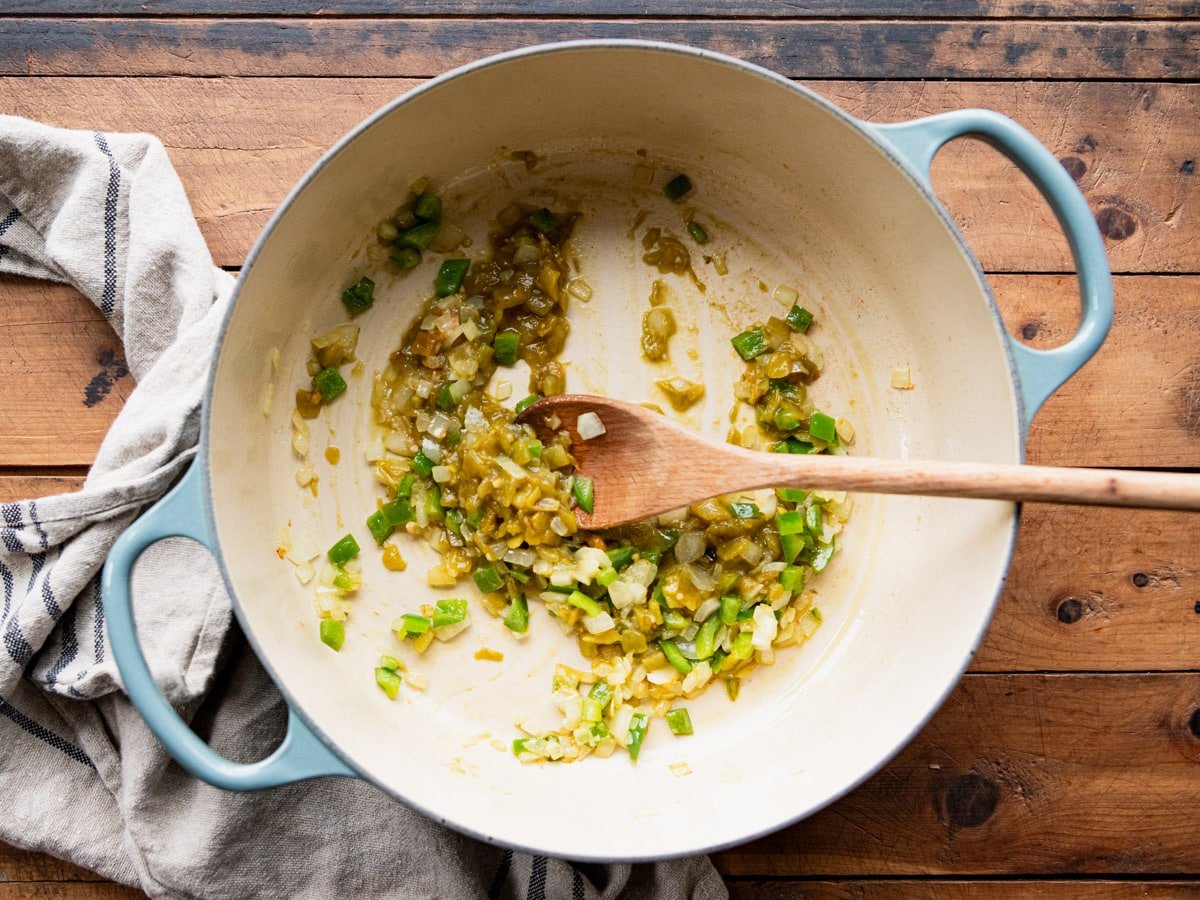
Step 2: Sauté the Vegetables
Heat olive oil in a large Dutch oven and add the jalapeno, bell pepper, and onion. Cook until everything is soft and smells sweet, not rushed. This takes about 7 to 10 minutes and builds flavor right from the start.
Step 3: Add Garlic and Green Chiles
Stir in the garlic and diced green chiles and cook for about a minute. You just want to wake them up, not brown them.
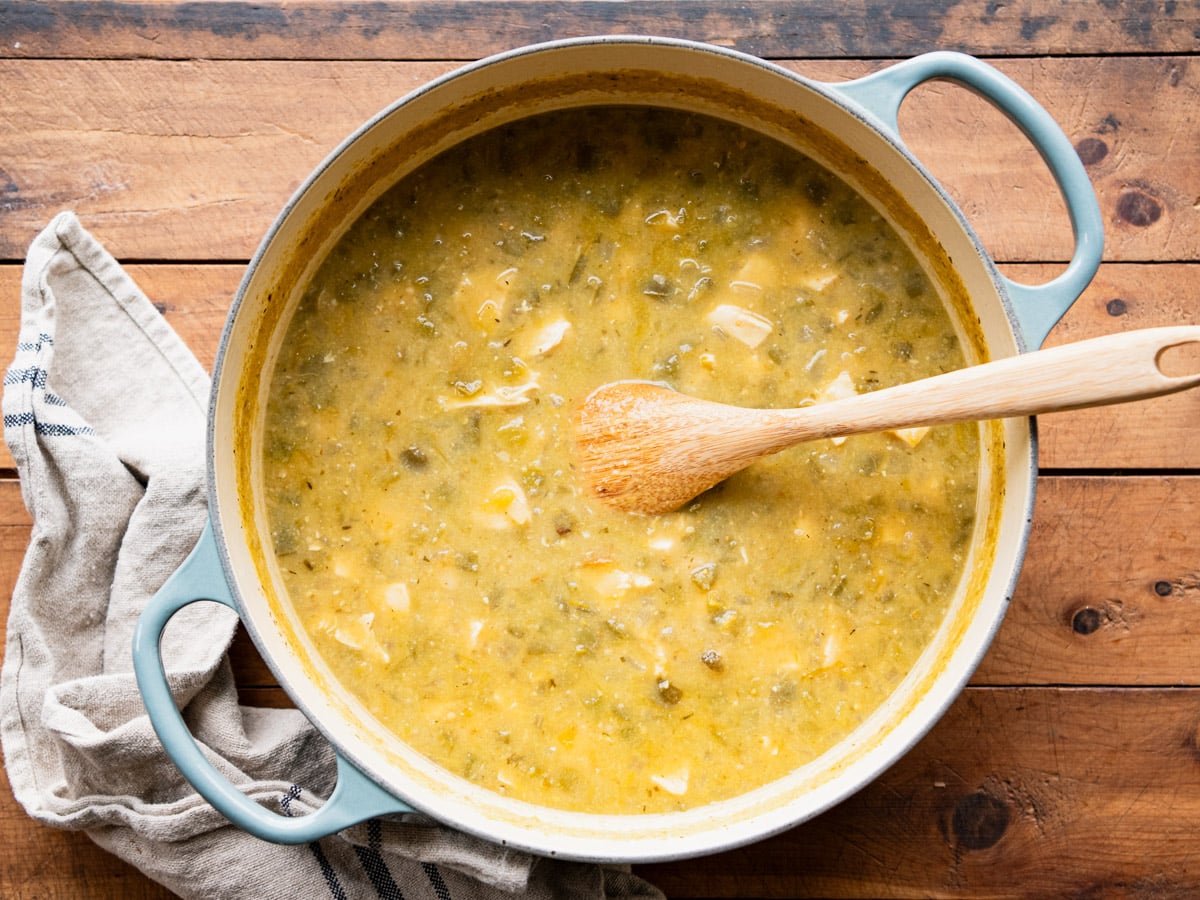
Step 4: Add the Rest of the Ingredients
Pour in the remaining broth, salsa verde, pureed beans, whole beans, chicken, and spices. Give everything a good stir and bring the pot to a gentle boil.

Step 5: Simmer Until Thick
Reduce the heat and let the chili simmer uncovered for about 30 minutes, stirring occasionally, until the chicken is cooked through and the chili thickens.
** Tip: If you are using chicken breasts, check them early so they stay tender.
Step 6: Finish with Lime
Right before serving, squeeze in some fresh lime juice and taste for salt and pepper. That little bit of acid makes all the flavors pop.
Slow Cooker Method
If you prefer the slow cooker, this recipe adapts easily.
Saute the vegetables first on the stovetop, then transfer them to the slow cooker. Add the pureed beans, remaining beans, chicken, salsa verde, spices, and just one cup of broth to start.
Cook on LOW for 4 to 6 hours or on HIGH for 2 to 3 hours. If the chili seems too thick, stir in more broth until it looks right. Finish with lime juice just before serving.
** Tip: Slow cookers trap moisture, so starting with less broth keeps the chili from turning soupy.
Serving Suggestions
This chili is perfect for a casual chili bar night. Set out bowls of toppings and let everyone fix their own.
Favorite toppings include shredded cheese, sour cream (or Greek yogurt), diced avocado, sliced green onions, fresh cilantro, tortilla chips, and lime wedges.
On the side, jalapeño cheddar cornbread, cornbread muffins, or easy homemade guacamole with tortilla chips and salsa are always a hit.
Variations and Customizations
- Skip the jalapeño for a mild chili or add cayenne for extra heat.
- Stir in corn for a little sweetness and texture.
- Swap cannellini beans for great northern or navy beans.
- Use cooked shredded chicken instead of raw chicken and stir it in during the last 10 to 15 minutes.
- Make it creamy by stirring in cream cheese or sour cream at the end.
Storage and Make Ahead Tips
Leftover chili keeps well in the refrigerator for 3 to 4 days. Reheat gently on the stovetop or in the microwave, adding a splash of broth if needed.
To freeze, let the chili cool completely, then store in airtight containers or freezer bags for up to 3 months.
** Tip: If you plan to freeze the chili, leave out any dairy and add it after reheating for the best texture.
Frequently Asked Questions
How spicy is green chicken chili?
With mild salsa verde and no jalapeno seeds, it is very family friendly.
Can I skip pureeing the beans?
Yes, but the chili will be thinner. Mashing some beans in the pot helps.
Why is my chicken dry?
Chicken breasts dry out quicker than thighs when overcooked. Check them early and avoid over simmering.
How do I thicken the chili without dairy?
Pureed beans and simmering uncovered work best.
Can I make this ahead for a party?
Absolutely. It reheats well and stays warm in a slow cooker on low.
Related Recipes

Did you make this recipe?
If you enjoyed this recipe, please leave a comment with a 5-star review at the bottom of the post. Thank you!

Green Chicken Chili
Ingredients
- 3 (15.5 ounce) cans cannellini beans (or other white beans), drained and rinsed, divided
- 1 tablespoon olive oil
- 1 jalapeño pepper, seeded and diced (optional)
- ½ medium green bell pepper, seeded and diced (about ½ cup total)
- ½ small yellow onion, diced (about ½ cup total)
- 1 clove garlic, minced or pressed (about 1 teaspoon total)
- 1 (4 ounce) can diced green chiles
- 3 cups chicken broth, divided
- 1 ½ lbs. boneless skinless chicken breast or boneless skinless chicken thighs, diced into bite-sized pieces (about 1-inch cubes)
- 1 (16 ounce) jar salsa verde
- 1 teaspoon ground cumin
- ¼ teaspoon dried oregano
- ¼ teaspoon dried thyme
- Kosher salt and black pepper, to taste
- Fresh lime juice, to taste
- Optional garnish: fresh limes, sour cream, avocado, grated cheese, fresh cilantro, sliced green onion, tortilla chips
Instructions
- Place 1 can of the drained and rinsed beans in a food processor or blender. Add ¼ cup of the broth and puree until smooth; set aside.

- Heat the oil in a large Dutch oven or stockpot over medium-high heat. Add the jalapeño, bell pepper, and onion; sauté until soft, about 7-10 minutes. Add garlic and green chilies; cook, stirring constantly, for 1 more minute.
- Stir in the remaining chicken broth, chicken, salsa verde, pureed beans, remaining 2 cans of drained and rinsed beans, cumin, oregano, and thyme. Bring to a boil over high heat.
- Once the chili boils, reduce heat to medium-low and simmer, uncovered, stirring occasionally, until the chicken is cooked through and the chili thickens, about 30 minutes. If the chili gets too thick, cover with a lid while it continues to simmer. Taste and season with salt and pepper, if desired.
- Add a squeeze of lime juice just before serving and garnish individual bowls with desired toppings.


ALTERNATE SLOW COOKER METHOD
- Place 1 can of the drained and rinsed beans in a food processor or blender. Add ¼ cup of the broth and puree until smooth; set aside.
- Heat the oil in a large skillet over medium-high heat. Add the jalapeño, bell pepper, and onion; sauté until soft, about 7-10 minutes. Add garlic and green chilies; cook, stirring constantly, for 1 more minute. Transfer to a slow cooker.
- Stir in just 1 cup of chicken broth, chicken, salsa verde, pureed beans, remaining 2 cans of drained and rinsed beans, cumin, oregano, and thyme. Cover and cook on LOW for 4-6 hours or on HIGH for 2-3 hours. Taste and season with salt and pepper, if needed. If the chili seems too thick, stir in extra chicken broth until it reaches the desired consistency. Add a squeeze of lime juice just before serving and garnish individual bowls with desired toppings.
Notes
- Chicken thighs stay juicier, but chicken breasts work if not overcooked.
- Pureeing one can of beans gives the chili a thick, creamy texture without cream.
- Start with mild salsa verde for kids and add heat at the table.
- Simmer uncovered on the stovetop for the thickest texture.
- Add extra broth if the chili thickens too much.
- Stir in cream cheese or sour cream at the end for a richer chili.
- Corn is a great optional add-in for sweetness.
- Leftovers keep 3 to 4 days in the refrigerator.
- Freeze without dairy for best results.
- Finish with lime juice to brighten the flavors.
Nutrition
Originally published in January, 2024, this post was updated in January, 2026.


GOING TO MAKE AFTER TRIP TO GROCERY STORE.
LOOKS YUMMY WITH LOAF OF CRUSTY BREAD
We hope you enjoy it, Diane!
I don’t have a blender or food processor. Can I just use with whole beans?
Yes, the texture will be different, but it will still be tasty!
Does it freeze well?
Hi, Stephanie! Yes! This freezes really well. Allow the chili to cool to room temperature. Package in airtight containers or Ziploc freezer bags and store in the freezer for up to 3 months.